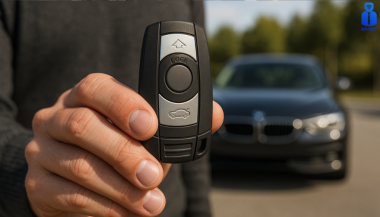
Post Name

If your car key shell is cracked, worn, or the buttons no longer press properly, replacing it with a new shell is often the most affordable and effective solution. But one major challenge stands in the way: figuring out exactly which replacement shell you need. With so many variations in blade types, button layouts, and internal compatibility, it’s easy to buy the wrong part—and waste both time and money.

This guide breaks down how to identify the correct key shell for your car, so you can upgrade or replace your damaged remote housing without confusion.


Step 1: Identify Your Key Blade Type

One of the most important features is the key blade. Even within the same car brand, different models and years may use different blade types. Two of the most common are:

HU83 blade – Used by many Peugeot and Citroën models. It has a curved groove on both sides.

VA2 blade – Similar in appearance but has a flat groove instead of a curve.

Other types include TOY43, TOY47, and SIP22, often used in Toyota, Fiat, and other manufacturers. If you're unsure, comparing your blade side-by-side with online reference images helps avoid errors.

Tip: Never rely only on the number of buttons—focus on the blade profile first.


Step 2: Count and Match the Button Layout

Next, verify how many buttons your original key has, and in what layout. Common options include:

2 buttons: Lock / Unlock

3 buttons: Lock / Unlock / Trunk

Smart keys: May have a more complex layout or hidden emergency blade

Even a small difference in layout can prevent the rubber buttons from pressing the internal switches correctly.

Also check whether the button pad is integrated into the case or if it’s a separate piece. That may affect your fit.


Step 3: Check the Internal Electronics Placement

When swapping a shell, you’ll be transferring the circuit board and (in most cases) a transponder chip. The replacement case must have:

The same mounting points and slots

Space for the battery (check if yours is CR1620, CR2032, etc.)

A similar design to support the flip mechanism, if your original key has one

If the internal layout doesn’t match, your circuit board may not sit securely—or your buttons may not work.

Bonus tip: Open your old key carefully and take photos of the internal structure before ordering a shell.


Step 4: Consider the Key Type – Flip or Fixed

There are two main styles:

Flip keys: Blade folds into the case and pops out with a button press

Fixed blade keys: Blade is static and exposed

You must match your replacement with the original style, unless you're intentionally upgrading. Flip key conversions are popular, but they require extra parts and a bit more installation effort.


Step 5: Check the Model Compatibility List

Many key shells are marketed as being compatible with a range of car models. Look for a list that includes:

Your vehicle’s make and model

The production years (e.g., “Peugeot 207 2010–2014”)

Even then, cross-reference with your physical key—models change subtly across production years.


Step 6: Know What You're Not Getting

A replacement key shell typically does not include:

The circuit board (you must transfer it from your old key)

The transponder chip

A pre-cut blade (unless stated)

You’ll likely need to cut the new blade or reuse the old one if it's detachable.


Choosing the right replacement key shell doesn't have to be trial and error. By focusing on blade type, button layout, and internal structure, you can confidently find a case that fits your needs—and your key electronics.

It’s a simple fix that extends the life of your existing key without the cost of a full replacement. Just take your time, check the details, and match your original key carefully.

A few minutes of inspection now can save hours of hassle later.

Related Posts

Car Won’t Start After Key Shell Change? Here’s What the Transponder Chip Does

Car Won’t Start After Key Shell Change? Here’s What the Transponder Chip Does

Modern car keys have come a long way from the traditional cut metal blades of the past. What was once a simple tool for turning an ignition has evolved into a smart, encrypted device with layers of built-in security. Among the most critical components in today’s car keys is the transponder chip — a small but vital element that could be the reason your car doesn’t start after replacing your key shell. If you've recently changed the shell or casing of your key and suddenly find that your car won’t start, you're not alone. This is one of the most common (and frustrating) issues car owners face when performing a key repair or upgrade. So let’s break down what’s really happening — and how you can fix it. What Is a Transponder and What Does It Do? A transponder chip (short for “transmitter-responder”) is a small electronic component embedded in your car key. Its purpose is to communicate with your vehicle’s immobilizer system to authorize ignition. Here’s how it works: When you insert your key and turn the ignition, your car sends out a radio signal. The transponder chip in your key responds with a coded signal unique to your car. If the code is correct, the car’s computer disables the immobilizer and allows the engine to start. If the chip is missing, broken, or the code doesn’t match — the engine won’t start, even if the key blade physically turns. This system is an anti-theft measure, and it's present in most vehicles manufactured after the late 1990s. Without a functional transponder, your key may unlock the doors but it will not allow the car to start. This ensures that even if someone manages to copy the physical blade of your key, they still can’t steal your car. Why Your Key Might Not Work After Shell Replacement Changing your key shell (also called a case or housing) can seem like a simple cosmetic repair — but it’s easy to overlook the importance of transferring the transponder chip during the process. If your key no longer starts the car after a shell replacement, the most likely reason is: You forgot to move the transponder chip into the new shell. In many keys, the chip is not part of the electronics board . It’s often a tiny black or glass capsule , sometimes hidden in a small compartment within the key shell — completely separate from the buttons and battery. If you didn’t see it, it’s probably still sitting inside the old casing. Some people assume that simply moving over the circuit board and battery is enough — but without the transponder, your key won’t be recognized by the car’s immobilizer. This results in the engine failing to start, even though the buttons may still lock and unlock the doors. Symptoms of a Missing or Misplaced Transponder If your key turns in the ignition but: The car does not crank or start You see a flashing key icon or immobilizer warning on the dashboard The central locking might still work, but the engine won’t respond You hear a clicking sound but no ignition occurs Then it’s almost certainly a transponder issue. The car's system is waiting for a valid coded signal from the key — and without it, the start command is rejected. How to Fix It: What You Need to Do Here’s how to get your car running again: 1. Check Your Old Key Shell Open the old casing and look for a small black or clear capsule (typically rice-sized). That’s your transponder chip. Some are glued in place and may require careful prying. 2. Transfer the Chip Carefully remove it and insert it into the correct compartment in your new key shell. Some aftermarket shells have a specific slot for it, while others require a bit of creativity to keep it securely in place. In some cases, adhesive putty or double-sided tape can help hold it. 3. Reassemble and Test Put your key back together and try starting the car again. If the chip is correctly placed, it should work immediately — no reprogramming needed. Always test both ignition and door lock/unlock functions. What If You Lost the Chip? Unfortunately, if the chip is damaged or lost, the key will no longer be able to start your vehicle. In this case, you’ll need to: Contact a professional auto locksmith Have a new transponder chip programmed to your car’s immobilizer system Provide proof of ownership (such as your vehicle logbook or registration) in most cases Depending on the make and model of your car, programming a new chip may cost anywhere from $50 to $250 , and it typically requires special diagnostic equipment. It’s worth noting that some dealerships may charge significantly more than independent auto locksmiths — and you may have to wait longer for service. Pro Tips When Replacing Your Key Shell Always examine the inside of your old shell carefully before throwing it away. Take photos before disassembly so you know where each component goes. If you're unsure where the chip is or how to transfer it, look for DIY videos specific to your key model. Use tweezers and caution — the chip is fragile. Avoid static electricity or contact with magnets during the transfer process. Some modern keys have transponders integrated into the circuit board , in which case no separate chip needs to be moved. If you’re working with a smart key or proximity key, additional steps may be required. These typically involve re-synchronization with the vehicle’s system and may not function correctly without professional assistance. Small Chip, Big Consequences It’s incredible how something as small as a transponder chip can control such a major function. Replacing your key shell is a great way to refresh the look and feel of your key — but it’s vital not to overlook the importance of transferring every component, especially the transponder. Many DIY repairs are abandoned or lead to confusion simply because of this overlooked step. Fortunately, it’s one of the easiest problems to fix once you understand what to look for. If your key looks brand new but your car won’t start, don’t panic. Chances are, the solution is sitting inside your old key shell — quietly waiting to be moved over.

Programming Your Car’s Keyless Remote: A Simple Guide for Every Car Owner

Programming Your Car’s Keyless Remote: A Simple Guide for Every Car Owner

When it comes to convenience, car keyless remotes have revolutionized the way we interact with our vehicles. No more fumbling with traditional keys or worrying about locking yourself out. With just a push of a button, you can lock, unlock, and even start your vehicle. But what happens when your keyless remote stops working, or when you need to program a new one? Here’s a simple guide to help you program your car's keyless remote, regardless of your vehicle's make or model. Understanding Keyless Remotes Before jumping into the programming process, it’s important to understand what a keyless remote is and how it works. Essentially, a keyless remote allows you to interact with your vehicle without needing to physically insert a key. Instead of using a traditional metal key, your car’s electronic system communicates wirelessly with the remote, allowing you to lock, unlock, and sometimes even start your vehicle, all with the push of a button. These remotes typically use a radio frequency to communicate with your car, sending a signal that’s encrypted for security. Most modern cars use transponder technology, which makes the system more secure and resistant to hacking or copying. This means that the remote must be properly programmed to your vehicle’s system to function correctly. When Do You Need to Program a Keyless Remote? There are several situations in which you might need to program your keyless remote: Replacing a Lost or Damaged Remote : If you’ve lost your keyless remote or it’s no longer functioning properly, you’ll need to get a replacement. This may require programming the new remote to sync with your vehicle. Adding a New Remote : If you’ve bought an additional keyless remote for your car (for a spouse, child, or other family member), you’ll need to program it so that it works with your vehicle. Battery Replacement : Sometimes, replacing the battery in your remote can cause the programming to reset, meaning you’ll need to reprogram the remote for it to work again. Changing or Resetting Vehicle Settings : Occasionally, vehicle settings or remotes can be reset or reprogrammed as part of regular maintenance, requiring you to program new or additional remotes. How to Program Your Car’s Keyless Remote Programming a keyless remote is easier than you might think, and in most cases, it can be done by following a few simple steps. The process varies slightly depending on the make and model of your car, but here’s a general overview of the steps involved: Get Your New or Replacement Remote : Ensure that your remote is compatible with your car’s system. If you're not sure, you can check with your car's manufacturer or an authorized dealership. Some remotes require specific codes to be programmed. Sit Inside Your Vehicle : For safety and security reasons, most cars require you to be inside the vehicle while programming the remote. Insert the Key in the Ignition : Insert the key into the ignition and turn it to the "ON" position without starting the engine. For cars with push-to-start systems, you may need to press the start button without pressing the brake pedal. Activate the Programming Mode : Depending on your car’s system, you’ll need to follow a sequence of steps to enter programming mode. This could involve turning the key on and off several times, or pressing certain buttons in a specific order. Refer to your vehicle’s manual for the exact steps, as the process can differ from one model to another. Program the Remote : Once your car is in programming mode, you’ll need to press the button on your keyless remote that you want to program. Usually, you’ll hear a chime or see the lights flash, indicating that the remote has been successfully programmed. Some cars may require you to press the button several times to ensure proper synchronization. Test the Remote : After programming, test the remote to make sure it works properly. Try locking and unlocking the doors or starting the engine. If everything works as expected, you’re done! Exit Programming Mode : To finish the process, simply turn off the ignition and remove the key. This should exit programming mode. If you have additional remotes to program, repeat the steps above for each one. What to Do if Programming Doesn’t Work While programming a keyless remote is usually a straightforward process, there are instances where things don’t go as planned. If your remote isn’t syncing with your car after following the steps, here are a few troubleshooting tips: Check the Battery : If the remote’s battery is dead or weak, it won’t transmit the signal to your car. Replace the battery and try programming again. Verify the Compatibility : Make sure that the remote is compatible with your vehicle’s make, model, and year. Some vehicles require special remotes that can only be programmed by the manufacturer or an authorized locksmith. Reset Your Vehicle’s System : In some cases, you might need to reset the car’s system to clear previous programming attempts. Check your owner’s manual or consult a professional for assistance. Consult a Professional : If you continue to have issues, it might be time to visit a dealership or a certified locksmith. These professionals have the tools and experience to program the remote correctly and ensure everything works seamlessly. Why Programming Your Keyless Remote Is Important Programming your keyless remote is a simple but important task that helps ensure your car’s security and convenience. By understanding how the process works and what to do if things go wrong, you’ll be able to troubleshoot and solve any issues quickly. Whether you’re replacing a lost remote or adding a new one to your collection, knowing how to program your remote saves time and money compared to visiting a dealership or locksmith. With the increased reliance on keyless remotes for unlocking and starting vehicles, it’s essential for every car owner to be familiar with this process. By keeping your remote in good working condition and knowing how to program it when necessary, you’ll enjoy a smoother, more efficient experience with your vehicle.

How to Maintain and Extend the Life of Your Car Keys

How to Maintain and Extend the Life of Your Car Keys

Your car keys are more than just tools to unlock and start your vehicle—they’re essential components for your car's convenience and security. Taking proper care of them can prevent unexpected failures and ensure they last for years. Here are seven easy and practical tips to help you keep your car keys in the best condition possible. 1. Keep Your Keys Clean and Dry Why It Matters: Moisture and dirt are the biggest enemies of car keys, particularly electronic fobs. Exposure to these elements can cause internal corrosion and failure. How to Do It: Avoid Moisture: Keep your keys away from water, rain, and high humidity. If they accidentally get wet, dry them immediately with a soft, absorbent cloth. Regular Cleaning: Gently wipe your keys with a clean cloth to remove dirt and dust. For crevices around buttons, use a cotton swab to clean hard-to-reach areas. 2. Handle Your Keys with Care Why It Matters: Dropping, tossing, or mishandling your keys can cause physical damage or misalign internal components, rendering them unusable. How to Do It: Avoid Drops: Be mindful when handling your keys. Attach them to a lanyard or key holder for better grip and to reduce accidental drops. Use a Protective Key Cover: A well-fitted key cover adds an extra layer of protection against scratches, drops, and general wear and tear. Plus, they’re available in various styles to match your preferences. 3. Replace Key Fob Batteries on Time Why It Matters: A weak battery can lead to your car key fob failing to work when you need it most, leaving you stranded or locked out. How to Do It: Watch for Warning Signs: If your key fob’s range decreases or requires multiple presses to function, the battery is likely weak and needs replacement. Replace Properly: Follow your car’s manual for step-by-step instructions on changing the battery. Using the correct battery type ensures reliable performance. 4. Protect Your Keys from Extreme Temperatures Why It Matters: Excessive heat or cold can harm the electronic components inside your key fob or damage the metal of traditional keys. How to Do It: Avoid Direct Sunlight and Heat: Don’t leave your keys exposed to the sun on your dashboard or near heaters. Extreme heat can warp materials and damage internal circuits. Keep Away from Freezing Temperatures: In colder months, avoid leaving your keys in your car or outside for prolonged periods, as freezing conditions can impact their functionality. 5. Rotate and Use Spare Keys Why It Matters: Spare keys can deteriorate if left unused for long periods. Regularly using them ensures they remain functional and ready in emergencies. How to Do It: Alternate Keys: Use your spare key occasionally to keep it in good working condition. This prevents any surprises when you actually need it. Safe Storage: Store spare keys in a dry, cool place, away from moisture, heat, or any magnetic devices that could interfere with their programming. 6. Avoid Overloading Your Keychain Why It Matters: A heavy keychain might seem harmless, but the extra weight can wear down your car’s ignition switch or damage your key over time. How to Do It: Limit What You Carry: Stick to the essentials—remove unnecessary keys, charms, or heavy accessories. Use Lightweight Keychains: Choose minimalistic and lightweight keychains to prevent undue stress on the ignition and the key itself. 7. Regularly Inspect for Wear and Tear Why It Matters: Keys, especially those with buttons or electronic components, can show signs of wear over time. Early detection helps avoid complete failure. How to Do It: Look for Physical Damage: Check for cracks, faded buttons, or scratches that might affect functionality. Seek Professional Help: If you notice significant wear or damage, consult a professional locksmith or dealership for repairs or replacement. Ignoring issues could lead to bigger, costlier problems down the line. Why Car Key Maintenance is Worth Your Effort Properly maintaining your car keys ensures they stay reliable, functional, and secure for years to come. Whether it’s a traditional key or a modern electronic fob, these small actions can save you from costly replacements or inconvenient malfunctions. Taking care of your keys isn’t just about preventing problems—it’s also about convenience, peace of mind, and getting the most out of your vehicle’s features. By following these simple tips, you’ll keep your car keys in top shape and avoid the stress of unexpected failures.

KEY COVERS: WHAT DO YOU NEED TO KNOW?

KEY COVERS: WHAT DO YOU NEED TO KNOW?

What is a Key Cover? A key cover , often referred to as a key shell or key case, is the outer part of your key. It houses the electronic board, chip, and battery but excludes the internal electronics themselves. If your key casing is damaged, there’s no need to replace the entire key – just changing the key cover can restore its durability and usability while saving you money. When Do You Need a New Key Cover? You might need a key cover replacement when: The buttons on your key become worn out or stop responding. The outer case cracks, exposing the internal electronics. The key mechanism no longer functions smoothly. You want to refresh the appearance of your key with a new, sturdy shell. Instead of struggling with a faulty key, simply replace the cover and extend the lifespan of your original key! How to Choose the Right Key Cover? When selecting a replacement key cover, consider the following factors: Button Layout: Ensure that the number of buttons and their symbols match your existing key. Blade Shape: If your key includes an integrated blade, make sure the new shell accommodates it correctly. Quality: A good-quality key cover ensures a snug fit, smooth functionality, and long-lasting durability. At MR-KEY , we offer a variety of key covers designed to match your specific car model perfectly, providing both aesthetics and functionality. How to Change Your Key Cover? Replacing your key cover is simple and doesn’t require professional assistance. Here’s how: Purchase a compatible key cover from our website. Open your old key case carefully. Transfer the electronic board and chip from your original key to the new key cover . Reassemble the key, ensuring all components fit securely. Test the buttons and functions to confirm everything is working properly. For step-by-step guidance, we provide video tutorials on our website, showing you exactly how to change your key shell and even replace the battery if needed. What Else Can You Change When Replacing the Key Cover? While changing your key cover, it's the perfect time to: Replace non-functional click buttons on your key’s electronic board. Change the battery since you're already disassembling the key, ensuring it lasts longer. At MR-KEY , we strive to make key replacements easy, affordable, and accessible to everyone. Explore our website to find the perfect key cover, key cutting services, and useful video guides to help you maintain your car key like a pro!

Chat with us