Post Name

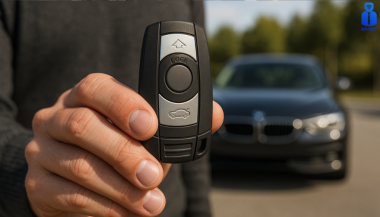
Upgrading your car key can significantly improve your vehicle’s security and make your daily routine more convenient. Whether you’re upgrading from a basic key to a remote key or stepping up to a smart key, this guide will take you through the entire process, step by step, ensuring a smooth transition.

Understanding Your Key Type

Before you start the upgrade process, it’s important to know which type of key you currently have. Here are the most common key types:

  • Traditional Metal Keys: These are basic, mechanical keys, common in older vehicles. They don’t have any electronic components.
  • Transponder Keys: These have an electronic chip inside the key head that communicates with the vehicle’s computer system for added security.
  • Remote Keys: These keys have buttons to lock/unlock the doors remotely and usually have a physical blade as a backup.

Understanding your current key type will help guide your decision on the best upgrade path.

Choosing the Right Upgrade

Once you know what type of key you have, you need to decide what features you want in your upgraded key. Some options to consider are:

  • Remote Locking: Allows you to lock/unlock the doors from a distance.
  • Keyless Entry: Lets you unlock the car without taking the key out of your pocket.
  • Smart Key: Offers advanced functions such as proximity unlocking, push-button start, and remote engine start.

Take some time to research the options available for your specific car model. Many car manufacturers offer compatible upgrades for different key types, so it’s important to consult your dealership or a trusted locksmith for recommendations.

Gathering What You’ll Need

Before starting the upgrade process, make sure you have the following materials:

  • The New Key: This could be a transponder key, remote key, or smart key.
  • Your Original Key: You’ll need this as a reference throughout the process.
  • Key Programming Device: Some keys require a special device to pair the key with your car.
  • Car Manual or Programming Guide: It’s always a good idea to have your car’s manual handy for specific instructions.

Having everything ready will make the process much smoother.

Step-by-Step Upgrade Process

Purchase the New Key
Start by purchasing your new key. You can buy it from your car’s dealership, a certified locksmith, or a trusted online retailer. Make sure that the key is compatible with your vehicle’s make and model.

Transfer Electronics (if necessary)
If your new key is just a shell, you will need to transfer the internal components from your old key. This includes the transponder chip and, if applicable, the key blade. Be careful when transferring the electronics to avoid any damage.

Program the Key
Programming the new key is crucial for it to work with your vehicle. Here’s a general guide:

  • Insert the original key into the ignition and turn it to the ON position.
  • Quickly remove the original key and insert the new key.
  • Turn the new key to the ON position and wait for the security light to turn off. This might take a few minutes.

Test the New Key
After programming, it’s important to test the new key to ensure everything works properly. Check the following functions:

  • Locking and unlocking the doors
  • Starting the engine
  • Any additional functions like remote trunk opening or proximity unlocking

Troubleshooting Common Issues

If your new key isn’t working as expected, don’t worry! Here are some common problems and their solutions:

  • Key Not Recognized: Check if the transponder chip is properly placed in the key.
  • Key Doesn’t Start the Car: Double-check the programming steps to ensure everything was done correctly.
  • Buttons Don’t Work: Verify that the battery in the new key is properly installed and functional.

If the problem persists, it’s best to consult a professional locksmith or visit your dealership for further assistance.

Upgrading your car key is an excellent way to improve both the security and convenience of your vehicle. By following these steps, you’ll be able to transition smoothly to your new key. If you run into any issues, don’t hesitate to reach out to a professional locksmith who can help you along the way. Enjoy the benefits of your new car key and the added peace of mind that comes with enhanced security.

Related Posts

Top 10 Fascinating Facts About BMW: Engineering Precision, Motorsport DNA, and Driving Pleasure

Top 10 Fascinating Facts About BMW: Engineering Precision, Motorsport DNA, and Driving Pleasure

BMW stands for precision engineering and pure driving pleasure. Founded in 1916 in Bavaria, BMW began as an aircraft engine manufacturer before reshaping the automotive world. Its guiding philosophy, “Aus Freude am Fahren” (Sheer Driving Pleasure), has defined the brand for decades. Today, BMW builds everything from electric city cars to high-performance M models. What connects them all is balance, control, and a driver-first mindset. These BMW facts reveal how the brand earned its reputation. 1. Munich’s Four-Cylinder Headquarters BMW’s headquarters in Munich is instantly recognizable. The building, completed in 1972, resembles four vertical engine cylinders joined together. BMW’s headquarters in Munich is instantly recognizable. The building, completed in 1972, resembles four vertical engine cylinders joined together. 2. Logical Model Names Since 1972 BMW’s naming system is deliberately simple. Introduced with the first 5 Series in 1972, the three-digit structure tells you exactly where a model sits in the lineup. The first number shows the series. The remaining digits traditionally indicated engine size. Letters like i , d , and x were later added to explain fuel type or drivetrain. BMW drivers can often decode a car before even opening the door. 3. The Only BMW With a Real Name Almost every BMW uses numbers—except one. The BMW Isetta remains the brand’s only mass-produced car with a proper name. Licensed from Italian manufacturer ISO in the 1950s, the Isetta featured a single front-opening door and ultra-compact dimensions. It helped BMW survive financially after the war and became a design icon in Europe. 4. Motorsport DNA: The Birth of BMW M BMW’s M division was created in 1972 to support racing programs. Its purpose was simple: win races and transfer that knowledge to road cars. BMW M cars quickly became benchmarks for performance sedans and coupes. The connection runs deep—BMW even powered a Formula 1 championship-winning car in 1983. Motorsport is not branding for BMW; it’s engineering validation. 5. Safety Innovations Ahead of Their Time In 1972, BMW revealed the Turbo concept car. It introduced ideas that would later become industry standards. Crumple zones, energy-absorbing steering columns, and even early collision-warning concepts were present. Decades before modern driver-assist systems, BMW was already testing how to protect drivers without compromising performance. 6. Hydrogen Engines in the 1970s BMW experimented with hydrogen power long before electrification became mainstream. In 1979, BMW tested a hydrogen-powered 5 Series sedan. The car looked ordinary but ran on modified combustion technology. This early project showed BMW’s willingness to explore alternative energy paths well ahead of regulations or market demand. 7. Project i and the Electric Breakthrough BMW’s modern electric strategy began in 2007 with Project i. The initiative was designed to rethink mobility from scratch. The result was the BMW i3, launched in 2013. It combined carbon-fiber construction, electric drive, and sustainable materials. Project i shaped BMW’s current EV lineup and proved electric cars could still deliver driving pleasure. 8. Limited-Run BMW Special Models BMW frequently builds rare, limited-production vehicles to showcase design and engineering freedom. Models like the modern 3.0 CSL tribute or special M editions celebrate milestones and motorsport heritage. These cars often sell out instantly, reinforcing BMW’s reputation for exclusivity and craftsmanship. 9. Precision Manufacturing With BMW iFACTORY BMW applies the same precision to manufacturing as it does to driving dynamics. The BMW iFACTORY concept integrates AI, robotics, and digital twins into production. Quality control is automated and continuously monitored. The result is consistent build quality across plants in Europe and beyond—something BMW drivers notice long after purchase. 10. Steering-Wheel Controls Before Anyone Else BMW introduced steering-wheel-mounted controls in the early 1990s. Inspired by Formula 1, the goal was simple: keep the driver’s hands on the wheel. Functions like audio and cruise control became easier to manage. Today this feature is universal, but BMW was among the first to make it standard in luxury cars. FAQ What does BMW stand for? BMW means Bayerische Motoren Werke (Bavarian Motor Works). The company was founded in Munich in 1916 and originally produced aircraft engines. Why do BMW drivers value the brand so highly? Balance, rear-wheel-drive heritage, motorsport DNA, and consistent engineering philosophy all contribute to BMW’s loyal following. What should you do if you lose your BMW key? BMW keys are coded and must match the vehicle’s security system. Owners usually replace them through dealers, but specialist suppliers can also provide compatible keys and cases . Platforms like MR-KEY help BMW owners replace worn or lost keys while maintaining proper ownership verification. Visit our shop at mr-key.com

Condensation Inside Motorcycle TFT Displays: Causes, Warning Signs & What It Really Means

Condensation Inside Motorcycle TFT Displays: Causes, Warning Signs & What It Really Means

Every modern motorcycle rider has seen it. You park your bike after a cold morning ride, glance at the dashboard, and notice a faint haze forming behind the TFT screen. Maybe small droplets gather along the edges. Maybe the whole display looks fogged from the inside. That moisture is not cosmetic. It is water inside a sealed electronic unit — and it is the earliest visible warning of a problem that can destroy a component costing €700 to over €1,200 to replace. This guide explains exactly why condensation forms inside motorcycle TFT displays, which bikes are most affected, what it really means for your instrument cluster, and the one affordable upgrade that prevents the damage cycle before it starts. Why Motorcycle TFT Displays Get Condensation Inside A motorcycle TFT display is a sealed electronic module exposed to some of the harshest conditions any screen will ever face. Unlike your phone in a pocket, a motorcycle dashboard sits directly in the path of rain, road spray, temperature swings, UV radiation, and constant vibration. Condensation forms when warm, humid air trapped inside the display housing meets a cooler surface — the glass front panel. The moisture in that air turns to liquid droplets on the coldest point, which is almost always the inside face of the screen. Here is how moisture gets trapped in the first place. Thermal breathing. Every ride creates a heat cycle. The engine, direct sunlight, and the display's own backlight warm the air inside the housing. When the bike stops and cools, that air contracts and draws in fresh, humid outside air through micro-gaps in the seals. Over weeks and months, humidity accumulates inside the unit. Seal degradation. The rubber gaskets and adhesive bonds that seal a TFT housing are not permanent. UV exposure breaks down rubber. Vibration loosens adhesive joints. Temperature cycling causes materials to expand and contract at different rates, gradually opening pathways for water ingress. Micro-damage to the front surface. Stone chips, cleaning scratches, and pressure marks on the display face can create hairline cracks invisible to the naked eye. These become moisture entry points — especially in rain or when using a pressure washer. High-humidity environments. Riders in coastal areas, tropical climates, or northern European countries with persistent dampness face accelerated moisture ingress. A bike garaged in a humid environment without ventilation is particularly vulnerable. The result is always the same: water inside the display that the sealed housing cannot easily release. Which Motorcycles Are Most Affected Condensation inside TFT displays is not limited to one manufacturer. It has been documented across virtually every major brand using TFT instrument clusters. BMW — The R 1250 GS, R 1300 GS, S 1000 RR, F 850 GS, and F 900 R all use 6.5-inch or 10.25-inch TFT displays. These are high-quality units, but they sit in exposed positions — particularly on adventure models ridden in all weather conditions. OEM replacement for the 6.5-inch TFT runs around £1,200, and if the wiring loom is damaged during theft or failure, that figure can reach £3,000+. Yamaha — Models like the MT-09, MT-07, Tracer 9, and Ténéré 700 use TFT dashboards. Yamaha's displays are generally well-sealed, but the same thermal breathing cycle applies. Adventure and touring riders who cover high mileage in variable conditions report condensation after 2–3 seasons. Honda — The Africa Twin, CB650R, and CBR1000RR-R all run TFT clusters. The Africa Twin's display sits in a highly exposed cockpit position. Forum reports from owners confirm moisture ingress, especially after extended wet-weather riding. Triumph — The Tiger 900, Street Triple, and Speed Triple RS use TFT displays. Triumph's units are compact, but the same vulnerability to vibration-induced seal failure applies across the range. Kawasaki — The Z900, Ninja 1000SX, Versys 1000, and newer Z650 models all feature TFT dashboards. Like all manufacturers, Kawasaki's sealed units face the same environmental pressures. The pattern is clear: this is not a brand-specific defect. It is an inherent vulnerability of mounting sensitive display technology in one of the most hostile environments imaginable. The Warning Signs You Should Never Ignore Condensation inside a motorcycle TFT display is progressive. It starts small and escalates. Here is what each stage looks like — and what it means. Light fogging after a cold start. A thin mist on the inside of the screen that clears within 10–15 minutes of riding. This is the earliest sign. Moisture is present inside the housing but has not yet caused damage. At this stage, the problem is still manageable. Persistent edge condensation. Droplets that form along the bottom or side edges of the display and do not fully evaporate during a ride. This means moisture is accumulating faster than it can escape. The seals are compromised. Internal staining or water marks. Visible trails, spots, or discolouration behind the glass that remain even when the display is dry. This is mineral residue from evaporated water. It means moisture has been cycling inside the display repeatedly. The internal coatings and bonding layers are being attacked. Intermittent display issues. Flickering backlight, sections of the screen dimming unevenly, or the display briefly shutting off during a ride. These are early signs of electrical damage from moisture reaching the circuit board or flex connectors behind the panel. Dead pixels appearing alongside condensation. If you see pixel failure combined with any visible moisture, the display is in active degradation. The liquid crystal layer or its driver circuits are being damaged. This combination almost always leads to full failure. Complete display blackout. The screen powers on but shows nothing, or fails to power on at all. At this point, the TFT module is usually beyond repair and must be replaced entirely. The critical takeaway: condensation that clears quickly is a warning. Condensation that stays, stains, or coincides with display glitches means damage is already underway. What Condensation Actually Does to a TFT Display The fog itself is not the problem. The damage happens behind it. A motorcycle TFT display is a laminated stack of layers: a front glass or polycarbonate cover, a polarising film, the liquid crystal panel itself, LED backlighting, and a circuit board with drivers and connectors. All bonded together with adhesive and housed in a sealed plastic or metal frame. When moisture sits inside this assembly, several destructive processes begin simultaneously. Corrosion of electrical contacts. The flex cables and solder joints connecting the LCD panel to the main circuit board are extremely sensitive to moisture. Even trace amounts of water can cause oxidation, increasing resistance and eventually breaking the connection. This is how entire rows or columns of pixels fail at once. Delamination of optical layers. The adhesive bonds between the polariser, LCD panel, and backlight diffuser swell and weaken when exposed to moisture. This causes visible clouding, uneven brightness, and eventually permanent optical distortion. Mineral deposits on internal surfaces. Water that evaporates inside the display leaves behind dissolved minerals and contaminants. These deposits scatter light, reduce contrast, and cannot be cleaned without disassembling the unit — which is rarely possible without destroying it. Short circuits on the PCB. If enough moisture reaches the main circuit board, it can bridge traces and create short circuits. This can cause complete display failure, error codes, or even damage to the motorcycle's CAN bus communication system. A motorcycle TFT display is not designed to be serviced. It is a sealed, disposable module. Once moisture damage reaches the internal electronics, the only option is full replacement. How to Prevent Water Ingress in Motorcycle TFT Displays Before Damage Starts Prevention is not complicated. But it requires acting before symptoms appear — not after. Never use a pressure washer on the dashboard. High-pressure water jets force moisture past seals that can handle rain but not direct, concentrated spray. Wash the display area gently with a damp microfibre cloth and motorcycle-safe LCD cleaner. Avoid parking in direct sunlight for extended periods. Prolonged heat accelerates UV degradation of seals and adhesives. It also increases the temperature differential that drives the thermal breathing cycle. Use a cover or park in shade when possible. Store the bike in a ventilated, dry environment. A damp, unventilated garage is one of the worst places for a motorcycle with a TFT display. If humidity control is not possible, a small dehumidifier or silica gel packs placed near the bike can help. Inspect the display edges regularly. Look for any visible gap between the display housing and its frame, or any separation of the front glass from the body. Catching a seal failure early — before moisture accumulates — gives you the chance to act. Protect the display surface from physical damage. The front face of the TFT is the largest and most vulnerable entry point for moisture. A single stone chip or a scratch from an abrasive cloth can breach the surface coating and create a pathway for water. Preventing that surface damage is the single most effective thing you can do. The One Upgrade That Prevents Condensation Damage in Motorcycle TFT Displays A quality screen protector designed specifically for your motorcycle's TFT display is the most cost-effective protection available — by a wide margin. Here is what a properly fitted screen protector actually does. It creates a physical barrier against impact. Stone chips, gravel flicks, and minor impacts hit the protector instead of the display surface. This eliminates the micro-cracks that become moisture entry points. It shields the surface from UV radiation. UV is the primary cause of seal and adhesive degradation. A screen protector absorbs UV energy before it reaches the display housing, slowing the ageing process of the seals beneath. It prevents cleaning damage. Without a protector, wiping the TFT with a dirty cloth, gloves, or the wrong cleaning product can create fine scratches that compromise the surface. With a protector fitted, you can clean aggressively without risking the display itself. After a few years, replace the protector — the screen underneath stays pristine. It reduces direct water contact with the display edges. A well-fitted protector overlaps the display bezels slightly, redirecting water away from the most vulnerable seal points around the screen perimeter. The cost comparison makes the decision obvious. A screen protector costs between €10 and €25. A TFT display replacement costs €700 to €1,500 or more, depending on the motorcycle. That is a return on investment measured in thousands of percent. Riders who fit a screen protector on day one of ownership — before the first ride, before the first stone chip, before the first rain — give their TFT display the best possible chance of lasting the life of the motorcycle. What to Do If You Already Have Condensation If moisture is already visible inside your display, the situation is not necessarily hopeless — but your options depend on how far it has progressed. If you see light fogging only. Park the bike in a warm, dry, ventilated space. Run the engine and let the display heat up for 20–30 minutes to encourage evaporation. Some riders have had success placing a small silica gel packet near the display housing to draw out residual moisture. Fit a screen protector immediately to prevent further surface-level water entry. If the bike is under warranty. Contact your dealer. Condensation inside a sealed TFT display is a manufacturing defect in the seal or housing. Many manufacturers — including BMW and KTM — have replaced displays under warranty for this exact issue. Document the condensation with clear photographs before your appointment. If condensation has caused staining or pixel issues. At this stage, the damage is internal and typically irreversible without replacing the display module. Get a quote from your dealer, check whether aftermarket options exist for your model, and fit a screen protector to the new unit immediately to prevent the cycle repeating. FAQ Is condensation inside my motorcycle TFT display normal? A very light, temporary fog on a cold morning that clears within minutes can occur even in a properly sealed unit. However, persistent condensation, visible droplets, or any staining is not normal — it indicates a compromised seal and active moisture ingress. Can I fix condensation inside a motorcycle display myself? If it is only light fogging, gentle heat and dry storage may resolve it temporarily. However, the seals are already compromised, so it will likely return. Full repair requires resealing or replacing the display unit, which is not a realistic DIY job for most riders. Will condensation void my warranty? No. Condensation inside a sealed factory unit is a seal failure, not user damage. Most manufacturers honour warranty claims for moisture ingress, provided there is no evidence of physical impact or tampering. Always document the issue with photos. How much does it cost to replace a motorcycle TFT display? OEM replacement costs vary significantly. BMW TFT units typically cost £700–£1,200 for the part alone, plus fitting. Honda, Yamaha, Triumph, and Kawasaki displays range from €400–€900 depending on the model. Labour adds €100–€300. Does a screen protector actually prevent condensation? A screen protector does not fix existing condensation. What it does is prevent the surface damage — stone chips, scratches, UV degradation — that causes seals to fail and moisture to enter in the first place. It is the most effective preventive measure available. Should I fit a screen protector to a brand-new bike? Yes. Day one. Before the first ride. The TFT display is at its most vulnerable when new because the seals have not yet been tested, and any early surface damage will accelerate their failure. Protecting the screen from the start is the best insurance against a four-figure repair bill down the line. Does riding in rain damage a motorcycle TFT display? Rain alone should not damage a properly sealed TFT display. The issue is cumulative: repeated exposure to rain, spray, temperature cycling, and UV gradually degrades seals over time. A screen protector significantly slows this process by shielding the most exposed surface. Protect Your Display Before It Costs You Hundreds A motorcycle TFT display is one of the most expensive single components on a modern bike — and one of the most exposed. The damage from water ingress is progressive, often invisible until it is too late, and almost always irreversible. A screen protector fitted from day one is the simplest, cheapest, and most effective way to protect that investment. Browse precision-fit motorcycle TFT screen protectors for BMW, Yamaha, Honda, Triumph, Kawasaki, and more at mr-key.com.

Here’s 1 Crazy Mistake 40% of Car Owners Make

Here’s 1 Crazy Mistake 40% of Car Owners Make

When it comes to car ownership, most of us are pretty diligent. We make sure our insurance is up to date, change the oil like clockwork, and even rotate our tires to avoid any wear and tear. But there’s one crucial aspect that many car owners overlook: having a spare key . It seems like a small detail, right? Yet, nearly 40% of car owners don’t have a backup key for their vehicle. And that’s a huge risk. Why? Because losing your only car key can cause a headache you’re not prepared for—and it’s a lot more common than you might think. The Hidden Dangers of Only Having One Car Key It’s easy to get comfortable with just one key. After all, it’s always in your pocket, bag, or hanging on your keychain. But life happens. Keys get lost, misplaced, or even stolen, and when that happens, you’re looking at a nightmare scenario. Here’s why: Costly Lockouts : Lose your key, and you’re locked out of your car, stranded until you can get help. Calling a tow truck or emergency locksmith is not only frustrating but can cost you hundreds of dollars. Inconvenient Delays : Have an important meeting? Picking the kids up from school? With only one key, losing it means your entire day—or week—grinds to a halt. Damaged Key, No Backup : Keys wear down over time, and if you only have one, a damaged key could lead to ignition problems. Suddenly, your car won’t start, and now you’re stuck paying for both a repair and a replacement. Security Risk : Lost keys are more than just a hassle—they’re a potential security threat. If your key falls into the wrong hands, your vehicle becomes vulnerable. The Pricey Locksmith Option Once you’re locked out or your key is lost, your options become limited—and expensive. Going to a local locksmith is one route, but here’s what you’re facing: High Prices : Traditional locksmiths can charge anywhere from €150 to €400 just to cut and program a new car key. Depending on your car model, it could be even more. Inconvenient : Many locksmiths don’t work around your schedule, and waiting for them to arrive or driving to their location takes time you don’t have. The Smart, Affordable Solution: Mr-Key.com Fortunately, there’s an easier and much more affordable option— Mr-Key.com . Instead of paying top dollar and wasting time, here’s how you can get a spare key in just a few simple steps: Take a Picture : Simply snap a photo of your existing key. Send It to Us : Upload the picture to Mr-Key.com using our secure service. Get Your Key Delivered : We’ll cut a perfect match and deliver it right to your door at a fraction of the cost of a traditional locksmith. Don’t Wait for a Crisis—Get Your Spare Key Now! Why risk being locked out or paying hundreds when you can have peace of mind for less? Visit Mr-Key.com today and get a spare car key cut from just a picture. It’s quick, it’s easy, and it’s affordable. Don’t be part of the 40% that gambles with just one key—protect your car and your schedule with Mr-Key.com!

How to Protect Your Car Key Fob from Relay Attacks

How to Protect Your Car Key Fob from Relay Attacks

Car theft has entered the digital age — and unfortunately, so have the thieves. As car manufacturers move toward keyless technology, a new type of threat has emerged: the relay attack. Unlike traditional break-ins, this high-tech method allows criminals to steal a vehicle without touching the keys — or even breaking a window. Imagine this: your car is parked safely outside your house. Your key fob is inside, hanging on a hook by the front door. You're fast asleep. But outside, two individuals with small electronic devices are working together. One stands near your front door, scanning for a signal from your key fob. The other waits by your car. Within seconds, your key’s signal is captured, extended, and transmitted to your car. It unlocks, starts, and drives away — and you might not notice until morning. This is not science fiction. It's called a relay attack , and it's one of the fastest-growing vehicle theft methods worldwide. Why Relay Attacks Are So Effective The key to this technique is exploiting the constant communication between your car and its fob. Most keyless entry systems are designed for convenience — you don’t even need to press a button. The car automatically detects the presence of the key fob and unlocks when you approach. This convenience is exactly what makes it vulnerable. Relay devices — which are cheap, portable, and easy to use — can mimic the signal and trick the car into thinking the key is nearby, even when it’s inside your home. Security experts have raised the alarm about this method for years, but many drivers still don’t realize how easily their vehicles can be accessed. In the UK alone, keyless car theft now accounts for more than 90% of vehicle thefts involving high-end models, according to the AA. And with the rise of online tutorials and black-market tools, the problem is growing globally. So, What Can You Do to Stay Safe? Fortunately, protecting your vehicle doesn’t require advanced tech or a huge investment — just awareness and a few smart habits. One of the most effective ways to block relay attacks is also the simplest: store your keys in a signal-blocking container . Often called a Faraday pouch or Faraday box, this lined case prevents radio signals from escaping. When your keys are stored inside, they can’t be scanned or cloned, no matter how close a thief gets to your home. Placement also matters. Many drivers leave their keys near the front door or on an entryway table — spots that are easy to access from outside. Moving your keys to the center of your home, an upper floor, or even a metal box can reduce signal exposure dramatically. Some newer key fobs allow you to manually disable the signal when it’s not in use. This feature is often hidden in the manual and rarely mentioned by dealers. Taking a moment to learn whether your key supports this — and how to activate it — can make a big difference. It’s also worth checking whether your vehicle’s software is up to date. Many automakers periodically release firmware updates that strengthen encryption or reduce signal range. In some cases, updates can even detect and block suspicious unlock attempts. And while it may seem old-fashioned, physical security still works . Devices like steering wheel locks or gear shift immobilisers can be powerful visual deterrents. Even if a thief manages to unlock your vehicle, the sight of a bulky lock inside may be enough to send them looking for an easier target. If you're looking for practical solutions beyond GPS , check out our blog: Do Car Keys Have GPS? What You Need to Know About Key Tracking . In summary, here are a few key takeaways to keep your keys and vehicle safer: Store your fob in a signal-blocking pouch or metal container Keep keys away from entry points like doors or windows Disable keyless signals if your fob supports it Update your car’s firmware regularly Use visible anti-theft devices as a deterrent Looking Ahead: Smarter Cars, Smarter Drivers Relay attacks are part of a larger trend — one where modern technology makes life more convenient, but also creates new risks. Just like we’ve learned to secure our phones and passwords, we now need to think about how we secure our vehicles. As carmakers explore more secure solutions — like Ultra Wideband (UWB) tech and biometric verification — drivers still need to take responsibility for their vehicle’s safety. The tools are already out there, and many of them cost less than a meal out. It’s not just about avoiding theft; it’s about peace of mind. So next time you get home, before tossing your keys on the hallway table, take a second to think: are they really safe there?

Chat with us