Post Name

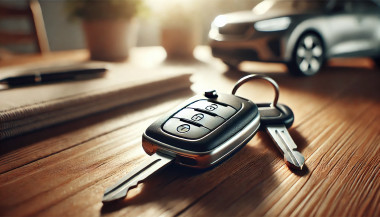
Losing a key can be a hassle, but the process of getting a replacement becomes much easier if you can locate the key code. The key code is a unique combination of letters and numbers that identifies the specific cut and type of your key. This code is essential for accurately replicating a new key, whether it’s for your car, house, or another type of lock. This guide will help you understand where to find your key code and what steps you can take if the code isn’t easily accessible.

Why the Key Code is Important

The key code is essentially a blueprint for your key. It tells a locksmith or dealer exactly how to cut a new key that will work with your lock. Without this code, creating a replacement key can be a trial-and-error process, which can be time-consuming and costly. Additionally, for certain types of keys, such as those for cars with transponder chips, the key code is necessary for programming the electronic components of the key.

Step 1: Inspect Your Key and Lock

The first and most straightforward step is to inspect your key and lock for the key code. For many keys, especially older models, the code is engraved or stamped directly onto the key itself. This is common with car keys, where the code may be found on the metal part of the key blade. In some cases, the code might be on the plastic casing of the key, especially if it’s a newer model with electronic components.

If the key itself doesn’t have the code, check the lock. The key code is sometimes inscribed on the lock’s cylinder or on a small metal plate attached to the lock. This is more common with padlocks or specialized security locks. If you’re dealing with a door lock, you might need to remove the lock from the door to inspect it closely.

Step 2: Review Documentation and Original Packaging

If you can’t find the key code on the key or lock, the next step is to review any documentation or packaging that came with the key. For vehicles, the key code is often provided in the owner’s manual or on a key tag that was given to you at the time of purchase. This tag is usually small and easily misplaced, so it’s worth checking any old documentation or vehicle paperwork you might have.

For other types of keys, such as those for padlocks, cabinets, or office furniture, the key code might be printed on the original packaging or on warranty cards. These are often overlooked, but they can be invaluable when you need a replacement key.

Step 3: Contact the Manufacturer or Dealer

If the key code isn’t visible on the key, lock, or documentation, your next step should be to contact the manufacturer or dealer. Most car manufacturers, for example, keep a record of key codes based on the Vehicle Identification Number (VIN). By providing your VIN to a dealership, they can usually retrieve the key code and either cut a new key for you or give you the information needed to get one cut elsewhere.

For other types of keys, such as those for cabinets or padlocks, contacting the manufacturer can also be helpful. Provide them with details about the product, such as the model number and any serial numbers, and they may be able to provide the key code or a replacement key directly.

Step 4: Professional Locksmith Assistance

If you’ve exhausted all other options, a professional locksmith is your best bet. Locksmiths have specialized tools and knowledge that allow them to decode locks or determine the correct key code even when it’s not visible or available through documentation. They can often cut a new key based on the lock itself, bypassing the need for the original key code entirely.

Locksmiths are particularly useful if you’re dealing with older locks, unique security systems, or if the key code is no longer accessible through traditional means. They can also help with programming transponder keys for vehicles, ensuring that your new key not only fits the lock but also communicates correctly with your car’s electronic systems.

Additional Tips for Key Code Location

  • Record Key Codes: If you find your key code, make sure to record it somewhere safe. This will save you time if you need another replacement in the future.
  • Ask About Spare Keys: If you’re contacting a dealership or manufacturer, ask if they can provide a spare key at the same time, especially if you’re prone to losing keys.
  • Consider a Key Tracking System: For those who frequently lose keys, consider investing in a key tracking system or a digital key organizer where you can store key codes and important information.

Locating your key code is a crucial step in the process of replacing a lost or broken key. By carefully inspecting your key and lock, reviewing any relevant documentation, contacting the manufacturer or dealer, or seeking help from a professional locksmith, you can ensure that your replacement key is accurate and functional. Taking these steps not only saves time and money but also provides peace of mind in knowing that you have a reliable solution for key replacement.

Related Posts

How to Take the Perfect Photo of Your Key for Easy Replacement

How to Take the Perfect Photo of Your Key for Easy Replacement

When you need a replacement key , taking a clear, detailed photo of your key can make the process much faster and more accurate. A high-quality image helps key makers understand the exact specifications, cuts, and dimensions of your key, which is especially important if you don’t have a spare. In this guide, we’ll walk you through the best practices for photographing your key so you can get an accurate replacement with ease. Why a Clear Key Photo Matters Photographing a key might sound simple, but it requires a bit of attention to detail. A well-taken photo captures the key’s grooves and unique cuts clearly, helping the key cutter replicate the exact pattern. Saves Time : A high-quality photo reduces the need for multiple attempts to cut a new key. Ensures Accuracy : Clear images help capture specific details, leading to a more precise fit. Convenient Process : With just a smartphone and a few tips, you can photograph your key from home without needing special equipment. Essential Tools for Photographing Your Key To take a clear photo of your key, you don’t need much beyond a few household items. Here’s what you’ll need: Smartphone or Camera : A phone camera is usually sufficient, but a standard digital camera works well too. Plain Background : Choose a neutral, solid-colored background like a piece of white paper or a smooth table surface. Good Lighting : Natural daylight or a bright room light helps capture details without shadows. Small Object for Elevation : A coin or similar item can lift the key slightly, making it easier to photograph. Step-by-Step Guide to Taking the Perfect Key Photo Follow these steps to take a photo that ensures clarity and accuracy for key replacement. 1. Set Up the Background Place a piece of plain white paper or another smooth, light-colored surface under your key. The solid color helps the details of the key stand out without any visual distractions. Tip : Avoid backgrounds with patterns or textures, as these can obscure the key’s features. 2. Position the Key Correctly Lay the key flat on the background, with the grooves and cuts facing up. The key should be positioned horizontally to allow a clear view of all its details. Side Profile : Make sure to capture the side profile that shows the cuts and grooves. Elevate Slightly : Place a coin or small object under one end of the key to angle it slightly toward the camera. This can help reduce shadows and improve focus on the cuts. 3. Adjust Lighting Good lighting is essential for capturing details. If possible, photograph your key in natural daylight near a window or use a well-lit room. Avoid Shadows : Ensure that no shadows fall across the key, as they can obscure details. Diffuse Light : If using a lamp, consider placing a thin cloth over it to diffuse the light and reduce harsh reflections. 4. Focus and Zoom Make sure your camera or smartphone is focused directly on the key. You may need to tap the screen to bring it into sharp focus. Zoom in Carefully : If you’re using a smartphone, zoom in slightly to capture the details, but avoid over-zooming, which can blur the image. Test Multiple Angles : Sometimes a slight adjustment in angle can capture the cuts more effectively, so take a few shots from slightly different perspectives. 5. Capture Multiple Photos It’s always a good idea to take several photos to ensure you have the best one. Try different angles and lighting adjustments to capture as many details as possible. Close-Up of the Grooves : Take one close-up image focusing on the cuts and grooves of the key. Overall Image : Include one full-length photo that shows the entire key from end to end. Try Different Angles : Slightly tilt the key or move the camera to see which angle best captures the detail of the cuts. Common Mistakes to Avoid When Photographing Your Key To get the best results, steer clear of these common issues that can impact the quality of your key photo: Blurry Images : If your hand shakes, use a small tripod or prop your phone on a stable surface. Poor Lighting : Avoid taking photos in dim rooms; use bright light to ensure the key is clearly visible. Obstructed Details : Make sure the entire length of the key is visible, without any part being cut off or covered. Tips for Ensuring a Smooth Replacement Process Once you have a clear photo of your key, there are a few final steps to make the replacement process as efficient as possible. Check the Photos : Look over your photos before sending them to ensure that they’re clear and detailed. Label the Key : If you’re photographing multiple keys, label each one in the image or add a note to avoid confusion. Include Measurements : If possible, add the measurements of the key’s length and width in your notes for added accuracy. A clear, detailed photo of your key can save you time and effort when seeking a replacement. By following these simple steps, you’ll provide all the necessary details to ensure your new key is an accurate match. Remember, good lighting, focus, and capturing all the unique cuts are essential to achieving the best results. With these guidelines, you’re set to take a photo that will make your key replacement process smooth and hassle-free.

How to Protect Your Car Key Fob from Relay Attacks

How to Protect Your Car Key Fob from Relay Attacks

Car theft has entered the digital age — and unfortunately, so have the thieves. As car manufacturers move toward keyless technology, a new type of threat has emerged: the relay attack. Unlike traditional break-ins, this high-tech method allows criminals to steal a vehicle without touching the keys — or even breaking a window. Imagine this: your car is parked safely outside your house. Your key fob is inside, hanging on a hook by the front door. You're fast asleep. But outside, two individuals with small electronic devices are working together. One stands near your front door, scanning for a signal from your key fob. The other waits by your car. Within seconds, your key’s signal is captured, extended, and transmitted to your car. It unlocks, starts, and drives away — and you might not notice until morning. This is not science fiction. It's called a relay attack , and it's one of the fastest-growing vehicle theft methods worldwide. Why Relay Attacks Are So Effective The key to this technique is exploiting the constant communication between your car and its fob. Most keyless entry systems are designed for convenience — you don’t even need to press a button. The car automatically detects the presence of the key fob and unlocks when you approach. This convenience is exactly what makes it vulnerable. Relay devices — which are cheap, portable, and easy to use — can mimic the signal and trick the car into thinking the key is nearby, even when it’s inside your home. Security experts have raised the alarm about this method for years, but many drivers still don’t realize how easily their vehicles can be accessed. In the UK alone, keyless car theft now accounts for more than 90% of vehicle thefts involving high-end models, according to the AA. And with the rise of online tutorials and black-market tools, the problem is growing globally. So, What Can You Do to Stay Safe? Fortunately, protecting your vehicle doesn’t require advanced tech or a huge investment — just awareness and a few smart habits. One of the most effective ways to block relay attacks is also the simplest: store your keys in a signal-blocking container . Often called a Faraday pouch or Faraday box, this lined case prevents radio signals from escaping. When your keys are stored inside, they can’t be scanned or cloned, no matter how close a thief gets to your home. Placement also matters. Many drivers leave their keys near the front door or on an entryway table — spots that are easy to access from outside. Moving your keys to the center of your home, an upper floor, or even a metal box can reduce signal exposure dramatically. Some newer key fobs allow you to manually disable the signal when it’s not in use. This feature is often hidden in the manual and rarely mentioned by dealers. Taking a moment to learn whether your key supports this — and how to activate it — can make a big difference. It’s also worth checking whether your vehicle’s software is up to date. Many automakers periodically release firmware updates that strengthen encryption or reduce signal range. In some cases, updates can even detect and block suspicious unlock attempts. And while it may seem old-fashioned, physical security still works . Devices like steering wheel locks or gear shift immobilisers can be powerful visual deterrents. Even if a thief manages to unlock your vehicle, the sight of a bulky lock inside may be enough to send them looking for an easier target. If you're looking for practical solutions beyond GPS , check out our blog: Do Car Keys Have GPS? What You Need to Know About Key Tracking . In summary, here are a few key takeaways to keep your keys and vehicle safer: Store your fob in a signal-blocking pouch or metal container Keep keys away from entry points like doors or windows Disable keyless signals if your fob supports it Update your car’s firmware regularly Use visible anti-theft devices as a deterrent Looking Ahead: Smarter Cars, Smarter Drivers Relay attacks are part of a larger trend — one where modern technology makes life more convenient, but also creates new risks. Just like we’ve learned to secure our phones and passwords, we now need to think about how we secure our vehicles. As carmakers explore more secure solutions — like Ultra Wideband (UWB) tech and biometric verification — drivers still need to take responsibility for their vehicle’s safety. The tools are already out there, and many of them cost less than a meal out. It’s not just about avoiding theft; it’s about peace of mind. So next time you get home, before tossing your keys on the hallway table, take a second to think: are they really safe there?

What’s the Difference Between Immobilizer, Transponder Chip, and Key Fob?

What’s the Difference Between Immobilizer, Transponder Chip, and Key Fob?

In modern vehicles, the once simple car key has evolved into a sophisticated piece of technology. With built-in electronics, anti-theft features, and remote functions, today’s car key is part of a broader ecosystem designed for both convenience and security. Yet with all this advancement comes confusion. Many drivers aren’t sure what terms like immobilizer , transponder chip , and key fob actually mean—or how they relate to one another. This guide breaks down these components in detail, explains how they work together, and clarifies why it matters when you’re replacing, reprogramming, or troubleshooting your car key. What Is an Immobilizer? An immobilizer is an electronic security device installed in most modern cars. Its purpose is to prevent the engine from starting unless the correct key—specifically, the correct coded signal—is detected. When you attempt to start your vehicle, the system searches for a signal from a registered transponder chip. If that signal is missing or incorrect, the immobilizer blocks the ignition system. This means the engine won’t crank or turn over, even if the physical key fits. Immobilizers are embedded in the car’s engine control unit (ECU) and became standard in vehicles after the late 1990s in many countries, in response to rising car theft. They offer a silent, invisible layer of protection against common theft techniques like hotwiring. Without the correct digital authentication, the car simply will not start. What Is a Transponder Chip? The transponder chip is a small electronic microchip located inside the car key or key fob. The word “transponder” is a combination of “transmitter” and “responder.” It is designed to emit a unique code that the car's immobilizer can recognize. When you insert the key into the ignition or bring a key fob close to a push-start system, the chip sends a signal to the car’s ECU. If the code matches the one stored in the car’s database, the immobilizer disables itself and allows the engine to start. Transponder chips are passive. They do not require a battery and are activated by electromagnetic energy from the ignition coil or receiver unit inside the vehicle. Without a functioning or correctly programmed transponder chip, your car will not start—even if the metal key turns in the ignition. What Is a Key Fob? A key fob is the remote control device you carry that allows you to perform functions like locking or unlocking your car, opening the trunk, and activating panic alarms. In modern vehicles, key fobs may also control remote start or proximity-based unlocking features. While key fobs often include a transponder chip inside them, they serve a different function. The key fob operates remote commands via short-range radio signals. The transponder chip, on the other hand, is responsible for enabling or disabling the engine. Smart key fobs, found in many recent vehicles, don’t require insertion into the ignition. Instead, the car detects the fob nearby and permits the engine to start with a button press. If your key fob battery dies, you might still be able to start the car manually if the transponder chip is present and recognized. Most fobs also have a hidden mechanical key inside, which can be used to unlock the door if the electronics fail. How They Work Together Although they are distinct components, the immobilizer, transponder chip, and key fob all work in harmony to secure and operate your vehicle. The immobilizer controls whether the engine is allowed to start. The transponder chip provides the digital identity that must be verified by the immobilizer. The key fob provides wireless control of non-engine functions like locking, unlocking, and trunk access. In most modern cars: You approach the vehicle with the key fob. The fob unlocks the doors. When you start the vehicle, the transponder chip sends a signal to the immobilizer. If the code matches, the engine is authorized to start. If the code doesn’t match, or if the chip is missing or damaged, the engine remains disabled—even if the rest of the key’s functions work perfectly. Why This Knowledge Matters Understanding how your car key works is essential when: Replacing a lost or broken key Buying a spare or duplicate Diagnosing why your car won’t start Choosing between locksmith and dealership services For example, if your key fob unlocks your car but won’t start it, the issue may lie with the transponder chip, not the battery. Conversely, if your fob doesn’t lock or unlock the car remotely, the chip may still be functional, and the issue could simply be a dead battery. Replacing a key without properly programming the transponder chip will result in a non-starting vehicle, even if the key physically fits and the remote works. For reliable replacement keys, fobs, batteries, and accessories, visit our Car Key Collection. Car keys are no longer just mechanical tools. They’re complex, multi-function devices that combine security, convenience, and connectivity. By understanding the role of the immobilizer , transponder chip , and key fob , you’ll not only protect your vehicle better, but also avoid costly mistakes when dealing with repairs or replacements. Whether you’re troubleshooting a non-starting car or simply trying to replace a damaged key, knowing the difference between these three elements gives you the clarity and confidence to take the right action.

What You Need To Know About BMW  Swirl Flaps and How To Solve The Problem With Them

What You Need To Know About BMW  Swirl Flaps and How To Solve The Problem With Them

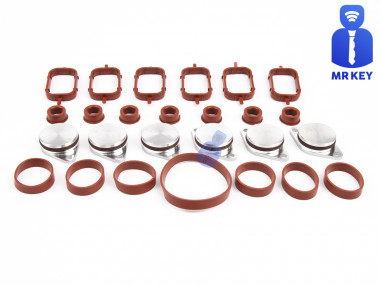
Swirl flaps are a BMW system that has been introduced to help burn the fuel mixture in the cylinder better due to the fact that diesel engines do not have throttle valves and it is not possible to adjust the air-fuel ratio. A diesel engine without vortex valves operates between a poor and a rich fuel mixture, because the only way to regulate it is through fuel injection. Design of the first generation swirl flaps that are made of made of metal. Unfortunately, swirl flaps are responsible for countless damaged engines and costly repairs due to design errors or metal fatigue. Once damaged, the cylinder sucks them in and causes great damage. This is how damaged valves damage the cylinder. Typical swirl flaps suction damage. The vortex valves are positioned in the inlet and are controlled by vacuum (DDE 4.0) or electrically (DDE5.0 / DDE6.4) by the engine ECU. Effects of malfunctioning valves: Swirl valves are stuck in open position: Deterioration of exhaust gas performance at lower speeds. Swirl valves are stuck in closed position: Approximate power loss of 10% at high engine speeds. How swirl flaps work: Performance characteristics: The vortex valves are in the closed position, at low engine speeds and small amounts of fuel injected (controlled by the ECU card). They open under the following conditions: coolant temperature <14 ° C OR * fuel quantity> 24 mg OR 2. engine speed 2250 rpm OR 3. inlet air temperature <-5 ° C. BMW and Pierburg have decided to produce diesel engines with metal vortex valves. The speed at which the pistons in the diesel engine operate is at least 60 rpm, so a sucked vortex valve will break and cause a number of damages inside the engine. In most cases, one or more pistons are severely damaged, as a bonus you get valves, in some cases a head or turbocharger. And this combination with a BMW engine is like a cumulative jackpot 🙂 In 2004, BMW began work on the problem and improved the design, however, a number of owners reported ongoing problems in this area. The solution to this problem is by removing the vortex valves and plugging, which does not affect the performance of the engine and at the same time, you can safely pass the exhaust test. Engines: M47 (136hp VP44 fuel pump) has no valves. M47N common rail engine (including M47N / M47TU / M47TUD20) (150hp. Face lift model from 2001 -) has valves. M57 engines (M57D) (525d & 187hp. 330d) cars with manual transmission do not have valves, but those with automatic have. M57N engines (M57TUD) (525d & 330d 204hp) have vortex valves. Ruined swirl flapss: The plugs that replace the vortex valves are easy to find on the internet, but you can also find them here on our website. Typical plugs: Disassembly of vortex valves: The vortex valves can be safely dismantled and in most cases if they are removed properly no loss of power is felt. Final list of models for which vortex valves are installed: Engine: M47N/M47TU/M47TUD20 Applications: * 110 kW (148 hp) and 330 N·m (243 lb·ft) o E46 320d 2001-2005 o E83 X3 2.0d (up to end of 2006) Engine: M47TU2D20 The engine was updated again in 2004 as the M47TU2D20. Still at 1995 cc, it produced more power across the range. Applications: * 120 kW (161 hp) and 340 N·m (251 lb·ft) E60/E61 520d E87 120d E90/E91 320d E83 X3 2.0d (end of 2006 onwards) Engine: M57/M57D25 M57D25 was introduced in 2000. Applications: * 166 PS (122 kW; 164 hp) at 4000 rpm, 350 N·m (260 lb·ft) at 2000-2500 rpm with a 4750 rpm redline, models: 2000-2003 E39 525d *Vehicles With Automatic Transmission ONLY* Engine: M57N/M57TU/M57TUD25 M57TUD25 was introduced in 2004. Applications: * 177 PS (130 kW; 175 hp) at 4000 rpm, 400 N·m (300 lb·ft) at 2000-2750 rpm models: E60/E61 525d Engine: M57/M57D30 M57D30, also called M57D29, was introduced in 1998. Applications: * 184 PS (135 kW; 181 hp)@4000, 390 N·m (290 lb·ft)@1750-3200 models: E39 530d *Vehicles With Automatic Transmission ONLY* E46 330d/330xd *Vehicles With Automatic Transmission ONLY* * 184 PS (135 kW; 181 hp)@4000, 410 N·m (300 lb·ft)@2000-3000 models: E38 730d *Vehicles With Automatic Transmission ONLY* E53 X5 3.0d * 193 PS (142 kW; 190 hp)@4000, 410 N·m (300 lb·ft)@1750-3000 models: E38 730d E39 530d Engine: M57N/M57TU/M57TUD30 M57TUD30 was introduced in 2002. It originally produced 160 kW (215 hp) at 4000 rpm and 500 N·m (370 lb·ft) at 2000-2750 rpm, but was tweaked for 150 kW (201 hp) at 4000 rpm and 410 N·m (300 lb·ft) at 1500-3250 rpm for 2003 and again for 200 kW (268 hp) at 4000 rpm and 560 N·m (410 lb·ft) at 2000-2250 rpm in 2004. Applications: * 204 PS (150 kW; 201 hp)@4000, 410 N·m (300 lb·ft)@1500-3250 models: E46 330d/330Cd/330xd E83 X3 3.0d * 218 PS (160 kW; 215 hp)@4000, 500 N·m (370 lb·ft)@2000-2750 models: E53 X5 3.0d E60/E61 530d/530xd E65 730d * 272 PS (200 kW; 268 hp)@4000, 560 N·m (410 lb·ft)@2000-2250 E60/E61 535d * 245 PS (180 kW; 242 hp)@4000, 500 N·m (370 lb·ft)@2000-2250 * 286 PS (210 kW; 282 hp)@4000, 580 N·m (430 lb·ft)@2000-2250 Engine: M57TU2D30 M57TU2D30 was introduced in 2007, making its debut in the facelifted E60 and E61. * M57TU2D30-UL: 197 PS (145 kW; 194 hp) * M57TU2D30-OL: 235 PS (173 kW; 232 hp)@4000, 500 N·m (370 lb·ft)@2000-2750 * M57TU2D30-TOP: 286 PS (210 kW; 282 hp), 580 N·m (430 lb·ft) Applications: * 197 PS (145 kW; 194 hp), 400 N·m (300 lb·ft) models: E90/E91/E92 325d E60/E61 525d/525xd * 231 PS (170 kW; 228 hp)@4000, 500 N·m (370 lb·ft)@2000-2750 models: E65 730d E90/E91 325d E90/E91 330d/330xd * 235 PS (173 kW; 232 hp) models: E60/E61, BMW E70, BMW E71 * 286 PS (210 kW; 282 hp), 580 N·m (430 lb·ft) models: E60/E61 535d E70 X5 3.0sd E71 X6 xDrive35d E83 X3 3.0sd E90/E91 335d The above models are listed for information only if you want to to make sure your engine has valves installed, please contact a competent person. Please note that the information described above is for informational purposes only and does not claim to be reliable. Mr-key.com is not responsible for any repair work you undertake that is related to the topic described in this article.

Chat with us