Post Name

Losing your motorcycle key is stressful, but the solution is almost always simpler than riders think. Whether you’re dealing with a chipped key, a worn ignition, or a code you can’t find, there are clear steps you can follow to get back on the road fast.

This guide explains how replacement motorcycle keys really work — from cutting and key codes to immobilizer compatibility — with examples from real motorcycle brands and models.

What to Do First When You Lose Your Motorcycle Key


Act quickly but stay calm. Most motorcycles can be re-keyed or cut from code without replacing expensive parts.

Check for the key code.

Look for a small alphanumeric code stamped on the ignition, seat lock, fuel cap, or original key tag. If available, a new key can be cut in minutes.

Confirm your key type.

Bikes like the BMW C600 Sport, C650GT, G310R, Suzuki Boulevard, Yamaha YZF-R1, or Honda CB/CBR/CRF may use different blanks, cuts, or chips.

Decide between a dealer or emergency locksmith.

Dealers rely on VIN lookups but may take days or weeks. A locksmith can often produce a working key on-site.

If the key was stolen, secure the bike.

A locksmith can re-key the ignition or erase the lost transponder from your system.

Cutting a New Motorcycle Key: How It Actually Works


Motorcycle keys fall into three categories:

mechanical, transponder (chipped), and keyless fobs. Replacing them works differently for each.

Mechanical Keys (most Honda, Yamaha, older Suzuki, Vespa, Piaggio)

These are simple metal keys. They can be cut even if you lost the original — locksmiths read the code or decode the lock.

Examples from your catalogue with mechanical key options:

Honda: CB Series, CBR Series, CRF, FourTrax, Goldwing, XR/XL

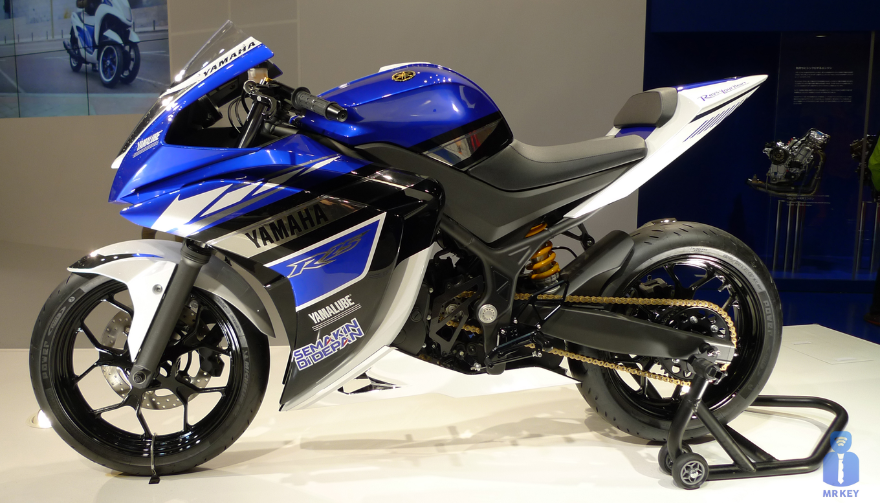
Yamaha: YZF-R1, YZF-R6, XJR400, FJR1300, SR400

Suzuki: Boulevard (S40/S50), Intruder (700/750/800/1400), Madura, Savage

Vespa / Aprilia / Ducati / Piaggio: ZADI key ranges C5001–C6475

These can be cut to code and shipped via replacement key delivery.

Transponder Keys (chipped)


Modern bikes often use embedded RFID chips. A new key must be:

Cut to the correct mechanical pattern

Programmed to the bike’s immobilizer or ECU

Examples with chip or immobilizer systems:

Suzuki models using 4D60 DST40 chips

Indian / KTM / Honda ZADI-system motorcycles

Newer BMW Motorrad models

A dealer or well-equipped locksmith can program transponder keys. Many quoted ECU replacements are unnecessary — a good locksmith can usually pair a new chip directly.

Keyless Fobs


Some Harley-Davidson and BMW models use proximity fobs. Losing one often immobilizes the bike entirely. Replacements require programming, and towing may be necessary.

Examples from your listings:

Harley-Davidson saddlebag and fob-linked models (LL226–LL450 range)

BMW keyless systems on touring and maxi-scooter models

Where Key Codes Are Found (and Why They Matter)


Key codes are the fastest, cheapest way to get a replacement key. They define the exact cut pattern.

Common key code locations:

Ignition barrel underside

Seat or helmet lock

Fuel cap inner plate

Owner’s manual or original key tag

ZADI-based systems (used by Vespa, Aprilia, Ducati, Piaggio, Indian, KTM) typically use numeric ranges like C5001–C6475, which Mr-Key can cut perfectly.

If no code is present, a locksmith can decode the lock manually — no need for new hardware.

Dealer vs. Emergency Locksmith: Which Is Better?


Dealers

Can order keys by VIN

Often slow and expensive

May insist on full ignition or ECU replacement

Useful for rare models or restricted fobs

Emergency Locksmiths

Faster and mobile

Cheaper than dealerships

Can cut by code, impression, or lock decoding

Can program many transponders without ECU replacement

For many riders — especially with models like Honda CB/CBR, Yamaha YZF, Suzuki Intruder, BMW G310R, Vespa/Aprilia/Piaggio — locksmiths are the most efficient choice.

Examples of Motorcycles Mr-Key Supports


BMW

C600 Sport

C650GT

G310R

Honda

CB Series

CBR Series

CRF Series

FourTrax

Goldwing

XR / XL

Honda ATV (A00–A99 / B00–B99 codes, 1983–2022)

Yamaha

YZF-R1

YZF-R6

XJR400

FJR1300

SR400

Suzuki

Boulevard S40 / S50

Intruder 700 / 750 / 800 / 1400

Madura

Savage

4D60 DST40 transponder models

Harley-Davidson

Saddle Bag LL226–LL450

Keyless fob models

Vespa / Aprilia / Ducati / Piaggio

ZADI key codes C5001–C6475

Multiple standard ignition and seat locks

KTM / Indian

Supported in ZADI Indian/Vespa/KTM/Honda product line

How to Avoid Losing Your Key Again


Make a spare immediately and store it safely.

Add a bright keychain or Bluetooth tracker.

Know your emergency start PIN (for keyless bikes).

Keep your key code and VIN stored separately from the bike.

The AA advises riders to secure spares and document key numbers.

FAQ


Can a locksmith make a motorcycle key without the original?

Yes. Locksmiths can cut by code or decode your ignition/lock manually.

Can I get a new key using my motorcycle’s VIN?

Dealers can often retrieve the factory key code from the VIN, though delays are common.

What if my lost key had a chip?

You’ll need both cutting and immobilizer programming. Locksmiths handle this for most brands.

Do I need to replace the ignition?

Rarely. Only if the key was stolen and security is compromised — not because the key is lost.

Need a Replacement Motorcycle Key Fast?


If you need a mechanical, transponder, or ZADI-system motorcycle key — or a code-cut replacement delivered to your home — we specialize in fast, professional solutions.

Visit our shop at mr-key.com to order a replacement key or request an emergency locksmith.

Related Posts

Programming Your Car’s Keyless Remote: A Simple Guide for Every Car Owner

Programming Your Car’s Keyless Remote: A Simple Guide for Every Car Owner

When it comes to convenience, car keyless remotes have revolutionized the way we interact with our vehicles. No more fumbling with traditional keys or worrying about locking yourself out. With just a push of a button, you can lock, unlock, and even start your vehicle. But what happens when your keyless remote stops working, or when you need to program a new one? Here’s a simple guide to help you program your car's keyless remote, regardless of your vehicle's make or model. Understanding Keyless Remotes Before jumping into the programming process, it’s important to understand what a keyless remote is and how it works. Essentially, a keyless remote allows you to interact with your vehicle without needing to physically insert a key. Instead of using a traditional metal key, your car’s electronic system communicates wirelessly with the remote, allowing you to lock, unlock, and sometimes even start your vehicle, all with the push of a button. These remotes typically use a radio frequency to communicate with your car, sending a signal that’s encrypted for security. Most modern cars use transponder technology, which makes the system more secure and resistant to hacking or copying. This means that the remote must be properly programmed to your vehicle’s system to function correctly. When Do You Need to Program a Keyless Remote? There are several situations in which you might need to program your keyless remote: Replacing a Lost or Damaged Remote : If you’ve lost your keyless remote or it’s no longer functioning properly, you’ll need to get a replacement. This may require programming the new remote to sync with your vehicle. Adding a New Remote : If you’ve bought an additional keyless remote for your car (for a spouse, child, or other family member), you’ll need to program it so that it works with your vehicle. Battery Replacement : Sometimes, replacing the battery in your remote can cause the programming to reset, meaning you’ll need to reprogram the remote for it to work again. Changing or Resetting Vehicle Settings : Occasionally, vehicle settings or remotes can be reset or reprogrammed as part of regular maintenance, requiring you to program new or additional remotes. How to Program Your Car’s Keyless Remote Programming a keyless remote is easier than you might think, and in most cases, it can be done by following a few simple steps. The process varies slightly depending on the make and model of your car, but here’s a general overview of the steps involved: Get Your New or Replacement Remote : Ensure that your remote is compatible with your car’s system. If you're not sure, you can check with your car's manufacturer or an authorized dealership. Some remotes require specific codes to be programmed. Sit Inside Your Vehicle : For safety and security reasons, most cars require you to be inside the vehicle while programming the remote. Insert the Key in the Ignition : Insert the key into the ignition and turn it to the "ON" position without starting the engine. For cars with push-to-start systems, you may need to press the start button without pressing the brake pedal. Activate the Programming Mode : Depending on your car’s system, you’ll need to follow a sequence of steps to enter programming mode. This could involve turning the key on and off several times, or pressing certain buttons in a specific order. Refer to your vehicle’s manual for the exact steps, as the process can differ from one model to another. Program the Remote : Once your car is in programming mode, you’ll need to press the button on your keyless remote that you want to program. Usually, you’ll hear a chime or see the lights flash, indicating that the remote has been successfully programmed. Some cars may require you to press the button several times to ensure proper synchronization. Test the Remote : After programming, test the remote to make sure it works properly. Try locking and unlocking the doors or starting the engine. If everything works as expected, you’re done! Exit Programming Mode : To finish the process, simply turn off the ignition and remove the key. This should exit programming mode. If you have additional remotes to program, repeat the steps above for each one. What to Do if Programming Doesn’t Work While programming a keyless remote is usually a straightforward process, there are instances where things don’t go as planned. If your remote isn’t syncing with your car after following the steps, here are a few troubleshooting tips: Check the Battery : If the remote’s battery is dead or weak, it won’t transmit the signal to your car. Replace the battery and try programming again. Verify the Compatibility : Make sure that the remote is compatible with your vehicle’s make, model, and year. Some vehicles require special remotes that can only be programmed by the manufacturer or an authorized locksmith. Reset Your Vehicle’s System : In some cases, you might need to reset the car’s system to clear previous programming attempts. Check your owner’s manual or consult a professional for assistance. Consult a Professional : If you continue to have issues, it might be time to visit a dealership or a certified locksmith. These professionals have the tools and experience to program the remote correctly and ensure everything works seamlessly. Why Programming Your Keyless Remote Is Important Programming your keyless remote is a simple but important task that helps ensure your car’s security and convenience. By understanding how the process works and what to do if things go wrong, you’ll be able to troubleshoot and solve any issues quickly. Whether you’re replacing a lost remote or adding a new one to your collection, knowing how to program your remote saves time and money compared to visiting a dealership or locksmith. With the increased reliance on keyless remotes for unlocking and starting vehicles, it’s essential for every car owner to be familiar with this process. By keeping your remote in good working condition and knowing how to program it when necessary, you’ll enjoy a smoother, more efficient experience with your vehicle.

Dead Pixels on a Motorcycle TFT Display: What They Mean & When Replacement Is Inevitable

Dead Pixels on a Motorcycle TFT Display: What They Mean & When Replacement Is Inevitable

Dead pixels on a motorcycle TFT display are rarely “just cosmetic”. On modern bikes, the TFT dashboard is a sealed, laminated electronic unit exposed to sun, heat, vibration, rain, and pressure washing . When pixels fail, it often signals structural damage inside the display , not a surface defect. This article explains what TFT display dead pixels really mean, why they appear, how to diagnose them correctly, and the point where replacement becomes unavoidable . What riders mean by “dead pixels” — and why it matters The term motorcycle display dead pixels is used loosely. In practice, three very different faults exist. True dead pixels (permanently black) A true dead pixel is a pixel transistor that no longer functions. It stays black on all backgrounds and during startup screens. This is a hardware failure inside the LCD matrix . It does not self-heal. Stuck pixels (fixed bright color) A stuck pixel remains red, green, blue, or white. On phones or TVs, this can sometimes be intermittent. On motorcycle TFTs, stuck pixels are often caused by heat stress or internal pressure and frequently progress into permanent failure. Lines or blocks of dead pixels A vertical or horizontal line of missing pixels is not a pixel issue. It indicates row or column driver failure inside the panel — a structural defect of the display module. Once this appears, replacement is usually inevitable. Why TFT dead pixels appear on motorcycles Dead pixels on a dashboard are rarely random. They follow consistent mechanical and environmental causes. Heat and UV exposure Motorcycle TFTs sit in direct sunlight. Daily heat cycles expand and contract the laminated layers inside the display. Over time, this stresses internal bonds and pixel drivers. A single failed pixel can become a cluster. Micro-impact and pressure A light impact that doesn’t crack the glass can still damage the internal LCD stack. This is common on naked bikes and adventure models where the display is more exposed. Moisture ingress and condensation Condensation inside a TFT display is a critical warning sign. It means the factory seal has been compromised. Moisture accelerates corrosion on connectors and display drivers, often leading to dead pixels followed by total blackout. Electrical stress Voltage fluctuations or grounding issues can contribute, but if the pixel defect appears in the same physical location across reboots , the issue is almost always panel-level, not wiring. Brand examples: how this appears in real motorcycles Dead pixel reports follow similar patterns across brands. BMW TFT clusters: pixel lines or dark zones often appear after heat exposure or condensation events. Clusters are fully integrated and typically replaced as a unit. Yamaha TFT dashboards: isolated dead pixels may appear first, followed by spreading rows on models parked outdoors long-term. Kawasaki TFT displays: line failures are commonly reported after pressure washing or heavy rain use. Honda TFT dashboards: less frequent, but once pixel clusters appear, dealers usually recommend full replacement. Across all brands, panel repair is not part of standard dealer service . Fast diagnosis: how to tell if the damage is permanent You can determine the seriousness in minutes. Check startup screens If the pixel defect appears during the boot logo or splash screen, it is hardware, not software. Test multiple backgrounds Switch themes or display modes: Always black → dead pixel Always bright or colored → stuck pixel Straight line → driver failure Look for progression A defect that grows over weeks is not stable. Progression is a replacement signal. Inspect for condensation Any fogging or haze inside the screen means moisture ingress. Pixel failure combined with condensation almost always worsens. When TFT display replacement is inevitable Replacement is not about annoyance. It’s about predictable failure . Replacement becomes inevitable when any of the following occur: A row or column of dead pixels appears Dead pixels spread over time Dead pixels appear together with condensation The defect blocks speed, warnings, or riding data The bike relies on the TFT for ride modes or system alerts At this stage, the TFT is no longer a reliable instrument cluster. Why TFT displays are rarely repaired A motorcycle TFT is not a standalone screen. It is: Laminated glass + LCD + polarizer Sealed against weather Electronically paired to the motorcycle Separating and rebuilding this stack requires specialized industrial equipment. As a result, OEMs replace the entire unit . Used clusters introduce risks: coding issues, immobilizer pairing, mileage discrepancies, and unknown moisture history. Cost reality in Europe In Europe, OEM motorcycle TFT replacement typically ranges from: €600–€1,200 for mid-range models €1,500–€2,500+ for premium or integrated systems This includes coding and calibration, not just the display itself. That’s why a small dashboard pixel issue deserves early attention. Can dead pixels be prevented? You cannot prevent internal electronic aging. You can reduce the most common triggers: Surface scratches that weaken seals Micro-impacts UV exposure Moisture pooling around edges A properly fitted screen protector does not fix dead pixels, but it reduces the external damage pathways that often lead to full TFT failure. If you want to reduce the risk of turning a small pixel defect into a four-figure repair, you can protect the display surface early — explore motorcycle TFT screen protectors at mr-key.com FAQ: TFT display dead pixels Are dead pixels dangerous? They are not dangerous by themselves, but they often indicate deeper display degradation. Can software updates fix dead pixels? No. If the defect appears in the same physical location during startup, it is hardware. Will one dead pixel spread? Sometimes. Spread is common when heat or moisture is involved. Is condensation inside the TFT serious? Yes. Condensation indicates seal failure and greatly increases the risk of progressive damage. Is replacement always required? Not for a single stable pixel. Replacement becomes unavoidable with progression, lines, or moisture involvement.

Lost Your Westfalia Towbar Key? Here's What to Do

Lost Your Westfalia Towbar Key? Here's What to Do

Have you lost your Westfalia towbar key just before a long-planned trip or an important towing job? Don’t worry, you’re not alone. Every year, thousands of drivers face the same issue: the towbar key disappears right when it's needed most. Westfalia detachable towbar keys are usually used only a few times per year – often for summer holidays, camping trips, towing, or moving. Because they are used so rarely, they often get forgotten for months. It's easy to lose track of where they were last placed: in the glove compartment, a drawer in the garage, or a coat pocket? Fortunately, there's a simple solution – without having to replace the entire towbar system. Step 1: Check the Lock Cylinder for a 5-Digit Code Take a close look at the front of your Westfalia towbar lock, around the keyhole. Many models have a 5-digit code engraved directly into the metal. If the code is between 20000 and 50000, it is your personal key code. This code allows professional key services (like MR-KEY) to create a perfectly matched replacement key – without the original. Examples of valid codes: 23456 27891 49821 You can enter this code directly into an online order form. Order a replacement key here: https://mr-key.com/cat/towbars-keys What if You Only See 3 Digits? Sometimes, you might only find a 3-digit number on the lock body (e.g., 104, 287). Unfortunately, these numbers are not valid key codes . They usually refer to batch numbers or internal components. In this case, we recommend: Conducting a thorough search for the original key (glove compartment, toolbox, jacket pockets, etc.) If the key cannot be found, consider replacing the towbar locking mechanism Tip: Make a Spare Key While You Still Can If you still have your original Westfalia towbar key, now is the perfect time to make a copy . Many Westfalia keys show a code like: 2W01 to 2W50 This code is usually engraved on the metal shaft of the key and matches your towbar lock. With this code, we can quickly and affordably produce a precise duplicate. Why make a spare key? Avoid last-minute panic before departure Reduce costs by preventing lock replacement Fast delivery when ordering by code Order here: https://mr-key.com/cat/towbars-keys Fast and Professional Westfalia Key Service At MR-KEY , we specialize in duplicating Westfalia towbar keys by code. Our service is fast, precise, and hassle-free: Simply provide the 5-digit lock code (20000–50000) We cut the key using high-precision machines Every key is checked before shipping In most cases, shipping is completed within 24 hours . Quick Overview Situation Can a New Key Be Made? What to Do 5-digit code on the lock (20000–50000) Yes Order a key by code Only 3-digit number on the lock No Search for the key or replace the lock Original key with "2W" code present Yes Have a spare key made Tips: How to Avoid Losing Your Key in the Future To avoid ending up in this situation again, follow these simple tips: Store your spare key in your vehicle documents folder or glove box Label your keychain with "Towbar" for easy identification Take a photo of your key code and save it on your phone or in the cloud These small steps can save you time, stress, and money. Losing your Westfalia towbar key doesn't have to ruin your travel plans. As long as your lock has a valid 5-digit code between 20000 and 50000 , a replacement key can be made and shipped quickly. And if you still have the original key? Make a copy now – a small investment for long-term peace of mind. Order your Westfalia replacement key now: https://mr-key.com/cat/towbars-keys Safe travels!

How to Choose the Right Car Key Shell for Your Vehicle + Why We Recommend Panasonic CR2032 Batteries

How to Choose the Right Car Key Shell for Your Vehicle + Why We Recommend Panasonic CR2032 Batteries

Your car key is one of those things you don’t really think about — until it breaks. Whether it’s the worn-out buttons, a cracked shell, or a battery that gives up at the worst possible moment, an aging car key can cause more than just annoyance. But here's the good news: you can restore your key to like-new condition easily, affordably, and from the comfort of your home. In this complete guide, we’ll show you how to choose the right replacement key shell for your car and why the Panasonic CR2032 battery is a trusted choice to keep your key fob performing reliably. Part 1: How to Choose the Right Car Key Shell Think of your key shell as a protective layer. It shields the sensitive electronics inside — the buttons, circuit board, and transponder chip — all of which are essential to operating your vehicle. When the case begins to wear down or fall apart, it’s time to replace it. 1. Know Your Car's Make, Model, and Year Key shells are made to fit specific car models and years. For instance: Flip key shells for Opel are commonly used on models from 2010 to 2024. Audi smart key shells are dependent on the platform code (like A3 8Y or A4 B9). Consult your owner's manual or use a compatibility tool like this one to confirm fitment. 2. Match the Key Blade Blades come in various formats like HU162, VA2, or HU100. Even a slight variation in shape or groove pattern can render the key useless in your ignition or door locks. Carefully compare the blade on your current key to the one listed for any replacement shell. 3. Button Layout and Functionality Make sure the number and positioning of buttons on the replacement shell matches your original. If not, the rubber pads may not line up with the contact points on your key’s circuit board, making the buttons unresponsive. 4. Interior Design and Compatibility The outside might look the same, but inside layouts often differ. Ensure that your circuit board, battery slot, and chip all fit securely inside the new shell. Misalignment can cause rattling, failure to start the car, or buttons that don’t function correctly. 5. Material Quality Avoid very cheap replacements with thin plastic and soft rubber. A good quality shell should be durable, with solid construction and tactile buttons that don't wear out quickly. For example, this Opel flip key shell combines strength with excellent fit. Part 2: Why We Recommend Panasonic CR2032 Batteries When your key fob starts failing — maybe the range drops or it takes multiple presses to unlock — chances are the battery is low. Many car owners replace the shell without considering the battery, only to find the problem persists. Understanding the CR2032 The CR2032 is a 3-volt lithium coin battery, commonly used in remote keys and small electronic devices. It’s compact, stable, and specifically suited for low-power, long-term applications. What Makes Panasonic CR2032 Stand Out? Panasonic’s version of the CR2032 is known for its consistency and reliability. It offers: A stable voltage output, ensuring your key communicates with your car effectively Longer life compared to many generic brands Resistance to leaks, which protects internal circuits from corrosion Choosing a battery from a trusted manufacturer can save you from unexpected failures, especially in colder climates where battery performance matters most. We recommend the Panasonic CR2032 battery for its excellent balance of performance and reliability. Refreshing Your Car Key: A Practical Approach If your car key is showing signs of age, it's usually best to replace both the shell and the battery. The process is simple: Open the old shell carefully, using a flat tool if needed. Remove the circuit board, chip, and battery. Clean the components gently with a dry brush. Place them into the new shell, ensuring alignment. Insert a fresh CR2032 battery. Close and secure the new shell. After completing these steps, your key should be more responsive, look better, and feel sturdier in your hand.

Chat with us