Post Name

Short answer: yes—for many keys, a locksmith can cut accurately from a photo or a code. The details depend on the key type, the quality of the image/data.


Key cutting from code vs from photo

By code (most precise).

A key code (often printed on locks, key tags, or documentation) translates into a series of cut depths called the bitting. On a code machine, a locksmith dials those depths and cuts a new key without the original present. This is the preferred method for many utility keys (e.g., caravan, retro auto, e-bike battery, furniture, mailboxes, ATVs, roof racks, towbars), but also for car keys. 

By photo (works in many cases).

From a clear, square-on image, a trained technician can decode the cut depths and reproduce the bitting. Research has shown keys can be recreated from ordinary or telephoto shots if the profile and scale are known. This is why publishing close-ups of your keys is discouraged.


When a photo is “good enough”

If you’re ordering car keys cut by photo or utility keys by photo, expect guidelines like:


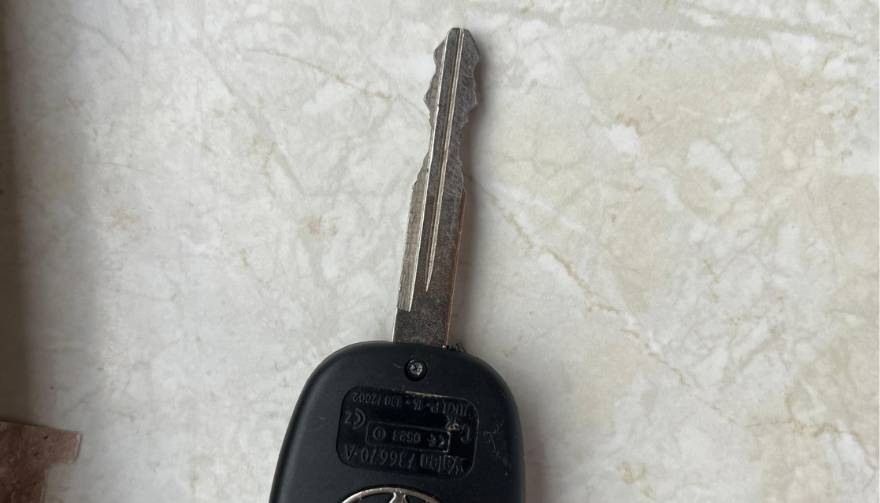
Flat, well-lit, high-resolution image; key blade perfectly side-on.

Ruler/coin in frame for scale; entire blade visible, shoulder to tip.

For double-sided/laser keys, shots of both sides.

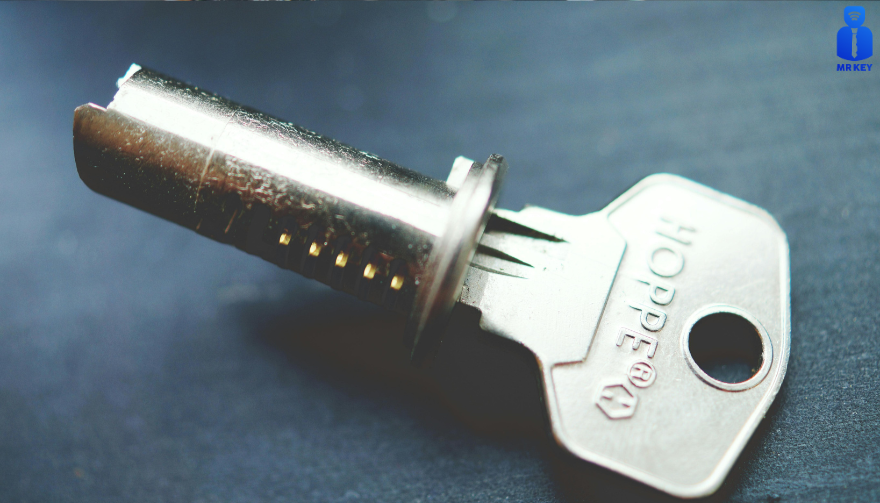
Keyway/profile identification (brand/series).


Automotive: cutting from photo or code—plus programming

Cutting the blade is only step one for modern cars. Since the late 1990s, most vehicles have immobilisers; the key’s transponder chip must be recognised or the engine won’t start. In practice:


Get the correct blank and cut it (photo or code).

Program the transponder/remote (OBD or on-board procedures), or pair a proximity fob.

Test mechanical operation and ignition start.


Main points UK readers should know:


Immobiliser/transponder tech became standard in the mid-1990s; without a programmed chip, a correctly cut key usually won’t start the car.

A key code specific to your vehicle lets a locksmith/dealer cut precisely without an original; some guides explain where owners can find it.


Utility keys we commonly see cut by code


If you have the key code, these are routinely cut accurately online:


Retro automobile keys (classic patterns; often stamped codes).

Caravan & motorhome keys (e.g., ZADI, FAP/FAWO—codes on barrels).

E-bike battery keys (e.g., ABUS/AXA series).

Furniture, mailboxes keys (office furniture, cam locks).

ATV/quad ignition and compartment keys.

Roof racks (e.g., Thule N*** series).

Towbars (e.g., Westfalia/Brink code series).


For these categories, supplying the printed code (from the lock face, key head, manual, or tag) usually yields the fastest, most reliable result compared to photos.


Accuracy expectations & limitations


What typically works well


Flat cylinder keys with standard depth systems (common utility keys).

Many car blades (including laser/sidewinder) if the image is clean and scaled.

Keys where the lock/brand series is known and the bitting can be derived.


What may be restricted or not feasible from a photo


Patented/restricted keyways (require authorised proof and controlled blanks).

Highly worn, bent, or obscured keys in photos.

Complex security keys that need factory or authorised dealer processes.

Car keys where programming tokens, PINs, or security codes are required.


For security and consumer protection in the UK, look for MLA-approved locksmiths and insist on identity/ownership checks for sensitive work.


Real-world risk: why photos can be enough


Academic work and well-reported incidents show that key geometry can be decoded from images at surprising distances. Media have covered expensive lock replacements after keys appeared on camera, underlining the practical risk of sharing key images online. Keep your keys out of frame.


What an online order typically requires


For car keys (photo or code):


Vehicle make/model/year, blade type, and VIN if needed for code retrieval.

Clear photos (both sides). 

Programming method: mobile visit, on-site, or mail-in ECU/fob (varies by model).

Expect additional steps for remote locking and proximity systems.


For utility keys (cut by code):


The code from the lock face or original key (e.g., N123, Z**).

Brand or system (Thule, Zadi, Westfalia, etc.).

Quantity and turnaround needs (next-day options often available).


Speed and success rates


By code: fastest and most consistent for; minimal adjustment needed. 

By photo: slightly more validation and back-and-forth; still accurate when images meet spec.


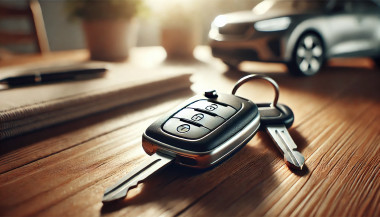
Why choose an online key cutting service like MR-KEY


Unlike traditional emergency locksmiths who mainly handle urgent lockouts, MR-KEY specialises in precision key cutting from photos or codes — ideal when you’re not locked out but need an exact replacement or spare.


Through our online platform, you can:


Order from anywhere in the UK — simply upload a clear photo or enter your key code.

Get fast, expert cutting using professional decoding software and calibrated machines.

Receive your key by post, ready to use or, for vehicles, to be programmed locally.


With MR-KEY, you save the cost and time of a mobile visit while still getting locksmith-level precision. Each key is verified before dispatch to ensure perfect fitting and reliable operation.


FAQs


Can a locksmith cut a car key from a photo?

Often yes, the blade can be cut from a high-quality photo, but modern cars also need transponder/immobiliser programming before the engine will start.


Is cutting by code more accurate than using a photo?

For most utility keys, yes. A verified key code maps to exact cut depths, making the process highly repeatable and quick.


Can someone copy my key from a social media photo?

It’s technically possible; public cases and research have shown keys can be decoded from images. Avoid posting close-ups of keys online.


What’s the difference between “key cutting,” “key replacement,” and an “emergency locksmith”?


Key cutting: the physical milling of a blade (by code/copy/photo).

Key replacement: end-to-end service supplying a working key/fob (cutting + programming if needed).

Emergency locksmith: rapid response for lockouts or urgent access/security issues.


Order your new key today at mr-key.com — fast, accurate, and cut by professionals from your photo or code.


Related Posts

Dead Pixels on a Motorcycle TFT Display: What They Mean & When Replacement Is Inevitable

Dead Pixels on a Motorcycle TFT Display: What They Mean & When Replacement Is Inevitable

Dead pixels on a motorcycle TFT display are rarely “just cosmetic”. On modern bikes, the TFT dashboard is a sealed, laminated electronic unit exposed to sun, heat, vibration, rain, and pressure washing . When pixels fail, it often signals structural damage inside the display , not a surface defect. This article explains what TFT display dead pixels really mean, why they appear, how to diagnose them correctly, and the point where replacement becomes unavoidable . What riders mean by “dead pixels” — and why it matters The term motorcycle display dead pixels is used loosely. In practice, three very different faults exist. True dead pixels (permanently black) A true dead pixel is a pixel transistor that no longer functions. It stays black on all backgrounds and during startup screens. This is a hardware failure inside the LCD matrix . It does not self-heal. Stuck pixels (fixed bright color) A stuck pixel remains red, green, blue, or white. On phones or TVs, this can sometimes be intermittent. On motorcycle TFTs, stuck pixels are often caused by heat stress or internal pressure and frequently progress into permanent failure. Lines or blocks of dead pixels A vertical or horizontal line of missing pixels is not a pixel issue. It indicates row or column driver failure inside the panel — a structural defect of the display module. Once this appears, replacement is usually inevitable. Why TFT dead pixels appear on motorcycles Dead pixels on a dashboard are rarely random. They follow consistent mechanical and environmental causes. Heat and UV exposure Motorcycle TFTs sit in direct sunlight. Daily heat cycles expand and contract the laminated layers inside the display. Over time, this stresses internal bonds and pixel drivers. A single failed pixel can become a cluster. Micro-impact and pressure A light impact that doesn’t crack the glass can still damage the internal LCD stack. This is common on naked bikes and adventure models where the display is more exposed. Moisture ingress and condensation Condensation inside a TFT display is a critical warning sign. It means the factory seal has been compromised. Moisture accelerates corrosion on connectors and display drivers, often leading to dead pixels followed by total blackout. Electrical stress Voltage fluctuations or grounding issues can contribute, but if the pixel defect appears in the same physical location across reboots , the issue is almost always panel-level, not wiring. Brand examples: how this appears in real motorcycles Dead pixel reports follow similar patterns across brands. BMW TFT clusters: pixel lines or dark zones often appear after heat exposure or condensation events. Clusters are fully integrated and typically replaced as a unit. Yamaha TFT dashboards: isolated dead pixels may appear first, followed by spreading rows on models parked outdoors long-term. Kawasaki TFT displays: line failures are commonly reported after pressure washing or heavy rain use. Honda TFT dashboards: less frequent, but once pixel clusters appear, dealers usually recommend full replacement. Across all brands, panel repair is not part of standard dealer service . Fast diagnosis: how to tell if the damage is permanent You can determine the seriousness in minutes. Check startup screens If the pixel defect appears during the boot logo or splash screen, it is hardware, not software. Test multiple backgrounds Switch themes or display modes: Always black → dead pixel Always bright or colored → stuck pixel Straight line → driver failure Look for progression A defect that grows over weeks is not stable. Progression is a replacement signal. Inspect for condensation Any fogging or haze inside the screen means moisture ingress. Pixel failure combined with condensation almost always worsens. When TFT display replacement is inevitable Replacement is not about annoyance. It’s about predictable failure . Replacement becomes inevitable when any of the following occur: A row or column of dead pixels appears Dead pixels spread over time Dead pixels appear together with condensation The defect blocks speed, warnings, or riding data The bike relies on the TFT for ride modes or system alerts At this stage, the TFT is no longer a reliable instrument cluster. Why TFT displays are rarely repaired A motorcycle TFT is not a standalone screen. It is: Laminated glass + LCD + polarizer Sealed against weather Electronically paired to the motorcycle Separating and rebuilding this stack requires specialized industrial equipment. As a result, OEMs replace the entire unit . Used clusters introduce risks: coding issues, immobilizer pairing, mileage discrepancies, and unknown moisture history. Cost reality in Europe In Europe, OEM motorcycle TFT replacement typically ranges from: €600–€1,200 for mid-range models €1,500–€2,500+ for premium or integrated systems This includes coding and calibration, not just the display itself. That’s why a small dashboard pixel issue deserves early attention. Can dead pixels be prevented? You cannot prevent internal electronic aging. You can reduce the most common triggers: Surface scratches that weaken seals Micro-impacts UV exposure Moisture pooling around edges A properly fitted screen protector does not fix dead pixels, but it reduces the external damage pathways that often lead to full TFT failure. If you want to reduce the risk of turning a small pixel defect into a four-figure repair, you can protect the display surface early — explore motorcycle TFT screen protectors at mr-key.com FAQ: TFT display dead pixels Are dead pixels dangerous? They are not dangerous by themselves, but they often indicate deeper display degradation. Can software updates fix dead pixels? No. If the defect appears in the same physical location during startup, it is hardware. Will one dead pixel spread? Sometimes. Spread is common when heat or moisture is involved. Is condensation inside the TFT serious? Yes. Condensation indicates seal failure and greatly increases the risk of progressive damage. Is replacement always required? Not for a single stable pixel. Replacement becomes unavoidable with progression, lines, or moisture involvement.

How to Take the Perfect Photo of Your Key for Easy Replacement

How to Take the Perfect Photo of Your Key for Easy Replacement

When you need a replacement key , taking a clear, detailed photo of your key can make the process much faster and more accurate. A high-quality image helps key makers understand the exact specifications, cuts, and dimensions of your key, which is especially important if you don’t have a spare. In this guide, we’ll walk you through the best practices for photographing your key so you can get an accurate replacement with ease. Why a Clear Key Photo Matters Photographing a key might sound simple, but it requires a bit of attention to detail. A well-taken photo captures the key’s grooves and unique cuts clearly, helping the key cutter replicate the exact pattern. Saves Time : A high-quality photo reduces the need for multiple attempts to cut a new key . Ensures Accuracy : Clear images help capture specific details, leading to a more precise fit. Convenient Process : With just a smartphone and a few tips, you can photograph your key from home without needing special equipment. Essential Tools for Photographing Your Key To take a clear photo of your key, you don’t need much beyond a few household items. Here’s what you’ll need: Smartphone or Camera : A phone camera is usually sufficient, but a standard digital camera works well too. Plain Background : Choose a neutral, solid-colored background like a piece of white paper or a smooth table surface. Good Lighting : Natural daylight or a bright room light helps capture details without shadows. Small Object for Elevation : A coin or similar item can lift the key slightly, making it easier to photograph. Step-by-Step Guide to Taking the Perfect Key Photo Follow these steps to take a photo that ensures clarity and accuracy for key replacement. 1. Set Up the Background Place a piece of plain white paper or another smooth, light-colored surface under your key. The solid color helps the details of the key stand out without any visual distractions. Tip : Avoid backgrounds with patterns or textures, as these can obscure the key’s features. 2. Position the Key Correctly Lay the key flat on the background, with the grooves and cuts facing up. The key should be positioned horizontally to allow a clear view of all its details. Side Profile : Make sure to capture the side profile that shows the cuts and grooves. Elevate Slightly : Place a coin or small object under one end of the key to angle it slightly toward the camera. This can help reduce shadows and improve focus on the cuts. 3. Adjust Lighting Good lighting is essential for capturing details. If possible, photograph your key in natural daylight near a window or use a well-lit room. Avoid Shadows : Ensure that no shadows fall across the key, as they can obscure details. Diffuse Light : If using a lamp, consider placing a thin cloth over it to diffuse the light and reduce harsh reflections. 4. Focus and Zoom Make sure your camera or smartphone is focused directly on the key. You may need to tap the screen to bring it into sharp focus. Zoom in Carefully : If you’re using a smartphone, zoom in slightly to capture the details, but avoid over-zooming, which can blur the image. Test Multiple Angles : Sometimes a slight adjustment in angle can capture the cuts more effectively, so take a few shots from slightly different perspectives. 5. Capture Multiple Photos It’s always a good idea to take several photos to ensure you have the best one. Try different angles and lighting adjustments to capture as many details as possible. Close-Up of the Grooves : Take one close-up image focusing on the cuts and grooves of the key. Overall Image : Include one full-length photo that shows the entire key from end to end. Try Different Angles : Slightly tilt the key or move the camera to see which angle best captures the detail of the cuts. Common Mistakes to Avoid When Photographing Your Key To get the best results, steer clear of these common issues that can impact the quality of your key photo: Blurry Images : If your hand shakes, use a small tripod or prop your phone on a stable surface. Poor Lighting : Avoid taking photos in dim rooms; use bright light to ensure the key is clearly visible. Obstructed Details : Make sure the entire length of the key is visible, without any part being cut off or covered. Tips for Ensuring a Smooth Replacement Process Once you have a clear photo of your key, there are a few final steps to make the replacement process as efficient as possible. Check the Photos : Look over your photos before sending them to ensure that they’re clear and detailed. Label the Key : If you’re photographing multiple keys, label each one in the image or add a note to avoid confusion. Include Measurements : If possible, add the measurements of the key’s length and width in your notes for added accuracy. A clear, detailed photo of your key can save you time and effort when seeking a replacement. By following these simple steps, you’ll provide all the necessary details to ensure your new key is an accurate match. Remember, good lighting, focus, and capturing all the unique cuts are essential to achieving the best results. With these guidelines, you’re set to take a photo that will make your key replacement process smooth and hassle-free.

Lost Your Witter, GDW, Thule (Brink) or TowTrust Towbar Key? Here's What to Do.

Lost Your Witter, GDW, Thule (Brink) or TowTrust Towbar Key? Here's What to Do.

Lost your towbar key right before a holiday or towing trip? You’re not alone. Detachable towbar keys are typically used only occasionally – often just before a caravan holiday or when you need to tow – which means they spend most of the year tucked away. It’s all too easy for that lost towbar key to go missing between uses. The good news is that if your key has an ACS-series code (ACS01–ACS10) engraved on it, you can order a precise replacement online in minutes and avoid throwing a wrench in your travel plans. What are ACS towbar keys? The ACS-series keys are a common type of detachable towbar key numbered ACS01 through ACS10 (for reference: ACS01, ACS02, ACS03, ACS04, ACS05, ACS06, ACS07, ACS08, ACS09, ACS10). These keys fit a specific locking system used by multiple towbar manufacturers. In fact, an ACS towbar key could belong to a detachable hitch from ACS itself or from popular brands like Witter, GDW, Thule (Brink) or TowTrust – all of whom use the same ACS lock design. What matters is the code stamped on your key or lock. If it falls in the ACS01–ACS10 range, that code is all you need to get a new key cut and shipped to you. Check Your Key Code (ACS01–ACS10) Before you panic, inspect your towbar’s lock (or any remaining key) for a small engraved code. Most detachable towbar locks have the key number stamped either on the face of the lock barrel or on the original key itself. For the ACS series, this code will start with “ACS” followed by a two-digit number – for example, ACS04 or ACS09. If you see a code in the format ACS## and especially if it’s between ACS01 and ACS10, you’re in luck. That means your towbar uses the ACS key system, and a towbar key ACS01–ACS10 replacement can be ordered without changing the lock. Why is the key code important? This unique code is what key cutting services use to create an exact match for your lock. No original key is required – the code itself tells the cutter how to shape the new key. As long as the code is clearly visible (and within the supported range), you won’t need to replace the entire towbar lock or mechanism. Just supply the code and a new key can be made to fit perfectly, as if it were the original. Tip: Wipe the lock face clean or use a flashlight if needed – dirt and road grime can obscure the tiny engraving. On some keys the code might be on the plastic head or metal shaft of the key. Look for “ACS” followed by numbers. Compatible Towbar Brands for ACS Keys One big advantage of the ACS lock system is its cross-compatibility. These key codes ACS01–ACS10 aren’t limited to a single towbar brand – they’re used across several major manufacturers of detachable towbars. If you have a detachable towbar from any of the following brands, there’s a good chance it uses an ACS-series key: ACS (A50-X) – ACS is the original supplier of this locking system (often referred to as the A50-X class detachable). Keys for ACS detachable towballs will have codes ACS01–ACS10. Brink / Thule – Thule’s towing division (now Brink) uses ACS keys for many of its detachable hitches. If you have a Thule or Brink detachable towbar, check for an ACS code on the lock. (Brink/Thule locks with codes like 1D## or 2D## are a different series – but ACS## codes are common on earlier Thule/Brink models.) Witter – A very popular towbar brand, Witter uses the ACS system on their detachable swan-neck towbars. A Witter detachable with an ACS key will have “ACS” on the key or lock face. Witter towbar key replacements are readily available by code. GDW – This European towbar manufacturer also uses ACS-series keys for many detachables. If you need a GDW towbar replacement key, the process is the same: find the ACS## code and order a matching key. Tow-Trust – TowTrust (Tow-Trust) towbars, often sold in the UK and EU, utilize ACS keys as well. Tow-Trust detachable models with ACS locks will have codes ACS01–ACS10 on the keys. Other brands like PCT Automotive or Towsure have also been known to use ACS locks in some of their detachable towbar systems. The key point is that multiple brands share this ACS key design. So whether your hitch is labeled Witter, Thule, Brink, GDW, or TowTrust, if the key code starts with ACS, you can get the correct replacement towbar key by that code. This compatibility makes it easier to find spares, since one good supplier can cover many brands under the ACS series. Quick Reference: ACS Key Codes and Brands For easy identification, here’s a summary of which detachable towbars use the ACS01–ACS10 key range: Towbar Brand Detachable Key Code Series Example Key Code ACS (A50-X system) ACS01 – ACS10 ACS07 (on key/lock) Brink (Thule Towbars) ACS01 – ACS10 ACS05 Witter ACS01 – ACS10 ACS03 GDW ACS01 – ACS10 ACS09 Tow-Trust ACS01 – ACS10 ACS02 If your towbar brand is listed above and you see an “ACS*” code on the lock, you can order a new key by that code. In the example codes, the number can be any from 01 to 10. How to Order a Replacement ACS Towbar Key Online One of the great things about these keys is how simple it is to get a replacement. You don’t need to visit a dealership or locksmith in person; you can order an ACS towbar key online and have it cut to code and delivered to your door. Here’s how to do it: 1. Locate the ACS key code – As mentioned, find the engraved code on your existing key or the towbar lock barrel (e.g. ACS08). Double-check that it’s in the ACS01–ACS10 range. 2. Visit a replacement key website – Go to a trusted online key supplier that offers keys cut to code. For example, you can order from a specialized service like Mr. Key. They have a product page specifically for spare keys for ACS A50-X / Brink / Thule towbars (codes ACS01–ACS10) – this is where you’ll enter your code to get the correct key. 3. Select your key code – On the product page, choose your exact code (say, ACS04 or ACS09) from the dropdown or list. 4. Place your order – Add the replacement key to your cart and check out. These keys are very affordable (usually only a few dollars or euros each), and you can often choose expedited shipping if you’re in a hurry. 5. Receive and test the key – Shipping is typically quick (a few days within Europe). Once it arrives, test the replacement towbar key in your detachable towbar’s lock. It should turn smoothly and unlock the mechanism just like the original. Problem solved. Product Link: https://mr-key.com/product/spare-key-for-acs-a50-x-brink-thule-towbar-codes-acs01-acs10 You can order the correct replacement key here: Spare Key for ACS A50-X / Brink / Thule Towbar – Codes ACS01–ACS10. Simply select your code from ACS01 up to ACS10 and choose the key with the matching number. The new key will be cut to that code and sent to you ready to use. Ordering online is not only convenient but also ensures you get the precise key you need. These keys are cut by code using professional tools, so you don’t have to worry about tracing an old key or guesswork. As long as the code you provide is correct, the new key will fit perfectly or you can get your money back. Make a Spare Key Now to Avoid Future Stress Once you have your new key in hand (or if you still have your original), it’s time to think ahead. Don’t wait until you’ve lost the only key to take action. Cutting a spare key while you still have a working one is quick and inexpensive, and it can save you a lot of trouble down the road. Here are some benefits of having a spare towbar key: No more last-minute panic: If one key goes missing, you’ll have a backup ready. This means no frantic searches the night before your trip and no postponed travel plans due to a missing key. Avoid costly lock replacements: Losing the only towbar key can be expensive – you might be forced to drill out the lock or replace the entire detachable neck mechanism. A spare key (which typically costs under £10) is far cheaper than a new lock or towbar. Keep your holiday on track: A Thule towbar spare key or Witter towbar spare key tucked in your glove box ensures that a lost key won’t derail your caravan holiday or trailer rental schedule. You can continue towing without delay. Fast & affordable peace of mind: Ordering an extra key by code is both fast and affordable. Many drivers are surprised at how easy it is – often it’s just a couple of clicks online and a short wait for delivery. It’s a small investment for the security of knowing you’re covered. Consider ordering two keys when you get your replacement. Many suppliers even offer a deal on a second key (or include a pair by default), so you can keep one spare at home and one in the vehicle. Having multiple keys means you’re highly unlikely to ever be locked out of your own towbar again. Losing your towbar key can be a frustrating experience, especially when it happens right before you need to use it. But if your detachable towbar uses the ACS lock system (codes ACS01–ACS10), solving the problem is straightforward. With a visible ACS key code and a reliable online key-cutting service, you can quickly get a new replacement towbar key cut to code and delivered. There’s no need for costly new locks or last-minute cancellations of your towing plans. Don’t let a lost towbar key ruin your trip. Take a moment to check your towbar for an ACS code. If it’s there, you can have a new key on the way in no time. And even if your current key is in hand, think ahead – get a spare made now to save yourself stress later. With fast online ordering and prices that won’t break the bank, getting an ACS towbar key replacement is the easiest way to ensure you’re never stuck without the key to your adventures. Safe towing.

Are Key Fobs Waterproof? A Comprehensive Guide to Keeping Your Key Fob Safe

Are Key Fobs Waterproof? A Comprehensive Guide to Keeping Your Key Fob Safe

In an era of advanced automotive technology, key fobs have become an essential part of modern driving. From unlocking doors to starting engines remotely, these small yet powerful devices are a marvel of convenience. However, one question often looms in the minds of car owners: are key fobs waterproof? With water being a common hazard in everyday life, understanding the limitations and care requirements of your key fob is crucial. Understanding Key Fob Technology Key fobs are more than just electronic keys; they are compact computers that communicate with your car. Using radio frequency (RF) technology, they transmit encrypted signals to your vehicle, enabling features like remote locking, engine start, and even personalized settings. This intricate technology is housed in a small casing that protects the internal components. While key fobs are designed to endure daily wear and tear, their resilience to water varies. Some models offer water resistance, but this is not synonymous with being fully waterproof. The degree of water resistance depends on the design and build quality of the key fob, which can differ significantly between manufacturers and models. Are Key Fobs Waterproof or Water-Resistant? The terms “waterproof” and “water-resistant” are often used interchangeably, but they have distinct meanings. Waterproof indicates that a device can be submerged in water without damage, while water-resistant means it can withstand splashes or brief exposure to water but not submersion. Most key fobs fall into the latter category. For example, some car manufacturers claim their key fobs can handle minor splashes or light rain. However, prolonged exposure to water or immersion—such as dropping your fob into a pool—can damage the electronic components and render the device unusable. Global Standards and Variability Globally, there is no universal standard governing the water resistance of key fobs. Manufacturers often follow internal guidelines or industry best practices. In some regions, automakers have started offering key fobs with improved water resistance as a response to customer demands for greater durability. For instance, luxury brands like BMW and Mercedes-Benz have introduced models with enhanced protection, but even these devices are not guaranteed to survive complete immersion. Comparatively, in markets where cost efficiency is prioritized, such as in certain developing countries, key fobs may lack advanced water-resistant features. This variability underscores the importance of checking the specifications of your specific key fob model. What to Do If Your Key Fob Gets Wet Accidents happen, and it’s not uncommon for key fobs to encounter water. If your key fob gets wet, quick action can often prevent permanent damage. First, remove the key fob from water immediately and dry it thoroughly with a soft cloth. If possible, open the casing to allow air circulation and dry the internal components. Avoid using heat sources such as hair dryers, as excessive heat can warp the plastic casing or damage the sensitive electronics. In cases of significant water exposure, placing the key fob in a container of uncooked rice or silica gel packets can help absorb moisture. However, this is not guaranteed to save a severely water-damaged key fob. If the device does not work after drying, contacting a professional locksmith or dealership for repair or replacement is the best course of action. Tips for Protecting Your Key Fob To minimize the risk of water damage, there are several precautions you can take: Use a protective case or cover designed specifically for key fobs. These accessories provide an added layer of protection against moisture and physical impacts. Avoid placing your key fob in pockets or bags where it may come into contact with liquids, such as water bottles or spilled drinks. Store your key fob in a designated dry area when not in use, particularly in environments where water exposure is likely, such as beaches or pools. The Future of Waterproof Key Fobs As technology advances, so does the potential for more robust key fobs. Automotive manufacturers are exploring the use of advanced materials and sealing techniques to create truly waterproof devices. Additionally, the rise of smartphone-based digital keys may eventually render physical key fobs obsolete, eliminating concerns about water damage altogether. Internationally, innovations in waterproofing technology are being driven by consumer demand and environmental considerations. For example, in regions with high humidity or frequent rainfall, automakers are under pressure to offer more durable solutions. As a result, future key fobs may combine water resistance with other features, such as solar charging or biometric security. Navigating the Realities of Key Fob Care Key fobs are indispensable in modern driving, but they are not invincible. While some offer limited water resistance, the majority are vulnerable to prolonged exposure or immersion. Understanding these limitations and taking proactive measures to protect your key fob can save you time, money, and frustration. As technology evolves, the prospect of waterproof or entirely digital keys becomes more realistic. For now, car owners should familiarize themselves with the specifications of their key fobs and follow best practices for care. Whether you’re navigating a sudden downpour or an accidental spill, a little knowledge and preparation can go a long way in safeguarding your key fob and ensuring uninterrupted access to your vehicle.

Chat with us