Post Name

As the temperature drops and winter approaches, it’s not just your car’s engine that needs extra attention. Your car’s key fob is also affected by the cold weather, and it’s important to understand how frigid temperatures can impact its performance. In this article, we’ll explore how cold weather can affect your key fob and what you can do to prevent it from causing you frustration during the colder months.

How Cold Weather Affects Your Key Fob

Key fobs are small electronic devices designed to make our lives easier. They allow us to lock, unlock, and start our cars without ever having to take the key out of our pocket or bag. However, like any electronic device, key fobs are sensitive to extreme temperatures.

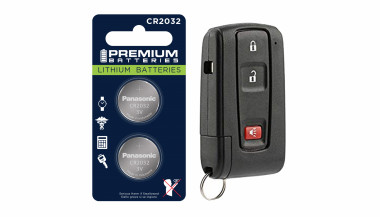
When the temperature drops, the battery inside the key fob can be affected. Cold weather causes the battery’s chemical reactions to slow down, which can lead to a reduced charge or even a complete failure to operate. If your key fob suddenly stops working or becomes unresponsive, it's likely due to the cold weather affecting the battery's ability to function properly.

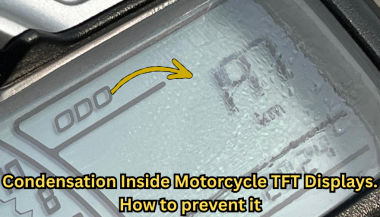
In addition to battery performance, the cold can also cause the internal components of the key fob to contract. This may interfere with the fob’s functionality, causing it to not respond when you press the buttons. Furthermore, moisture from snow, rain, or condensation can get into the fob, which can cause short circuits or further damage.

Signs Your Key Fob May Be Affected by the Cold

If you live in an area where cold temperatures are common, it’s essential to be aware of the signs that your key fob might be struggling with the weather. Here are some indicators that the cold is affecting your key fob:

  • Unresponsive buttons: If you press the buttons on your key fob and nothing happens, it may be due to the battery or the internal components not responding correctly to the cold.
  • Delayed reactions: If you notice a delay in your fob’s response, where the locks or alarm take longer than usual to react, this is another sign of cold-induced malfunction.
  • Reduced range: If your key fob is working, but only from a very short distance, it could be due to the battery’s reduced performance in the cold.

If you notice these issues, don’t immediately panic. There are simple fixes and preventative steps you can take to resolve the issue.

What You Can Do to Protect Your Key Fob in the Cold

Fortunately, there are several things you can do to ensure that your key fob continues to work properly during cold weather. By taking a few precautions, you can protect the battery and internal components of your key fob from extreme temperatures:

Keep Your Key Fob Warm
One of the easiest ways to prevent cold weather from affecting your key fob is to keep it warm. If you're going outside during cold weather, keep your key fob in your coat pocket or a warm, insulated area. You can even use a small pouch or key fob holder with insulation to protect it from the cold.

Replace the Battery Before Winter
If your key fob is already showing signs of battery issues, consider replacing the battery before winter hits. Even if it’s not quite dead yet, replacing the battery can help ensure that your key fob works smoothly during colder months. Many key fob batteries are easy to replace and can be done at home with a simple tool.

Use a Backup Key
If you anticipate being in extremely cold conditions or live in a particularly harsh climate, consider having a backup key. Many cars come with a traditional key hidden inside the key fob, which you can use if the key fob stops working in the cold. Having this backup can save you a lot of hassle if your fob stops working unexpectedly.

Avoid Moisture Exposure
It’s important to keep your key fob dry, especially in winter, when snow, rain, and condensation can cause moisture to build up inside. If your fob does get wet, dry it thoroughly as soon as possible and avoid leaving it outside in damp conditions. If moisture persists, it may cause the internal components to fail.

Test Your Key Fob Regularly
To ensure that everything is working properly, make a habit of testing your key fob regularly, especially during the colder months. If you notice any signs of malfunction early, you can address the issue before it gets worse.

What to Do If Your Key Fob Stops Working

If your key fob stops working despite taking preventative measures, don’t panic. There are a few things you can do:

  • Warm up the Fob: Try warming up the fob by placing it in your pocket for a few minutes or rubbing it in your hands. This can help restore some functionality if the battery has slowed down due to the cold.
  • Replace the Battery: If the fob still isn’t working, it may be time to replace the battery. A new battery can often resolve issues related to cold weather.
  • Contact a Professional: If the fob continues to malfunction after changing the battery, it may be time to take it to a professional locksmith or the dealership to check for internal damage.

While it’s easy to overlook the impact that cold weather can have on your car’s key fob, it’s important to understand the effects that extreme temperatures can have on its performance. By taking simple precautions and knowing the signs of potential issues, you can help ensure that your key fob continues to work smoothly throughout the colder months.

From keeping it warm to regular maintenance, there are several ways to protect your key fob and avoid the frustration of a malfunction during the winter. So, this season, take a few extra steps to care for your key fob, and you’ll be able to unlock and start your car with ease, no matter how cold it gets outside.

Related Posts

Can I order a replacement car key online with delivery?

Can I order a replacement car key online with delivery?

Short answer: Yes. You can order a replacement car key online in the UK and have it delivered in 3–4 days. Choose the right key type, provide a photo or key code for cutting, and have a local locksmith program it when it arrives. Why trust this guide: With over 25 years in the locksmith trade and more than 650,000 satisfied customers, Mr-Key explains exactly how online key replacement works — clearly, securely, and step by step. When online replacement works (and when it doesn’t) Ordering online is ideal if you need a spare, a like-for-like remote, or a replacement for a lost or damaged key. It’s the fastest and most convenient way to get OEM-grade parts delivered to your door. You simply order the correct key, have it cut from a photo or key code, then let a local locksmith program it to your vehicle. Online ordering doesn’t replace immobiliser pairing. Modern vehicles still require professional programming once the key arrives. Key types explained Transponder keys These have a mechanical blade and an electronic chip that communicates with your car’s immobiliser. Remote fobs Include lock/unlock buttons plus a built-in transponder. We supply the pre-cut blade (if requested) and tested electronics. Proximity or smart keys Keyless entry and push-start units. Delivered ready for your locksmith to pair with the car. Key shells & batteries Replace worn housings or dead batteries without any programming. Also available: caravan keys, ATV keys , roof-rack keys , mailbox keys, towbar keys , and more. Browse our full range at mr-key.com . How online ordering works 1. Identify your key Use your vehicle make, model, and year. Match your key shape, button layout, and frequency markings. 2. Choose how to cut it By photo: send a clear image of your existing key. By key code: provide the manufacturer’s key code for factory-accurate cutting. 3. We cut and test Keys are machine-cut and tested for precision. Electronics are checked before dispatch. 4. Delivery in 3–4 days Typical UK delivery with tracking and updates. 5. Local programming Arrange a nearby automotive locksmith to pair the key. Most jobs take 15–30 minutes. What affects cost Key type — proximity and smart keys cost more than basic transponders. Electronics and frequency — differ by brand and year. Cutting method — photo or code; standard or laser blade. Programming complexity — varies by model. Extras — spare shells, emergency blades, or upgraded housings. Pro tip: Order two keys now — you’ll save money on future locksmith visits and prevent lockouts. Programming: DIY vs local locksmith Modern immobilisers are secure by design. Mr-Key does not supply pairing or programming kits. A professional locksmith uses diagnostic tools to safely program your new key and verify vehicle ownership. It’s faster, safer, and ensures full functionality. Shipping, warranty & returns Delivery: 3–4 days across the UK. Warranty: 12-month full coverage on keys and electronics. Returns: Contact support before programming — unused items are easier to exchange. Dealer vs local locksmith vs online Option Speed Convenience Programming Best for Main dealer Medium–slow Appointment required Dealer tools Brand-new cars, under warranty Local locksmith Fast Mobile visit Done on site Emergencies, quick help Online (Mr-Key) 3–4 days Order from home Done by locksmith Planned replacements, spares Most UK drivers choose online ordering + local locksmith pairing — the fastest, most cost-efficient combination. Troubleshooting after delivery Key turns but car won’t start Blade fits, but immobiliser isn’t paired yet. Book a locksmith. Remote buttons not working Replace the battery and re-pair during programming. Proximity key not detected Use the emergency start position (usually near the steering column) and ask your locksmith to register it. Blade feels rough Use light graphite lubricant or send a photo for recheck. How to avoid another lockout Order a second key and keep it at home. Replace weak remote batteries yearly. Label your spare with the vehicle reg. For keyless cars, store keys away from doors and use a signal-blocking pouch. FAQ Can I order a replacement car key online and get it delivered? Yes. Send your key photo or code, receive delivery in 3–4 days, and have it programmed locally. Do I need proof of ownership? Your locksmith may ask for it. For UK vehicle documentation, see GOV.UK – V5C log book . What’s the difference between key types? Transponder keys start the car; remote fobs add buttons; proximity keys enable keyless entry/start. Can you cut my key from a photo? Yes. Clear, well-lit images allow accurate decoding and cutting. Can I program the key myself? No. Only an automotive locksmith can safely pair it. How long does delivery take? Usually 3–4 days within the UK. Do you cover my vehicle? Almost all brands plus caravans, ATVs, lockers, and more. What warranty do I get? 12-month full warranty on all keys and electronics. What if the battery is dead? Replace it with the correct cell. If issues continue, have the locksmith check frequency and pairing. What if I’ve lost all keys? Order online and arrange programming. Mobile locksmiths can often attend on site. Can I order two keys? Yes — it’s the smartest option to prevent future emergencies. Shop now: https://mr-key.com

The Complete Guide to Car Key Cutting: Everything You Need to Know

The Complete Guide to Car Key Cutting: Everything You Need to Know

Unlocking the Mysteries of Car Key Cutting Have you ever been in a situation where you needed a spare car key or had to replace a lost one? Car key cutting is an essential process for creating duplicate keys or replacements, but it’s often misunderstood. From traditional keys to modern transponder and smart keys, the art of key cutting has evolved dramatically with advancements in technology. This guide will walk you through the key cutting process, its types, and when professional help is required, helping you navigate the complexities of car key duplication with confidence. What Is Car Key Cutting? Car key cutting is the process of creating a new key that matches the physical shape and specifications of your vehicle’s locks and ignition. This process involves cutting the metal key blade to fit the car’s lock mechanism precisely. For modern cars, this may also include programming the electronic components of the key, such as transponder chips or remote controls. The method used for cutting a car key depends on the type of key and the car model. Traditional keys are simpler to cut, while transponder and smart keys require specialized tools and expertise. Types of Car Keys and Cutting Methods Traditional Keys These are the classic mechanical keys used in older vehicles. Cutting these keys involves duplicating the grooves and ridges of the original key using a key-cutting machine. Transponder Keys Found in most modern cars, transponder keys contain a microchip that communicates with the car’s computer. After cutting the blade, these keys must also be programmed to function. Smart Keys These advanced keys use wireless communication to interact with the car. They don’t require physical cutting but involve programming to sync with the vehicle. Each type of key requires a different approach and level of expertise, making it essential to know what kind of key you have before proceeding with duplication. The Key Cutting Process: Step by Step Identify the Key Type Determine whether you have a traditional, transponder, or smart key. This will dictate the tools and process needed for cutting and programming. Gather Required Information Provide the key cutter with details about your car, such as the make, model, and year. For some keys, a Vehicle Identification Number (VIN) may be required. Cutting the Key Blade For traditional and transponder keys, the blade is cut using a key duplicator or a laser key-cutting machine. Precision is crucial to ensure the key fits perfectly in the lock. Programming (if required) For transponder and smart keys, the key must be programmed to the car’s computer system. This step may require specialized equipment or professional expertise. When to Seek Professional Help While traditional keys can often be duplicated at local hardware stores, transponder and smart keys typically require specialized tools and knowledge. Professional locksmiths and dealerships are equipped to handle these advanced key types, ensuring proper cutting and programming. Reasons to choose a professional: Complexity: Smart and transponder keys require technical expertise. Accuracy: Professionals use precise equipment to ensure the key functions flawlessly. Programming Needs: Only trained specialists can program keys to sync with your vehicle. Cost of Car Key Cutting The cost of cutting a car key varies depending on the type of key and the service provider. Traditional keys are the most affordable, typically costing between $10 and $50. Transponder and smart keys, however, can range from $50 to $300 or more due to the additional programming required. Tips to save money: Have a spare key: This simplifies the duplication process and reduces costs. Compare prices: Contact multiple locksmiths or dealerships to find the best deal. Be Prepared for Every Key Emergency Car key cutting is a vital service for any car owner, whether you’re duplicating a spare key or replacing a lost one. Understanding the process and knowing when to seek professional help can save you time, money, and frustration. By staying informed and proactive, you can ensure that your vehicle remains accessible and secure, no matter what challenges arise.

How to Remove or Change a Roof Rack Lock Barrel Easily

How to Remove or Change a Roof Rack Lock Barrel Easily

Changing or removing the lock barrel on your roof rack may seem like a daunting task, but it’s actually simpler than you might think. Whether you need a replacement due to a lost key, wear and tear, or just want to swap out an old lock for a new one, following the right steps can make the process hassle-free. This guide will walk you through everything you need to know about handling a roof rack lock barrel with ease. Why You Might Need to Change a Roof Rack Lock Barrel ? There are several reasons why you may want to replace or remove your roof rack lock barrel: Lost Key : If you've misplaced the key, replacing the lock barrel is often the most practical solution. Upgrading the Lock : Maybe you want a more secure lock for added peace of mind. Routine Maintenance : Over time, lock barrels can wear down, making it harder to insert or turn the key. Uniformity : If you've recently changed your car key, you may want to match your roof rack lock with it. Knowing why you’re changing the lock barrel will help you determine the steps you need to follow. What You’ll Need Before you start, gather these essential tools and items: Replacement Lock Barrel : Ensure it’s compatible with your roof rack model. Master Key or Removal Key : Often required to remove the old lock barrel. New Key : The key that corresponds to the replacement lock barrel. Flathead Screwdriver : To gently pry and release certain parts if needed. Step-by-Step Guide to Removing a Roof Rack Lock Barrel Removing a lock barrel from your roof rack doesn’t require extensive mechanical skills. Just follow these straightforward steps: 1. Locate the Lock Barrel The lock barrel is usually situated in the center or side of the roof rack. Look for the small lock with the keyhole, as this is where you'll be inserting the master or removal key. 2. Insert the Master Key or Removal Key If you have a master or removal key, insert it into the lock. This is often a universal key provided by the lock manufacturer specifically for removing lock barrels. Once it’s inserted, turn the key slightly to unlock the barrel. Tip: If you don’t have a removal key, contact a professional or see if you can order one specifically for your model. 3. Pull the Lock Barrel Out With the removal key still in place, gently pull the lock barrel out. If it’s resistant, try wiggling it slightly while pulling. Avoid forcing it, as this could damage the lock or roof rack. In some cases, you may need a flathead screwdriver to help pry it out, but be careful not to scratch the surrounding area. 4. Check the Casing After removing the lock barrel, inspect the casing where the barrel was installed. Make sure it’s clean and free of debris. Any dirt or rust could interfere with the new lock barrel, so it’s a good idea to clean this area before proceeding. Installing the New Lock Barrel Once the old barrel is removed, you’re ready to install the new one. Here’s how: 1. Align the New Lock Barrel Take your new lock barrel and align it with the casing where the old one was. Most barrels are designed to fit in only one direction, so make sure you align it properly to avoid jamming. 2. Insert the New Barrel Push the new lock barrel into the casing until it clicks into place. This might require a bit of pressure, but it should fit snugly without needing excessive force. 3. Test the New Key After installing the new lock barrel, insert the new key and turn it to ensure it’s working smoothly. The key should turn easily and lock securely. This step verifies that the new lock is properly aligned and functional. Common Challenges and Solutions While changing a roof rack lock barrel is generally straightforward, you might encounter some challenges. Here’s how to troubleshoot common issues: Stuck Barrel : If the old barrel is stuck, apply a lubricant like WD-40 around the lock to help loosen it. No Removal Key : If you don’t have a master or removal key, consider reaching out to a locksmith or checking if the manufacturer offers a replacement. Barrel Won’t Fit : Ensure you’ve purchased a compatible lock barrel. Even slight differences in design can prevent it from fitting properly. Tips for Maintaining Your Roof Rack Lock To keep your new lock barrel in good condition and prevent the need for frequent replacements, consider these maintenance tips: Regular Cleaning : Dirt and grime can accumulate inside the lock over time, making it harder to operate. Clean the lock regularly to prevent this. Use Lubricant : Apply a small amount of lubricant inside the lock barrel periodically to keep the key turning smoothly. Protect from Rust : If your roof rack is exposed to rain and humidity, use a protective cover or shield to keep moisture out of the lock barrel. Check Key Fit : Avoid using a damaged or bent key, as this can wear out the lock barrel more quickly. When to Seek Professional Help In some cases, removing or replacing a roof rack lock barrel might require assistance from a professional: Lost or Damaged Keys : If both your main key and master key are lost or damaged, a professional can help retrieve or replace the lock barrel. Damaged Lock Mechanism : If the lock itself is damaged or jammed, forcing it can make things worse. A professional locksmith can safely remove and replace it. Replacing or removing a roof rack lock barrel is an affordable and manageable task for most car owners. By following the right steps and keeping up with regular maintenance, you can ensure your roof rack lock stays functional and secure. Whether you’re upgrading for security or replacing a worn-out lock, a new lock barrel can make all the difference in keeping your roof rack safe. Effortless Key Replacement for a Variety of Locks Order 2x Union Keys FT Series, custom-cut to your original key code, for a hassle-free replacement. Compatible with a range of locks, including those from Aston Martin, Jaguar, Land Rover, and more, these keys are perfect for classic cars, caravans, petrol caps, roof racks, and truck canopies. Simply find your lock code (e.g., FT101-FT360) on the lock face and enjoy fast delivery of high-quality spare keys.

How to Install a Hydrogel Navigation Screen Protector

How to Install a Hydrogel Navigation Screen Protector

Nowadays car interiors rely heavily on touchscreens. Whether you drive a BMW 3 Series , VW Golf , Audi A4 , Mercedes A-Class , Peugeot 3008 , or Skoda Octavia , your infotainment display is the centre of navigation, settings, entertainment and safety features. But these screens are also fragile—prone to scratches , fingerprints , micro-abrasions , and glare . A hydrogel navigation screen protector is one of the best ways to protect your car touchscreen without affecting clarity or touch sensitivity. This guide shows you exactly how to install a hydrogel protector , step by step, with expert tips, mistakes to avoid, and a few insider tricks that most guides miss. What Is a Hydrogel Screen Protector? Hydrogel is a soft, self-healing, flexible material used widely in phone protection and now increasingly in automotive displays. Unlike tempered glass, it adapts to curved edges and eliminates small bubbles over time. For more technical background, you can read the scientific definition on hydrogels Hydrogel is ideal for infotainment screen protection because it: Reduces glare Absorbs micro-scratches Maintains full touch sensitivity Adapts to curved and angled car screens Self-heals small marks over 24–48 hours It’s especially useful for European cars where screens are large and glossy, such as: Mercedes MBUX screens (A-Class, C-Class, GLC) Volkswagen MIB systems (Golf, Passat, Tiguan) BMW iDrive displays (3 Series, X1, X3) Audi MMI touchscreens (A4, A3, Q5) Peugeot i-Cockpit models Renault Clio, Captur, Megane Skoda Octavia, Superb, Scala Curious which specific models benefit the most from hydrogel protection? Check out our full guide on which cars benefit most from hydrogel navigation protection . Before You Start: Essential Preparation Installing a hydrogel protector takes only a few minutes, but the preparation stage determines whether the final result looks factory-perfect . You Will Need Hydrogel screen protector Microfiber cloth Screen-cleaning wipe (wet & dry) Dust-removal sticker (optional but recommended) Small squeegee / card Choose the Right Environment Install the protector in: A dust-free space (car parked indoors is ideal) Soft lighting (so dust particles are visible) A still environment (no wind, no blowing air) Avoid doing it outside or while standing near open windows. Step-by-Step: How to Install a Hydrogel Navigation Screen Protector 1. Clean the Navigation Screen Thoroughly Use a wet wipe first, then a dry microfiber cloth. Focus on: Corners Edges Around the frame Any oily fingerprints Tip: Turn the screen off to see dust more easily. 2. Remove All Dust Particles Even one small dust speck can create a permanent bubble. Use: Dust-removal stickers A clean microfiber cloth Hold the screen at an angle and look under the light. If perfectionism matters anywhere, it’s here. 3. Peel the First Protective Layer Most hydrogel protectors have two layers . Peel Layer 1 halfway and align the protector with: Left and right edges Upper frame Any curved edges Do not peel it completely yet. 4. Align and Apply the Protector Once aligned: Press the top centre gently Slowly drag your finger downward Peel off the rest of Layer 1 as you go The film will naturally stick without much force. 5. Use the Squeegee to Push Out Air Work from centre outward , using firm but controlled pressure. Hydrogel is self-healing , so small micro-bubbles usually disappear within 24–48 hours . 6. Remove the Final Top Layer After application: Peel Layer 2 from one corner Pull slowly to avoid lifting the protector This reveals a glossy, clear surface below. 7. Allow 24 Hours for Full Adhesion Do not touch the screen too much during this period. Avoid: Heat exposure Cleaning sprays Aggressive pressing Hydrogel needs time to “settle” and self-heal. Common Mistakes to Avoid Even a perfect protector can be ruined by simple errors. Installing in a dusty environment Fibres, dust and hair easily get trapped. Touching the sticky side This leaves permanent marks. Rushing the alignment Hydrogel is flexible but not stretch-proof. Cleaning with alcohol after installation This can damage the outer coating. Installing on a hot screen Heat weakens adhesion and causes micro-bubbles. For a complete walkthrough , see our guide on how to protect your car’s navigation screen . Why Hydrogel Is Better Than Tempered Glass for Car Screens Tempered glass works well for smartphones—but not for car navigation screens. Hydrogel performs better because: It bends and adapts to curved displays It doesn’t create raised edges It avoids touchscreen sensitivity issues It self-heals micro-abrasions It provides better Anti-Glare performance If you want to see more in depth guide on why hydrogel protectors are better check out our guide on Hydrogel vs Tempered Glass Navigation Protectors Comparison FAQs 1. Does a hydrogel protector reduce screen sensitivity No. Hydrogel maintains full touch responsiveness because the material is soft and pressure-adaptive. 2. Can I reuse a hydrogel screen protector? No. Once removed, it cannot be reinstalled cleanly. 3. How long do micro-bubbles take to disappear? Usually 24–48 hours. Stubborn ones may take up to 72 hours if the screen is curved. 4. Will the protector affect brightness or clarity? High-quality hydrogel preserves original screen clarity. Matte versions reduce glare but may slightly soften reflections. 5. Is hydrogel safe for anti-reflective or coated screens? Yes. Hydrogel adhesive is gentle and does not damage coatings. If you want premium hydrogel protectors for BMW, Audi, Mercedes, VW, Peugeot, Renault, Skoda and more, explore our full selection today. Visit our shop at mr-key.com Related Guides Which cars benefit most from hydrogel navigation protection How to Protect Your Car’s Navigation Screen from Scratches,Glare & Fingerprints Hydrogel vs Tempered Glass Navigation Protectors Comparison

Chat with us