Post Name


Losing or encountering issues with your car key can feel like a nightmare, especially when you’re in a hurry. From unresponsive key fobs to stuck keys, these problems are more common than you might think. The good news? Most of these issues have simple, affordable fixes that you can address quickly. This guide will help you identify common car key problems and provide solutions to get you back on track without breaking the bank.

1. Key Won’t Turn in the Ignition

Why It Happens:
When your car key refuses to turn, it’s often due to a worn-out key, a damaged ignition cylinder, or a locked steering wheel.

How to Fix It:

  • Check the Steering Wheel: If the wheel is locked, try gently turning the steering wheel left and right while turning the key in the ignition.
  • Inspect the Key: A bent or worn-out key can cause alignment issues. Try a spare key if you have one.
  • Lubricate the Ignition: Use a small amount of graphite lubricant (avoid oil-based products) to loosen the ignition cylinder.
  • If All Else Fails: Consult a professional to replace the key or ignition lock.

Tip: Avoid forcing the key, as this could damage the ignition further.

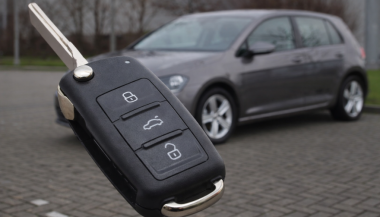
2. Car Key Fob Isn’t Responding

Why It Happens:
Modern key fobs are convenient, but they rely on batteries and electronic components that can fail. A dead battery is the most common culprit.

How to Fix It:

  • Replace the Battery: Open your key fob (usually with a small screwdriver) and swap out the old battery for a fresh one. Most fobs use coin-shaped batteries like CR2032.
  • Reprogram the Key Fob: If changing the battery doesn’t work, your fob may need reprogramming. Follow your car manual’s instructions or consult a professional locksmith.
  • Check for Damage: Inspect the buttons and internal components for signs of wear or moisture.

Tip: Always keep a spare battery on hand to avoid unexpected key fob failures.

3. Key Stuck in the Ignition

Why It Happens:
This issue often stems from a locked transmission, dirt in the ignition, or a worn-out key that doesn’t align properly.

How to Fix It:

  • Ensure the Car Is in Park: For automatic cars, check that the gear shifter is fully in the “Park” position.
  • Clean the Ignition: Use compressed air to remove dirt or debris from the keyhole.
  • Jiggle the Key: Gently wiggle the key while applying light pressure to help free it.
  • Inspect for Damage: If the key is bent, avoid forcing it. A professional can help safely extract it.

Tip: If the problem persists, you may need to replace the ignition cylinder or key to prevent further damage.

4. Worn or Damaged Car Key

Why It Happens:
Over time, constant use can wear down the grooves on your key, making it difficult to start the car or open the doors.

How to Fix It:

  • Get a Duplicate Key: If your key is showing wear, have a duplicate made while it still works.
  • Replace the Key: A locksmith can create a new key based on your car’s lock or key code.
  • Upgrade to a Modern Key: If you’re using an older mechanical key, consider upgrading to a transponder key or key fob for added convenience and security.

Tip: Don’t wait until your key stops working entirely. Replacing a worn key early can save you time and stress.

5. Key Fob Signal Interference

Why It Happens:
Sometimes, your car key fob may not respond due to signal interference from nearby electronics or a faulty antenna.

How to Fix It:

  • Move Away from Interference: Check for other devices nearby, such as Wi-Fi routers or radios, which may disrupt the signal.
  • Inspect the Fob: Ensure the key fob’s battery is working and the buttons are functional.
  • Reset the Key Fob: Follow your car manual’s instructions to reset or resynchronize the fob.
  • Test the Car’s Receiver: If the problem persists, there may be an issue with your car’s signal receiver.

Tip: Parking in a location free from electronic interference can help diagnose if this is the root cause.

Preventing Car Key Problems: Simple Tips

Taking care of your car key now can save you from bigger headaches later. Here are some quick maintenance tips:

  • Keep Keys Clean: Avoid exposing keys to water, dirt, or chemicals.
  • Store Spare Keys Safely: Always have a backup key in a secure and accessible place.
  • Replace Batteries Regularly: Change key fob batteries annually to prevent unexpected failures.
  • Inspect Your Keys: If you notice wear, cracks, or loose buttons, address the issue early.

Why Addressing Car Key Problems Early Saves You Money

Ignoring small car key problems can lead to more expensive repairs down the road. For example:

  • A damaged ignition can cost far more to replace than addressing a stuck key early.
  • Reprogramming a lost or broken key fob is more costly than simply replacing a battery.
  • Getting a duplicate key before the original breaks ensures you’re not left stranded.

By staying proactive, you can keep your car keys functioning smoothly without spending a fortune.


Related Posts

How to Install a Hydrogel Navigation Screen Protector

How to Install a Hydrogel Navigation Screen Protector

Nowadays car interiors rely heavily on touchscreens. Whether you drive a BMW 3 Series , VW Golf , Audi A4 , Mercedes A-Class , Peugeot 3008 , or Skoda Octavia , your infotainment display is the centre of navigation, settings, entertainment and safety features. But these screens are also fragile—prone to scratches , fingerprints , micro-abrasions , and glare . A hydrogel navigation screen protector is one of the best ways to protect your car touchscreen without affecting clarity or touch sensitivity. This guide shows you exactly how to install a hydrogel protector , step by step, with expert tips, mistakes to avoid, and a few insider tricks that most guides miss. What Is a Hydrogel Screen Protector? Hydrogel is a soft, self-healing, flexible material used widely in phone protection and now increasingly in automotive displays. Unlike tempered glass, it adapts to curved edges and eliminates small bubbles over time. For more technical background, you can read the scientific definition on hydrogels Hydrogel is ideal for infotainment screen protection because it: Reduces glare Absorbs micro-scratches Maintains full touch sensitivity Adapts to curved and angled car screens Self-heals small marks over 24–48 hours It’s especially useful for European cars where screens are large and glossy, such as: Mercedes MBUX screens (A-Class, C-Class, GLC) Volkswagen MIB systems (Golf, Passat, Tiguan) BMW iDrive displays (3 Series, X1, X3) Audi MMI touchscreens (A4, A3, Q5) Peugeot i-Cockpit models Renault Clio, Captur, Megane Skoda Octavia, Superb, Scala Curious which specific models benefit the most from hydrogel protection? Check out our full guide on which cars benefit most from hydrogel navigation protection . Before You Start: Essential Preparation Installing a hydrogel protector takes only a few minutes, but the preparation stage determines whether the final result looks factory-perfect . You Will Need Hydrogel screen protector Microfiber cloth Screen-cleaning wipe (wet & dry) Dust-removal sticker (optional but recommended) Small squeegee / card Choose the Right Environment Install the protector in: A dust-free space (car parked indoors is ideal) Soft lighting (so dust particles are visible) A still environment (no wind, no blowing air) Avoid doing it outside or while standing near open windows. Step-by-Step: How to Install a Hydrogel Navigation Screen Protector 1. Clean the Navigation Screen Thoroughly Use a wet wipe first, then a dry microfiber cloth. Focus on: Corners Edges Around the frame Any oily fingerprints Tip: Turn the screen off to see dust more easily. 2. Remove All Dust Particles Even one small dust speck can create a permanent bubble. Use: Dust-removal stickers A clean microfiber cloth Hold the screen at an angle and look under the light. If perfectionism matters anywhere, it’s here. 3. Peel the First Protective Layer Most hydrogel protectors have two layers . Peel Layer 1 halfway and align the protector with: Left and right edges Upper frame Any curved edges Do not peel it completely yet. 4. Align and Apply the Protector Once aligned: Press the top centre gently Slowly drag your finger downward Peel off the rest of Layer 1 as you go The film will naturally stick without much force. 5. Use the Squeegee to Push Out Air Work from centre outward , using firm but controlled pressure. Hydrogel is self-healing , so small micro-bubbles usually disappear within 24–48 hours . 6. Remove the Final Top Layer After application: Peel Layer 2 from one corner Pull slowly to avoid lifting the protector This reveals a glossy, clear surface below. 7. Allow 24 Hours for Full Adhesion Do not touch the screen too much during this period. Avoid: Heat exposure Cleaning sprays Aggressive pressing Hydrogel needs time to “settle” and self-heal. Common Mistakes to Avoid Even a perfect protector can be ruined by simple errors. Installing in a dusty environment Fibres, dust and hair easily get trapped. Touching the sticky side This leaves permanent marks. Rushing the alignment Hydrogel is flexible but not stretch-proof. Cleaning with alcohol after installation This can damage the outer coating. Installing on a hot screen Heat weakens adhesion and causes micro-bubbles. For a complete walkthrough , see our guide on how to protect your car’s navigation screen . Why Hydrogel Is Better Than Tempered Glass for Car Screens Tempered glass works well for smartphones—but not for car navigation screens. Hydrogel performs better because: It bends and adapts to curved displays It doesn’t create raised edges It avoids touchscreen sensitivity issues It self-heals micro-abrasions It provides better Anti-Glare performance If you want to see more in depth guide on why hydrogel protectors are better check out our guide on Hydrogel vs Tempered Glass Navigation Protectors Comparison FAQs 1. Does a hydrogel protector reduce screen sensitivity No. Hydrogel maintains full touch responsiveness because the material is soft and pressure-adaptive. 2. Can I reuse a hydrogel screen protector? No. Once removed, it cannot be reinstalled cleanly. 3. How long do micro-bubbles take to disappear? Usually 24–48 hours. Stubborn ones may take up to 72 hours if the screen is curved. 4. Will the protector affect brightness or clarity? High-quality hydrogel preserves original screen clarity. Matte versions reduce glare but may slightly soften reflections. 5. Is hydrogel safe for anti-reflective or coated screens? Yes. Hydrogel adhesive is gentle and does not damage coatings. If you want premium hydrogel protectors for BMW, Audi, Mercedes, VW, Peugeot, Renault, Skoda and more, explore our full selection today. Visit our shop at mr-key.com Related Guides Which cars benefit most from hydrogel navigation protection How to Protect Your Car’s Navigation Screen from Scratches,Glare & Fingerprints Hydrogel vs Tempered Glass Navigation Protectors Comparison

Why Your Motorcycle TFT Display Needs a Screen Protector (Before It’s Too Late)

Why Your Motorcycle TFT Display Needs a Screen Protector (Before It’s Too Late)

Modern motorcycles are smarter, more connected, and more expensive than ever. At the center of that evolution sits the TFT display—your bike’s digital command hub. Speed, revs, riding modes, navigation, calls, warnings. One exposed surface controls it all. And it’s far more vulnerable than most riders realise. A motorcycle screen protector isn’t an accessory. It’s preventive maintenance. Ignore it, and you’re gambling with one of the most expensive components on your bike. The Hidden Weak Point on Modern Motorcycles Motorcycle manufacturers invest heavily in engines, frames, and electronics. But the TFT display? It’s still a thin, exposed panel, mounted directly in the line of fire. Unlike a phone, it: Lives outdoors 24/7 Takes direct UV exposure Gets hit by dust, sand, insects, and road debris Is cleaned repeatedly—often incorrectly A single mistake is enough to leave permanent damage. TFT Displays Scratch Far Easier Than You Think Most motorcycle TFT screens are plastic-based or plastic-coated , not hardened glass like premium smartphones. That matters. Plastic scratches: From dust particles wiped across the surface From dry cloths or paper towels From jacket zippers or gloves Even from “careful” cleaning at fuel stops Once scratched, there is no polish, no fix, no reset . The damage is permanent. A motorcycle display protector absorbs this damage instead of the screen itself. Sunlight Is Quietly Destroying Your Display UV exposure doesn’t crack screens overnight. It does something worse. It slowly: Fades colours Reduces contrast Creates uneven patches Permanently dulls brightness After a few summers, the display that once looked sharp now looks tired—especially when riding in direct sunlight. A quality bike screen protector acts as a UV barrier, preserving clarity and colour accuracy for years. Glare Isn’t Just Annoying. It’s Dangerous. A washed-out screen at speed isn’t just inconvenient. It means: Missed warning lights Hard-to-read navigation prompts Delayed reaction times In bright sun, an unprotected TFT can become a mirror. Screen protectors designed for motorcycles reduce reflections and glare, improving readability in real-world riding conditions—not showroom lighting. Cleaning Your Screen Is Probably Damaging It Most riders clean their TFT displays the same way they clean helmets or windscreens. That’s a mistake. Common causes of micro-scratches: Dry wiping Paper towels Window cleaners Cloths contaminated with dust Over time, these tiny marks add up. The screen becomes hazy. Night riding gets worse. Contrast drops. A motorcycle screen protector takes that abuse instead—so you can replace the protector, not the display. The Real Cost of a Damaged Motorcycle TFT Display Here’s what many riders discover too late. Replacing a TFT display typically costs: €800–€1,200 for the part Labour and coding often extra In many cases, the bike must go to an authorised dealer Insurance often won’t cover cosmetic damage. Scratches don’t qualify as “failure.” A screen protector costs a fraction of that—and eliminates the risk entirely. Resale Value Takes a Direct Hit Buyers notice screens immediately. A scratched or faded TFT display: Signals neglect Raises questions about overall maintenance Lowers perceived value Even if the bike is mechanically perfect, a damaged display can knock hundreds off resale or trade-in value. Protecting the screen protects the bike’s future value. Why Motorcycle Displays Are More Vulnerable Than Phones It’s tempting to compare TFT displays to smartphones. That comparison fails. Motorcycle screens: Are permanently exposed to the elements Experience constant vibration Are cleaned in uncontrolled environments Sit at steep angles that catch sunlight They endure more abuse in one riding season than most phones do in five years. A dedicated motorcycle display protector is designed for exactly these conditions. Screen Protectors Don’t Affect Touch or Visibility A common myth: screen protectors reduce clarity or touch response. High-quality motorcycle screen protectors are: Ultra-thin Optically clear Designed for glove interaction Precisely cut for each display shape Once installed, most riders forget it’s even there—until it saves the screen. Installation Is Easier Than You Expect Modern protectors are made for DIY installation. Typically: No liquids required No permanent adhesives No tools beyond what’s included With careful alignment, installation takes minutes—and protects the display for years. Who Should Use a Motorcycle Screen Protector? Short answer: every rider. Especially if you: Park outdoors Ride in bright sun Tour long distances Use navigation or Bluetooth features Plan to keep or resell the bike If your motorcycle has a TFT display, it’s already at risk. FAQ Do motorcycle TFT displays scratch easily? Yes. Most TFT displays use plastic-based surfaces that scratch far more easily than smartphone glass—often from normal cleaning alone. Can a scratched motorcycle display be repaired? No. Scratches are permanent. The only true fix is replacing the entire display unit. How much does it cost to replace a motorcycle TFT screen? Replacement typically costs between €800 and €1,200, excluding labour and dealer programming. Does a screen protector affect brightness or touch sensitivity? No. Quality protectors are optically clear and maintain full touch responsiveness. Is a motorcycle screen protector worth it? Considering the replacement cost of a TFT display, a screen protector is one of the highest-value protective upgrades you can make. Can I remove or replace the protector later? Yes. Screen protectors are removable and replaceable without damaging the original display. Protect the Most Expensive Screen on Your Bike Your motorcycle’s TFT display is essential, fragile, and costly to replace. Damage doesn’t announce itself. It accumulates quietly—scratch by scratch, fade by fade—until it’s too late. Visit our shop at mr-key.com to explore our motorcycle screen protectors and protect your display before the damage becomes permanent.

Common Car Key Problems and Solutions Every Driver Should Know

Common Car Key Problems and Solutions Every Driver Should Know

There’s nothing quite as frustrating as standing outside your car, key in hand, only to realize something’s not working. Whether your key won’t turn, the remote isn’t responding, or the key itself has seen better days, car key problems seem to happen at the worst possible moment. The good news? Most of these issues are avoidable or fixable, and knowing what to expect can save you both time and stress. 1. Worn-Out Key Blades You might not notice it happening, but over time, your key blade wears down. Each time you insert it into the lock or ignition, tiny grooves and cuts on the blade experience friction. After years of use, the edges get smooth, and the key may stop fitting snugly. Suddenly, you find yourself jiggling or forcing it, risking more damage. The solution here is simple: if you start noticing that the key feels loose or takes a few tries to turn, it’s time to get a replacement cut based on the original code, not by copying the worn-out key. A fresh, precisely cut key blade will fit and function perfectly, preventing damage to your lock cylinder. 2. Dead Key Fob Battery Modern cars often come with remote keys or keyless entry systems, and while they offer convenience, they also rely on tiny batteries. One day, you press the button, and nothing happens—no lights, no unlock sound, no response. Before assuming the worst, check the battery. Typically, key fob batteries (like CR1620 or CR2032 types) are inexpensive and easy to replace. A quick change will often restore full functionality. Make it a habit to change your key battery every 1-2 years, especially if you notice reduced range or need to press the button multiple times. 3. Key Not Turning in the Ignition You get into your car, insert the key, and suddenly it won’t turn. You might try wiggling the steering wheel or pushing the key harder, but nothing works. More often than not, the problem is either with the steering lock mechanism being engaged or dirt buildup inside the ignition cylinder. First, try gently moving the steering wheel side-to-side while turning the key—sometimes the wheel locks under tension, and this simple trick unlocks it. If the problem persists, there could be debris inside the ignition. Using a can of compressed air to blow out dust and tiny particles can help, but if it continues, a professional cleaning or inspection might be necessary before the key or ignition gets damaged. 4. Broken or Bent Keys You might not think twice when you use your key to open a package or pry something open—but keys aren't made for multitasking. Over time, rough handling, bending, or dropping your key can weaken the metal. Eventually, you could end up with a bent key that struggles to fit, or worse, a snapped key stuck in your lock. If your key has visible bends or cracks, don’t wait. Replacing it before it breaks entirely can save you the headache of needing an extraction service. Also, always carry a spare key, just in case. 5. Key Programming Issues If your car uses a transponder key or a smart key, there’s more than just a metal blade involved. Inside is a chip programmed to communicate with your car’s immobilizer system. If your key loses synchronization—maybe after battery replacement, an electrical issue, or accidentally resetting your system—it can leave you unable to start your vehicle. In these cases, reprogramming the key is necessary. Some cars allow you to do this manually following specific sequences (like turning the ignition on and off), but others require specialized diagnostic tools. Familiarizing yourself with your car’s manual or researching the process beforehand helps avoid surprises. 6. Water Damage Dropped your key in water or left it exposed to rain? Electronics inside remote keys and smart keys aren’t waterproof. Moisture can short-circuit internal components, causing the key to stop functioning entirely. If this happens, act fast. Remove the battery immediately and dry out the key as thoroughly as possible. You can use silica gel packets or place the key in a bowl of rice overnight to absorb moisture. However, water damage isn’t always reversible, so keeping your key away from wet environments is the best precaution. Car key problems often feel like an emergency when they strike, but most of them are preventable or quickly fixable with a little know-how. Paying attention to the warning signs—whether it’s a key that’s worn, a fob that’s sluggish, or a key that won’t turn—allows you to act before things escalate. Understanding how your key works and handling it with care will save you from unnecessary stress (and unexpected expenses) down the road. So next time something feels off with your key, remember: a little attention now can prevent a major hassle later.

How to Rescue Your Car Key After It Gets Wet: A Practical Guide

How to Rescue Your Car Key After It Gets Wet: A Practical Guide

The Modern Dilemma: Wet Car Keys and How to Fix Them Imagine this: you’re caught in an unexpected downpour, and your car key slips from your hand, landing straight into a puddle. Or perhaps you accidentally leave your keys in your pocket while diving into a swimming pool. Whatever the scenario, the moment you realize your car key has been submerged in water can be panic-inducing. With modern car keys embedded with electronic chips and sophisticated technology, exposure to moisture can mean more than just a temporary inconvenience—it could leave you locked out or facing expensive repairs. But before you rush to replace your key, there are several steps you can take to salvage it. Understanding the Risks: What Happens When a Car Key Gets Wet? Car keys today are more than just metal; many include electronic transponders and remote control systems that communicate with the vehicle’s ignition. Water exposure can lead to: Short circuits: Moisture can cause electronic components to malfunction or fail entirely. Corrosion: Over time, water can lead to rust and degradation of internal circuits. Battery failure: Many car keys contain small batteries, and water exposure can lead to leakage or loss of function. While traditional metal keys are less affected by water, smart keys and key fobs are vulnerable. Acting quickly can often save your key from irreparable damage. Immediate Steps to Take When Your Car Key Gets Wet If your car key has been exposed to water, time is of the essence. Here’s what you need to do: Retrieve the key from the water as quickly as possible and wipe off excess moisture using a dry, absorbent cloth or paper towel. Remove the battery if possible since many car key fobs have removable batteries; check your car manual for instructions. If the battery is wet, replace it with a new one rather than attempting to dry and reuse it. Disassemble the key fob if safe to do so, carefully opening the casing to allow internal components to dry. Avoid using force or tools that might damage delicate parts. Use silica gel or rice for drying—place the key fob in a container of silica gel packets (often found in new shoe boxes or electronics packaging) for 24-48 hours; if silica gel is unavailable, uncooked rice can work as an alternative, though it may not be as effective. Avoid using direct heat—do not use hairdryers, microwaves, or ovens to speed up drying, as high temperatures can warp plastic components and damage circuits; instead, allow the key to air dry naturally in a warm, ventilated space. Finally, test the key once you’re confident it is dry by reinserting the battery and testing it on your car; if the key does not work, it may require reprogramming or replacement. When to Seek Professional Help If your key remains unresponsive despite thorough drying, it may have suffered internal damage. In such cases, consider these options: Contact your car manufacturer or dealership—they can provide a replacement key or attempt to reprogram the existing one. Visit a professional locksmith—many automotive locksmiths specialize in repairing and reprogramming electronic keys at a lower cost than dealerships. Check your car insurance policy—some policies cover lost or damaged keys, potentially reducing replacement costs. Global Trends in Key Fob Durability and Waterproofing Car manufacturers are increasingly designing key fobs to withstand water exposure. For example, Tesla’s Model 3 key card eliminates the need for traditional keys by using a waterproof RFID card, Toyota and BMW have introduced water-resistant key fobs, minimizing the risk of damage, and future innovations may include biometric key technology, reducing dependency on physical devices altogether. As technology advances, water-resistant key designs may become the norm, reducing the stress of accidental spills or submersion. Preventative Measures: How to Protect Your Car Key from Water Damage To avoid future incidents, consider these preventative steps: Use a waterproof key case: Available online, these cases provide a protective barrier against water exposure. Designate a dry storage spot: Avoid leaving keys in pockets that may go through the wash or near pools and sinks. Invest in a spare key: Having a backup key can be a lifesaver if your primary key is damaged beyond repair. Check for manufacturer upgrades: Some car brands offer upgraded, water-resistant key fobs for an additional fee. Act Quickly to Save Your Key A wet car key doesn’t necessarily mean it’s the end of the road. By acting swiftly and following proper drying techniques, you may be able to rescue your key without costly replacements. As car technology evolves, so too will key durability, but for now, a little caution and quick thinking can go a long way. If you frequently find yourself around water, taking preventative measures can save time, money, and frustration.

Chat with us