Post Name

Losing your keys can be a frustrating experience, but identifying the right replacement doesn't have to be. Whether you've lost a house key, a car key, or a key to a padlock or cabinet, understanding how to identify the key you need is crucial. This guide will walk you through the process of identifying your keys, ensuring you find the right replacement quickly and efficiently.

The Importance of Key Identification

Before diving into how to replace a lost key, it’s important to understand why key identification is critical. Keys come in a variety of shapes, sizes, and designs, each tailored to specific types of locks. Identifying your key correctly will save time, money, and frustration. For example, car keys often include transponder chips that need to be programmed to your vehicle, while house keys may have specific patterns that fit only one brand of lock.

Step 1: Check for Key Codes and Markings

The first step in identifying your key is to look for any codes or markings. These can be found on the key itself or sometimes on the lock. Key codes are often a series of letters and numbers that indicate the specific model or cut of the key. If you still have the original key, examine it closely for these codes. If not, check the lock for any inscriptions that might offer clues.

Key codes are essential, particularly for high-security keys or specialized keys such as those used in commercial settings. For car keys, this code might also be found in the vehicle’s manual or on a key tag provided at the time of purchase.

Step 2: Determine the Key Type

Next, determine the type of key you need. Different keys serve different purposes:

  • House Keys: Typically flat with unique grooves along the edge, these are used in residential locks.
  • Car Keys: These may include electronic transponders and are often more complex.
  • Padlock Keys: Usually smaller, these keys have a unique profile that fits the specific lock.
  • Cabinet or Locker Keys: These are often smaller and may be specific to a brand or lock type.

Identifying the correct key type is important because it narrows down your options when searching for a replacement.

Step 3: Identify the Lock Brand

If you cannot find a key code, identifying the lock brand is the next best step. The brand name is usually stamped somewhere on the lock or key. Knowing the brand will help you narrow down the options for finding a replacement key.

For example, many house keys are cut to fit specific brands like Yale or Schlage. Car keys, on the other hand, are usually specific to the car manufacturer. Knowing the brand is especially useful when you need to replace a key without an original to reference.

Step 4: Examine the Key Profile

The profile of the key refers to the unique cuts, grooves, and ridges along its blade. This profile is what allows the key to operate a specific lock. When identifying your key, compare the profile of your key to those available through online resources or in-store at key-cutting services.

If you have a high-security key, it may have a more complex profile that is difficult to replicate. In such cases, it’s best to consult a professional locksmith or the lock manufacturer for an exact match.

Step 5: Utilize Online Resources

There are many online resources available to help you identify and replace your lost key. Websites often offer key identification tools where you can input details such as key codes, lock brands, and key types to find a match. Additionally, many online stores specialize in replacement keys, offering a wide selection based on the information you provide.

Step 6: Contact the Manufacturer

If you're still having trouble identifying your key, contacting the lock or car manufacturer can be extremely helpful. Provide them with any details you have about the lock or key, and they can often guide you to the right replacement. For car keys, your vehicle identification number (VIN) can often be used by the dealership to cut a new key or program a replacement transponder key.

Step 7: Professional Locksmith Assistance

When all else fails, a professional locksmith is your best bet. Locksmiths have the tools and expertise to identify and replicate nearly any type of key. They can also assist with programming transponder keys for cars or creating master keys for complex locking systems.

Losing a key doesn't have to be a stressful experience if you know how to identify and replace it effectively. By following these steps—checking for key codes, determining the key type, identifying the lock brand, examining the key profile, using online resources, and seeking professional help—you can ensure that you find the right replacement quickly and efficiently. Proper key identification is the first step toward restoring access and ensuring security.

Related Posts

The Secret to Smooth Locks: How (and Why) to Lubricate Your Locks Like a Pro

The Secret to Smooth Locks: How (and Why) to Lubricate Your Locks Like a Pro

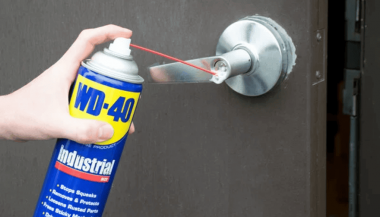
Regular lock maintenance is essential to prevent key jamming or lock failure. Proper lubrication reduces wear and tear, ensures smooth operation, and extends the lifespan of your locks. A well-lubricated lock decreases the risk of your key getting stuck or breaking inside the lock—an inconvenient and costly problem. At MR-KEY , we understand the importance of well-maintained locks and want to help you keep yours in top condition. How Often Should You Lubricate Your Locks? For most locks, lubricating them every three to six months is sufficient. However, locks exposed to extreme weather conditions—such as those on towbars, roof racks, or outdoor gates—require more frequent maintenance. Rain, dust, and freezing temperatures can cause internal components to stick, making it difficult to insert or turn the key. If you notice resistance when using a lock, it’s time for lubrication. What Lubricant Should You Use for Locks? Choosing the right lubricant is crucial for long-term lock performance. Here are the best options: • Teflon-based (PTFE) spray – Forms a protective film inside the lock, reducing friction and repelling dust buildup. • Dry silicone spray – Excellent for outdoor locks as it resists moisture without attracting dirt. • WD-40 Specialist Dry PTFE or White Lithium Grease – Unlike regular WD-40, these provide long-lasting lubrication and protection against corrosion. • Graphite powder – A great choice for older locks but should not be used if there’s oil residue inside the lock. While WD-40 Multi-Use is a quick fix for stuck locks, it is primarily a cleaner rather than a long-term lubricant. If used, follow up with a dry lubricant to prevent dirt accumulation inside the lock. How to Lubricate a Lock If your lock is functioning properly but feels slightly stiff, follow these steps: 1. Clean the Lock – Insert and remove the key a few times to dislodge debris, wiping it clean each time. 2. Apply the Lubricant – Insert the spray straw into the keyhole and apply two short bursts of lubricant. 3. Work the Lock – Insert and turn the key multiple times to distribute the lubricant inside. 4. Wipe Excess Lubricant – Remove any residue from the key and lock exterior to prevent dirt buildup. For graphite powder , follow the manufacturer’s specific instructions, as overapplication can lead to clumping inside the lock. Special Care for Towbar and Roof Rack Locks Locks on towbars and roof racks are exposed to harsher conditions than typical door locks. To keep them in good shape: • Regularly inspect them for stiffness or corrosion. • Apply dry silicone spray or PTFE lubricant for lasting protection. • If the lock is exposed to frequent moisture, white lithium grease offers superior water resistance. Lock It in: The Key to Long-Lasting Security Regular lock maintenance is a small effort that prevents big problems. By keeping your locks clean and properly lubricated—especially those exposed to the elements—you can avoid costly repairs and ensure they function smoothly for years. For high-quality lock maintenance products, visit MR-KEY and keep your locks in perfect working condition. A little maintenance goes a long way in ensuring security and peace of mind!

What You Need To Know About BMW  Swirl Flaps and How To Solve The Problem With Them

What You Need To Know About BMW  Swirl Flaps and How To Solve The Problem With Them

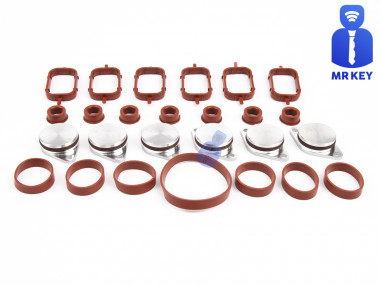
Swirl flaps are a BMW system that has been introduced to help burn the fuel mixture in the cylinder better due to the fact that diesel engines do not have throttle valves and it is not possible to adjust the air-fuel ratio. A diesel engine without vortex valves operates between a poor and a rich fuel mixture, because the only way to regulate it is through fuel injection. Design of the first generation swirl flaps that are made of made of metal. Unfortunately, swirl flaps are responsible for countless damaged engines and costly repairs due to design errors or metal fatigue. Once damaged, the cylinder sucks them in and causes great damage. This is how damaged valves damage the cylinder. Typical swirl flaps suction damage. The vortex valves are positioned in the inlet and are controlled by vacuum (DDE 4.0) or electrically (DDE5.0 / DDE6.4) by the engine ECU. Effects of malfunctioning valves: Swirl valves are stuck in open position: Deterioration of exhaust gas performance at lower speeds. Swirl valves are stuck in closed position: Approximate power loss of 10% at high engine speeds. How swirl flaps work: Performance characteristics: The vortex valves are in the closed position, at low engine speeds and small amounts of fuel injected (controlled by the ECU card). They open under the following conditions: coolant temperature <14 ° C OR * fuel quantity> 24 mg OR 2. engine speed 2250 rpm OR 3. inlet air temperature <-5 ° C. BMW and Pierburg have decided to produce diesel engines with metal vortex valves. The speed at which the pistons in the diesel engine operate is at least 60 rpm, so a sucked vortex valve will break and cause a number of damages inside the engine. In most cases, one or more pistons are severely damaged, as a bonus you get valves, in some cases a head or turbocharger. And this combination with a BMW engine is like a cumulative jackpot 🙂 In 2004, BMW began work on the problem and improved the design, however, a number of owners reported ongoing problems in this area. The solution to this problem is by removing the vortex valves and plugging, which does not affect the performance of the engine and at the same time, you can safely pass the exhaust test. Engines: M47 (136hp VP44 fuel pump) has no valves. M47N common rail engine (including M47N / M47TU / M47TUD20) (150hp. Face lift model from 2001 -) has valves. M57 engines (M57D) (525d & 187hp. 330d) cars with manual transmission do not have valves, but those with automatic have. M57N engines (M57TUD) (525d & 330d 204hp) have vortex valves. Ruined swirl flapss: The plugs that replace the vortex valves are easy to find on the internet, but you can also find them here on our website. Typical plugs: Disassembly of vortex valves: The vortex valves can be safely dismantled and in most cases if they are removed properly no loss of power is felt. Final list of models for which vortex valves are installed: Engine: M47N/M47TU/M47TUD20 Applications: * 110 kW (148 hp) and 330 N·m (243 lb·ft) o E46 320d 2001-2005 o E83 X3 2.0d (up to end of 2006) Engine: M47TU2D20 The engine was updated again in 2004 as the M47TU2D20. Still at 1995 cc, it produced more power across the range. Applications: * 120 kW (161 hp) and 340 N·m (251 lb·ft) E60/E61 520d E87 120d E90/E91 320d E83 X3 2.0d (end of 2006 onwards) Engine: M57/M57D25 M57D25 was introduced in 2000. Applications: * 166 PS (122 kW; 164 hp) at 4000 rpm, 350 N·m (260 lb·ft) at 2000-2500 rpm with a 4750 rpm redline, models: 2000-2003 E39 525d *Vehicles With Automatic Transmission ONLY* Engine: M57N/M57TU/M57TUD25 M57TUD25 was introduced in 2004. Applications: * 177 PS (130 kW; 175 hp) at 4000 rpm, 400 N·m (300 lb·ft) at 2000-2750 rpm models: E60/E61 525d Engine: M57/M57D30 M57D30, also called M57D29, was introduced in 1998. Applications: * 184 PS (135 kW; 181 hp)@4000, 390 N·m (290 lb·ft)@1750-3200 models: E39 530d *Vehicles With Automatic Transmission ONLY* E46 330d/330xd *Vehicles With Automatic Transmission ONLY* * 184 PS (135 kW; 181 hp)@4000, 410 N·m (300 lb·ft)@2000-3000 models: E38 730d *Vehicles With Automatic Transmission ONLY* E53 X5 3.0d * 193 PS (142 kW; 190 hp)@4000, 410 N·m (300 lb·ft)@1750-3000 models: E38 730d E39 530d Engine: M57N/M57TU/M57TUD30 M57TUD30 was introduced in 2002. It originally produced 160 kW (215 hp) at 4000 rpm and 500 N·m (370 lb·ft) at 2000-2750 rpm, but was tweaked for 150 kW (201 hp) at 4000 rpm and 410 N·m (300 lb·ft) at 1500-3250 rpm for 2003 and again for 200 kW (268 hp) at 4000 rpm and 560 N·m (410 lb·ft) at 2000-2250 rpm in 2004. Applications: * 204 PS (150 kW; 201 hp)@4000, 410 N·m (300 lb·ft)@1500-3250 models: E46 330d/330Cd/330xd E83 X3 3.0d * 218 PS (160 kW; 215 hp)@4000, 500 N·m (370 lb·ft)@2000-2750 models: E53 X5 3.0d E60/E61 530d/530xd E65 730d * 272 PS (200 kW; 268 hp)@4000, 560 N·m (410 lb·ft)@2000-2250 E60/E61 535d * 245 PS (180 kW; 242 hp)@4000, 500 N·m (370 lb·ft)@2000-2250 * 286 PS (210 kW; 282 hp)@4000, 580 N·m (430 lb·ft)@2000-2250 Engine: M57TU2D30 M57TU2D30 was introduced in 2007, making its debut in the facelifted E60 and E61. * M57TU2D30-UL: 197 PS (145 kW; 194 hp) * M57TU2D30-OL: 235 PS (173 kW; 232 hp)@4000, 500 N·m (370 lb·ft)@2000-2750 * M57TU2D30-TOP: 286 PS (210 kW; 282 hp), 580 N·m (430 lb·ft) Applications: * 197 PS (145 kW; 194 hp), 400 N·m (300 lb·ft) models: E90/E91/E92 325d E60/E61 525d/525xd * 231 PS (170 kW; 228 hp)@4000, 500 N·m (370 lb·ft)@2000-2750 models: E65 730d E90/E91 325d E90/E91 330d/330xd * 235 PS (173 kW; 232 hp) models: E60/E61, BMW E70, BMW E71 * 286 PS (210 kW; 282 hp), 580 N·m (430 lb·ft) models: E60/E61 535d E70 X5 3.0sd E71 X6 xDrive35d E83 X3 3.0sd E90/E91 335d The above models are listed for information only if you want to to make sure your engine has valves installed, please contact a competent person. Please note that the information described above is for informational purposes only and does not claim to be reliable. Mr-key.com is not responsible for any repair work you undertake that is related to the topic described in this article.

The Essential Guide to Understanding Detachable Tow Bars

The Essential Guide to Understanding Detachable Tow Bars

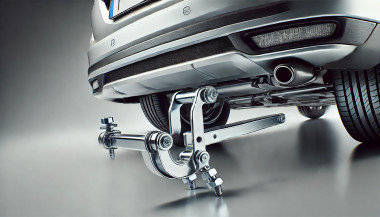
Detachable tow bars offer versatility and convenience for car owners who occasionally need to tow. Unlike fixed tow bars, they can be removed when not in use, maintaining your car's aesthetics and avoiding unnecessary bulk. However, understanding how they work, their benefits, and their maintenance requirements is essential to get the most out of your tow bar. Here’s what you need to know. Why Choose a Detachable Tow Bar? A detachable tow bar is an excellent solution if you only tow occasionally or prefer a clean look for your car when the tow bar is not in use. Here are some of its key advantages: Aesthetic Appeal : When removed, the tow bar does not interfere with the car's design. Convenience : Detachable tow bars are easy to attach and remove without tools, making them user-friendly. Versatility : They allow you to tow various loads, from trailers to bike racks, without permanently altering your car's appearance. Legal Compliance : In some regions, a visible, unused tow bar can lead to fines. A detachable option helps you avoid this. Types of Detachable Tow Bars Detachable tow bars come in different types, each suited to specific needs and preferences: Vertical Detachable Tow Bars Design : These tow bars fit seamlessly into your car’s underside, leaving no visible parts when removed. Best For : Those prioritizing aesthetics and a clean finish. Horizontal Detachable Tow Bars Design : These are partially visible but still maintain a low profile. Best For : Easier access and handling without compromising too much on appearance. Swan Neck Tow Bars Design : These have a slim, curved neck, making them stylish and less obtrusive. Best For : European-style vehicles and those who need a compact towing solution. How to Install and Use a Detachable Tow Bar Installing and using a detachable tow bar is straightforward, but following the proper steps ensures safety and efficiency: Read the Manual : Always start by reviewing the manufacturer’s instructions specific to your tow bar. Clean the Mounting Area : Dirt or debris can interfere with secure attachment. Secure the Tow Bar : Align the tow bar with the mounting bracket and ensure it clicks into place. Test Stability : Gently pull the tow bar to confirm it’s securely attached. Remove When Not in Use : Detach the tow bar and store it in a clean, dry place to prevent wear. Common Issues and Troubleshooting While detachable tow bars are convenient, they can occasionally present challenges. Here’s how to address some common problems: Stuck Tow Bar : If the tow bar is difficult to remove, check for rust or dirt in the mounting area. Use a lubricant to loosen it, but avoid using excessive force. Loose Connection : Ensure the tow bar clicks firmly into place during installation. A loose tow bar can be dangerous. Key Issues : If the locking mechanism doesn’t work, inspect the key and lock for dirt or damage. Sometimes, a replacement key may be necessary. Tips for Maintaining Your Detachable Tow Bar Proper maintenance can extend the life of your detachable tow bar and ensure its performance: Regular Cleaning : Clean the tow bar and mounting area to prevent rust and buildup. Lubricate Moving Parts : Apply a small amount of lubricant to the locking mechanism and other moving parts for smooth operation. Inspect for Damage : Check for signs of wear, cracks, or rust, especially if you tow frequently. Store Properly : When not in use, store the tow bar in a protective case or bag in a dry location. Safety Considerations When Towing Towing comes with responsibility. Here are some safety tips to keep in mind: Check Weight Limits : Never exceed your car or tow bar’s towing capacity. Inspect Connections : Ensure the tow bar and trailer hitch are secure before every trip. Test Lights : Verify that your trailer’s brake and signal lights are functioning properly. Drive Cautiously : Towing affects handling and braking. Allow extra time for stopping and maneuvering. Benefits of Investing in a Detachable Tow Bar For many drivers, a detachable tow bar offers the perfect balance of functionality and style. Whether you’re towing for leisure, work, or practicality, this option ensures: A clean car appearance when the tow bar is removed. Versatile use for different towing needs. Easy storage and maintenance. Detachable tow bars are a versatile and practical choice for occasional towing. With proper installation, regular maintenance, and a focus on safety, you can enjoy their convenience without compromising your car's aesthetics. Whether you're hauling a trailer or attaching a bike rack, a detachable tow bar offers flexibility and ease for all your towing needs. What Will You Receive When Your Order is Complete? When you place an order, you’ll receive two perfectly cut keys for Witter, GWD, TOW Trust, or Renz towbars, tailored to your original key code. These keys are compatible with lock codes within the ranges TR01-TR10 or 32001-32200. Simply select your code from the dropdown menu (e.g., TR03), and we’ll take care of the rest. Order Your Keys Today!

Effortlessly Ordering Multiple Replacement Car Keys: A Step-by-Step Guide

Effortlessly Ordering Multiple Replacement Car Keys: A Step-by-Step Guide

As a car owner, managing multiple key replacements can be daunting. Fortunately, there's a streamlined method to order several keys simultaneously using a CSV file. Here's how you can simplify the process: 1. Prepare Your Key List Create a Spreadsheet: Use software like Microsoft Excel to list your key codes. Enter Details: In Column A, input each key code; in Column B, specify the quantity needed. Avoid Headers: Start directly with your data; do not include column titles. 2. Save as CSV Choose CSV Format: When saving, select 'CSV (Comma delimited)' from the 'Save as type' dropdown. Ensure Correct Format: Avoid other CSV formats to prevent compatibility issues. 3. Upload Your CSV File Access Your Account: Log into your trade account on the key replacement website. Navigate to Product Page: Find the specific key product you need. Upload CSV: Click the 'Upload a CSV' button above the key number entry field and select your file. Wait for Processing: Large files may take time to upload; remain on the page until completion. 4. Complete Your Order Add to Basket: Once uploaded, click 'Add to basket.' Proceed to Checkout: Follow the standard payment process to finalize your order. Important Considerations Separate Files for Different Keys: If ordering various key types or series, create individual CSV files for each. Trade Account Requirement: This feature is typically available to trade account holders; ensure you have the necessary access. By following these steps, you can efficiently manage bulk key replacements, saving time and ensuring accuracy.

Chat with us