Post Name

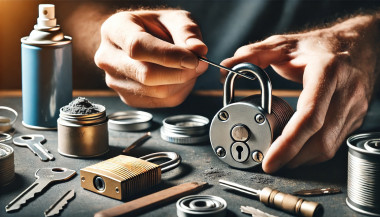
Changing or removing the lock barrel on your roof rack may seem like a daunting task, but it’s actually simpler than you might think. Whether you need a replacement due to a lost key, wear and tear, or just want to swap out an old lock for a new one, following the right steps can make the process hassle-free. This guide will walk you through everything you need to know about handling a roof rack lock barrel with ease.

Why You Might Need to Change a Roof Rack Lock Barrel ?

There are several reasons why you may want to replace or remove your roof rack lock barrel:

  • Lost Key: If you've misplaced the key, replacing the lock barrel is often the most practical solution.
  • Upgrading the Lock: Maybe you want a more secure lock for added peace of mind.
  • Routine Maintenance: Over time, lock barrels can wear down, making it harder to insert or turn the key.
  • Uniformity: If you've recently changed your car key, you may want to match your roof rack lock with it.

Knowing why you’re changing the lock barrel will help you determine the steps you need to follow.

What You’ll Need

Before you start, gather these essential tools and items:

  • Replacement Lock Barrel: Ensure it’s compatible with your roof rack model.
  • Master Key or Removal Key: Often required to remove the old lock barrel.
  • New Key: The key that corresponds to the replacement lock barrel.
  • Flathead Screwdriver: To gently pry and release certain parts if needed.

Step-by-Step Guide to Removing a Roof Rack Lock Barrel

Removing a lock barrel from your roof rack doesn’t require extensive mechanical skills. Just follow these straightforward steps:

1. Locate the Lock Barrel

The lock barrel is usually situated in the center or side of the roof rack. Look for the small lock with the keyhole, as this is where you'll be inserting the master or removal key.

2. Insert the Master Key or Removal Key

If you have a master or removal key, insert it into the lock. This is often a universal key provided by the lock manufacturer specifically for removing lock barrels. Once it’s inserted, turn the key slightly to unlock the barrel.

Tip: If you don’t have a removal key, contact a professional or see if you can order one specifically for your model.

3. Pull the Lock Barrel Out

With the removal key still in place, gently pull the lock barrel out. If it’s resistant, try wiggling it slightly while pulling. Avoid forcing it, as this could damage the lock or roof rack. In some cases, you may need a flathead screwdriver to help pry it out, but be careful not to scratch the surrounding area.

4. Check the Casing

After removing the lock barrel, inspect the casing where the barrel was installed. Make sure it’s clean and free of debris. Any dirt or rust could interfere with the new lock barrel, so it’s a good idea to clean this area before proceeding.

Installing the New Lock Barrel

Once the old barrel is removed, you’re ready to install the new one. Here’s how:

1. Align the New Lock Barrel

Take your new lock barrel and align it with the casing where the old one was. Most barrels are designed to fit in only one direction, so make sure you align it properly to avoid jamming.

2. Insert the New Barrel

Push the new lock barrel into the casing until it clicks into place. This might require a bit of pressure, but it should fit snugly without needing excessive force.

3. Test the New Key

After installing the new lock barrel, insert the new key and turn it to ensure it’s working smoothly. The key should turn easily and lock securely. This step verifies that the new lock is properly aligned and functional.

Common Challenges and Solutions

While changing a roof rack lock barrel is generally straightforward, you might encounter some challenges. Here’s how to troubleshoot common issues:

  • Stuck Barrel: If the old barrel is stuck, apply a lubricant like WD-40 around the lock to help loosen it.
  • No Removal Key: If you don’t have a master or removal key, consider reaching out to a locksmith or checking if the manufacturer offers a replacement.
  • Barrel Won’t Fit: Ensure you’ve purchased a compatible lock barrel. Even slight differences in design can prevent it from fitting properly.

Tips for Maintaining Your Roof Rack Lock

To keep your new lock barrel in good condition and prevent the need for frequent replacements, consider these maintenance tips:

  • Regular Cleaning: Dirt and grime can accumulate inside the lock over time, making it harder to operate. Clean the lock regularly to prevent this.
  • Use Lubricant: Apply a small amount of lubricant inside the lock barrel periodically to keep the key turning smoothly.
  • Protect from Rust: If your roof rack is exposed to rain and humidity, use a protective cover or shield to keep moisture out of the lock barrel.
  • Check Key Fit: Avoid using a damaged or bent key, as this can wear out the lock barrel more quickly.

When to Seek Professional Help

In some cases, removing or replacing a roof rack lock barrel might require assistance from a professional:

  • Lost or Damaged Keys: If both your main key and master key are lost or damaged, a professional can help retrieve or replace the lock barrel.
  • Damaged Lock Mechanism: If the lock itself is damaged or jammed, forcing it can make things worse. A professional locksmith can safely remove and replace it.

Replacing or removing a roof rack lock barrel is an affordable and manageable task for most car owners. By following the right steps and keeping up with regular maintenance, you can ensure your roof rack lock stays functional and secure. Whether you’re upgrading for security or replacing a worn-out lock, a new lock barrel can make all the difference in keeping your roof rack safe.

Effortless Key Replacement for a Variety of Locks

Order 2x Union Keys FT Series, custom-cut to your original key code, for a hassle-free replacement. Compatible with a range of locks, including those from Aston Martin, Jaguar, Land Rover, and more, these keys are perfect for classic cars, caravans, petrol caps, roof racks, and truck canopies. Simply find your lock code (e.g., FT101-FT360) on the lock face and enjoy fast delivery of high-quality spare keys.

Related Posts

Do Car Keys Have GPS? What You Need to Know About Key Tracking

Do Car Keys Have GPS? What You Need to Know About Key Tracking

In an age where smartphones can locate us with pinpoint accuracy and lost luggage can be tracked halfway around the world, it’s easy to assume car keys are just as smart. But for many frustrated drivers, losing a car key feels like sending it into a black hole. The lack of a clear way to find them often leads to stress, wasted time, and sometimes costly replacements. So here’s the big question: Do car keys have GPS, and can they be tracked like other smart devices? This article explains the technology behind key tracking, compares GPS with Bluetooth, and offers practical ways to find lost keys in a connected world. The Truth About GPS in Car Keys While GPS technology has become common in many consumer devices, the vast majority of car keys do not include built-in GPS. Even the most modern remote key fobs, which allow for keyless entry and push-button start, generally lack the components necessary for GPS functionality. These components include a satellite GPS receiver, a data transmission module, and a sustainable power source—none of which are typically found in a key fob. The design of a car key prioritizes compactness, cost-efficiency, and low energy usage. Adding GPS would not only increase manufacturing costs but also introduce battery life challenges. That’s why most manufacturers have opted against including GPS tracking in car keys. GPS requires constant power and data transmission — something a small coin cell battery in a typical key fob can’t support." – Marcus Lee, Automotive Tech Analyst How Can Car Keys Be Tracked? Although your keys may not have GPS, there are other technologies that make it possible to track or locate them when they’re lost. These include Bluetooth trackers, crowdsourced networks, and GPS systems that track the vehicle instead of the key itself. 1. Bluetooth Trackers (Apple AirTag, Tile, Chipolo) These small, attachable gadgets can be added to your keychain and linked to a mobile app. They rely on Bluetooth to provide location data when within a certain range. If your keys are somewhere nearby—like in your home or office—these trackers can play a sound or show you their last known position on a map. The range is generally up to 120 meters (400 feet), and battery life can last up to a year, making them a practical, low-maintenance option for most users. 2. Crowdsourced Networks (Find My, Tile Network) If your Bluetooth tracker is out of range, some brands offer a smart workaround. Apple’s AirTag, for instance, uses the “Find My” network, which consists of millions of iPhones around the world. If someone with an Apple device passes near your lost keys, the location is anonymously and securely sent to your phone. This creates a global, decentralized tracking system that mimics GPS functionality without requiring satellites or cellular connections. 3. Car GPS Systems (Vehicle Only, Not the Key) Some high-end cars offer integrated GPS systems, but these track the vehicle, not the keys. Brands like Tesla, BMW, and Mercedes-Benz allow owners to locate their car through mobile apps. If your keys are left inside the car, you may be able to find them by locating the vehicle. However, once the keys are removed, they cannot be tracked unless equipped with a separate Bluetooth tracker. GPS vs Bluetooth: What’s the Difference? To better understand why GPS isn’t commonly included in car keys, it’s useful to compare the two technologies: GPS provides global, real-time tracking with high precision, but it’s power-intensive and costly. Bluetooth, while more limited in range, is ideal for small items and short distances, offering a cost-effective solution for everyday use. Global Perspectives on Key Tracking Around the world, the adoption of key tracking technologies differs based on privacy laws, tech infrastructure, and consumer behavior. In Japan and South Korea, smart home and car integration are advanced, yet GPS-enabled keys are still not the norm. In many parts of Europe, particularly in countries like Germany, Bluetooth solutions are favored due to strict data privacy regulations. In contrast, the U.S. market has embraced personal tracking devices like Apple AirTag and Tile, making them increasingly common accessories. These differences highlight how technology adoption often reflects broader cultural and legal norms, as well as the balance between convenience and privacy. Smart Tips to Keep Track of Your Keys Whether your keys have advanced tech or not, you can take simple steps to avoid losing them. Attaching a Bluetooth tracker is a great first line of defense. Keeping your keys in a consistent, designated place at home reduces the chances of misplacement. Many tracking apps also offer “left behind” alerts, which notify you if you leave your keys behind when moving out of range. It's also smart to keep a spare key somewhere safe and consider going keyless if your next car allows it. Implementing a few of these habits can save you time, frustration, and the cost of replacing a lost key. The Future of Key Tracking While car keys may not have built-in GPS, technology continues to evolve with practical alternatives. Bluetooth trackers, supported by app alerts and community networks, already provide effective ways to find lost keys. As innovation progresses, we can expect even more seamless solutions, such as Ultra Wideband (UWB) technology and Internet of Things (IoT) integrations, to become mainstream. As our tools become smarter, so must the way we use and manage them. With a little foresight and the right accessories, you'll never lose track of your keys again.

Simple Tips to Free a Stuck Lock: What You Need to Know

Simple Tips to Free a Stuck Lock: What You Need to Know

Locks are meant to provide security, but when they seize up, they can leave you feeling frustrated and helpless. Dealing with a stuck lock is more common than you might think, and thankfully, there are affordable and effective solutions to get it working smoothly again. Whether it's a car door, trunk, or your home lock, here are some tried-and-true methods to free up a jammed lock. Why Locks Seize Up Understanding the causes behind a stuck lock can help you prevent it from happening in the future. Locks can seize up for various reasons: Dirt and Debris : Over time, dust, grime, or even small particles can accumulate inside the lock mechanism, making it harder for the internal parts to move smoothly. Rust and Corrosion : Exposure to moisture, humidity, or salty air can lead to rust buildup on metal parts within the lock, which can prevent movement. Lack of Lubrication : Locks need to be lubricated occasionally to ensure smooth operation. Without lubrication, friction increases, and the lock may eventually jam. Now, let’s look at some simple steps to tackle a seized lock. Step 1: Use Graphite Powder or Dry Lubricant The first thing to try is applying a lubricant, but be careful about what type you use. Wet or oil-based lubricants can attract dust, which eventually clogs the lock. Graphite Powder : This is one of the best options for freeing up a stuck lock. Sprinkle a small amount of graphite powder into the keyhole, insert the key, and gently move it back and forth. This spreads the graphite, reducing friction and allowing the lock components to move more freely. Dry Lubricants : These are specifically designed for locks and are ideal for situations where you want to avoid residue buildup. Spray a small amount into the lock, then insert the key and gently turn it. Pro Tip : Avoid using regular WD-40 or other oil-based products, as they may lead to a buildup over time, making the problem worse. Step 2: Try the Key with Gentle Force If lubrication alone doesn’t do the trick, the next step is to use a little gentle force with your key. Be cautious here; applying too much force could break the key inside the lock. Insert the Key : Once the lubricant has been applied, insert the key fully into the lock. Wiggle Carefully : Gently wiggle and turn the key without applying too much force. This movement may help distribute the lubricant further and gradually loosen up any stuck components. Caution : If you feel excessive resistance, don’t force the key. Forcing it can cause damage or even snap the key, which would require additional assistance to remove. Step 3: Warm Up the Lock (Especially Useful for Cold Weather) Cold temperatures can cause locks to seize due to ice or metal contraction. If you suspect the cold is the issue, warming up the lock can be effective. Use a Hair Dryer : Direct warm air onto the lock for several minutes to allow the metal to expand and the ice (if any) to melt. Heat the Key : You can also try warming the key slightly with a lighter, but exercise caution and make sure it isn’t too hot before inserting it into the lock. Safety Note : Avoid open flames directly on the lock itself, as this can damage surrounding surfaces or even warp the lock mechanism. Step 4: Use a Vinegar Solution for Corroded Locks If rust is the culprit, vinegar is a great household solution for loosening rust and corrosion in a lock. Apply Vinegar : Put a few drops of vinegar on the key, insert it into the lock, and let it sit for a minute or two. Vinegar can help dissolve light rust, making it easier to turn the key. Follow with Lubricant : After using vinegar, apply a small amount of graphite powder or dry lubricant to ensure the lock remains smooth and functional. Step 5: Work with Compressed Air to Remove Debris If dirt or debris has accumulated inside the lock, compressed air is a quick and efficient way to clear it out. Blow Out Dust : Use a can of compressed air and direct the nozzle into the keyhole. Short bursts of air can blow out dust and small debris that may be obstructing the mechanism. Follow Up : After using compressed air, it’s a good idea to add a dry lubricant to prevent any remaining dust from causing future jams. How to Prevent Lock Seizure in the Future Once you’ve successfully freed a seized lock, it’s helpful to take steps to prevent it from happening again. Here are some preventive tips: Regularly Lubricate : Use a dry lubricant or graphite powder once or twice a year, especially if you live in a humid or dusty area. Keep Locks Clean : Wipe off any visible dirt or dust around the lock mechanism. If the lock is exposed to elements (like outdoor or car locks), covering it can help keep debris and moisture out. Avoid Overusing Keys : If your key shows signs of wear, consider getting a replacement. Worn-out keys can cause more friction inside the lock, leading to jams. When to Seek Professional Help Sometimes, despite your best efforts, a lock just won’t budge. In cases where the lock is significantly damaged, heavily corroded, or if the key breaks inside, it’s best to reach out for professional assistance. A professional has specialized tools and expertise to address these issues without causing further damage. Taking Care of Your Locks A stuck lock can be an inconvenience, but by following these simple steps and using a little patience, you can often resolve the issue without professional help. Keeping locks in good condition with regular care is the key to ensuring they function smoothly for years to come.

Jaguar and Land Rover Key Fobs: Common Problems & How to Fix Them

Jaguar and Land Rover Key Fobs: Common Problems & How to Fix Them

Owning a Jaguar or Land Rover means enjoying luxury, performance, and cutting-edge technology. But like any high-tech component, your key fob isn’t immune to problems. Whether you drive a Jaguar F-PACE, a Land Rover Discovery, or any other model, a malfunctioning key fob can quickly become an inconvenience. The good news is that most key fob issues can be resolved quickly and affordably . Here’s what you need to know about the most common Jaguar and Land Rover key fob problems and how you can fix them. Your Key Fob Isn’t Responding Pressing the button without any response is one of the most common issues. If your key fob isn’t unlocking or locking your car, the most likely culprit is a dead battery. Replacing it with a high-quality CR2032 battery is often the easiest fix. However, if the problem persists, your key fob may need reprogramming, or its internal electronic components might be damaged. Checking your vehicle’s manual for reprogramming instructions or visiting a dealership can help resolve the issue. In cases of water damage or physical impact, a complete key fob replacement might be necessary. Reduced Key Fob Signal Range If you notice that you need to be much closer to your car than usual for the key fob to work, the battery is likely weakening. Replacing the battery should be your first step. Other factors, such as interference from electronic devices like smartphones or WiFi routers, may also contribute to signal issues. Storing your key away from such devices can help. If these steps don’t improve the range, internal damage to the key fob’s antenna may require a replacement shell or an upgrade to a new key fob. Unresponsive or Sticking Buttons Over time, dirt and debris can accumulate under the buttons, making them less responsive or difficult to press. Cleaning the key fob with a soft cloth and isopropyl alcohol can help restore functionality. If the buttons feel loose or fail to click, a replacement shell might be necessary. In some cases, the internal button contacts wear out, requiring a full key fob upgrade. “Smart Key Not Found” or Keyless Start Issues If you see a “Key Not Found” message when trying to start your car, the issue may be a low battery in your key fob. Holding the key fob closer to the start button can sometimes override the problem, as many Jaguar and Land Rover models have a backup proximity sensor. If the issue persists, replacing the battery or consulting your vehicle’s manual for emergency start procedures might be required. If none of these solutions work, there may be a deeper issue with the vehicle’s keyless entry system. Spare Key Fob Not Working A backup key fob that hasn’t been used for a long time may no longer work when you need it. This can happen if the battery has drained due to inactivity or if the key has lost its programming. Regularly testing your spare key can prevent surprises. Replacing the battery should be the first step, and if the key has lost its programming, a visit to a professional or dealership may be necessary to restore its functionality. When to Replace Your Key Fob If you’ve tried all these fixes and your Jaguar or Land Rover key fob is still not working, it may be time for a replacement. Internal components wear out over time, and investing in a new key fob can save you from frustrating lockouts and start failures.

How to Take the Perfect Photo of Your Key for Easy Replacement

How to Take the Perfect Photo of Your Key for Easy Replacement

When you need a replacement key , taking a clear, detailed photo of your key can make the process much faster and more accurate. A high-quality image helps key makers understand the exact specifications, cuts, and dimensions of your key, which is especially important if you don’t have a spare. In this guide, we’ll walk you through the best practices for photographing your key so you can get an accurate replacement with ease. Why a Clear Key Photo Matters Photographing a key might sound simple, but it requires a bit of attention to detail. A well-taken photo captures the key’s grooves and unique cuts clearly, helping the key cutter replicate the exact pattern. Saves Time : A high-quality photo reduces the need for multiple attempts to cut a new key. Ensures Accuracy : Clear images help capture specific details, leading to a more precise fit. Convenient Process : With just a smartphone and a few tips, you can photograph your key from home without needing special equipment. Essential Tools for Photographing Your Key To take a clear photo of your key, you don’t need much beyond a few household items. Here’s what you’ll need: Smartphone or Camera : A phone camera is usually sufficient, but a standard digital camera works well too. Plain Background : Choose a neutral, solid-colored background like a piece of white paper or a smooth table surface. Good Lighting : Natural daylight or a bright room light helps capture details without shadows. Small Object for Elevation : A coin or similar item can lift the key slightly, making it easier to photograph. Step-by-Step Guide to Taking the Perfect Key Photo Follow these steps to take a photo that ensures clarity and accuracy for key replacement. 1. Set Up the Background Place a piece of plain white paper or another smooth, light-colored surface under your key. The solid color helps the details of the key stand out without any visual distractions. Tip : Avoid backgrounds with patterns or textures, as these can obscure the key’s features. 2. Position the Key Correctly Lay the key flat on the background, with the grooves and cuts facing up. The key should be positioned horizontally to allow a clear view of all its details. Side Profile : Make sure to capture the side profile that shows the cuts and grooves. Elevate Slightly : Place a coin or small object under one end of the key to angle it slightly toward the camera. This can help reduce shadows and improve focus on the cuts. 3. Adjust Lighting Good lighting is essential for capturing details. If possible, photograph your key in natural daylight near a window or use a well-lit room. Avoid Shadows : Ensure that no shadows fall across the key, as they can obscure details. Diffuse Light : If using a lamp, consider placing a thin cloth over it to diffuse the light and reduce harsh reflections. 4. Focus and Zoom Make sure your camera or smartphone is focused directly on the key. You may need to tap the screen to bring it into sharp focus. Zoom in Carefully : If you’re using a smartphone, zoom in slightly to capture the details, but avoid over-zooming, which can blur the image. Test Multiple Angles : Sometimes a slight adjustment in angle can capture the cuts more effectively, so take a few shots from slightly different perspectives. 5. Capture Multiple Photos It’s always a good idea to take several photos to ensure you have the best one. Try different angles and lighting adjustments to capture as many details as possible. Close-Up of the Grooves : Take one close-up image focusing on the cuts and grooves of the key. Overall Image : Include one full-length photo that shows the entire key from end to end. Try Different Angles : Slightly tilt the key or move the camera to see which angle best captures the detail of the cuts. Common Mistakes to Avoid When Photographing Your Key To get the best results, steer clear of these common issues that can impact the quality of your key photo: Blurry Images : If your hand shakes, use a small tripod or prop your phone on a stable surface. Poor Lighting : Avoid taking photos in dim rooms; use bright light to ensure the key is clearly visible. Obstructed Details : Make sure the entire length of the key is visible, without any part being cut off or covered. Tips for Ensuring a Smooth Replacement Process Once you have a clear photo of your key, there are a few final steps to make the replacement process as efficient as possible. Check the Photos : Look over your photos before sending them to ensure that they’re clear and detailed. Label the Key : If you’re photographing multiple keys, label each one in the image or add a note to avoid confusion. Include Measurements : If possible, add the measurements of the key’s length and width in your notes for added accuracy. A clear, detailed photo of your key can save you time and effort when seeking a replacement. By following these simple steps, you’ll provide all the necessary details to ensure your new key is an accurate match. Remember, good lighting, focus, and capturing all the unique cuts are essential to achieving the best results. With these guidelines, you’re set to take a photo that will make your key replacement process smooth and hassle-free.

Chat with us