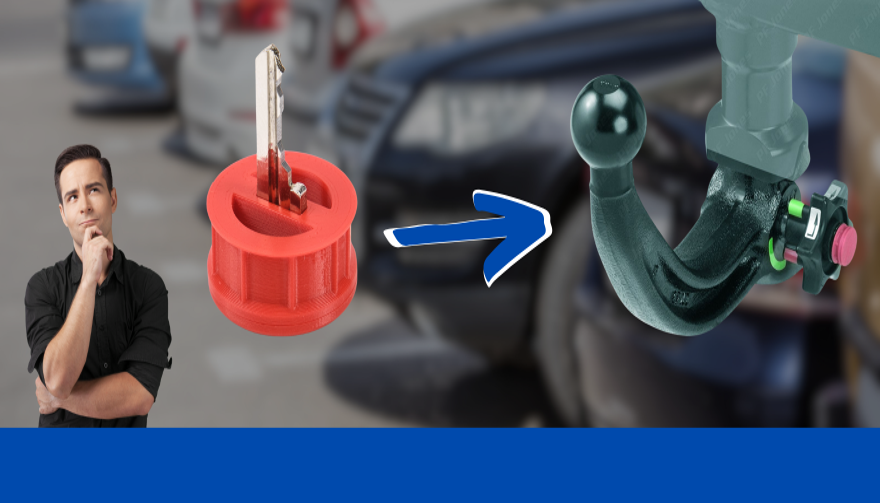
Post Name

Westfalia towbars are a common choice for many car owners due to their reliability and ease of use. However, because you may use your Westfalia towbar key sporadically throughout the year, it’s not uncommon to misplace it, often at the most inconvenient times—like when you're about to go on vacation.

If you've lost your key, you might not know the number of the key you need to order a replacement. Fortunately, there is a way to determine this, depending on whether your towbar lock has a 3-digit or a 5-digit number.

Step 1: Check the Number on Your Towbar Lock

The first step is to inspect your towbar lock to see if it has a 3-digit or 5-digit number. Here’s what to do next:

Sample picture of how 5-digits lock number looks like.

  • If you have a 3-digit number: Unfortunately, the key code remains unknown based on this number alone. We can only manufacture a new key if you have at least one original key and can provide us with the W** or 2W** code from it.
  • If you have a 5-digit number: You're in luck! You can easily determine the correct key code. The key code is based on the last two digits of the 5-digit lock number, prefixed with "2W".

Step 2: Calculate Your Key Code

If your towbar lock has a 5-digit number, simply ignore the first three digits and use the last two digits. Prepend "2W" to these digits to form the key code.

For example, if the code on your lock is 33322, then your key code is 2W22. This code will be the number you provide when ordering a replacement key.

Even if your 5-digit lock code starts with a different set of three digits, the method remains the same—ignore the first three and focus on the last two digits.

For your convenience, we include our key code generator below.

What to Do If You’ve Lost All Your Keys

If you have lost all your keys and only have the 5-digit number on the lock, you can still determine the correct key using the method described above.

 Unfortunately, if your lock only has a 3-digit number, the specific key code cannot be determined based on the number alone.

Remember, the key code is crucial for obtaining a replacement key. If the towbar was manufactured after 2008, the 5-digit code on the lock cylinder will allow you to identify the correct key. Simply use the last two digits and prefix them with "2W" to get the key code.

If you're ever unsure, it's always a good idea to reach out to the manufacturer or a professional who can assist in identifying the correct key.

Conclusion

Choosing the correct key for your Westfalia towbar is straightforward if you know what to look for. By following these steps, you can quickly determine the correct key code and ensure you're never stuck without access to your towbar when you need it most. Be sure to keep your key code information safe, and consider having a spare key made to avoid future issues.

Click Here To Order Your Westfalia Towbar Key >>

Related Posts

The Real Cost of Replacing a Motorcycle TFT Display: Prices, Causes, and Hidden Costs

The Real Cost of Replacing a Motorcycle TFT Display: Prices, Causes, and Hidden Costs

Motorcycle TFT displays are no longer simple speedometers. They are high-resolution computers bonded to glass, sealed against weather, coded to the bike’s electronics, and integrated into safety systems. When a broken TFT display happens, the bill is rarely just “a screen.” Below is the most complete, Europe-focused breakdown of motorcycle display replacement cost you’ll find online—built for riders who are actively searching for replacement prices and real-world risks. What Actually Breaks When a TFT Display Fails A TFT failure is rarely cosmetic. Modern displays are laminated units. Damage spreads. Common failure modes Cracked outer glass → moisture ingress follows Dead pixels or pixel lines → panel failure, not fixable Water ingress / condensation → corrosion of PCB and connectors Sun delamination → layers separate, image fades or ghosts Complete blackout → power board or CAN communication fault Once moisture enters, replacement—not repair—is the only OEM-approved path. Motorcycle Display Replacement Cost (Europe, Real Numbers) These are OEM replacement ranges in Europe, excluding insurance, based on dealer parts pricing, labour, and required coding. Brand Typical TFT Replacement Cost (€) Yamaha €650 – €1,400 BMW €1,200 – €2,500 Honda €800 – €1,800 Triumph €900 – €2,000 Kawasaki €700 – €1,600 Important: These are not worst-case numbers. They are normal dealer outcomes once a display is declared faulty. Why TFT Replacement Is So Expensive 1. The screen is bonded, not modular You cannot replace “just the glass.” The LCD, digitizer, polarizer, and control board are sealed together. 2. Coding & pairing is often mandatory Many TFT units must be coded to the ECU / immobiliser . Without dealer software: Warning lights remain Ride modes may not function Service intervals can’t be reset This adds labour and eliminates cheap aftermarket options. 3. Dead pixels = full replacement Unlike TVs or phones, dead pixels on motorcycle TFTs are not serviceable . OEM policy treats this as a safety-critical component. 4. Water ingress escalates damage fast Condensation today becomes corrosion tomorrow. Displays that “still work” often fail weeks later. The Most Expensive Damage Types (Ranked) Water ingress / condensation Often invisible at first Leads to PCB corrosion Almost always ends in full replacement Dead pixels / pixel columns Caused by pressure, UV heat, or micro-fractures No repair path Cracked glass Immediate usability loss Allows moisture entry Sun delamination Common on bikes parked outdoors Progressive, irreversible Real-World Cost Example (BMW vs Yamaha) BMW adventure / sport models TFT unit: €1,500–€2,200 Coding & labour: €200–€400 Total: €1,700–€2,600 Yamaha mid-range models TFT unit: €700–€1,100 Labour: €100–€250 Total: €800–€1,350 Same problem. Vastly different outcomes. Why “Used” or eBay TFT Displays Are Risky Many riders try to save money this way. Most regret it. VIN or ECU mismatch Immobiliser conflicts No warranty Hidden moisture damage Dealer refusal to code A used TFT that fails after installation means paying twice . The Preventable Part: Surface Damage That Starts It All Most catastrophic failures start small: Fine scratches Stone impacts UV exposure Heat cycling Once the protective surface is compromised, water ingress and pixel failure follow . That’s why many riders choose hydrogel motorcycle screen protectors —they absorb impact, self-heal micro-scratches, and add a moisture barrier without affecting visibility. You can browse motorcycle screen protectors by brand and model here → Motorcycle TFT screen protectors for Yamaha, BMW, Honda, Triumph & Kawasaki . (Exact fit matters. Generic films do not.) What Dealers Rarely Warn You About Condensation voids goodwill claims Pixel defects worsen with time Sun damage is considered “wear” Even hairline cracks can invalidate warranty By the time you ask for a quote, the outcome is usually decided. FAQ — Motorcycle TFT Display Replacement How much does a motorcycle TFT display cost to replace? In Europe, expect €650 to €2,500+ , depending on brand, model, and coding requirements. Can dead pixels be repaired? No. Dead pixels mean full TFT replacement on modern motorcycles. Is condensation inside the display dangerous? Yes. Condensation indicates seal failure and usually leads to corrosion and total failure. Can I ride with a broken TFT display? Often no. Many bikes rely on the TFT for warnings, modes, and diagnostics. Does a screen protector really help? Yes—for scratch prevention, impact absorption, and moisture protection . It cannot fix damage, but it significantly reduces risk. Are aftermarket TFT displays a safe option? Rarely. Most lack proper integration, coding support, or durability. Protecting a €1,500 Part Costs a Fraction A motorcycle TFT display is one of the most expensive components on your bike that faces direct impact, UV exposure, heat, and water—every ride . If you want model-specific protection designed for your exact display shape, visit our shop at mr-key.com and choose the right motorcycle screen protector for your bike.

Which Cars Benefit Most From Hydrogel Navigation Protection? (2026 Overview)

Which Cars Benefit Most From Hydrogel Navigation Protection? (2026 Overview)

Modern cars rely heavily on large navigation and infotainment screens. These displays are used constantly and exposed to scratches, fingerprints, dust, heat and direct sunlight. Repairs are expensive, and replacement screens can cost several hundred euros. A hydrogel screen protector adds a thin, flexible layer that guards the display without affecting clarity or touch response. Premium and Luxury Models Premium brands adopted large infotainment screens early, making them among the most likely to benefit. BMW models such as the 3 Series , 5 Series and X5 use wide, high-resolution displays (up to 14.9”). Audi cars like the A4 , A6 and Q5 include 10–12” touchscreens. Mercedes-Benz models such as the C-Class , E-Class and GLC use vertically oriented 11–12” MBUX screens. Porsche vehicles (Cayenne, Macan, Panamera) and Tesla models (Model 3, Y, S) use some of the largest screens in Europe. These vehicles benefit significantly from a hydrogel protector thanks to their large surfaces and frequent touch use. Popular European Models Mainstream European cars now feature screens as large as luxury models. Volkswagen offers 10–15” displays in models such as the Golf , Tiguan and Passat . Škoda uses up to 13” screens in the Octavia , Superb and Kodiaq . Dacia equips models like the Jogger , Duster and Sandero with 7–10” displays. Toyota (Corolla, RAV4, Yaris Cross). Renault (Captur, Clio, Megane E-Tech). Peugeot (208, 3008, 5008) Citroën (C4, C5 Aircross) Nissan (Qashqai, Juke, Leaf) Ford (Focus, Kuga) Kia (Sportage, Ceed, Niro, Picanto, Stonic, Rio, Sorento) all rely on large central touchscreens. As screens grow in size across all price segments, protection becomes increasingly important. Benefits of Hydrogel Screen Protectors Hydrogel film is thin, flexible and adheres tightly. It works on flat and curved surfaces where tempered glass cannot. The material absorbs small impacts and can self-heal minor marks. With its anti-glare properties It keeps the display clear, maintains original brightness and preserves smooth touch performance. It also helps reduce smudges and makes daily cleaning easier. Once you’ve chosen a hydrogel protector for your car, the next step is applying it correctly. Follow our step-by-step guide on how to install a hydrogel navigation screen protector for a perfect bubble-free result. Who Needs Hydrogel Protection the Most? Any car with: a large touchscreen (8” or more) glossy glass prone to fingerprints curved edges high cabin sun exposure Hydrogel is especially useful for daily drivers, family cars and vehicles where multiple people interact with the system. Rental, Company and Service Vehicles Benefit Even More Cars used for business—such as rental cars , company vehicles , fleet cars , taxis , and service vehicles —experience significantly higher daily usage than private cars. Their navigation screens are touched constantly by different drivers, exposed to dust, temperature changes and frequent cleaning. Because of this heavy wear, screens in rental and company vehicles are far more likely to show scratches, fingerprints and long-term damage. A hydrogel dashboard screen protector adds a durable layer that absorbs daily abuse, keeps the display clear for every driver and reduces maintenance costs for fleet managers. For any vehicle that is shared or driven by multiple users, screen protection is not just useful—it’s essential . FAQ What is a hydrogel screen protector? A thin, flexible film that protects a car’s navigation or dashboard display. How is it installed? Clean the screen, align the film and press it down. Dry installation is recommended. What are the benefits? Scratch resistance, impact absorption, reduced fingerprints and full coverage on curved screens. Is it compatible with all cars? Yes, if you choose a protector cut for your specific model. Does it affect touch response? No. Hydrogel keeps full touch accuracy. How long does it last? Usually 1–3 years, depending on use. Easy to replace. Hydrogel vs tempered glass? Hydrogel fits curved screens and absorbs impacts. Glass is harder but can crack and does not cover complex shapes. For more in depth guide check out Hydrogel vs Tempered Glass Navigation Protectors Comparison How can I protect my car’s navigation screen from scratches and fingerprints? If you want to know more about How to Protect Your Car’s Navigation Screen from Scratches and Fingerprints check out our guide. Visit mr-key.com to find a custom-cut hydrogel protector for your car model. Related Guides How to Install a Hydrogel Navigation Screen Protector How to Protect Your Car’s Navigation Screen from Scratches, Glare & Fingerprints Hydrogel vs Tempered Glass Navigation Protectors Comparison

How to Program a Car Key: A Step-by-Step Guide

How to Program a Car Key: A Step-by-Step Guide

Lost Your Car Key Programming? Here's What to Do Have you ever lost your car keys or found yourself with a spare key that doesn’t start your vehicle? While the process of programming a car key might seem intimidating, it’s often simpler than you’d expect. In many cases, car owners can program keys themselves without needing a visit to a dealership. This guide walks you through the essentials of car key programming, helping you save time, effort, and potentially a significant amount of money. Understanding Car Key Programming: The Basics Car key programming is the process of syncing a key with a car's internal computer so it can communicate securely. Modern vehicles use transponder keys or smart keys equipped with chips that emit a unique signal. Without proper programming, these keys won’t function, even if they fit perfectly into the ignition. While older mechanical keys didn’t require programming, today’s advanced systems add a layer of security, reducing the risk of car theft. However, this added sophistication means that replacing or reprogramming a key is no longer as simple as cutting a piece of metal. Quick Tip: Check your vehicle’s owner manual to see if programming your car key is a DIY-friendly process, as some models allow self-programming, while others require professional tools. Step-by-Step Guide to Programming a Car Key Before starting, ensure you have all necessary tools and information: The vehicle’s owner manual. All keys that need programming, including the functional ones. Step 1: Access Programming Mode Start by sitting in the driver’s seat with all the doors closed. Insert the already functional key into the ignition and turn it to the “on” position (do not start the engine). Some vehicles require you to cycle the key between “on” and “off” positions a specific number of times to enter programming mode. Step 2: Add the New Key Once in programming mode, remove the functional key and quickly insert the new key into the ignition. Turn it to the “on” position. The vehicle’s security light may flash to indicate the key has been successfully programmed. Step 3: Test the Key After programming, remove the new key and test it to ensure it can start the car and unlock the doors. Note: Each car manufacturer has unique programming steps. Be sure to consult your owner’s manual or the manufacturer’s website for specific instructions. When Professional Help Is Needed While many vehicles allow for DIY key programming, others require specialized equipment or software that only dealerships or locksmiths can access. This is particularly true for luxury or high-end cars with advanced encryption and security features. If your DIY efforts fail, it’s best to seek help from a certified professional. Visiting a dealership is a reliable, albeit more expensive, option. Alternatively, professional locksmiths often provide programming services at a lower cost, making them a practical choice for many drivers. Costs and Considerations The cost of programming a car key varies significantly based on the vehicle’s make and model. For basic models, self-programming might cost nothing if you already have a functional key. However, professional programming can range from $50 to $300 or more, especially for smart keys or proximity fobs. To minimize costs: Have a spare key : Always keep a functional spare to simplify programming if a replacement is needed. Research costs : Call local locksmiths or dealerships to compare pricing. Empower Yourself with Knowledge Programming a car key doesn’t have to be a daunting task. With the right tools and information, many car owners can handle the process themselves, saving time and money. However, it’s essential to recognize when professional assistance is necessary, particularly for complex key systems. By understanding the basics of car key programming and following a step-by-step approach, you can ensure your vehicle remains secure and functional. So, whether it’s a spare key or a replacement, you now have the confidence to tackle the task or know where to turn for help.

Jaguar and Land Rover Key Fobs: Common Problems & How to Fix Them

Jaguar and Land Rover Key Fobs: Common Problems & How to Fix Them

Owning a Jaguar or Land Rover means enjoying luxury, performance, and cutting-edge technology. But like any high-tech component, your key fob isn’t immune to problems. Whether you drive a Jaguar F-PACE, a Land Rover Discovery, or any other model, a malfunctioning key fob can quickly become an inconvenience. The good news is that most key fob issues can be resolved quickly and affordably . Here’s what you need to know about the most common Jaguar and Land Rover key fob problems and how you can fix them. Your Key Fob Isn’t Responding Pressing the button without any response is one of the most common issues. If your key fob isn’t unlocking or locking your car, the most likely culprit is a dead battery. Replacing it with a high-quality CR2032 battery is often the easiest fix. However, if the problem persists, your key fob may need reprogramming, or its internal electronic components might be damaged. Checking your vehicle’s manual for reprogramming instructions or visiting a dealership can help resolve the issue. In cases of water damage or physical impact, a complete key fob replacement might be necessary. Reduced Key Fob Signal Range If you notice that you need to be much closer to your car than usual for the key fob to work, the battery is likely weakening. Replacing the battery should be your first step. Other factors, such as interference from electronic devices like smartphones or WiFi routers, may also contribute to signal issues. Storing your key away from such devices can help. If these steps don’t improve the range, internal damage to the key fob’s antenna may require a replacement shell or an upgrade to a new key fob. Unresponsive or Sticking Buttons Over time, dirt and debris can accumulate under the buttons, making them less responsive or difficult to press. Cleaning the key fob with a soft cloth and isopropyl alcohol can help restore functionality. If the buttons feel loose or fail to click, a replacement shell might be necessary. In some cases, the internal button contacts wear out, requiring a full key fob upgrade. “Smart Key Not Found” or Keyless Start Issues If you see a “Key Not Found” message when trying to start your car, the issue may be a low battery in your key fob. Holding the key fob closer to the start button can sometimes override the problem, as many Jaguar and Land Rover models have a backup proximity sensor. If the issue persists, replacing the battery or consulting your vehicle’s manual for emergency start procedures might be required. If none of these solutions work, there may be a deeper issue with the vehicle’s keyless entry system. Spare Key Fob Not Working A backup key fob that hasn’t been used for a long time may no longer work when you need it. This can happen if the battery has drained due to inactivity or if the key has lost its programming. Regularly testing your spare key can prevent surprises. Replacing the battery should be the first step, and if the key has lost its programming, a visit to a professional or dealership may be necessary to restore its functionality. When to Replace Your Key Fob If you’ve tried all these fixes and your Jaguar or Land Rover key fob is still not working, it may be time for a replacement. Internal components wear out over time, and investing in a new key fob can save you from frustrating lockouts and start failures.

Chat with us