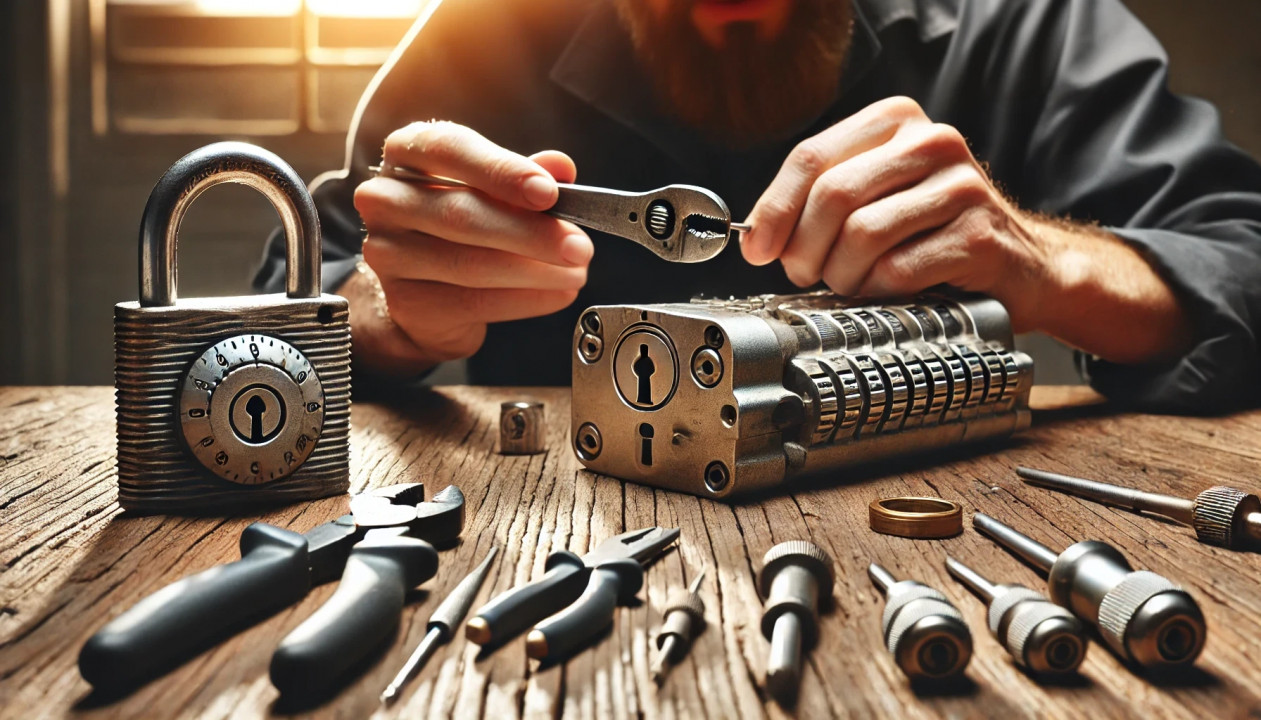
Simple Tips to Free a Stuck Lock: What You Need to Know
29.10.2024
Locks are meant to provide security, but when they seize up, they can leave you feeling frustrated and helpless. Dealing with a stuck lock is more common than you might think, and thankfully, there are affordable and effective solutions to get it working smoothly again. Whether it's a car door, trunk, or your home lock, here are some tried-and-true methods to free up a jammed lock.
Why Locks Seize Up
Understanding the causes behind a stuck lock can help you prevent it from happening in the future. Locks can seize up for various reasons:
Dirt and Debris: Over time, dust, grime, or even small particles can accumulate inside the lock mechanism, making it harder for the internal parts to move smoothly.
Rust and Corrosion: Exposure to moisture, humidity, or salty air can lead to rust buildup on metal parts within the lock, which can prevent movement.
Lack of Lubrication: Locks need to be lubricated occasionally to ensure smooth operation. Without lubrication, friction increases, and the lock may eventually jam.
Now, let’s look at some simple steps to tackle a seized lock.
Step 1: Use Graphite Powder or Dry Lubricant
The first thing to try is applying a lubricant, but be careful about what type you use. Wet or oil-based lubricants can attract dust, which eventually clogs the lock.
Graphite Powder: This is one of the best options for freeing up a stuck lock. Sprinkle a small amount of graphite powder into the keyhole, insert the key, and gently move it back and forth. This spreads the graphite, reducing friction and allowing the lock components to move more freely.
Dry Lubricants: These are specifically designed for locks and are ideal for situations where you want to avoid residue buildup. Spray a small amount into the lock, then insert the key and gently turn it.
Pro Tip: Avoid using regular WD-40 or other oil-based products, as they may lead to a buildup over time, making the problem worse.
Step 2: Try the Key with Gentle Force
If lubrication alone doesn’t do the trick, the next step is to use a little gentle force with your key. Be cautious here; applying too much force could break the key inside the lock.
Insert the Key: Once the lubricant has been applied, insert the key fully into the lock.
Wiggle Carefully: Gently wiggle and turn the key without applying too much force. This movement may help distribute the lubricant further and gradually loosen up any stuck components.
Caution: If you feel excessive resistance, don’t force the key. Forcing it can cause damage or even snap the key, which would require additional assistance to remove.
Step 3: Warm Up the Lock (Especially Useful for Cold Weather)
Cold temperatures can cause locks to seize due to ice or metal contraction. If you suspect the cold is the issue, warming up the lock can be effective.
Use a Hair Dryer: Direct warm air onto the lock for several minutes to allow the metal to expand and the ice (if any) to melt.
Heat the Key: You can also try warming the key slightly with a lighter, but exercise caution and make sure it isn’t too hot before inserting it into the lock.
Safety Note: Avoid open flames directly on the lock itself, as this can damage surrounding surfaces or even warp the lock mechanism.
Step 4: Use a Vinegar Solution for Corroded Locks
If rust is the culprit, vinegar is a great household solution for loosening rust and corrosion in a lock.
Apply Vinegar: Put a few drops of vinegar on the key, insert it into the lock, and let it sit for a minute or two. Vinegar can help dissolve light rust, making it easier to turn the key.
Follow with Lubricant: After using vinegar, apply a small amount of graphite powder or dry lubricant to ensure the lock remains smooth and functional.
Step 5: Work with Compressed Air to Remove Debris
If dirt or debris has accumulated inside the lock, compressed air is a quick and efficient way to clear it out.
Blow Out Dust: Use a can of compressed air and direct the nozzle into the keyhole. Short bursts of air can blow out dust and small debris that may be obstructing the mechanism.
Follow Up: After using compressed air, it’s a good idea to add a dry lubricant to prevent any remaining dust from causing future jams.
How to Prevent Lock Seizure in the Future
Once you’ve successfully freed a seized lock, it’s helpful to take steps to prevent it from happening again. Here are some preventive tips:
Regularly Lubricate: Use a dry lubricant or graphite powder once or twice a year, especially if you live in a humid or dusty area.
Keep Locks Clean: Wipe off any visible dirt or dust around the lock mechanism. If the lock is exposed to elements (like outdoor or car locks), covering it can help keep debris and moisture out.
Avoid Overusing Keys: If your key shows signs of wear, consider getting a replacement. Worn-out keys can cause more friction inside the lock, leading to jams.
When to Seek Professional Help
Sometimes, despite your best efforts, a lock just won’t budge. In cases where the lock is significantly damaged, heavily corroded, or if the key breaks inside, it’s best to reach out for professional assistance. A professional has specialized tools and expertise to address these issues without causing further damage.
Taking Care of Your Locks
A stuck lock can be an inconvenience, but by following these simple steps and using a little patience, you can often resolve the issue without professional help. Keeping locks in good condition with regular care is the key to ensuring they function smoothly for years to come.
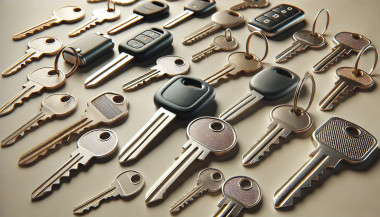
Replacing a lost or broken key might seem straightforward, but identifying the correct type of key is crucial to getting an exact replacement. Whether you need a car key, a house key, or even a cabinet key, each type has specific features that determine its function and fit. Here’s a step-by-step guide to understanding your key type, so you can save time and avoid unnecessary frustration when ordering a replacement. Why Key Identification is Important Keys come in many shapes and sizes, each designed for specific types of locks. Understanding your key’s unique characteristics ensures you get the right replacement and avoid wasted time or money on mismatched keys. Avoid Extra Costs : Ordering the wrong key can mean additional fees for reordering. Save Time : Getting the right key from the start saves the hassle of sending it back and waiting for the correct replacement. Enhance Security : Accurate key identification ensures your security by avoiding compromised, incorrect key fits. Types of Keys: Which One is Yours? Understanding the different types of keys can help you determine what you have. Here are the common types and what makes each unique. 1. Household Keys Household keys are typically designed for residential locks like front doors, back doors, and garage doors. These keys are often small and have either a single or double-sided cut pattern along the edges. Some household keys are unique in design, making them specific to a particular lock type. Common Features : Smaller, single or double-sided cuts. Typical Use : Standard residential door locks, such as deadbolts and knob locks. Tip : Look for any identifying numbers or letters on the key itself. These may indicate a specific lock series, making it easier to identify. 2. Car Keys Car keys come in various styles, depending on the make, model, and year of the vehicle. While older cars may use basic metal keys, most modern vehicles use transponder keys or fob keys with embedded chips for added security. Basic Car Keys : Metal keys without electronic components. Transponder Keys : These have a small chip embedded in the head, which communicates with the car to prevent theft. Key Fobs : Some cars use a fob that contains a keyless entry system, which requires programming specific to your vehicle. Tip : If your car uses a transponder or fob key, you may need assistance programming the replacement. 3. Padlock Keys Keys for padlocks can be small and compact, with a straightforward design. These keys often have a unique series number printed on them, making it easier to match them to a specific lock model. Common Features : Small size, usually single-sided. Typical Use : Storage units, gym lockers, and outdoor gates. 4. Furniture and Cabinet Keys Furniture and cabinet keys are typically found on desks, filing cabinets, and other types of lockable furniture. These keys are generally small, with a straight or tubular shaft, and they often have numbers or letters for identification. Common Features : Compact, single or double-sided cuts, often with identification codes. Typical Use : Office furniture, personal storage, and older-style drawers. 5. High-Security Keys High-security keys are specifically designed to prevent unauthorized duplication. These keys have unique, intricate cut patterns and require special authorization for copying. Common Features : Complex, often multi-sided cuts with additional security features. Typical Use : High-security doors in residential or commercial settings, safes, and secure access points. Key Identification Tips: What to Look For Once you know the type of key, you’ll want to examine specific details that will help with identification. Here’s what to look for: Keyway and Shape : The groove pattern, or “keyway,” is specific to the key type. Take note of the key’s shape and groove configuration. Markings and Codes : Look for any numbers or letters printed on the key. These often refer to specific lock brands or key series. Size and Length : Measure your key’s length, as some keys are longer or shorter depending on the lock type. Metal Head Design : Certain keys, like car keys, may have plastic or rubberized heads, which can indicate the need for a transponder or chip inside. Steps to Identify Your Key Type Inspect for Markings : Look closely at your key for any stamped numbers, letters, or symbols. These markings can often be referenced to find a matching lock or brand series. Measure Your Key : Use a ruler or tape measure to record the length and width of your key. These dimensions can help narrow down the exact key type. Examine the Cut Pattern : Take note of the number of cuts and whether they are on one or both sides. Identify the Head Style : If it’s a car key with a transponder, the head might be plastic or rubber. Check for a Code on the Lock : Some padlocks and cabinet locks have codes printed on them that correspond to a specific key model. What to Do When You Can't Identify the Key If your key has no visible markings or the cuts are unusual, consider taking a photo to help in the identification process. For specialty keys or hard-to-identify types, you may want to seek professional help or consult a detailed online database for reference. Preventing Future Key Confusion Once you’ve identified your key, take a few steps to prevent future issues with identification. Label Your Keys : Adding a small tag with a brief description can help you remember the type of key. Keep Spare Keys in a Safe Place : Having a backup key prevents you from needing a replacement immediately. Store Key Codes or Information : If your key or lock has a series code, store it in a safe place in case you need it for future reference. Identifying your key type is essential for getting a precise replacement without unnecessary hassle. By taking the time to understand your key’s unique features, you can save both time and money when it’s time to replace it. Following these steps will help ensure that your replacement key works as smoothly as the original.
When it comes to convenience, car keyless remotes have revolutionized the way we interact with our vehicles. No more fumbling with traditional keys or worrying about locking yourself out. With just a push of a button, you can lock, unlock, and even start your vehicle. But what happens when your keyless remote stops working, or when you need to program a new one? Here’s a simple guide to help you program your car's keyless remote, regardless of your vehicle's make or model. Understanding Keyless Remotes Before jumping into the programming process, it’s important to understand what a keyless remote is and how it works. Essentially, a keyless remote allows you to interact with your vehicle without needing to physically insert a key. Instead of using a traditional metal key, your car’s electronic system communicates wirelessly with the remote, allowing you to lock, unlock, and sometimes even start your vehicle, all with the push of a button. These remotes typically use a radio frequency to communicate with your car, sending a signal that’s encrypted for security. Most modern cars use transponder technology, which makes the system more secure and resistant to hacking or copying. This means that the remote must be properly programmed to your vehicle’s system to function correctly. When Do You Need to Program a Keyless Remote? There are several situations in which you might need to program your keyless remote: Replacing a Lost or Damaged Remote : If you’ve lost your keyless remote or it’s no longer functioning properly, you’ll need to get a replacement. This may require programming the new remote to sync with your vehicle. Adding a New Remote : If you’ve bought an additional keyless remote for your car (for a spouse, child, or other family member), you’ll need to program it so that it works with your vehicle. Battery Replacement : Sometimes, replacing the battery in your remote can cause the programming to reset, meaning you’ll need to reprogram the remote for it to work again. Changing or Resetting Vehicle Settings : Occasionally, vehicle settings or remotes can be reset or reprogrammed as part of regular maintenance, requiring you to program new or additional remotes. How to Program Your Car’s Keyless Remote Programming a keyless remote is easier than you might think, and in most cases, it can be done by following a few simple steps. The process varies slightly depending on the make and model of your car, but here’s a general overview of the steps involved: Get Your New or Replacement Remote : Ensure that your remote is compatible with your car’s system. If you're not sure, you can check with your car's manufacturer or an authorized dealership. Some remotes require specific codes to be programmed. Sit Inside Your Vehicle : For safety and security reasons, most cars require you to be inside the vehicle while programming the remote. Insert the Key in the Ignition : Insert the key into the ignition and turn it to the "ON" position without starting the engine. For cars with push-to-start systems, you may need to press the start button without pressing the brake pedal. Activate the Programming Mode : Depending on your car’s system, you’ll need to follow a sequence of steps to enter programming mode. This could involve turning the key on and off several times, or pressing certain buttons in a specific order. Refer to your vehicle’s manual for the exact steps, as the process can differ from one model to another. Program the Remote : Once your car is in programming mode, you’ll need to press the button on your keyless remote that you want to program. Usually, you’ll hear a chime or see the lights flash, indicating that the remote has been successfully programmed. Some cars may require you to press the button several times to ensure proper synchronization. Test the Remote : After programming, test the remote to make sure it works properly. Try locking and unlocking the doors or starting the engine. If everything works as expected, you’re done! Exit Programming Mode : To finish the process, simply turn off the ignition and remove the key. This should exit programming mode. If you have additional remotes to program, repeat the steps above for each one. What to Do if Programming Doesn’t Work While programming a keyless remote is usually a straightforward process, there are instances where things don’t go as planned. If your remote isn’t syncing with your car after following the steps, here are a few troubleshooting tips: Check the Battery : If the remote’s battery is dead or weak, it won’t transmit the signal to your car. Replace the battery and try programming again. Verify the Compatibility : Make sure that the remote is compatible with your vehicle’s make, model, and year. Some vehicles require special remotes that can only be programmed by the manufacturer or an authorized locksmith. Reset Your Vehicle’s System : In some cases, you might need to reset the car’s system to clear previous programming attempts. Check your owner’s manual or consult a professional for assistance. Consult a Professional : If you continue to have issues, it might be time to visit a dealership or a certified locksmith. These professionals have the tools and experience to program the remote correctly and ensure everything works seamlessly. Why Programming Your Keyless Remote Is Important Programming your keyless remote is a simple but important task that helps ensure your car’s security and convenience. By understanding how the process works and what to do if things go wrong, you’ll be able to troubleshoot and solve any issues quickly. Whether you’re replacing a lost remote or adding a new one to your collection, knowing how to program your remote saves time and money compared to visiting a dealership or locksmith. With the increased reliance on keyless remotes for unlocking and starting vehicles, it’s essential for every car owner to be familiar with this process. By keeping your remote in good working condition and knowing how to program it when necessary, you’ll enjoy a smoother, more efficient experience with your vehicle.
In modern vehicles, the once simple car key has evolved into a sophisticated piece of technology. With built-in electronics, anti-theft features, and remote functions, today’s car key is part of a broader ecosystem designed for both convenience and security. Yet with all this advancement comes confusion. Many drivers aren’t sure what terms like immobilizer , transponder chip , and key fob actually mean—or how they relate to one another. This guide breaks down these components in detail, explains how they work together, and clarifies why it matters when you’re replacing, reprogramming, or troubleshooting your car key. What Is an Immobilizer? An immobilizer is an electronic security device installed in most modern cars. Its purpose is to prevent the engine from starting unless the correct key—specifically, the correct coded signal—is detected. When you attempt to start your vehicle, the system searches for a signal from a registered transponder chip. If that signal is missing or incorrect, the immobilizer blocks the ignition system. This means the engine won’t crank or turn over, even if the physical key fits. Immobilizers are embedded in the car’s engine control unit (ECU) and became standard in vehicles after the late 1990s in many countries, in response to rising car theft. They offer a silent, invisible layer of protection against common theft techniques like hotwiring. Without the correct digital authentication, the car simply will not start. What Is a Transponder Chip? The transponder chip is a small electronic microchip located inside the car key or key fob. The word “transponder” is a combination of “transmitter” and “responder.” It is designed to emit a unique code that the car's immobilizer can recognize. When you insert the key into the ignition or bring a key fob close to a push-start system, the chip sends a signal to the car’s ECU. If the code matches the one stored in the car’s database, the immobilizer disables itself and allows the engine to start. Transponder chips are passive. They do not require a battery and are activated by electromagnetic energy from the ignition coil or receiver unit inside the vehicle. Without a functioning or correctly programmed transponder chip, your car will not start—even if the metal key turns in the ignition. What Is a Key Fob? A key fob is the remote control device you carry that allows you to perform functions like locking or unlocking your car, opening the trunk, and activating panic alarms. In modern vehicles, key fobs may also control remote start or proximity-based unlocking features. While key fobs often include a transponder chip inside them, they serve a different function. The key fob operates remote commands via short-range radio signals. The transponder chip, on the other hand, is responsible for enabling or disabling the engine. Smart key fobs, found in many recent vehicles, don’t require insertion into the ignition. Instead, the car detects the fob nearby and permits the engine to start with a button press. If your key fob battery dies, you might still be able to start the car manually if the transponder chip is present and recognized. Most fobs also have a hidden mechanical key inside, which can be used to unlock the door if the electronics fail. How They Work Together Although they are distinct components, the immobilizer, transponder chip, and key fob all work in harmony to secure and operate your vehicle. The immobilizer controls whether the engine is allowed to start. The transponder chip provides the digital identity that must be verified by the immobilizer. The key fob provides wireless control of non-engine functions like locking, unlocking, and trunk access. In most modern cars: You approach the vehicle with the key fob. The fob unlocks the doors. When you start the vehicle, the transponder chip sends a signal to the immobilizer. If the code matches, the engine is authorized to start. If the code doesn’t match, or if the chip is missing or damaged, the engine remains disabled—even if the rest of the key’s functions work perfectly. Why This Knowledge Matters Understanding how your car key works is essential when: Replacing a lost or broken key Buying a spare or duplicate Diagnosing why your car won’t start Choosing between locksmith and dealership services For example, if your key fob unlocks your car but won’t start it, the issue may lie with the transponder chip, not the battery. Conversely, if your fob doesn’t lock or unlock the car remotely, the chip may still be functional, and the issue could simply be a dead battery. Replacing a key without properly programming the transponder chip will result in a non-starting vehicle, even if the key physically fits and the remote works. For reliable replacement keys, fobs, batteries, and accessories, visit our Car Key Collection. Car keys are no longer just mechanical tools. They’re complex, multi-function devices that combine security, convenience, and connectivity. By understanding the role of the immobilizer , transponder chip , and key fob , you’ll not only protect your vehicle better, but also avoid costly mistakes when dealing with repairs or replacements. Whether you’re troubleshooting a non-starting car or simply trying to replace a damaged key, knowing the difference between these three elements gives you the clarity and confidence to take the right action.
Your car key fob is one of the most used items in your daily life. You press it multiple times a day, carry it in your pocket or bag, toss it on desks, and sometimes accidentally drop it on the ground. But how often do you actually clean or check it? Most people only think about their key fob when it stops working. By then, it's often too late. The good news is, with a little attention and regular maintenance, you can keep your car key fob working perfectly for years to come. In this article, you'll learn how to clean and maintain your car key fob like a pro — so you can save money, avoid frustration, and get the best performance out of your key. Why Cleaning and Maintaining Your Key Fob Matters Car key fobs aren’t just simple remotes. They're packed with sensitive electronics, small batteries, and tiny contact points that can easily get damaged by dirt, moisture, or simple neglect. If you never clean or check your key fob, you might start to notice: Unresponsive buttons Reduced signal range Frequent battery issues Complete failure to unlock or start the car Most of these problems are avoidable with basic maintenance . Cleaning your key fob regularly helps keep it functional, protects its electronics, and ensures it lasts longer. It also saves you from spending money on costly repairs or total key replacements. How to Clean Your Car Key Fob: Step-by-Step Guide Step 1: Open the Key Fob Gently Start by carefully opening your key fob. Most models have a small groove or notch where you can insert a flathead screwdriver or a coin to separate the shell. Be gentle — forcing it open can crack the plastic or damage internal clips. If you're unsure, check your car’s manual or look up your key model online to find specific instructions. Step 2: Remove the Battery Once you open the key fob, always remove the battery before cleaning. This protects the electronic circuit from any accidental moisture and prevents short-circuiting. Set the battery aside in a dry, safe place. Step 3: Clean the Exterior Use a soft, dry microfiber cloth to wipe the outside of the key fob shell. For tougher dirt or sticky areas, slightly dampen the cloth with water or isopropyl alcohol (70% or higher). Avoid using harsh cleaning chemicals that could damage the plastic or remove painted symbols. Step 4: Clean the Buttons and Small Gaps Dirt, dust, and pocket debris often collect around the buttons. These particles can block the buttons from making proper contact or cause them to stick. Use a cotton swab or a soft toothbrush to gently clean around the edges and in between the buttons. For tight spaces, a toothpick can help dislodge stubborn dirt. If needed, lightly moisten the cotton swab with alcohol to break down grime. Always dry the key fob thoroughly after cleaning. Step 5: Inspect and Clean the Battery Contacts Battery contacts can become dirty or corroded over time, especially if the battery leaked or moisture got inside. Check the metal contact points carefully. If you see white powder or greenish residue (common signs of corrosion), gently clean them using a cotton swab dipped in isopropyl alcohol. Be extremely careful not to bend or scratch the contacts. If corrosion is too severe, the key fob might need professional repair or a replacement circuit board. Step 6: Replace the Battery if Needed Key fob batteries typically last between 1 to 2 years, but frequent use, weak signals, or exposure to extreme temperatures can shorten battery life. If your battery is old or low, replace it with a new one. Most car key fobs use CR2032 or CR2025 batteries. Always make sure you install the new battery in the correct position, respecting the polarity (+ / -). A fresh battery not only improves response time but also ensures the signal reaches your car reliably. Step 7: Reassemble the Key Fob Once everything is clean and fully dry, carefully snap the key fob back together. Make sure the casing is securely closed and the buttons feel smooth and responsive. Test the key fob to confirm that it works correctly. Pro Tips to Keep Your Car Key Fob in Top Shape A well-maintained key fob can last many years. Here’s how to keep it working perfectly: Keep it Dry: Most key fobs aren’t waterproof. Avoid rain, puddles, wet pockets, or any contact with liquids. Use a Protective Cover: A silicone or rubber key cover adds shock protection, keeps out dirt, and prevents scratches. Avoid Extreme Heat or Cold: Leaving your key fob in direct sunlight or in a freezing car can damage the battery and weaken plastic parts. Change the Battery Regularly: Don’t wait for your key fob to completely stop working. Weak batteries can lead to unreliable signals and unexpected failure. Don’t Drop It: Even though most key fobs can handle light drops, repeated impact can cause internal damage. When to Replace the Key Fob Shell If your key fob shell is cracked, worn, or no longer closes tightly, it’s time to replace it. A damaged shell can let moisture and dirt reach the electronics and cause long-term damage. Replacing the shell is a quick and affordable solution that can extend your key fob’s life significantly. At Mr. Key , we offer high-quality key fob shells, batteries, and repair kits that can help you refresh your key fob and save money compared to dealership prices. Explore our key fob repair kits, protective covers, and replacement batteries now at mr-key.com . Your car key fob may seem like a small detail, but it plays a huge role in your daily life. Without it, you can’t get in or even start your car. The good news is that taking care of your key fob is easy. With regular cleaning, battery checks, and some simple maintenance, you can keep it working reliably for years. And if you need to replace your battery, your key shell, or your entire key fob, Mr. Key is here to help. We provide everything you need to keep your keys in perfect shape, save money, and avoid unnecessary trips to the dealer.
We use cookies to personalise content and ads, to provide social media features and to analyse our traffic. We also share information about your use of our site with our social media, advertising and analytics partners who may combine it with other information that you’ve provided to them or that they’ve collected from your use of their services.
Basic
Cookies necessary for the proper functioning of the online store (such as storing products in the cart, sending a forgotten cart reminder by e-mail, etc. )
Ensures security for visitors by preventing cross-site request forgery. This cookie is essential for website and visitor security.
1 day
1st Party
laravel_session
PHP
To store the username of the logged in user. This information is necessary to allow the user to remain logged in to a website without having to submit their username and password for each page visited. Without this cookie, the user cannot move to areas of the website that require authenticated access.
Up to 2 hours
1st Party
__stripe_mid
Stripe
Serves to provide fraud prevention when attempting to shop on the site.
Up to 1 year
3rd Party
Advertisement
Advertising on other websites or platforms, retargeting, remarketing.
This cookie is set by Facebook to deliver advertising when they are on Facebook or a digital platform powered by advertising on Facebook after you visit this website.
2 months
3rd Party
fr
Facebook
The cookie also tracks a user's web behavior on sites that have a Facebook pixel or Facebook social plugin.
-
3rd Party
Analytics
Web controlling, conversion tracking of marketing tools.
Used to reduce the query rate. If Google Analytics is implemented via Google Tag Manager, this cookie will be named _dc_gtm_ .
1 minute
3rd Party
_gac_<property-id>
Google Analytics
Contains campaign-related information about the user. Linked Google Analytics and Google Ads accounts, Google Ads website conversion tags will read this cookie.
90 days
3rd Party
Google Remarketing
Google Analytics
Used to track pages viewed by users that are sent to Google Ads
-
3rd Party
dynx_itemid
Google Analytics
Used to track product ID in Google Ads
-
3rd Party
dynx_pagetype
Google Analytics
Used to track page type in Google Ads
-
3rd Party
dynx_totalvalue
Google Analytics
Used to track product value in Google Ads
3rd Party
dynx_category
Google Analytics
Used for category tracking in Google Ads
-
3rd Party
ga4_analytics
Google Analytics
Serves to process behavior such as setting Google Analytics cookies, sending automatic and enhanced measurement events, and declaring common settings.
3rd Party
Google Conversion Tracking
Google Ads.
Used to transmit order information to Google Ads.
-
3rd Party
conversion ID
Google Ads.
An identification number used to transmit order information to Google Ads.
-
3rd Party
conversion labеl
Google Ads.
A label used to transmit information about successful orders to Google Ads.
-
3rd Party
Additional software
Other external services and software to personalize the user experience.
Cookies are small text files that can be used by websites to make a user's experience more efficient.
The law states that we can store cookies on your device if they are strictly necessary for the operation of this site. For all other types of cookies we need your permission.
This site uses different types of cookies. Some cookies are placed by third party services that appear on our pages.
You can at any time change or withdraw your consent from the Cookie Declaration on our website.
Learn more about who we are, how you can contact us and how we process personal data in our Privacy Policy.
Please state your consent ID and date when you contact us regarding your consent.


_1736342764.jpg)
 (1)_1746173037.jpg)
_1751630541.jpg)