Simple Tips to Free a Stuck Lock: What You Need to Know
29.10.2024
Locks are meant to provide security, but when they seize up, they can leave you feeling frustrated and helpless. Dealing with a stuck lock is more common than you might think, and thankfully, there are affordable and effective solutions to get it working smoothly again. Whether it's a car door, trunk, or your home lock, here are some tried-and-true methods to free up a jammed lock.
Why Locks Seize Up
Understanding the causes behind a stuck lock can help you prevent it from happening in the future. Locks can seize up for various reasons:
Dirt and Debris: Over time, dust, grime, or even small particles can accumulate inside the lock mechanism, making it harder for the internal parts to move smoothly.
Rust and Corrosion: Exposure to moisture, humidity, or salty air can lead to rust buildup on metal parts within the lock, which can prevent movement.
Lack of Lubrication: Locks need to be lubricated occasionally to ensure smooth operation. Without lubrication, friction increases, and the lock may eventually jam.
Now, let’s look at some simple steps to tackle a seized lock.
Step 1: Use Graphite Powder or Dry Lubricant
The first thing to try is applying a lubricant, but be careful about what type you use. Wet or oil-based lubricants can attract dust, which eventually clogs the lock.
Graphite Powder: This is one of the best options for freeing up a stuck lock. Sprinkle a small amount of graphite powder into the keyhole, insert the key, and gently move it back and forth. This spreads the graphite, reducing friction and allowing the lock components to move more freely.
Dry Lubricants: These are specifically designed for locks and are ideal for situations where you want to avoid residue buildup. Spray a small amount into the lock, then insert the key and gently turn it.
Pro Tip: Avoid using regular WD-40 or other oil-based products, as they may lead to a buildup over time, making the problem worse.
Step 2: Try the Key with Gentle Force
If lubrication alone doesn’t do the trick, the next step is to use a little gentle force with your key. Be cautious here; applying too much force could break the key inside the lock.
Insert the Key: Once the lubricant has been applied, insert the key fully into the lock.
Wiggle Carefully: Gently wiggle and turn the key without applying too much force. This movement may help distribute the lubricant further and gradually loosen up any stuck components.
Caution: If you feel excessive resistance, don’t force the key. Forcing it can cause damage or even snap the key, which would require additional assistance to remove.
Step 3: Warm Up the Lock (Especially Useful for Cold Weather)
Cold temperatures can cause locks to seize due to ice or metal contraction. If you suspect the cold is the issue, warming up the lock can be effective.
Use a Hair Dryer: Direct warm air onto the lock for several minutes to allow the metal to expand and the ice (if any) to melt.
Heat the Key: You can also try warming the key slightly with a lighter, but exercise caution and make sure it isn’t too hot before inserting it into the lock.
Safety Note: Avoid open flames directly on the lock itself, as this can damage surrounding surfaces or even warp the lock mechanism.
Step 4: Use a Vinegar Solution for Corroded Locks
If rust is the culprit, vinegar is a great household solution for loosening rust and corrosion in a lock.
Apply Vinegar: Put a few drops of vinegar on the key, insert it into the lock, and let it sit for a minute or two. Vinegar can help dissolve light rust, making it easier to turn the key.
Follow with Lubricant: After using vinegar, apply a small amount of graphite powder or dry lubricant to ensure the lock remains smooth and functional.
Step 5: Work with Compressed Air to Remove Debris
If dirt or debris has accumulated inside the lock, compressed air is a quick and efficient way to clear it out.
Blow Out Dust: Use a can of compressed air and direct the nozzle into the keyhole. Short bursts of air can blow out dust and small debris that may be obstructing the mechanism.
Follow Up: After using compressed air, it’s a good idea to add a dry lubricant to prevent any remaining dust from causing future jams.
How to Prevent Lock Seizure in the Future
Once you’ve successfully freed a seized lock, it’s helpful to take steps to prevent it from happening again. Here are some preventive tips:
Regularly Lubricate: Use a dry lubricant or graphite powder once or twice a year, especially if you live in a humid or dusty area.
Keep Locks Clean: Wipe off any visible dirt or dust around the lock mechanism. If the lock is exposed to elements (like outdoor or car locks), covering it can help keep debris and moisture out.
Avoid Overusing Keys: If your key shows signs of wear, consider getting a replacement. Worn-out keys can cause more friction inside the lock, leading to jams.
When to Seek Professional Help
Sometimes, despite your best efforts, a lock just won’t budge. In cases where the lock is significantly damaged, heavily corroded, or if the key breaks inside, it’s best to reach out for professional assistance. A professional has specialized tools and expertise to address these issues without causing further damage.
Taking Care of Your Locks
A stuck lock can be an inconvenience, but by following these simple steps and using a little patience, you can often resolve the issue without professional help. Keeping locks in good condition with regular care is the key to ensuring they function smoothly for years to come.
When it comes to convenience, car keyless remotes have revolutionized the way we interact with our vehicles. No more fumbling with traditional keys or worrying about locking yourself out. With just a push of a button, you can lock, unlock, and even start your vehicle. But what happens when your keyless remote stops working, or when you need to program a new one? Here’s a simple guide to help you program your car's keyless remote, regardless of your vehicle's make or model. Understanding Keyless Remotes Before jumping into the programming process, it’s important to understand what a keyless remote is and how it works. Essentially, a keyless remote allows you to interact with your vehicle without needing to physically insert a key. Instead of using a traditional metal key, your car’s electronic system communicates wirelessly with the remote, allowing you to lock, unlock, and sometimes even start your vehicle, all with the push of a button. These remotes typically use a radio frequency to communicate with your car, sending a signal that’s encrypted for security. Most modern cars use transponder technology, which makes the system more secure and resistant to hacking or copying. This means that the remote must be properly programmed to your vehicle’s system to function correctly. When Do You Need to Program a Keyless Remote? There are several situations in which you might need to program your keyless remote: Replacing a Lost or Damaged Remote : If you’ve lost your keyless remote or it’s no longer functioning properly, you’ll need to get a replacement. This may require programming the new remote to sync with your vehicle. Adding a New Remote : If you’ve bought an additional keyless remote for your car (for a spouse, child, or other family member), you’ll need to program it so that it works with your vehicle. Battery Replacement : Sometimes, replacing the battery in your remote can cause the programming to reset, meaning you’ll need to reprogram the remote for it to work again. Changing or Resetting Vehicle Settings : Occasionally, vehicle settings or remotes can be reset or reprogrammed as part of regular maintenance, requiring you to program new or additional remotes. How to Program Your Car’s Keyless Remote Programming a keyless remote is easier than you might think, and in most cases, it can be done by following a few simple steps. The process varies slightly depending on the make and model of your car, but here’s a general overview of the steps involved: Get Your New or Replacement Remote : Ensure that your remote is compatible with your car’s system. If you're not sure, you can check with your car's manufacturer or an authorized dealership. Some remotes require specific codes to be programmed. Sit Inside Your Vehicle : For safety and security reasons, most cars require you to be inside the vehicle while programming the remote. Insert the Key in the Ignition : Insert the key into the ignition and turn it to the "ON" position without starting the engine. For cars with push-to-start systems, you may need to press the start button without pressing the brake pedal. Activate the Programming Mode : Depending on your car’s system, you’ll need to follow a sequence of steps to enter programming mode. This could involve turning the key on and off several times, or pressing certain buttons in a specific order. Refer to your vehicle’s manual for the exact steps, as the process can differ from one model to another. Program the Remote : Once your car is in programming mode, you’ll need to press the button on your keyless remote that you want to program. Usually, you’ll hear a chime or see the lights flash, indicating that the remote has been successfully programmed. Some cars may require you to press the button several times to ensure proper synchronization. Test the Remote : After programming, test the remote to make sure it works properly. Try locking and unlocking the doors or starting the engine. If everything works as expected, you’re done! Exit Programming Mode : To finish the process, simply turn off the ignition and remove the key. This should exit programming mode. If you have additional remotes to program, repeat the steps above for each one. What to Do if Programming Doesn’t Work While programming a keyless remote is usually a straightforward process, there are instances where things don’t go as planned. If your remote isn’t syncing with your car after following the steps, here are a few troubleshooting tips: Check the Battery : If the remote’s battery is dead or weak, it won’t transmit the signal to your car. Replace the battery and try programming again. Verify the Compatibility : Make sure that the remote is compatible with your vehicle’s make, model, and year. Some vehicles require special remotes that can only be programmed by the manufacturer or an authorized locksmith. Reset Your Vehicle’s System : In some cases, you might need to reset the car’s system to clear previous programming attempts. Check your owner’s manual or consult a professional for assistance. Consult a Professional : If you continue to have issues, it might be time to visit a dealership or a certified locksmith. These professionals have the tools and experience to program the remote correctly and ensure everything works seamlessly. Why Programming Your Keyless Remote Is Important Programming your keyless remote is a simple but important task that helps ensure your car’s security and convenience. By understanding how the process works and what to do if things go wrong, you’ll be able to troubleshoot and solve any issues quickly. Whether you’re replacing a lost remote or adding a new one to your collection, knowing how to program your remote saves time and money compared to visiting a dealership or locksmith. With the increased reliance on keyless remotes for unlocking and starting vehicles, it’s essential for every car owner to be familiar with this process. By keeping your remote in good working condition and knowing how to program it when necessary, you’ll enjoy a smoother, more efficient experience with your vehicle.
1. Why this happens and why you must act fast Losing car keys while travelling is more common than you might assume. Whether it’s slipping out of a beach bag, leaving them at a café or dropping in transit, your vehicle becomes vulnerable. In addition, modern keys increasingly contain electronic transponders , chips or fobs—meaning replacement cost and complexity shoot up. When you’re away from home, both the stress and the stakes increase: you may face towing, expensive replacements or worse — being stranded. The sooner you act the less time you give for theft, theft-of-opportunity or further cost escalation. 2. Immediate steps when you realise your keys are missing a) Stay calm and retrace your steps Start by pausing. Panic hampers clear thinking. Consider the last time you remember using your keys: in the car, on unloading luggage, at hotel reception. Retrace your route slowly. As RAC advise, this step often resolves the problem without cost. b) Search systematically Check all pockets, bags, seats, coat hangers, beach bags, under cushions, in and around your car. If you’re staying somewhere temporarily, check hotel rooms, fuelling stations, parking lots. As one travel-site suggests: “Go through all your pockets… look around all surfaces in your hotel room”. c) Contact places you visited Call restaurants, cafés, shops, airport parking or hotels where you parked the vehicle. Key finders are often handed in. d) Assess risk of theft If you suspect the keys were stolen (pick-pocket, hotel burglary or unattended vehicle) you should alert local police and your insurance provider—once a key is missing, your vehicle security is compromised. e) Secure the vehicle If the vehicle is parked in an insecure location, consider moving it (if possible) or arranging towing. Leaving it locked but unattended increases theft risk. 3. How to use replacement key delivery services Replacement key delivery refers to services that cut and program a new car key and deliver it (or have it fitted) to your location—whether your holiday base, airport car park or home driveway. Steps to follow: Have vehicle details ready: make, model, year, registration number, VIN if available. Choose service: For UK and travel users, many auto-locksmiths offer mobile services that come to you. Confirm delivery logistics: Where is the vehicle parked? Will you be present when the key is delivered or fitted? If abroad, is the company able to support your location? Understand key type: Basic mechanical, transponder chip key, keyless fob—all vary in price and logistics. Check old key de-activation: A top provider will delete the lost key’s code so it cannot be used in future—critical for security. Why this is often your best path while travelling Going via your vehicle manufacturer dealer is often slower and pricier — as UK guide notes: “The quickest and least expensive way … is via an auto locksmith.” In a foreign locale, a mobile specialist or key-delivery service saves towing the vehicle and waiting for factory part shipment. 4. Hiring an emergency locksmith: what to look for When you’re locked out or stranded, an emergency locksmith (24-hour) can be your lifeline. But not all are equal. Checklist: Confirm they specialise in auto locksmith / car key replacement , not just domestic locks. Ask for credentials (affiliation with industry body). Insist on proof they will delete/pair the key to your vehicle (so lost key becomes useless). Understand travel/overseas call-out charges. Before arrival, ask for an estimate and payment process (card, cash etc.). Some holiday locales only accept cash. Stay with your vehicle in a safe public place. If you are on a remote vacation site, move to well-lit area before the locksmith arrives. Typical process: The locksmith arrives, verifies ownership (ID + logbook/V5C). They cut and/or program a key, or fix the lock/immobiliser if required. You pay for service and receive the new key — vehicle is back on the road. 5. Insurance, roadside cover and overseas travel issues Insurance/key cover Do you have lost key cover? Most UK car insurance policies don’t include lost keys as standard. You might need a premium add-on. If you claim, your no-claims bonus may be affected. Breakdown/roadside assistance Your breakdown provider (e.g., Motorway or RAC ) may offer key services, but often their vans don’t carry full key-programming equipment. So an auto locksmith still may be needed. Travelling abroad Check if your insurance/cover extends to the country you’re in. Confirm language support and local currency charges with any service you call. If you rented the car: contact the rental company immediately — they may have specific protocols for lost keys (often expensive). 6. Special cases: rental vehicles, keyless entry & fobs Rental vehicles When you lose the keys to a hire car abroad, you are likely to be liable for high fees. Rental companies will likely charge for towing and replacement, not just the locksmith. According to travel forums: “We do not offer coverage for lost keys… The replacement fee of $125 for lost key.” Call the rental agency, follow their instructions, and keep all receipts. Keyless / smart keys & modern cars Most vehicles since 2000 use transponder chips or keyless systems. Replacement these can cost several hundred pounds—UK guides show typical range from £100–£300 or more depending on brand. When you lose a keyless fob, you may need the original still in possession or need the vehicle brought to the dealer. Factor this potential delay into your travel plans. Single key left If you only have one remaining key, treat it as your last key. Get a spare made ASAP once you’re home so you’re not in the same situation again. 7. Preventative measures for your next trip Always carry a spare key at home or with a trusted person. Use a tracker (such as an AirTag or Bluetooth key-tracker) on your keyring. UK blogs suggest this simple tech helps locate lost keys. Establish a routine spot where you place your keys at the start of every journey. If you have old keys (house + car), don’t mix them during travel. Note down your vehicle details (make, model, registration, VIN) in your phone before travelling—so you’re ready if you need a replacement. For holiday car hire, take a photo of the key and keep the rental company’s emergency phone number saved. FAQ Q: What happens if I lose my only car key and I’m abroad? A: You’ll need to contact an auto locksmith or dealer who can cut and program a new key. Have vehicle details ready. Expect cost and waiting time to increase since you have no spare. Q: Can I just use a dealer to replace the key? A: Yes, but often it’s slower and more expensive . UK guides claim mobile auto locksmiths are typically faster and cheaper. Q: How long does replacement take? A: For many modern cars, the physical key can be cut quickly, but programming and blank arrival may take days. Dealers might take up to weeks. Q: Will my car insurance cover a lost key? A: Only if you have key-cover added or your insurance includes it—not standard. Check your policy. Claiming may affect your no-claims status. Q: What should I do if I lose the key and my car is locked in a remote place? A: First make sure you are safe. Then use your breakdown/roadside cover to move the vehicle to a safe area if needed. Then call an emergency auto locksmith to attend and provide a replacement. Need a reliable solution now? Visit our shop at mr-key.com to discover how we can cut and deliver replacement car keys swiftly—even when you’re travelling.
The convenience of a modern car key fob is hard to overstate — it unlocks doors, starts engines, and sometimes even controls your car remotely. But at the heart of all these features lies a small coin battery, usually a CR2032, that powers your fob’s every function. Like all batteries, it doesn’t last forever, and certain conditions can shorten its lifespan or cause unexpected problems like leaks. In this guide, we’ll explore how long your key fob battery should last, what causes leaks, and how temperature plays a critical role in battery performance. How Long Do Key Fob Batteries Typically Last? Most key fobs use lithium coin batteries like the CR2032. These are designed for small electronic devices and typically last between two to four years, depending on how often you use your fob and how close it stays to your vehicle. Constant use — such as frequent locking and unlocking — can deplete the battery faster. If your smart key remains within range of your car at all times, it may draw more power passively. Another key factor is the quality of the battery. High-grade batteries like those from Panasonic usually last longer and offer more consistent voltage. You’ll know it’s time for a replacement when the fob works only at short distances, you need to press buttons more than once, or the indicator light becomes dim or fails to light up at all. Catching these early signs is important, as a simple battery replacement can prevent unexpected lockouts or costly service calls. Battery Leaks in Key Fobs: Risks and Prevention Though not as common, a leaking battery can be far more destructive than a dead one. Leakage can corrode the internal components of your key fob, sometimes making it unusable. Signs of a leak include white residue inside the battery compartment, visible corrosion on the metal contacts, or a strange smell or dampness near the battery slot. Leaks often occur in batteries that are expired, low-quality, or exposed to extreme heat or moisture. To reduce the risk of leaks, it's a good idea to replace your key fob battery every two years, regardless of performance. Always use reputable brands such as Panasonic CR2032 , and store spare batteries in a cool, dry place. Also avoid mixing new and old batteries, even temporarily. If you notice any signs of leakage, remove the battery promptly and clean the compartment using a cotton swab and isopropyl alcohol. If the corrosion is severe, replacing the key fob casing or consulting a specialist may be necessary. How Temperature Affects Your Key Fob Battery Life Ambient temperature can have a major effect on battery efficiency. In cold conditions, the chemical reactions within a lithium coin battery slow down, resulting in reduced voltage and sluggish or inconsistent performance. A key fob left overnight in freezing temperatures might stop working until it warms up. On the flip side, high temperatures accelerate battery depletion. Leaving your key fob inside a hot car or near a heat source can shorten its lifespan and, in rare cases, even cause the battery to leak. Heat can also warp internal components, especially in compact spaces like key fobs. To protect your battery, avoid exposing your key fob to direct sunlight or intense heat for long periods. Don’t store it in jackets or compartments that get hot in summer, and try to keep a spare battery handy if you live in an area with extreme seasonal swings. Choosing temperature-resistant batteries — like those from Panasonic — adds another layer of protection. Key fob batteries are small but essential parts of modern car ownership. Understanding their typical lifespan, recognizing early signs of failure or leakage, and knowing how temperature affects their performance can help you avoid unpleasant surprises. With a little foresight, you can keep your key fob working smoothly for years. Replace the battery every two to three years, choose high-quality brands, and take precautions during temperature extremes. A few minutes of care now can save you from frustration later.
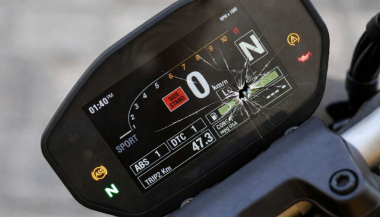
Motorcycle TFT displays are no longer simple speedometers. They are high-resolution computers bonded to glass, sealed against weather, coded to the bike’s electronics, and integrated into safety systems. When a broken TFT display happens, the bill is rarely just “a screen.” Below is the most complete, Europe-focused breakdown of motorcycle display replacement cost you’ll find online—built for riders who are actively searching for replacement prices and real-world risks. What Actually Breaks When a TFT Display Fails A TFT failure is rarely cosmetic. Modern displays are laminated units. Damage spreads. Common failure modes Cracked outer glass → moisture ingress follows Dead pixels or pixel lines → panel failure, not fixable Water ingress / condensation → corrosion of PCB and connectors Sun delamination → layers separate, image fades or ghosts Complete blackout → power board or CAN communication fault Once moisture enters, replacement—not repair—is the only OEM-approved path. Motorcycle Display Replacement Cost (Europe, Real Numbers) These are OEM replacement ranges in Europe, excluding insurance, based on dealer parts pricing, labour, and required coding. Brand Typical TFT Replacement Cost (€) Yamaha €650 – €1,400 BMW €1,200 – €2,500 Honda €800 – €1,800 Triumph €900 – €2,000 Kawasaki €700 – €1,600 Important: These are not worst-case numbers. They are normal dealer outcomes once a display is declared faulty. Why TFT Replacement Is So Expensive 1. The screen is bonded, not modular You cannot replace “just the glass.” The LCD, digitizer, polarizer, and control board are sealed together. 2. Coding & pairing is often mandatory Many TFT units must be coded to the ECU / immobiliser . Without dealer software: Warning lights remain Ride modes may not function Service intervals can’t be reset This adds labour and eliminates cheap aftermarket options. 3. Dead pixels = full replacement Unlike TVs or phones, dead pixels on motorcycle TFTs are not serviceable . OEM policy treats this as a safety-critical component. 4. Water ingress escalates damage fast Condensation today becomes corrosion tomorrow. Displays that “still work” often fail weeks later. The Most Expensive Damage Types (Ranked) Water ingress / condensation Often invisible at first Leads to PCB corrosion Almost always ends in full replacement Dead pixels / pixel columns Caused by pressure, UV heat, or micro-fractures No repair path Cracked glass Immediate usability loss Allows moisture entry Sun delamination Common on bikes parked outdoors Progressive, irreversible Real-World Cost Example (BMW vs Yamaha) BMW adventure / sport models TFT unit: €1,500–€2,200 Coding & labour: €200–€400 Total: €1,700–€2,600 Yamaha mid-range models TFT unit: €700–€1,100 Labour: €100–€250 Total: €800–€1,350 Same problem. Vastly different outcomes. Why “Used” or eBay TFT Displays Are Risky Many riders try to save money this way. Most regret it. VIN or ECU mismatch Immobiliser conflicts No warranty Hidden moisture damage Dealer refusal to code A used TFT that fails after installation means paying twice . The Preventable Part: Surface Damage That Starts It All Most catastrophic failures start small: Fine scratches Stone impacts UV exposure Heat cycling Once the protective surface is compromised, water ingress and pixel failure follow . That’s why many riders choose hydrogel motorcycle screen protectors —they absorb impact, self-heal micro-scratches, and add a moisture barrier without affecting visibility. You can browse motorcycle screen protectors by brand and model here → Motorcycle TFT screen protectors for Yamaha, BMW, Honda, Triumph & Kawasaki . (Exact fit matters. Generic films do not.) What Dealers Rarely Warn You About Condensation voids goodwill claims Pixel defects worsen with time Sun damage is considered “wear” Even hairline cracks can invalidate warranty By the time you ask for a quote, the outcome is usually decided. FAQ — Motorcycle TFT Display Replacement How much does a motorcycle TFT display cost to replace? In Europe, expect €650 to €2,500+ , depending on brand, model, and coding requirements. Can dead pixels be repaired? No. Dead pixels mean full TFT replacement on modern motorcycles. Is condensation inside the display dangerous? Yes. Condensation indicates seal failure and usually leads to corrosion and total failure. Can I ride with a broken TFT display? Often no. Many bikes rely on the TFT for warnings, modes, and diagnostics. Does a screen protector really help? Yes—for scratch prevention, impact absorption, and moisture protection . It cannot fix damage, but it significantly reduces risk. Are aftermarket TFT displays a safe option? Rarely. Most lack proper integration, coding support, or durability. Protecting a €1,500 Part Costs a Fraction A motorcycle TFT display is one of the most expensive components on your bike that faces direct impact, UV exposure, heat, and water—every ride . If you want model-specific protection designed for your exact display shape, visit our shop at mr-key.com and choose the right motorcycle screen protector for your bike.
We use cookies to personalise content and ads, to provide social media features and to analyse our traffic. We also share information about your use of our site with our social media, advertising and analytics partners who may combine it with other information that you’ve provided to them or that they’ve collected from your use of their services.
Basic
Cookies necessary for the proper functioning of the online store (such as storing products in the cart, sending a forgotten cart reminder by e-mail, etc. )
Ensures security for visitors by preventing cross-site request forgery. This cookie is essential for website and visitor security.
1 day
1st Party
laravel_session
PHP
To store the username of the logged in user. This information is necessary to allow the user to remain logged in to a website without having to submit their username and password for each page visited. Without this cookie, the user cannot move to areas of the website that require authenticated access.
Up to 2 hours
1st Party
__stripe_mid
Stripe
Serves to provide fraud prevention when attempting to shop on the site.
Up to 1 year
3rd Party
Advertisement
Advertising on other websites or platforms, retargeting, remarketing.
This cookie is set by Facebook to deliver advertising when they are on Facebook or a digital platform powered by advertising on Facebook after you visit this website.
2 months
3rd Party
fr
Facebook
The cookie also tracks a user's web behavior on sites that have a Facebook pixel or Facebook social plugin.
-
3rd Party
Analytics
Web controlling, conversion tracking of marketing tools.
Used to reduce the query rate. If Google Analytics is implemented via Google Tag Manager, this cookie will be named _dc_gtm_ .
1 minute
3rd Party
_gac_<property-id>
Google Analytics
Contains campaign-related information about the user. Linked Google Analytics and Google Ads accounts, Google Ads website conversion tags will read this cookie.
90 days
3rd Party
Google Remarketing
Google Analytics
Used to track pages viewed by users that are sent to Google Ads
-
3rd Party
dynx_itemid
Google Analytics
Used to track product ID in Google Ads
-
3rd Party
dynx_pagetype
Google Analytics
Used to track page type in Google Ads
-
3rd Party
dynx_totalvalue
Google Analytics
Used to track product value in Google Ads
3rd Party
dynx_category
Google Analytics
Used for category tracking in Google Ads
-
3rd Party
ga4_analytics
Google Analytics
Serves to process behavior such as setting Google Analytics cookies, sending automatic and enhanced measurement events, and declaring common settings.
3rd Party
Google Conversion Tracking
Google Ads.
Used to transmit order information to Google Ads.
-
3rd Party
conversion ID
Google Ads.
An identification number used to transmit order information to Google Ads.
-
3rd Party
conversion labеl
Google Ads.
A label used to transmit information about successful orders to Google Ads.
-
3rd Party
Additional software
Other external services and software to personalize the user experience.
Cookies are small text files that can be used by websites to make a user's experience more efficient.
The law states that we can store cookies on your device if they are strictly necessary for the operation of this site. For all other types of cookies we need your permission.
This site uses different types of cookies. Some cookies are placed by third party services that appear on our pages.
You can at any time change or withdraw your consent from the Cookie Declaration on our website.
Learn more about who we are, how you can contact us and how we process personal data in our Privacy Policy.
Please state your consent ID and date when you contact us regarding your consent.


_1736342764.jpg)

 (1)_1749457081.jpg)