Post Name

You’ve got a spare car key in your hand and one big question on your mind: can you program it yourself, or should you visit a locksmith or dealer? The answer depends on your car and the key. In this guide, you'll discover when DIY programming is possible, when it's not, and how to avoid common mistakes. Whether you're aiming to save money or just want a backup key for peace of mind, here's everything you need to know.


Types of Car Keys: What You’re Working With

Not all car keys are the same—and that matters. Older vehicles often use simple metal keys or basic transponder keys, while modern cars rely on electronic fobs and smart keys with encrypted chips. If your car was built before the early 2000s, there’s a good chance you can program a spare yourself without any special tools. Newer vehicles, however, might require dealer-level software or diagnostic equipment to complete the job.

Basic key types include:

Non-transponder metal keys: can be copied at any key-cutting service.

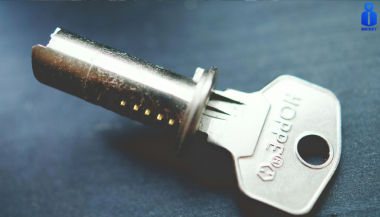
Transponder keys: contain a chip that communicates with your car’s immobilizer.

Remote key fobs: combine keyless entry with a transponder chip.

Smart/proximity keys: high-tech, often require dealer programming.


How DIY Key Programming Works

If your car supports on-board programming, you're in luck. Here’s how a common DIY method looks:

Insert your original (master) key into the ignition and turn it to “on” (don’t start the engine).

Leave it for five seconds, then remove it.

Quickly insert the new spare key and turn it to “on.”

Wait for the security light to blink or turn off—this confirms successful programming.

Test the spare key by starting the engine.

Note: This process varies by vehicle. Always consult your owner's manual or search for your specific make, model, and year online before starting.


When You’ll Need a Professional

DIY isn’t always an option. If your car uses advanced keyless systems, push-button start, or encrypted communication, programming usually requires access to manufacturer software and security codes. In these cases, a qualified locksmith or dealership is your best (and safest) bet.

Also, if your vehicle requires a unique PIN to program a new key—and you don’t have it—don’t guess. Incorrect attempts could lock the system and result in costly reprogramming.


Choosing the Right Spare Key

Buying the correct spare key is critical for success. You’ll need:

The correct transponder chip type (e.g., ID46, ID48, PCF7946)

Matching blade shape or key profile

The correct frequency (commonly 433MHz or 868MHz)

Avoid cheap generic blanks unless you're certain they’re compatible. Poor-quality keys may not accept programming or may fail shortly after.


Quick DIY Checklist: Are You Ready?

You already have a working master key

Your vehicle supports on-board key programming

The spare matches in chip, frequency, and blade

You’re comfortable following time-sensitive steps

You’re okay calling a pro if things don’t work

If you checked most of those, DIY might be a great fit. If not, you’re better off with professional help—it could save you time, frustration, and possibly money in the long run.


Be Smart with Your Spare Key

Having a backup key is more than convenient—it’s essential. From lost keys to unexpected lockouts, a properly programmed spare key can save the day. If your vehicle allows DIY programming, take your time, follow instructions carefully, and double-check compatibility. If you hit a wall, don’t force it. Pros are there for a reason.

No matter which route you take, you’ll thank yourself later for being prepared. Because when it comes to your car keys, one really isn’t enough.

Related Posts

How to Install a Hydrogel Navigation Screen Protector

How to Install a Hydrogel Navigation Screen Protector

Nowadays car interiors rely heavily on touchscreens. Whether you drive a BMW 3 Series , VW Golf , Audi A4 , Mercedes A-Class , Peugeot 3008 , or Skoda Octavia , your infotainment display is the centre of navigation, settings, entertainment and safety features. But these screens are also fragile—prone to scratches , fingerprints , micro-abrasions , and glare . A hydrogel navigation screen protector is one of the best ways to protect your car touchscreen without affecting clarity or touch sensitivity. This guide shows you exactly how to install a hydrogel protector , step by step, with expert tips, mistakes to avoid, and a few insider tricks that most guides miss. What Is a Hydrogel Screen Protector? Hydrogel is a soft, self-healing, flexible material used widely in phone protection and now increasingly in automotive displays. Unlike tempered glass, it adapts to curved edges and eliminates small bubbles over time. For more technical background, you can read the scientific definition on hydrogels Hydrogel is ideal for infotainment screen protection because it: Reduces glare Absorbs micro-scratches Maintains full touch sensitivity Adapts to curved and angled car screens Self-heals small marks over 24–48 hours It’s especially useful for European cars where screens are large and glossy, such as: Mercedes MBUX screens (A-Class, C-Class, GLC) Volkswagen MIB systems (Golf, Passat, Tiguan) BMW iDrive displays (3 Series, X1, X3) Audi MMI touchscreens (A4, A3, Q5) Peugeot i-Cockpit models Renault Clio, Captur, Megane Skoda Octavia, Superb, Scala Curious which specific models benefit the most from hydrogel protection? Check out our full guide on which cars benefit most from hydrogel navigation protection . Before You Start: Essential Preparation Installing a hydrogel protector takes only a few minutes, but the preparation stage determines whether the final result looks factory-perfect . You Will Need Hydrogel screen protector Microfiber cloth Screen-cleaning wipe (wet & dry) Dust-removal sticker (optional but recommended) Small squeegee / card Choose the Right Environment Install the protector in: A dust-free space (car parked indoors is ideal) Soft lighting (so dust particles are visible) A still environment (no wind, no blowing air) Avoid doing it outside or while standing near open windows. Step-by-Step: How to Install a Hydrogel Navigation Screen Protector 1. Clean the Navigation Screen Thoroughly Use a wet wipe first, then a dry microfiber cloth. Focus on: Corners Edges Around the frame Any oily fingerprints Tip: Turn the screen off to see dust more easily. 2. Remove All Dust Particles Even one small dust speck can create a permanent bubble. Use: Dust-removal stickers A clean microfiber cloth Hold the screen at an angle and look under the light. If perfectionism matters anywhere, it’s here. 3. Peel the First Protective Layer Most hydrogel protectors have two layers . Peel Layer 1 halfway and align the protector with: Left and right edges Upper frame Any curved edges Do not peel it completely yet. 4. Align and Apply the Protector Once aligned: Press the top centre gently Slowly drag your finger downward Peel off the rest of Layer 1 as you go The film will naturally stick without much force. 5. Use the Squeegee to Push Out Air Work from centre outward , using firm but controlled pressure. Hydrogel is self-healing , so small micro-bubbles usually disappear within 24–48 hours . 6. Remove the Final Top Layer After application: Peel Layer 2 from one corner Pull slowly to avoid lifting the protector This reveals a glossy, clear surface below. 7. Allow 24 Hours for Full Adhesion Do not touch the screen too much during this period. Avoid: Heat exposure Cleaning sprays Aggressive pressing Hydrogel needs time to “settle” and self-heal. Common Mistakes to Avoid Even a perfect protector can be ruined by simple errors. Installing in a dusty environment Fibres, dust and hair easily get trapped. Touching the sticky side This leaves permanent marks. Rushing the alignment Hydrogel is flexible but not stretch-proof. Cleaning with alcohol after installation This can damage the outer coating. Installing on a hot screen Heat weakens adhesion and causes micro-bubbles. For a complete walkthrough , see our guide on how to protect your car’s navigation screen . Why Hydrogel Is Better Than Tempered Glass for Car Screens Tempered glass works well for smartphones—but not for car navigation screens. Hydrogel performs better because: It bends and adapts to curved displays It doesn’t create raised edges It avoids touchscreen sensitivity issues It self-heals micro-abrasions It provides better Anti-Glare performance If you want to see more in depth guide on why hydrogel protectors are better check out our guide on Hydrogel vs Tempered Glass Navigation Protectors Comparison FAQs 1. Does a hydrogel protector reduce screen sensitivity No. Hydrogel maintains full touch responsiveness because the material is soft and pressure-adaptive. 2. Can I reuse a hydrogel screen protector? No. Once removed, it cannot be reinstalled cleanly. 3. How long do micro-bubbles take to disappear? Usually 24–48 hours. Stubborn ones may take up to 72 hours if the screen is curved. 4. Will the protector affect brightness or clarity? High-quality hydrogel preserves original screen clarity. Matte versions reduce glare but may slightly soften reflections. 5. Is hydrogel safe for anti-reflective or coated screens? Yes. Hydrogel adhesive is gentle and does not damage coatings. If you want premium hydrogel protectors for BMW, Audi, Mercedes, VW, Peugeot, Renault, Skoda and more, explore our full selection today. Visit our shop at mr-key.com Related Guides Which cars benefit most from hydrogel navigation protection How to Protect Your Car’s Navigation Screen from Scratches,Glare & Fingerprints Hydrogel vs Tempered Glass Navigation Protectors Comparison

How to Take the Perfect Photo of Your Key for Easy Replacement

How to Take the Perfect Photo of Your Key for Easy Replacement

When you need a replacement key , taking a clear, detailed photo of your key can make the process much faster and more accurate. A high-quality image helps key makers understand the exact specifications, cuts, and dimensions of your key, which is especially important if you don’t have a spare. In this guide, we’ll walk you through the best practices for photographing your key so you can get an accurate replacement with ease. Why a Clear Key Photo Matters Photographing a key might sound simple, but it requires a bit of attention to detail. A well-taken photo captures the key’s grooves and unique cuts clearly, helping the key cutter replicate the exact pattern. Saves Time : A high-quality photo reduces the need for multiple attempts to cut a new key . Ensures Accuracy : Clear images help capture specific details, leading to a more precise fit. Convenient Process : With just a smartphone and a few tips, you can photograph your key from home without needing special equipment. Essential Tools for Photographing Your Key To take a clear photo of your key, you don’t need much beyond a few household items. Here’s what you’ll need: Smartphone or Camera : A phone camera is usually sufficient, but a standard digital camera works well too. Plain Background : Choose a neutral, solid-colored background like a piece of white paper or a smooth table surface. Good Lighting : Natural daylight or a bright room light helps capture details without shadows. Small Object for Elevation : A coin or similar item can lift the key slightly, making it easier to photograph. Step-by-Step Guide to Taking the Perfect Key Photo Follow these steps to take a photo that ensures clarity and accuracy for key replacement. 1. Set Up the Background Place a piece of plain white paper or another smooth, light-colored surface under your key. The solid color helps the details of the key stand out without any visual distractions. Tip : Avoid backgrounds with patterns or textures, as these can obscure the key’s features. 2. Position the Key Correctly Lay the key flat on the background, with the grooves and cuts facing up. The key should be positioned horizontally to allow a clear view of all its details. Side Profile : Make sure to capture the side profile that shows the cuts and grooves. Elevate Slightly : Place a coin or small object under one end of the key to angle it slightly toward the camera. This can help reduce shadows and improve focus on the cuts. 3. Adjust Lighting Good lighting is essential for capturing details. If possible, photograph your key in natural daylight near a window or use a well-lit room. Avoid Shadows : Ensure that no shadows fall across the key, as they can obscure details. Diffuse Light : If using a lamp, consider placing a thin cloth over it to diffuse the light and reduce harsh reflections. 4. Focus and Zoom Make sure your camera or smartphone is focused directly on the key. You may need to tap the screen to bring it into sharp focus. Zoom in Carefully : If you’re using a smartphone, zoom in slightly to capture the details, but avoid over-zooming, which can blur the image. Test Multiple Angles : Sometimes a slight adjustment in angle can capture the cuts more effectively, so take a few shots from slightly different perspectives. 5. Capture Multiple Photos It’s always a good idea to take several photos to ensure you have the best one. Try different angles and lighting adjustments to capture as many details as possible. Close-Up of the Grooves : Take one close-up image focusing on the cuts and grooves of the key. Overall Image : Include one full-length photo that shows the entire key from end to end. Try Different Angles : Slightly tilt the key or move the camera to see which angle best captures the detail of the cuts. Common Mistakes to Avoid When Photographing Your Key To get the best results, steer clear of these common issues that can impact the quality of your key photo: Blurry Images : If your hand shakes, use a small tripod or prop your phone on a stable surface. Poor Lighting : Avoid taking photos in dim rooms; use bright light to ensure the key is clearly visible. Obstructed Details : Make sure the entire length of the key is visible, without any part being cut off or covered. Tips for Ensuring a Smooth Replacement Process Once you have a clear photo of your key, there are a few final steps to make the replacement process as efficient as possible. Check the Photos : Look over your photos before sending them to ensure that they’re clear and detailed. Label the Key : If you’re photographing multiple keys, label each one in the image or add a note to avoid confusion. Include Measurements : If possible, add the measurements of the key’s length and width in your notes for added accuracy. A clear, detailed photo of your key can save you time and effort when seeking a replacement. By following these simple steps, you’ll provide all the necessary details to ensure your new key is an accurate match. Remember, good lighting, focus, and capturing all the unique cuts are essential to achieving the best results. With these guidelines, you’re set to take a photo that will make your key replacement process smooth and hassle-free.

Comprehensive Guide: Common Car Key Problems and How to Solve Them

Comprehensive Guide: Common Car Key Problems and How to Solve Them

Your car key is a small but essential part of your daily life. When it stops working properly—whether due to a dead battery, water exposure, signal interference, or ignition issues—it can quickly disrupt your plans. Fortunately, many common car key problems can be identified early and resolved effectively with the right approach. In this comprehensive guide, we explore four of the most frequent car key issues and provide detailed solutions to help you stay on the road with confidence. Recognizing a Failing Car Key Battery The battery inside your car key fob is designed to last, but not indefinitely. On average, a CR2032 battery will power a key fob effectively for one to three years, depending on usage patterns and environmental conditions. A weakening battery usually does not fail suddenly; it provides warning signs that many drivers overlook. One of the earliest indications is a noticeable decrease in the remote’s operating range. You may find yourself needing to stand closer to the vehicle for the key fob to work. As the battery continues to lose power, the fob may start working inconsistently, responding only after multiple button presses or with a delay. Some vehicles will display a low battery warning on the dashboard, providing a clear signal that replacement is necessary. Allowing the battery to fully deplete can leave you unable to unlock or start your car at a critical moment. By promptly replacing the battery with a reliable product, such as the Panasonic CR2032, you can restore full functionality and prevent future inconvenience. Addressing Water Damage in Car Keys Water damage is a common cause of key fob failure. Whether it’s from rain exposure, dropping the key in water, or accidental washing, moisture can cause both immediate and long-term damage to the key's internal components. When water enters the fob, it can short-circuit the delicate electronics, rendering the key inoperative. In other cases, corrosion may develop slowly, causing the key to malfunction days or weeks after the exposure. If your car key gets wet, the first step is to remove the battery immediately to minimize damage. Dry the key as thoroughly as possible using a soft cloth and allow it to air dry in a warm, ventilated space for at least 24 hours. It is crucial to avoid using heat sources like hair dryers, which can damage sensitive components. After drying, install a fresh battery and test the key. If the key still does not function, the internal circuits may have been irreparably damaged, and a professional evaluation or shell replacement may be necessary. Understanding Weak Signal Issues in Car Keys A weak key fob signal can lead to frustration and can often be mistakenly attributed to a battery issue alone. While a low battery is a common cause, signal strength can also be affected by other factors. Physical impacts, such as dropping the key, can disrupt the internal connections or damage the antenna, reducing the fob's ability to communicate effectively with the car. Environmental factors can also interfere with the signal. Parking near large metal structures, power lines, or areas with strong electronic interference can block or weaken the signal temporarily. Additionally, worn buttons that no longer make proper contact with the internal circuit board can result in poor signal transmission, even if the battery is new. When experiencing signal issues, it is important to inspect the key carefully. Replacing the battery, ensuring all components are securely seated, and considering the replacement of worn key shells can often restore proper function. Persistent problems, however, may require professional assessment to ensure the key and vehicle are correctly paired. Dealing with Ignition Problems When the Car Key Won’t Turn One of the most alarming car key issues is inserting the key into the ignition only to find it won’t turn. This problem can stem from several sources, and identifying the correct cause is essential for a safe and effective fix. A worn key blade is a common culprit, especially in vehicles with many years of use. Over time, the precision cuts on the key blade can wear down, making it difficult for the key to properly engage the pins within the ignition cylinder. Another frequent cause is the steering wheel lock mechanism. If the steering wheel locks in place, it can prevent the key from turning until the wheel is gently moved to relieve the pressure. In some cases, the ignition cylinder itself may become dirty, misaligned, or mechanically worn. If you have a spare key, testing it can help determine whether the issue lies with the key or the ignition. Cleaning the ignition slot with compressed air can sometimes resolve minor blockages. If the problem persists, professional servicing of the ignition system may be necessary to avoid more serious mechanical failures. Car Key Maintenance and Problem Solving Car key problems are a common inconvenience that most drivers will face at some point. However, understanding the signs and causes of these issues can empower you to act quickly and avoid more significant disruptions. Whether dealing with a failing battery, water exposure, weak signal, or ignition lockout, timely intervention and proper maintenance can prevent escalation. Regularly checking your key's condition, replacing batteries with trusted products, and ensuring your key shell remains intact are simple yet effective practices that can extend the life of your car key. By addressing small issues early, you can maintain reliable access to your vehicle and reduce the risk of unexpected problems. For high-quality replacement shells, batteries, and accessories, visit mr-key.com and explore solutions designed to keep your car key functioning like new.

Understanding Key Fob Security: Protecting Your Vehicle

Understanding Key Fob Security: Protecting Your Vehicle

You use your key fob every day—locking and unlocking your car, maybe even starting the engine from a distance—without giving it a second thought. But as technology in vehicles advances, so do the methods used to compromise it. Keyless entry has made life more convenient, but it’s also introduced a new set of risks. If you’ve ever wondered how secure your key fob really is, or how you can protect yourself against modern car theft, this guide is for you. How Your Key Fob Works Key fobs operate by sending a low-frequency radio signal to your car. When the car recognizes the encrypted signal, it unlocks or starts the engine. It’s fast, wireless, and requires no physical interaction with the car—just proximity. Most modern fobs also use a rolling code system that changes the signal each time, making it harder for thieves to duplicate. This technology helps protect against basic forms of signal cloning, but “harder” doesn’t mean “impossible.” Criminals have found ways to bypass even these security measures. What Is a Relay Attack? One of the most common forms of key fob theft today is the relay attack. It relies on extending the communication range of your key fob without your knowledge. Here’s how it works: thieves use two devices. One person stands near your home, capturing the signal from your key fob—even through walls or windows. The second person uses a relay device to transmit that signal to your car. The car thinks the key fob is close and unlocks the doors. In some cases, they can even start the engine and drive off without ever seeing the key. All of this can happen in seconds. There’s no broken glass, no forced entry, and often no alarms triggered. By the time you realize something’s wrong, your vehicle might already be gone. Signal Jamming and Other Threats Relay attacks aren’t the only thing to worry about. Another tactic thieves use is signal jamming. This involves blocking the signal between your key fob and your car when you attempt to lock it. You might press the button and hear nothing unusual—but your car never actually locks. You walk away, thinking everything’s secure, while the thief simply opens the door and gains access. Then there’s code grabbing, which involves intercepting your key fob’s signal and replaying it later to unlock the vehicle. While more complex and less common, it’s another reminder that your key fob isn’t just a convenience—it’s a target. How to Protect Your Key Fob Fortunately, there are several effective ways to protect your key fob. Start by storing it away from exterior walls and windows. The closer your fob is to the outside of your home, the easier it is for thieves to pick up its signal. For stronger protection, use a Faraday pouch or metal container. These signal-blocking enclosures prevent any radio frequency from escaping, effectively rendering your fob invisible to relay devices. They’re inexpensive, easy to use, and highly effective. If your vehicle allows it, consider disabling the keyless entry feature when not in use—especially overnight or when your car is parked for long periods. You’ll usually find this option in your car’s settings or user manual. Make a habit of confirming your vehicle locks before walking away. Look for flashing lights or listen for the beep. These small checks can alert you if a jamming attempt has occurred. Be cautious with third-party or aftermarket fobs. Not all of them use reliable encryption or high-quality components. A poorly designed fob could introduce new vulnerabilities rather than protecting against them. Stay One Step Ahead Keyless technology is here to stay, offering undeniable convenience to drivers. But with that convenience comes a new wave of digital risks. Thieves don’t need to break windows anymore—they just need the right equipment and an unsecured signal. You don’t need to be a tech expert to protect yourself. Just understanding how your key fob works—and taking a few simple precautions—can significantly reduce your risk. Treat your fob like the digital key it is. Keep it protected, and you’ll keep your car safer, too. Because in today’s world, car security isn’t just about the locks—it’s about the signal.

Chat with us