Post Name

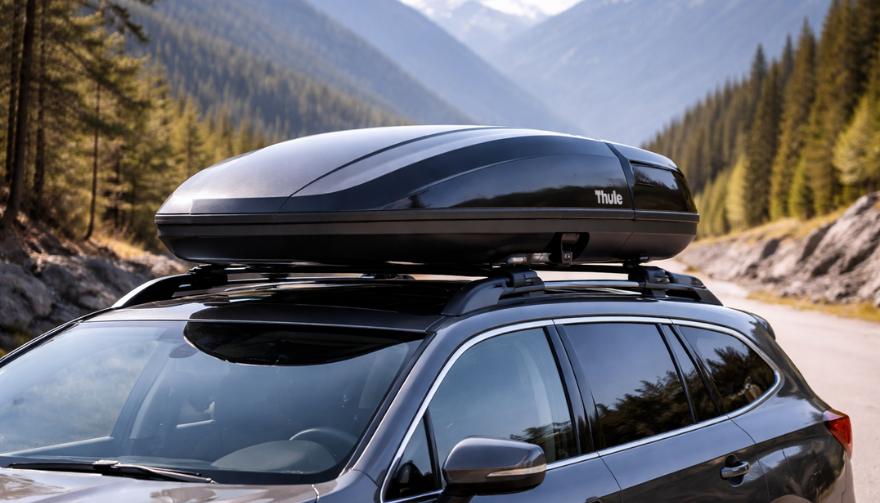
Losing a roof rack key is more common than manufacturers like to admit. The good news: it's almost always solvable — quickly, cheaply, and without a locksmith.

Here's the exact sequence to follow, from the moment you realise the key is gone.

Step 1: Don't Panic — and Don't Force It

The first instinct is to try to open the lock anyway. Don't.

Forcing a barrel lock with the wrong tool damages the cylinder, strips the keyway, and turns a simple €8 key replacement into a €40 lock cylinder replacement. Leave the lock alone until you have the right key or professional help.

Step 2: Check for the Key Code

Before you do anything else, find your key code. This is the number stamped on your lock barrel, printed on your original key card, or listed in your rack documentation.

Where to look:

  • The lock face — look at the front of any lock point on your rack. The code is usually stamped directly on the metal
  • Your original key — if you have one remaining key, the code is often stamped on the bow (the flat grip section)
  • Paperwork — the key card or code card that came with your rack at purchase
  • Registration confirmation — if you registered your rack online with Thule, Yakima, or Mont Blanc, the code may be on your account

Found the code? You're done with the hard part. Jump to Step 5.

No code visible? Continue to Step 3.

Step 3: Photograph the Lock

Take a clear, close-up photograph of the lock face in good light.

This photo can do two things:

  1. Help a specialist identify your key — experienced suppliers can often determine the correct key from the keyway profile and any partial stamping visible in a photo
  2. Help a locksmith decode the lock — a physical locksmith can sometimes read the code from the lock face or decode it by impression

Send the photo to a specialist before assuming you're stuck.

Step 4: Identify Your Brand and Model

If the code is genuinely unreadable, your brand and rack model narrows down the options considerably.

  • Thule — uses N-series codes (N001–N200+), stamped on the lock barrel. If you know your N-code, the key is in stock.
  • Yakima — uses SKS (Same Key System) codes, typically found on the lock core. Common range: SKS-101 to SKS-132+.
  • Mont Blanc — numeric code system, on a sticker inside the lock or on the original key card.
  • GIVI — code found on the product label or lock face.
  • Other brands — most use ISO-standard barrel formats with numeric codes.

Once you have brand + model, a specialist supplier can suggest the most likely code ranges for your rack generation and help you narrow it down.

Step 5: Order the Replacement Key

With your code confirmed, ordering is straightforward.

What you need to provide:

  • Brand (Thule, Yakima, Mont Blanc, GIVI, other)
  • Exact key code (e.g. N121, SKS-115)
  • Quantity — we recommend ordering two: one replacement and one spare

From mr-key.com, keys ship to most European destinations within 2–5 business days. No locksmith. No dealer visit. No full rack replacement.

Step 6: What If You Still Can't Unlock the Rack?

If you have cargo on the rack that you need to remove urgently — bikes, a roof box, ski equipment — and you cannot wait for a replacement key, you have limited but real options.

Option A: Call a locksmith A locksmith experienced with barrel locks can open your rack lock without damage and, in many cases, cut you a working key on the spot. This costs €50–€120 depending on location and time of day.

Option B: Contact your rack manufacturer Thule and Yakima both have customer service lines. With proof of purchase or registered ownership, they may be able to supply a replacement key or lock service.

Option C: Remove the lock cylinder On some rack models, the lock cylinder can be removed from the outside with the rack foot or arm partially dismantled. This requires mechanical confidence and the correct tools — consult your rack's installation manual first. Once the cylinder is out, a locksmith can decode it or you can replace it entirely.

Roof Rack

After the Crisis: What to Do Next

Once you have access and a replacement key in hand, take 10 minutes to prevent this from happening again.

Photograph your key code. Take a photo of the code stamped on your lock face. Store it in cloud storage or email it to yourself with the subject line "roof rack key code — [your rack brand]."

Buy a spare key. It costs less than €10. Keep it somewhere separate from your main keyring — a drawer at home, your work locker, your other car.

Register your rack. Thule and Yakima both offer product registration. Registering links your key code to your account, making future replacements instant.

Label your key. If you have multiple sets of keys — car, house, garage, rack — label your rack key clearly so it's never confused and never left behind.

Roof Rack Key Replacement: Brand-by-Brand Quick Reference

BrandWhere to Find CodeKey FormatNotes
ThuleStamped on lock faceN001–N200+One-Key System: one code for all locks
YakimaOn lock coreSKS-101–SKS-132+Same Key System: one code for all locks
Mont BlancInside lock or key cardNumericSticker sometimes fades — check paperwork
GIVIProduct label or lock faceNumericPrimarily motorcycle/touring racks
Kamei / G3 / FaradLock face or documentationVariesContact supplier with photo if unsure

FAQ

Q: I lost both keys — can I still get a replacement? A: Yes. The key code is stamped on the lock itself, not on the key. As long as you can read the code on the lock face, you can order a replacement. If the code is unreadable, send a photo to a specialist supplier.

Q: My rack is second-hand and came with no keys — what are my options? A: Check the lock face for a stamped code. If none is visible, a locksmith can decode the lock. Alternatively, order a replacement lock cylinder for your rack model — it will arrive with new keys and a new code.

Q: How long will a locksmith take to open a roof rack lock? A: Most experienced locksmiths can open a barrel-style rack lock in under 10 minutes. The challenge is finding one who works on non-automotive locks — call ahead and confirm.

Q: Can I drill out a roof rack lock myself? A: Technically yes, but this destroys the lock cylinder and leaves your rack unsecurable until you replace the full lock assembly. Only consider this if the cargo is time-critical and a locksmith is not available.

Q: Will my insurance cover a lost roof rack key? A: Home contents or vehicle insurance sometimes covers key replacement, including accessories like rack locks. Check your policy — the cost of a specialist supplier is low, but it's worth reclaiming if covered.

Q: I found a spare key in my car — how do I know if it's the right one? A: Try it carefully and gently. If it inserts smoothly and turns without force, it's the correct key. If it doesn't insert fully or requires force, stop — it's the wrong profile and forcing it risks damaging the cylinder.

Q: Can I order a replacement key for an old rack that's no longer sold? A: In most cases yes. Key codes from established brands like Thule and Yakima remain in production for decades. Discontinued rack models still use the same N-series or SKS key codes.

Get Your Replacement Key (Fast EU Shipping – Same-Day Dispatch)

You know the code. You know the process. Don't leave it until the next trip.

Visit mr-key.com to order your replacement roof rack key by brand and code. We ship to Germany, France, Italy, Greece, Netherlands, Romania, Spain, the UK, and across Europe — with tracking on every order.

Order Your Roof Rack Key at mr-key.com

Also read: The Complete Guide to Roof Rack Replacement Keys | Thule Roof Rack Key Replacement: How to Find Your Code and Order the Right Key

Related Posts

Hydrogel vs Tempered Glass Navigation Protectors Comparison

Hydrogel vs Tempered Glass Navigation Protectors Comparison

Cars and vehicles nowadays often include large touchscreen navigation systems that are prone to scratches, fingerprints and cracks. These displays are expensive to replace – one owner reported a factory infotainment screen costing over $3,000 to swap out – so protecting them is crucial. That’s where navigation screen protectors come in. The two main options are hydrogel film protectors and tempered glass protectors . Below, we compare hydrogel vs tempered glass for car navigation screens, looking at fit, durability, clarity and more, so you can choose the best protection for your car. Hydrogel vs Tempered Glass: The Essentials Tempered glass protectors A rigid, hard 9H glass shield. Excellent scratch resistance, very clear, and feels like the original screen. Best for completely flat displays. Hydrogel protectors A flexible, self-healing polymer film originally used in aviation and military applications. Ultra-thin, edge-to-edge fit, excellent for curved or uniquely shaped screens. Key difference: Hydrogel bends. Tempered glass doesn’t. Fit & Coverage (Hydrogel Wins) Modern cars often have curved or tapered displays. Tempered glass cannot follow these shapes, leaving exposed edges, air gaps or weak adhesion points. Hydrogel protectors conform perfectly to flat, curved and 3D-shaped screens. They wrap the edges, eliminate halo gaps, and achieve full-surface coverage. If your car’s screen isn’t perfectly flat, hydrogel is the correct choice. Scratch & Impact Protection Tempered glass: Extremely resistant to scratches Can crack on impact, sacrificing itself to protect the screen Once cracked, must be replaced Hydrogel: Softer surface, but self-heals micro-scratches over time Doesn’t shatter; absorbs everyday bumps Ideal for preventing long-term wear and swirl marks Glass is harder; hydrogel stays clearer longer thanks to self-healing. Clarity, Glare & Touch Sensitivity Both types maintain high clarity and touch accuracy, but behave differently in real use: Tempered glass: Ultra-clear Glossy surface shows fingerprints easily Good touch response Hydrogel: Crystal-clear or matte anti-glare options Reduces reflections in sunlight — very useful in cars Zero touch interference due to ultra-thin structure Minor micro-bubbles self-resolve within hours If you drive in bright sun or hate fingerprint shine, hydrogel’s matte option is a major advantage. Installation & Removal Tempered glass: Simple dry install One-shot alignment Rigid, so easy to place but unforgiving if misaligned Hydrogel: Dry or wet install Allows micro-adjustments Easy bubble removal No cracking during installation Removal is simple for both, though hydrogel is safer (no glass shards, no risk of breakage during removal). If you want to learn more about how to install your hydrogel navigation screen protector visit our guide. Which Should You Choose? For general car owners with modern infotainment systems, the winner is clear: ✔ Hydrogel protectors are better for most car navigation screens. Why: Perfect fit on curved screens Self-healing surface Anti-glare options Full edge-to-edge coverage Zero loss in touch sensitivity Tempered glass is fine for older or perfectly flat screens — but today’s automotive displays benefit more from hydrogel technology. FAQ Does a navigation screen really need protection? Yes. Screens scratch easily, attract fingerprints, and are expensive to replace. A protector preserves clarity and resale value. Is hydrogel or tempered glass better overall? Hydrogel — unless your screen is perfectly flat. It fits better, reduces glare, and self-heals surface scratches. Will a protector affect touch response? No. Both types maintain excellent touch accuracy. Hydrogel is especially responsive due to its thin, adaptive structure. How do I protect my screen from fingerprints and glare? Use a matte hydrogel film. For more techniques, see our guide on [ How to Protect Your Car’s Navigation Screen from Scratches, Glare & Fingerprints ] . Which cars benefit most from hydrogel protection? Any model with curved, large, glossy or high-resolution displays. See our model list: [ Which Cars Benefit Most From Hydrogel Navigation Protection? ] . For custom-cut hydrogel protectors for your exact car model, visit mr-key.com . Related Guides How to Protect Your Car’s Navigation Screen from Scratches, Glare & Fingerprints How to Install a Hydrogel Navigation Screen Protector Which Cars Benefit Most From Hydrogel Navigation Protection?

Car Ignition Switch Problems: Symptoms, Causes, and Replacement Guide

Car Ignition Switch Problems: Symptoms, Causes, and Replacement Guide

The ignition switch is one of the most important electrical components in any car. When it starts to fail, the symptoms can appear suddenly, seem unrelated, and quickly leave you stranded. This guide explains the real-world signs , the common causes , the most accurate diagnosis steps , and a clear ignition switch replacement guide that helps any driver understand what’s happening and what to do next. If you’re dealing with car ignition lock problems , this article gives you the clarity you need to fix the issue fast and safely. What the Ignition Switch Actually Does The ignition switch has two critical jobs: 1. Electrical power distribution It sends power to the dashboard, fuel pump, ignition system, starter motor, and electronic modules. 2. Starting the engine When you turn the key (or press the button), it bridges electrical circuits, enabling the starter motor to crank the engine. When the ignition switch begins failing, even slightly, it disrupts these circuits. That’s why symptoms can range from flickering dash lights to complete engine shutdown. Symptoms of a Failing Ignition Switch These are the most common, proven symptoms that mechanics use to identify ignition switch problems. 1. Car Won’t Start or Cranks Intermittently If turning the key does nothing—or the engine cranks sometimes but not always—the ignition switch may not be sending power consistently to the starter relay. Typical behavior includes: Silence when turning the key Clicks but no cranking Starts only after multiple attempts Total power loss during cranking This is one of the most classic ignition switch symptoms. 2. Stalling While Driving A failing ignition switch can cut power to the engine while you’re moving . Common signs: Sudden stall for no reason All dash lights go off instantly Engine dies when hitting bumps Engine cuts out but restarts immediately This is dangerous and needs urgent attention. 3. Dashboard Lights Flickering or Turning Off When the internal contacts inside the switch wear out, they create tiny power interruptions. You may see: Speedometer drops to zero Warning lights randomly appear Interior electronics momentarily cut out Radio resets or flickers These short power losses are a major red flag. 4. Key Feels Hot or Hard to Turn If the key is warm after driving, the switch may be overheating internally. If the key becomes difficult to rotate, the ignition cylinder (mechanical part) may be worn — which often leads to switch failure later. 5. Accessories Don’t Work in ACC Mode If turning the key to ACC does not activate: radio wipers power windows heater fan …the accessory circuit inside the switch may be failing. 6. No Sound from the Fuel Pump When Turning the Key You should hear a soft humming for 1–2 seconds. If you don’t, it may mean the ignition switch isn’t powering the pump relay. What Causes Ignition Switch Problems? Ignition switches fail for predictable and well-documented reasons. 1. Internal Wear Over Time Inside the ignition switch are metal contact plates . After thousands of cycles, these contacts burn, corrode, or lose tension. Symptoms develop slowly: random stalling needing to wiggle the key intermittent power This is the most common cause. 2. Heavy Keychains Many drivers don’t realise this: A heavy keychain constantly pulls on the ignition cylinder. Over years, this causes: internal looseness misalignment premature switch failure If your keychain has more than a few items, it may be contributing. 3. Heat and Electrical Overload Faulty relays, worn fuel pumps, or aftermarket accessories can overload the ignition switch. Excess heat damages the internal copper contacts, causing: hot key symptoms partial circuit failure total switch burnout 4. Moisture or Dirt in the Cylinder Moisture or dust causes the mechanical part of the ignition to jam or bind. This forces extra pressure onto the switch every time the key turns. 5. Faulty Key or Worn Key Blade If your key doesn’t rotate smoothly, it can damage both the cylinder and the switch . Worn keys often lead to electrical faults later. How to Diagnose Ignition Switch Problems Accurately Before replacing parts, you should confirm the ignition switch is truly the issue. These steps follow the same logic professional mechanics use. 1. Check if Dashboard Lights Turn On Turn the key to ON without starting the engine. If: no lights come on lights flicker radio stays off …the ignition switch might not be sending voltage. 2. Try Starting with Accessories On Turn the key to ACC. If the accessories work in ACC but the engine won’t start, the “start circuit” inside the ignition switch may be failing. 3. Wiggle Test Gently wiggle the key while: trying to start with ACC on with the engine idling If wiggling makes electronics turn on/off, the switch is internally worn. 4. Bump Test While Driving If the car stalls when hitting bumps or potholes, the switch is losing internal contact momentarily. This is one of the strongest indicators of a failing switch. 5. Test Voltage at the Ignition Switch (Advanced) Using a multimeter, check for: constant power switched power accessory power start signal power If any circuit fails randomly, it confirms an ignition switch fault. If you need a safety reference for electrical testing, you can check the UK Government’s general vehicle safety guidance here: Prevention: How to Avoid Ignition Switch Problems Ignition switch failures can often be prevented with small habits. 1. Keep Your Keychain Light Remove heavy accessories. This reduces stress on the ignition cylinder and switch dramatically. 2. Avoid Resting Hands on the Key While Driving Constant pressure on the key twists the internal contacts. 3. Only Use Correct, Undamaged Keys Bent, cracked, or worn keys can damage: the cylinder the switch the steering lock If your key is worn, replace it before it causes further problems. 4. Address Electrical Problems Early A failing alternator, weak battery, or short circuits can overload the ignition switch. If you notice dim headlights or battery warnings, fix those early. 5. Keep Dust and Moisture Out of the Cylinder Avoid spraying WD-40 or household lubricants into the ignition—it attracts dust. Use proper graphite lock lubricant if needed. Ignition Switch Replacement Guide You should only replace the ignition switch if diagnosis confirms it. Below is a clear replacement overview used by both DIYers and technicians. Note: Procedures vary by vehicle, but the overall steps are similar. 1. Disconnect the Battery Always disconnect the negative terminal. This prevents: accidental airbag deployment electrical shorts damage to modules 2. Remove Steering Column Covers Most cars use simple screws underneath. Once removed, the top and bottom covers split apart. 3. Locate the Ignition Switch Module It is usually mounted behind the ignition cylinder. Depending on the car: it may be held by two screws or secured with clips or integrated into a combined steering lock module 4. Remove the Electrical Connector Ignition switches usually have one large multi-pin connector. Release the locking tab and pull it gently. 5. Remove and Replace the Switch Install the new switch in the exact orientation as the old one. Common mistakes to avoid: misaligning the switch’s internal slot tightening screws unevenly damaging wiring during removal 6. Reassemble and Test Thoroughly After reassembly, test: ACC mode ON mode engine start headlights indicators wipers radio If everything works consistently, the replacement is successful. Is It Safe to Drive with a Bad Ignition Switch? Usually no . A failing ignition switch can: stall the engine suddenly disable power steering shutdown ABS cut power to headlights at night The RAC warns that electrical failures causing engine cut-outs are a serious safety risk. If your switch is failing, get it inspected immediately. FAQ: Car Ignition Switch Problems 1. How much does ignition switch replacement cost? Most replacements cost £80–£300 depending on the vehicle. Some modern cars require coding, making the cost higher. 2. Can a bad ignition switch cause the car to stall? Yes. Loss of electrical contact in the switch can cut power to the engine instantly. 3. Is a failing ignition switch the same as a bad starter? No. A bad starter prevents the engine from cranking. A bad ignition switch prevents power from reaching the starter or other systems. 4. Can a locksmith replace an ignition switch? In many cases, yes — especially for older vehicles. For modern immobilizer systems, a vehicle technician may be required. 5. Can I drive with ignition switch problems? It’s unsafe. The engine can cut out while driving, especially on bumps or turns. 6. Does a bad ignition switch affect accessories only? It can affect: accessories engine start fuel pump dashboard power ECU communication It depends on which internal circuit fails. 7. What’s the lifespan of an ignition switch? Most last between 10–15 years , depending on usage and electrical load. 8. Do push-button cars have ignition switches? Yes — they use an electronic ignition switch module instead of a mechanical one. Failure symptoms are similar. 9. What does a worn key have to do with ignition switch problems? A badly worn key can cause mechanical strain on the cylinder, which then stresses the electrical switch linked behind it. 10. Can I prevent ignition switch issues? Yes — keep your keychain light, avoid forcing the key, and keep electrical systems maintained. For high-quality replacement automotive parts and spare key, visit our shop at mr-key.com .

Pioneering Innovations in Cars: A Journey Through 150 Years

Pioneering Innovations in Cars: A Journey Through 150 Years

The automotive industry has undergone extraordinary changes in the last 150 years. From the earliest steam-powered engines to today’s smart, electric vehicles, cars have become symbols of innovation, convenience, and human progress. This article explores the most groundbreaking innovations that have defined car history, driving us into the future. 1. The Birth of the Car (Late 19th Century) The late 1800s marked the beginning of the automobile industry with the invention of the first cars. Key Milestone: Karl Benz’s creation of the Benz Patent-Motorwagen in 1885-86 was a game-changer. Impact: For the first time, individuals could travel independently without relying on horses or trains. This innovation laid the foundation for a new era of personal transportation. 2. The Rise of Mass Production (Early 20th Century) The early 1900s brought cars to the masses through assembly line production. Key Milestone: Henry Ford’s introduction of the moving assembly line in 1913 revolutionized car manufacturing. Impact: Cars became affordable and accessible to ordinary people, leading to the widespread adoption of automobiles. The Model T became a symbol of this industrial transformation. 3. The Era of Safety Innovations (1950s–1970s) As cars became common, safety innovations took center stage. Key Milestones: Seatbelts: Volvo introduced the modern three-point seatbelt in 1959. Airbags: Developed in the 1970s to provide additional protection during crashes. Impact: These innovations drastically reduced injuries and fatalities, making cars safer for all passengers. Safety continues to be a driving force behind car innovations today. 4. Fuel Efficiency and Environmental Consciousness (1980s–2000s) The late 20th century witnessed a shift towards eco-friendly car innovations. Key Milestones: Introduction of hybrid cars like the Toyota Prius (1997). Stricter emission regulations led to cleaner, more efficient engines. Impact: Consumers and manufacturers started prioritizing fuel efficiency and reducing environmental impact. This period laid the groundwork for the electric car revolution. 5. The Digital Revolution in Cars (2000s–2020s) Modern cars are no longer just machines; they’re smart devices on wheels. Key Innovations: GPS Navigation: Real-time navigation made travel simpler and safer. Infotainment Systems: Touchscreens and voice controls for entertainment and information. Driver Assistance: Features like parking sensors, adaptive cruise control, and collision alerts. Impact: Technology has transformed driving into a more connected, comfortable, and efficient experience. 6. Electric and Autonomous Cars (The Future is Here) The future of cars lies in sustainability and autonomy. Key Innovations: Electric Vehicles (EVs): Companies like Tesla popularized EVs, offering zero-emission driving. Autonomous Driving: Self-driving technology is advancing rapidly, promising safer and more efficient transportation. Impact: Electric and autonomous cars represent a monumental leap towards reducing environmental impact and redefining mobility. The next 50 years will likely see even bolder transformations. From steam engines to self-driving electric vehicles, the car has come a long way. Each era brought innovations that shaped not just how we travel but also how we live. As technology continues to evolve, the possibilities for cars seem endless. Whether it’s improving safety, reducing emissions, or offering autonomous capabilities, cars will remain at the heart of human progress.

Inside a Key Rescue: How to Salvage a Wet or Flooded Car Key

Inside a Key Rescue: How to Salvage a Wet or Flooded Car Key

Water damage is one of the most common – and most stressful – problems car key owners face. Whether your key fell into a puddle, went through the wash, or was simply caught in a downpour, it can stop working in an instant. But does water exposure always mean you need to buy a new key? Not necessarily. In many cases, a quick and proper response can save your key, restore its function, and spare you an expensive replacement. This guide walks you through how to rescue a wet or flooded car key, what not to do, and how to know when it’s beyond repair. How Car Keys Get Wet Modern car keys, especially keyless remotes and fobs, aren’t designed to be waterproof. Even small amounts of moisture can cause damage if the internal components are exposed. Some of the most common causes of water-damaged keys include: Being left in clothing and run through the washing machine Falling into sinks, toilets, or puddles Exposure to rain, snow, or slush Dropped at the beach or near pools Stored in damp gym bags or jackets Once water enters the key shell, it can corrode the circuit board, damage the battery, or short-circuit the transponder chip. What to Do Immediately After Getting Your Key Wet The first few minutes after exposure are critical. Acting quickly can mean the difference between a working key and a dead one. 1. Remove the Key from the Water Take the key out of the water as quickly as possible. The longer it sits, the more damage can occur inside. 2. Open the Key Shell If your key has a removable shell, gently open it using a small screwdriver or plastic tool. This allows you to access the internal parts and dry them properly. If you’re unsure how to open it, look up a video or guide specific to your car model. 3. Take Out the Battery Immediately remove the battery. A wet battery in contact with electronics can cause short circuits and corrosion. Do not reinstall the same battery later; it may be compromised. 4. Dry the Internal Components Gently pat all visible parts dry with a lint-free cloth. Do not use paper towels, as they can leave behind fibers. Then allow the key to air-dry using one of the following methods: Option A: Use Silica Gel or Desiccant Packs Place the opened key and all components in an airtight container with silica gel packets. Leave it sealed for at least 24 to 48 hours. Option B: Use Uncooked Rice If silica gel isn’t available, uncooked rice can work as an alternative. Place the key in a bowl of rice and cover it completely. Leave it for 2 to 3 days. Do not use a hair dryer, microwave, or place the key near a heater. High heat can warp the plastic shell and damage sensitive electronics. After Drying: Will the Key Work Again? After a full drying period, insert a new battery and test the key. In many cases, it will begin working again — especially if water exposure was brief and the board was not damaged. If the key still doesn’t respond, try the following steps: Inspect the circuit board for corrosion or residue Try replacing the outer shell if buttons feel worn or unresponsive Check if the vehicle recognizes the transponder chip If none of these steps work, the internal chip or electronics may be permanently damaged. When to Replace the Key Sometimes the damage goes beyond what cleaning and drying can fix. You’ll likely need a full replacement if: The key no longer sends a signal The LED light doesn’t flash when pressing buttons There is visible corrosion on the circuit board The transponder chip fails to communicate with the vehicle Buttons are physically damaged or unresponsive The key was underwater for an extended time In these situations, replacing the key is often the most reliable solution. Don’t Wait Until It’s Too Late – Keep a Spare Key If you’ve experienced water damage once, there’s a good chance it could happen again. Keeping a backup key stored in a safe, dry location is one of the best precautions you can take. You can find replacement key shells, blades, batteries, and fully programmed keys for most vehicle brands at mr-key.com . Investing in a spare can save time, money, and stress. Final Tips for Car Key Water Damage Act fast and remove the battery as soon as possible Use silica gel or rice for slow, safe drying Avoid heat, rubbing, or shaking the electronics Replace the shell if it’s worn, cracked, or damaged If in doubt, test with a new battery before replacing the entire key Need Replacement Parts? Whether you need a new shell, battery, or a complete key, visit mr-key.com to find compatible parts for a wide range of vehicles. Our selection includes: Key shells for all major brands CR2032 batteries Key blades and electronics Fully assembled remote keys with chip and programming options If your key has been exposed to water, don’t panic. With the right steps, many keys can be rescued — and if not, we’re here to help you find the right replacement.

Chat with us