Post Name

Car keys have come a long way from simple metal tools to advanced electronic devices. While they offer convenience and security, they're also prone to wear and tear over time. If you own an Opel, Peugeot, or Citroën, you've likely encountered a dead battery, faulty buttons, or a cracked key shell. These issues, though frustrating, are easy to fix with the right approach. This guide explores everything you need to know to maintain or restore your car key's functionality—without unnecessary expense. From understanding how these keys work, to step-by-step maintenance practices, we'll walk you through all the essentials to keep your keys working like new.

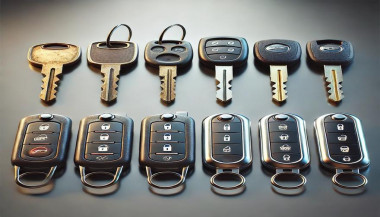
How Car Keys Work Today

Modern car keys are more than just tools to unlock and start your vehicle. They are miniaturized computers embedded with microchips, transponders, and signal systems that communicate with your car's onboard electronics. Most Opel, Peugeot, and Citroën models feature flip keys with integrated remote buttons, and inside each key fob lies a delicate configuration of electronics that perform critical functions like remote unlocking and engine ignition authorization.

These keys depend heavily on power from a small coin-cell battery, usually the CR2032. While small and seemingly insignificant, the battery is the heart of your key fob. When it begins to fail, even slightly, the symptoms can range from reduced signal range to complete unresponsiveness. That’s why it’s crucial to replace it in time.

Replacing the Battery in Opel Car Keys

Your Opel car key is essential to your daily routine. Over time, the lithium CR2032 battery inside may weaken, resulting in slower response or reduced range. The good news is that replacing it is straightforward and requires only a few tools. Once you identify your key type—typically a flip key with two or three buttons—you can open the casing using a small screwdriver or plastic tool.

Inside, you'll find a battery nestled within the key's internal framework. Carefully remove the old battery and insert a new CR2032, ideally a reliable model like the Panasonic CR2032. Proper alignment is crucial; the wrong orientation can prevent the key from functioning entirely. Align the shell halves carefully and press them back together until they click into place. If your key shell is also showing signs of damage or wear, consider replacing it with this Opel 3-button key housing.

Replacing the battery is a quick job, but it makes a world of difference in reliability and peace of mind. Plus, it spares you the inconvenience of getting stranded or needing dealer intervention.

Common Peugeot Flip Key Issues and How to Fix Them

Peugeot flip keys are compact and stylish, but frequent use can expose a few recurring problems. The flip mechanism may lose tension, buttons may stop responding, or the outer shell may crack. In many cases, the spring inside wears down, and the plastic buttons may degrade over time. Exposure to moisture, dirt, or accidental drops can also damage the key fob.

These symptoms can often be resolved by replacing both the battery and the key shell. Thankfully, most replacement shells come with a new flip mechanism already installed, making the process quick and cost-effective. If you're dealing with a damaged shell or non-functional buttons, a compatible Peugeot key shell can restore both the look and performance of your key.

To repair your key, begin by opening the shell using a thin screwdriver. Remove the internal circuit board and transponder chip carefully. Transfer them into the new shell, ensuring everything fits snugly. Insert a fresh CR2032 battery before closing the key shell, then test all functions.

Unlike dealer replacements, this DIY approach is affordable and efficient, putting the control in your hands.

Understanding Citroën Key Shell Compatibility

Citroën keys often resemble Peugeot models but feature subtle design differences that can impact shell compatibility. Before purchasing a replacement shell, it's important to examine a few key details. First, confirm that the button layout matches exactly—some models include a trunk release, while others do not.

Next, check the blade type, usually HU83 or VA2, and make sure your new shell supports that configuration. You’ll also need to ensure there’s a space for the transponder chip, as without it, your car won’t start. Lastly, confirm that your circuit board (PCB) fits securely in the new housing. If you're unsure, compare your key with this Citroën 3-button shell for reference.

A mismatched shell can result in poor fitment, misaligned buttons, or failure to lock and unlock your car. That’s why it's important to compare your current key closely to any replacement product. Shell replacements are not one-size-fits-all—small deviations in size or design can render them useless.

Going Beyond: Caring for Your Car Key Long-Term

Maintaining your car key goes beyond occasional repairs. Think of it as part of your overall vehicle care routine. Keep your key clean by regularly wiping it down with a soft cloth. Avoid exposing it to moisture or extreme temperatures, which can damage the battery and internal electronics. If your key starts to feel loose or if the blade no longer flips smoothly, it's a sign that maintenance is due.

Another often-overlooked aspect is the condition of your key ring. Overloaded or heavy keychains can put unnecessary strain on the ignition switch and the key’s blade over time. Keeping your key light and secure can prolong both the key and the ignition system’s lifespan.

If you find yourself frequently pressing buttons or experiencing lag in signal response, don't ignore it. These early symptoms are usually signs that a new battery is needed, or the shell's contacts are worn. Addressing small problems before they escalate can save you from full key failure.

Car Key Maintenance

Caring for your car key doesn’t have to be a daunting task. Whether you drive an Opel, a Peugeot, or a Citroën, regular maintenance and minor DIY repairs can significantly extend the life of your key. Replacing a worn battery and upgrading a broken shell not only restores functionality but also revives the overall appearance of your key. Use quality components, take your time during repairs, and always test your key before final assembly.

By taking these small steps, you can avoid costly replacements and enjoy reliable key performance for years to come. Explore trusted replacement parts and accessories online at mr-key.com to keep your car keys in top condition year-round.

Related Posts

How to Identify the Right Replacement Key Shell for Your Car

How to Identify the Right Replacement Key Shell for Your Car

If your car key shell is cracked, worn, or the buttons no longer press properly, replacing it with a new shell is often the most affordable and effective solution. But one major challenge stands in the way: figuring out exactly which replacement shell you need. With so many variations in blade types, button layouts, and internal compatibility, it’s easy to buy the wrong part—and waste both time and money. This guide breaks down how to identify the correct key shell for your car, so you can upgrade or replace your damaged remote housing without confusion. Step 1: Identify Your Key Blade Type One of the most important features is the key blade. Even within the same car brand, different models and years may use different blade types. Two of the most common are: HU83 blade – Used by many Peugeot and Citroën models. It has a curved groove on both sides. VA2 blade – Similar in appearance but has a flat groove instead of a curve. Other types include TOY43, TOY47, and SIP22, often used in Toyota, Fiat, and other manufacturers. If you're unsure, comparing your blade side-by-side with online reference images helps avoid errors. Tip: Never rely only on the number of buttons—focus on the blade profile first. Step 2: Count and Match the Button Layout Next, verify how many buttons your original key has, and in what layout. Common options include: 2 buttons: Lock / Unlock 3 buttons: Lock / Unlock / Trunk Smart keys: May have a more complex layout or hidden emergency blade Even a small difference in layout can prevent the rubber buttons from pressing the internal switches correctly. Also check whether the button pad is integrated into the case or if it’s a separate piece. That may affect your fit. Step 3: Check the Internal Electronics Placement When swapping a shell, you’ll be transferring the circuit board and (in most cases) a transponder chip. The replacement case must have: The same mounting points and slots Space for the battery (check if yours is CR1620, CR2032, etc.) A similar design to support the flip mechanism, if your original key has one If the internal layout doesn’t match, your circuit board may not sit securely—or your buttons may not work. Bonus tip: Open your old key carefully and take photos of the internal structure before ordering a shell. Step 4: Consider the Key Type – Flip or Fixed There are two main styles: Flip keys: Blade folds into the case and pops out with a button press Fixed blade keys: Blade is static and exposed You must match your replacement with the original style, unless you're intentionally upgrading. Flip key conversions are popular, but they require extra parts and a bit more installation effort. Step 5: Check the Model Compatibility List Many key shells are marketed as being compatible with a range of car models. Look for a list that includes: Your vehicle’s make and model The production years (e.g., “Peugeot 207 2010–2014”) Even then, cross-reference with your physical key—models change subtly across production years. Step 6: Know What You're Not Getting A replacement key shell typically does not include: The circuit board (you must transfer it from your old key) The transponder chip A pre-cut blade (unless stated) You’ll likely need to cut the new blade or reuse the old one if it's detachable. Choosing the right replacement key shell doesn't have to be trial and error. By focusing on blade type, button layout, and internal structure, you can confidently find a case that fits your needs—and your key electronics. It’s a simple fix that extends the life of your existing key without the cost of a full replacement. Just take your time, check the details, and match your original key carefully. A few minutes of inspection now can save hours of hassle later.

What You Need To Know About BMW  Swirl Flaps and How To Solve The Problem With Them

What You Need To Know About BMW  Swirl Flaps and How To Solve The Problem With Them

Swirl flaps are a BMW system that has been introduced to help burn the fuel mixture in the cylinder better due to the fact that diesel engines do not have throttle valves and it is not possible to adjust the air-fuel ratio. A diesel engine without vortex valves operates between a poor and a rich fuel mixture, because the only way to regulate it is through fuel injection. Design of the first generation swirl flaps that are made of made of metal. Unfortunately, swirl flaps are responsible for countless damaged engines and costly repairs due to design errors or metal fatigue. Once damaged, the cylinder sucks them in and causes great damage. This is how damaged valves damage the cylinder. Typical swirl flaps suction damage. The vortex valves are positioned in the inlet and are controlled by vacuum (DDE 4.0) or electrically (DDE5.0 / DDE6.4) by the engine ECU. Effects of malfunctioning valves: Swirl valves are stuck in open position: Deterioration of exhaust gas performance at lower speeds. Swirl valves are stuck in closed position: Approximate power loss of 10% at high engine speeds. How swirl flaps work: Performance characteristics: The vortex valves are in the closed position, at low engine speeds and small amounts of fuel injected (controlled by the ECU card). They open under the following conditions: coolant temperature <14 ° C OR * fuel quantity> 24 mg OR 2. engine speed 2250 rpm OR 3. inlet air temperature <-5 ° C. BMW and Pierburg have decided to produce diesel engines with metal vortex valves. The speed at which the pistons in the diesel engine operate is at least 60 rpm, so a sucked vortex valve will break and cause a number of damages inside the engine. In most cases, one or more pistons are severely damaged, as a bonus you get valves, in some cases a head or turbocharger. And this combination with a BMW engine is like a cumulative jackpot 🙂 In 2004, BMW began work on the problem and improved the design, however, a number of owners reported ongoing problems in this area. The solution to this problem is by removing the vortex valves and plugging, which does not affect the performance of the engine and at the same time, you can safely pass the exhaust test. Engines: M47 (136hp VP44 fuel pump) has no valves. M47N common rail engine (including M47N / M47TU / M47TUD20) (150hp. Face lift model from 2001 -) has valves. M57 engines (M57D) (525d & 187hp. 330d) cars with manual transmission do not have valves, but those with automatic have. M57N engines (M57TUD) (525d & 330d 204hp) have vortex valves. Ruined swirl flapss: The plugs that replace the vortex valves are easy to find on the internet, but you can also find them here on our website. Typical plugs: Disassembly of vortex valves: The vortex valves can be safely dismantled and in most cases if they are removed properly no loss of power is felt. Final list of models for which vortex valves are installed: Engine: M47N/M47TU/M47TUD20 Applications: * 110 kW (148 hp) and 330 N·m (243 lb·ft) o E46 320d 2001-2005 o E83 X3 2.0d (up to end of 2006) Engine: M47TU2D20 The engine was updated again in 2004 as the M47TU2D20. Still at 1995 cc, it produced more power across the range. Applications: * 120 kW (161 hp) and 340 N·m (251 lb·ft) E60/E61 520d E87 120d E90/E91 320d E83 X3 2.0d (end of 2006 onwards) Engine: M57/M57D25 M57D25 was introduced in 2000. Applications: * 166 PS (122 kW; 164 hp) at 4000 rpm, 350 N·m (260 lb·ft) at 2000-2500 rpm with a 4750 rpm redline, models: 2000-2003 E39 525d *Vehicles With Automatic Transmission ONLY* Engine: M57N/M57TU/M57TUD25 M57TUD25 was introduced in 2004. Applications: * 177 PS (130 kW; 175 hp) at 4000 rpm, 400 N·m (300 lb·ft) at 2000-2750 rpm models: E60/E61 525d Engine: M57/M57D30 M57D30, also called M57D29, was introduced in 1998. Applications: * 184 PS (135 kW; 181 hp)@4000, 390 N·m (290 lb·ft)@1750-3200 models: E39 530d *Vehicles With Automatic Transmission ONLY* E46 330d/330xd *Vehicles With Automatic Transmission ONLY* * 184 PS (135 kW; 181 hp)@4000, 410 N·m (300 lb·ft)@2000-3000 models: E38 730d *Vehicles With Automatic Transmission ONLY* E53 X5 3.0d * 193 PS (142 kW; 190 hp)@4000, 410 N·m (300 lb·ft)@1750-3000 models: E38 730d E39 530d Engine: M57N/M57TU/M57TUD30 M57TUD30 was introduced in 2002. It originally produced 160 kW (215 hp) at 4000 rpm and 500 N·m (370 lb·ft) at 2000-2750 rpm, but was tweaked for 150 kW (201 hp) at 4000 rpm and 410 N·m (300 lb·ft) at 1500-3250 rpm for 2003 and again for 200 kW (268 hp) at 4000 rpm and 560 N·m (410 lb·ft) at 2000-2250 rpm in 2004. Applications: * 204 PS (150 kW; 201 hp)@4000, 410 N·m (300 lb·ft)@1500-3250 models: E46 330d/330Cd/330xd E83 X3 3.0d * 218 PS (160 kW; 215 hp)@4000, 500 N·m (370 lb·ft)@2000-2750 models: E53 X5 3.0d E60/E61 530d/530xd E65 730d * 272 PS (200 kW; 268 hp)@4000, 560 N·m (410 lb·ft)@2000-2250 E60/E61 535d * 245 PS (180 kW; 242 hp)@4000, 500 N·m (370 lb·ft)@2000-2250 * 286 PS (210 kW; 282 hp)@4000, 580 N·m (430 lb·ft)@2000-2250 Engine: M57TU2D30 M57TU2D30 was introduced in 2007, making its debut in the facelifted E60 and E61. * M57TU2D30-UL: 197 PS (145 kW; 194 hp) * M57TU2D30-OL: 235 PS (173 kW; 232 hp)@4000, 500 N·m (370 lb·ft)@2000-2750 * M57TU2D30-TOP: 286 PS (210 kW; 282 hp), 580 N·m (430 lb·ft) Applications: * 197 PS (145 kW; 194 hp), 400 N·m (300 lb·ft) models: E90/E91/E92 325d E60/E61 525d/525xd * 231 PS (170 kW; 228 hp)@4000, 500 N·m (370 lb·ft)@2000-2750 models: E65 730d E90/E91 325d E90/E91 330d/330xd * 235 PS (173 kW; 232 hp) models: E60/E61, BMW E70, BMW E71 * 286 PS (210 kW; 282 hp), 580 N·m (430 lb·ft) models: E60/E61 535d E70 X5 3.0sd E71 X6 xDrive35d E83 X3 3.0sd E90/E91 335d The above models are listed for information only if you want to to make sure your engine has valves installed, please contact a competent person. Please note that the information described above is for informational purposes only and does not claim to be reliable. Mr-key.com is not responsible for any repair work you undertake that is related to the topic described in this article.

KEY COVERS: WHAT DO YOU NEED TO KNOW?

KEY COVERS: WHAT DO YOU NEED TO KNOW?

What is a Key Cover? A key cover , often referred to as a key shell or key case, is the outer part of your key. It houses the electronic board, chip, and battery but excludes the internal electronics themselves. If your key casing is damaged, there’s no need to replace the entire key – just changing the key cover can restore its durability and usability while saving you money. When Do You Need a New Key Cover? You might need a key cover replacement when: The buttons on your key become worn out or stop responding. The outer case cracks, exposing the internal electronics. The key mechanism no longer functions smoothly. You want to refresh the appearance of your key with a new, sturdy shell. Instead of struggling with a faulty key, simply replace the cover and extend the lifespan of your original key! How to Choose the Right Key Cover? When selecting a replacement key cover, consider the following factors: Button Layout: Ensure that the number of buttons and their symbols match your existing key. Blade Shape: If your key includes an integrated blade, make sure the new shell accommodates it correctly. Quality: A good-quality key cover ensures a snug fit, smooth functionality, and long-lasting durability. At MR-KEY , we offer a variety of key covers designed to match your specific car model perfectly, providing both aesthetics and functionality. How to Change Your Key Cover? Replacing your key cover is simple and doesn’t require professional assistance. Here’s how: Purchase a compatible key cover from our website. Open your old key case carefully. Transfer the electronic board and chip from your original key to the new key cover . Reassemble the key, ensuring all components fit securely. Test the buttons and functions to confirm everything is working properly. For step-by-step guidance, we provide video tutorials on our website, showing you exactly how to change your key shell and even replace the battery if needed. What Else Can You Change When Replacing the Key Cover? While changing your key cover, it's the perfect time to: Replace non-functional click buttons on your key’s electronic board. Change the battery since you're already disassembling the key, ensuring it lasts longer. At MR-KEY , we strive to make key replacements easy, affordable, and accessible to everyone. Explore our website to find the perfect key cover, key cutting services, and useful video guides to help you maintain your car key like a pro!

Programming Your Car’s Keyless Remote: A Simple Guide for Every Car Owner

Programming Your Car’s Keyless Remote: A Simple Guide for Every Car Owner

When it comes to convenience, car keyless remotes have revolutionized the way we interact with our vehicles. No more fumbling with traditional keys or worrying about locking yourself out. With just a push of a button, you can lock, unlock, and even start your vehicle. But what happens when your keyless remote stops working, or when you need to program a new one? Here’s a simple guide to help you program your car's keyless remote, regardless of your vehicle's make or model. Understanding Keyless Remotes Before jumping into the programming process, it’s important to understand what a keyless remote is and how it works. Essentially, a keyless remote allows you to interact with your vehicle without needing to physically insert a key. Instead of using a traditional metal key, your car’s electronic system communicates wirelessly with the remote, allowing you to lock, unlock, and sometimes even start your vehicle, all with the push of a button. These remotes typically use a radio frequency to communicate with your car, sending a signal that’s encrypted for security. Most modern cars use transponder technology, which makes the system more secure and resistant to hacking or copying. This means that the remote must be properly programmed to your vehicle’s system to function correctly. When Do You Need to Program a Keyless Remote? There are several situations in which you might need to program your keyless remote: Replacing a Lost or Damaged Remote : If you’ve lost your keyless remote or it’s no longer functioning properly, you’ll need to get a replacement. This may require programming the new remote to sync with your vehicle. Adding a New Remote : If you’ve bought an additional keyless remote for your car (for a spouse, child, or other family member), you’ll need to program it so that it works with your vehicle. Battery Replacement : Sometimes, replacing the battery in your remote can cause the programming to reset, meaning you’ll need to reprogram the remote for it to work again. Changing or Resetting Vehicle Settings : Occasionally, vehicle settings or remotes can be reset or reprogrammed as part of regular maintenance, requiring you to program new or additional remotes. How to Program Your Car’s Keyless Remote Programming a keyless remote is easier than you might think, and in most cases, it can be done by following a few simple steps. The process varies slightly depending on the make and model of your car, but here’s a general overview of the steps involved: Get Your New or Replacement Remote : Ensure that your remote is compatible with your car’s system. If you're not sure, you can check with your car's manufacturer or an authorized dealership. Some remotes require specific codes to be programmed. Sit Inside Your Vehicle : For safety and security reasons, most cars require you to be inside the vehicle while programming the remote. Insert the Key in the Ignition : Insert the key into the ignition and turn it to the "ON" position without starting the engine. For cars with push-to-start systems, you may need to press the start button without pressing the brake pedal. Activate the Programming Mode : Depending on your car’s system, you’ll need to follow a sequence of steps to enter programming mode. This could involve turning the key on and off several times, or pressing certain buttons in a specific order. Refer to your vehicle’s manual for the exact steps, as the process can differ from one model to another. Program the Remote : Once your car is in programming mode, you’ll need to press the button on your keyless remote that you want to program. Usually, you’ll hear a chime or see the lights flash, indicating that the remote has been successfully programmed. Some cars may require you to press the button several times to ensure proper synchronization. Test the Remote : After programming, test the remote to make sure it works properly. Try locking and unlocking the doors or starting the engine. If everything works as expected, you’re done! Exit Programming Mode : To finish the process, simply turn off the ignition and remove the key. This should exit programming mode. If you have additional remotes to program, repeat the steps above for each one. What to Do if Programming Doesn’t Work While programming a keyless remote is usually a straightforward process, there are instances where things don’t go as planned. If your remote isn’t syncing with your car after following the steps, here are a few troubleshooting tips: Check the Battery : If the remote’s battery is dead or weak, it won’t transmit the signal to your car. Replace the battery and try programming again. Verify the Compatibility : Make sure that the remote is compatible with your vehicle’s make, model, and year. Some vehicles require special remotes that can only be programmed by the manufacturer or an authorized locksmith. Reset Your Vehicle’s System : In some cases, you might need to reset the car’s system to clear previous programming attempts. Check your owner’s manual or consult a professional for assistance. Consult a Professional : If you continue to have issues, it might be time to visit a dealership or a certified locksmith. These professionals have the tools and experience to program the remote correctly and ensure everything works seamlessly. Why Programming Your Keyless Remote Is Important Programming your keyless remote is a simple but important task that helps ensure your car’s security and convenience. By understanding how the process works and what to do if things go wrong, you’ll be able to troubleshoot and solve any issues quickly. Whether you’re replacing a lost remote or adding a new one to your collection, knowing how to program your remote saves time and money compared to visiting a dealership or locksmith. With the increased reliance on keyless remotes for unlocking and starting vehicles, it’s essential for every car owner to be familiar with this process. By keeping your remote in good working condition and knowing how to program it when necessary, you’ll enjoy a smoother, more efficient experience with your vehicle.

Chat with us