Post Name

In modern vehicles, the once simple car key has evolved into a sophisticated piece of technology. With built-in electronics, anti-theft features, and remote functions, today’s car key is part of a broader ecosystem designed for both convenience and security.

Yet with all this advancement comes confusion. Many drivers aren’t sure what terms like immobilizer, transponder chip, and key fob actually mean—or how they relate to one another.

This guide breaks down these components in detail, explains how they work together, and clarifies why it matters when you’re replacing, reprogramming, or troubleshooting your car key.

What Is an Immobilizer?

An immobilizer is an electronic security device installed in most modern cars. Its purpose is to prevent the engine from starting unless the correct key—specifically, the correct coded signal—is detected.

When you attempt to start your vehicle, the system searches for a signal from a registered transponder chip. If that signal is missing or incorrect, the immobilizer blocks the ignition system. This means the engine won’t crank or turn over, even if the physical key fits.

Immobilizers are embedded in the car’s engine control unit (ECU) and became standard in vehicles after the late 1990s in many countries, in response to rising car theft.

They offer a silent, invisible layer of protection against common theft techniques like hotwiring. Without the correct digital authentication, the car simply will not start.

What Is a Transponder Chip?

The transponder chip is a small electronic microchip located inside the car key or key fob. The word “transponder” is a combination of “transmitter” and “responder.” It is designed to emit a unique code that the car's immobilizer can recognize.

When you insert the key into the ignition or bring a key fob close to a push-start system, the chip sends a signal to the car’s ECU. If the code matches the one stored in the car’s database, the immobilizer disables itself and allows the engine to start.

Transponder chips are passive. They do not require a battery and are activated by electromagnetic energy from the ignition coil or receiver unit inside the vehicle.

Without a functioning or correctly programmed transponder chip, your car will not start—even if the metal key turns in the ignition.

What Is a Key Fob?

A key fob is the remote control device you carry that allows you to perform functions like locking or unlocking your car, opening the trunk, and activating panic alarms. In modern vehicles, key fobs may also control remote start or proximity-based unlocking features.

While key fobs often include a transponder chip inside them, they serve a different function. The key fob operates remote commands via short-range radio signals. The transponder chip, on the other hand, is responsible for enabling or disabling the engine.

Smart key fobs, found in many recent vehicles, don’t require insertion into the ignition. Instead, the car detects the fob nearby and permits the engine to start with a button press.

If your key fob battery dies, you might still be able to start the car manually if the transponder chip is present and recognized. Most fobs also have a hidden mechanical key inside, which can be used to unlock the door if the electronics fail.

How They Work Together

Although they are distinct components, the immobilizer, transponder chip, and key fob all work in harmony to secure and operate your vehicle.

The immobilizer controls whether the engine is allowed to start.

The transponder chip provides the digital identity that must be verified by the immobilizer.

The key fob provides wireless control of non-engine functions like locking, unlocking, and trunk access.

In most modern cars:

You approach the vehicle with the key fob.

The fob unlocks the doors.

When you start the vehicle, the transponder chip sends a signal to the immobilizer.

If the code matches, the engine is authorized to start.

If the code doesn’t match, or if the chip is missing or damaged, the engine remains disabled—even if the rest of the key’s functions work perfectly.

Why This Knowledge Matters

Understanding how your car key works is essential when:

Replacing a lost or broken key

Buying a spare or duplicate

Diagnosing why your car won’t start

Choosing between locksmith and dealership services

For example, if your key fob unlocks your car but won’t start it, the issue may lie with the transponder chip, not the battery. Conversely, if your fob doesn’t lock or unlock the car remotely, the chip may still be functional, and the issue could simply be a dead battery.

Replacing a key without properly programming the transponder chip will result in a non-starting vehicle, even if the key physically fits and the remote works.

For reliable replacement keys, fobs, batteries, and accessories, visit our Car Key Collection.

Car keys are no longer just mechanical tools. They’re complex, multi-function devices that combine security, convenience, and connectivity. By understanding the role of the immobilizer, transponder chip, and key fob, you’ll not only protect your vehicle better, but also avoid costly mistakes when dealing with repairs or replacements.

Whether you’re troubleshooting a non-starting car or simply trying to replace a damaged key, knowing the difference between these three elements gives you the clarity and confidence to take the right action.

Related Posts

What You Need To Know About BMW  Swirl Flaps and How To Solve The Problem With Them

What You Need To Know About BMW  Swirl Flaps and How To Solve The Problem With Them

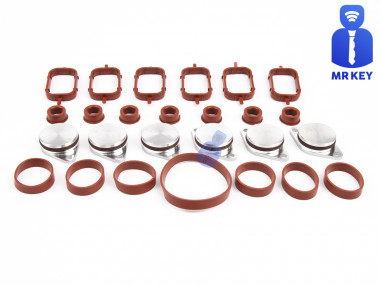
Swirl flaps are a BMW system that has been introduced to help burn the fuel mixture in the cylinder better due to the fact that diesel engines do not have throttle valves and it is not possible to adjust the air-fuel ratio. A diesel engine without vortex valves operates between a poor and a rich fuel mixture, because the only way to regulate it is through fuel injection. Design of the first generation swirl flaps that are made of made of metal. Unfortunately, swirl flaps are responsible for countless damaged engines and costly repairs due to design errors or metal fatigue. Once damaged, the cylinder sucks them in and causes great damage. This is how damaged valves damage the cylinder. Typical swirl flaps suction damage. The vortex valves are positioned in the inlet and are controlled by vacuum (DDE 4.0) or electrically (DDE5.0 / DDE6.4) by the engine ECU. Effects of malfunctioning valves: Swirl valves are stuck in open position: Deterioration of exhaust gas performance at lower speeds. Swirl valves are stuck in closed position: Approximate power loss of 10% at high engine speeds. How swirl flaps work: Performance characteristics: The vortex valves are in the closed position, at low engine speeds and small amounts of fuel injected (controlled by the ECU card). They open under the following conditions: coolant temperature <14 ° C OR * fuel quantity> 24 mg OR 2. engine speed 2250 rpm OR 3. inlet air temperature <-5 ° C. BMW and Pierburg have decided to produce diesel engines with metal vortex valves. The speed at which the pistons in the diesel engine operate is at least 60 rpm, so a sucked vortex valve will break and cause a number of damages inside the engine. In most cases, one or more pistons are severely damaged, as a bonus you get valves, in some cases a head or turbocharger. And this combination with a BMW engine is like a cumulative jackpot 🙂 In 2004, BMW began work on the problem and improved the design, however, a number of owners reported ongoing problems in this area. The solution to this problem is by removing the vortex valves and plugging, which does not affect the performance of the engine and at the same time, you can safely pass the exhaust test. Engines: M47 (136hp VP44 fuel pump) has no valves. M47N common rail engine (including M47N / M47TU / M47TUD20) (150hp. Face lift model from 2001 -) has valves. M57 engines (M57D) (525d & 187hp. 330d) cars with manual transmission do not have valves, but those with automatic have. M57N engines (M57TUD) (525d & 330d 204hp) have vortex valves. Ruined swirl flapss: The plugs that replace the vortex valves are easy to find on the internet, but you can also find them here on our website. Typical plugs: Disassembly of vortex valves: The vortex valves can be safely dismantled and in most cases if they are removed properly no loss of power is felt. Final list of models for which vortex valves are installed: Engine: M47N/M47TU/M47TUD20 Applications: * 110 kW (148 hp) and 330 N·m (243 lb·ft) o E46 320d 2001-2005 o E83 X3 2.0d (up to end of 2006) Engine: M47TU2D20 The engine was updated again in 2004 as the M47TU2D20. Still at 1995 cc, it produced more power across the range. Applications: * 120 kW (161 hp) and 340 N·m (251 lb·ft) E60/E61 520d E87 120d E90/E91 320d E83 X3 2.0d (end of 2006 onwards) Engine: M57/M57D25 M57D25 was introduced in 2000. Applications: * 166 PS (122 kW; 164 hp) at 4000 rpm, 350 N·m (260 lb·ft) at 2000-2500 rpm with a 4750 rpm redline, models: 2000-2003 E39 525d *Vehicles With Automatic Transmission ONLY* Engine: M57N/M57TU/M57TUD25 M57TUD25 was introduced in 2004. Applications: * 177 PS (130 kW; 175 hp) at 4000 rpm, 400 N·m (300 lb·ft) at 2000-2750 rpm models: E60/E61 525d Engine: M57/M57D30 M57D30, also called M57D29, was introduced in 1998. Applications: * 184 PS (135 kW; 181 hp)@4000, 390 N·m (290 lb·ft)@1750-3200 models: E39 530d *Vehicles With Automatic Transmission ONLY* E46 330d/330xd *Vehicles With Automatic Transmission ONLY* * 184 PS (135 kW; 181 hp)@4000, 410 N·m (300 lb·ft)@2000-3000 models: E38 730d *Vehicles With Automatic Transmission ONLY* E53 X5 3.0d * 193 PS (142 kW; 190 hp)@4000, 410 N·m (300 lb·ft)@1750-3000 models: E38 730d E39 530d Engine: M57N/M57TU/M57TUD30 M57TUD30 was introduced in 2002. It originally produced 160 kW (215 hp) at 4000 rpm and 500 N·m (370 lb·ft) at 2000-2750 rpm, but was tweaked for 150 kW (201 hp) at 4000 rpm and 410 N·m (300 lb·ft) at 1500-3250 rpm for 2003 and again for 200 kW (268 hp) at 4000 rpm and 560 N·m (410 lb·ft) at 2000-2250 rpm in 2004. Applications: * 204 PS (150 kW; 201 hp)@4000, 410 N·m (300 lb·ft)@1500-3250 models: E46 330d/330Cd/330xd E83 X3 3.0d * 218 PS (160 kW; 215 hp)@4000, 500 N·m (370 lb·ft)@2000-2750 models: E53 X5 3.0d E60/E61 530d/530xd E65 730d * 272 PS (200 kW; 268 hp)@4000, 560 N·m (410 lb·ft)@2000-2250 E60/E61 535d * 245 PS (180 kW; 242 hp)@4000, 500 N·m (370 lb·ft)@2000-2250 * 286 PS (210 kW; 282 hp)@4000, 580 N·m (430 lb·ft)@2000-2250 Engine: M57TU2D30 M57TU2D30 was introduced in 2007, making its debut in the facelifted E60 and E61. * M57TU2D30-UL: 197 PS (145 kW; 194 hp) * M57TU2D30-OL: 235 PS (173 kW; 232 hp)@4000, 500 N·m (370 lb·ft)@2000-2750 * M57TU2D30-TOP: 286 PS (210 kW; 282 hp), 580 N·m (430 lb·ft) Applications: * 197 PS (145 kW; 194 hp), 400 N·m (300 lb·ft) models: E90/E91/E92 325d E60/E61 525d/525xd * 231 PS (170 kW; 228 hp)@4000, 500 N·m (370 lb·ft)@2000-2750 models: E65 730d E90/E91 325d E90/E91 330d/330xd * 235 PS (173 kW; 232 hp) models: E60/E61, BMW E70, BMW E71 * 286 PS (210 kW; 282 hp), 580 N·m (430 lb·ft) models: E60/E61 535d E70 X5 3.0sd E71 X6 xDrive35d E83 X3 3.0sd E90/E91 335d The above models are listed for information only if you want to to make sure your engine has valves installed, please contact a competent person. Please note that the information described above is for informational purposes only and does not claim to be reliable. Mr-key.com is not responsible for any repair work you undertake that is related to the topic described in this article.

Simple Tips to Free a Stuck Lock: What You Need to Know

Simple Tips to Free a Stuck Lock: What You Need to Know

Locks are meant to provide security, but when they seize up, they can leave you feeling frustrated and helpless. Dealing with a stuck lock is more common than you might think, and thankfully, there are affordable and effective solutions to get it working smoothly again. Whether it's a car door, trunk, or your home lock, here are some tried-and-true methods to free up a jammed lock. Why Locks Seize Up Understanding the causes behind a stuck lock can help you prevent it from happening in the future. Locks can seize up for various reasons: Dirt and Debris : Over time, dust, grime, or even small particles can accumulate inside the lock mechanism, making it harder for the internal parts to move smoothly. Rust and Corrosion : Exposure to moisture, humidity, or salty air can lead to rust buildup on metal parts within the lock, which can prevent movement. Lack of Lubrication : Locks need to be lubricated occasionally to ensure smooth operation. Without lubrication, friction increases, and the lock may eventually jam. Now, let’s look at some simple steps to tackle a seized lock. Step 1: Use Graphite Powder or Dry Lubricant The first thing to try is applying a lubricant, but be careful about what type you use. Wet or oil-based lubricants can attract dust, which eventually clogs the lock. Graphite Powder : This is one of the best options for freeing up a stuck lock. Sprinkle a small amount of graphite powder into the keyhole, insert the key, and gently move it back and forth. This spreads the graphite, reducing friction and allowing the lock components to move more freely. Dry Lubricants : These are specifically designed for locks and are ideal for situations where you want to avoid residue buildup. Spray a small amount into the lock, then insert the key and gently turn it. Pro Tip : Avoid using regular WD-40 or other oil-based products, as they may lead to a buildup over time, making the problem worse. Step 2: Try the Key with Gentle Force If lubrication alone doesn’t do the trick, the next step is to use a little gentle force with your key. Be cautious here; applying too much force could break the key inside the lock. Insert the Key : Once the lubricant has been applied, insert the key fully into the lock. Wiggle Carefully : Gently wiggle and turn the key without applying too much force. This movement may help distribute the lubricant further and gradually loosen up any stuck components. Caution : If you feel excessive resistance, don’t force the key. Forcing it can cause damage or even snap the key, which would require additional assistance to remove. Step 3: Warm Up the Lock (Especially Useful for Cold Weather) Cold temperatures can cause locks to seize due to ice or metal contraction. If you suspect the cold is the issue, warming up the lock can be effective. Use a Hair Dryer : Direct warm air onto the lock for several minutes to allow the metal to expand and the ice (if any) to melt. Heat the Key : You can also try warming the key slightly with a lighter, but exercise caution and make sure it isn’t too hot before inserting it into the lock. Safety Note : Avoid open flames directly on the lock itself, as this can damage surrounding surfaces or even warp the lock mechanism. Step 4: Use a Vinegar Solution for Corroded Locks If rust is the culprit, vinegar is a great household solution for loosening rust and corrosion in a lock. Apply Vinegar : Put a few drops of vinegar on the key, insert it into the lock, and let it sit for a minute or two. Vinegar can help dissolve light rust, making it easier to turn the key. Follow with Lubricant : After using vinegar, apply a small amount of graphite powder or dry lubricant to ensure the lock remains smooth and functional. Step 5: Work with Compressed Air to Remove Debris If dirt or debris has accumulated inside the lock, compressed air is a quick and efficient way to clear it out. Blow Out Dust : Use a can of compressed air and direct the nozzle into the keyhole. Short bursts of air can blow out dust and small debris that may be obstructing the mechanism. Follow Up : After using compressed air, it’s a good idea to add a dry lubricant to prevent any remaining dust from causing future jams. How to Prevent Lock Seizure in the Future Once you’ve successfully freed a seized lock, it’s helpful to take steps to prevent it from happening again. Here are some preventive tips: Regularly Lubricate : Use a dry lubricant or graphite powder once or twice a year, especially if you live in a humid or dusty area. Keep Locks Clean : Wipe off any visible dirt or dust around the lock mechanism. If the lock is exposed to elements (like outdoor or car locks), covering it can help keep debris and moisture out. Avoid Overusing Keys : If your key shows signs of wear, consider getting a replacement. Worn-out keys can cause more friction inside the lock, leading to jams. When to Seek Professional Help Sometimes, despite your best efforts, a lock just won’t budge. In cases where the lock is significantly damaged, heavily corroded, or if the key breaks inside, it’s best to reach out for professional assistance. A professional has specialized tools and expertise to address these issues without causing further damage. Taking Care of Your Locks A stuck lock can be an inconvenience, but by following these simple steps and using a little patience, you can often resolve the issue without professional help. Keeping locks in good condition with regular care is the key to ensuring they function smoothly for years to come.

Removing Keys from Locks: A Comprehensive Guide

Removing Keys from Locks: A Comprehensive Guide

Removing a key from a lock may seem simple, but it can become tricky when dealing with stuck or broken keys. Whether you're dealing with a standard lock, padlock, or vehicle ignition, understanding the correct techniques can save you from damage and frustration. This guide will walk you through the essential steps for removing keys from various types of locks, offering practical advice and tips to ensure a smooth process. Common Scenarios and Challenges Keys can become stuck or difficult to remove for several reasons, including misalignment, wear and tear, or damage to the key or lock. Additionally, environmental factors like temperature changes can cause metals to expand or contract, making key removal more challenging. Recognizing the cause of the issue is the first step in effectively addressing it. Basic Techniques for Key Removal Gentle Wiggle and Pull: The first technique to try is a gentle wiggle and pull. Hold the key firmly and move it slightly up and down or side to side while pulling gently. This method works well if the key is simply stuck due to misalignment. Lubrication: If the key is difficult to remove, applying a small amount of graphite powder or a silicone-based lubricant into the keyhole can help. Avoid using oil-based lubricants, as they can attract dirt and grime, potentially worsening the problem. Tapping the Lock: For stubborn cases, lightly tapping the lock with a hammer while gently pulling the key can help dislodge it. This method is effective when the key is stuck due to debris or minor misalignments within the lock. Advanced Techniques for Stuck Keys Using a Key Extractor: If the key is broken off inside the lock, a key extractor tool can be very effective. Insert the tool into the keyhole, hook the broken key piece, and pull it out carefully. This method requires patience and a steady hand. Pliers and Tweezers: If part of the key is still protruding, you can use needle-nose pliers or tweezers to grip and pull the key out. Be careful not to apply too much force, as this can push the key further into the lock or damage the lock mechanism. Heat Application: In cold weather, metal contracts, which can cause the key to get stuck. Gently heating the key with a hairdryer or warm cloth can expand the metal slightly, making it easier to remove. However, avoid using an open flame, as it can damage the lock or key. Preventing Key Stuck Issues Prevention is always better than cure. Here are some tips to prevent keys from getting stuck in the future: Regular Maintenance: Keep your locks and keys clean and well-lubricated with appropriate materials. Regularly inspect for wear and tear, and replace any damaged keys or locks. Use Duplicate Keys: If you notice a key becoming difficult to use, have a duplicate made before it breaks or becomes stuck. This will save you the hassle of dealing with a stuck key. Avoid Excessive Force: Never force a key into a lock. If it doesn’t turn easily, stop and inspect both the key and the lock for damage or obstruction. When to Call a Professional While many stuck key issues can be resolved with the techniques mentioned above, there are times when professional assistance is necessary. If you’ve tried all the methods and the key remains stuck, or if you’re dealing with a high-security lock, it’s best to contact a professional locksmith. They have the tools and expertise to safely remove the key without damaging the lock or key further. Dealing with a stuck key can be frustrating, but understanding the proper techniques can save you time and prevent damage. From basic wiggling and lubrication to more advanced methods like using a key extractor, there are various approaches depending on the severity of the situation. Regular maintenance and careful handling can help prevent these issues from occurring in the first place. When in doubt, don’t hesitate to seek professional help to ensure your lock and key remain in good working condition.

How to Upgrade Your Car Key: A Step-by-Step Guide

How to Upgrade Your Car Key: A Step-by-Step Guide

Upgrading your car key can significantly improve your vehicle’s security and make your daily routine more convenient. Whether you’re upgrading from a basic key to a remote key or stepping up to a smart key, this guide will take you through the entire process, step by step, ensuring a smooth transition. Understanding Your Key Type Before you start the upgrade process, it’s important to know which type of key you currently have. Here are the most common key types: Traditional Metal Keys : These are basic, mechanical keys, common in older vehicles. They don’t have any electronic components. Transponder Keys : These have an electronic chip inside the key head that communicates with the vehicle’s computer system for added security. Remote Keys : These keys have buttons to lock/unlock the doors remotely and usually have a physical blade as a backup. Understanding your current key type will help guide your decision on the best upgrade path. Choosing the Right Upgrade Once you know what type of key you have, you need to decide what features you want in your upgraded key. Some options to consider are: Remote Locking : Allows you to lock/unlock the doors from a distance. Keyless Entry : Lets you unlock the car without taking the key out of your pocket. Smart Key : Offers advanced functions such as proximity unlocking, push-button start, and remote engine start. Take some time to research the options available for your specific car model. Many car manufacturers offer compatible upgrades for different key types, so it’s important to consult your dealership or a trusted locksmith for recommendations. Gathering What You’ll Need Before starting the upgrade process, make sure you have the following materials: The New Key : This could be a transponder key, remote key, or smart key. Your Original Key : You’ll need this as a reference throughout the process. Key Programming Device : Some keys require a special device to pair the key with your car. Car Manual or Programming Guide : It’s always a good idea to have your car’s manual handy for specific instructions. Having everything ready will make the process much smoother. Step-by-Step Upgrade Process Purchase the New Key Start by purchasing your new key. You can buy it from your car’s dealership, a certified locksmith, or a trusted online retailer. Make sure that the key is compatible with your vehicle’s make and model. Transfer Electronics (if necessary) If your new key is just a shell, you will need to transfer the internal components from your old key. This includes the transponder chip and, if applicable, the key blade. Be careful when transferring the electronics to avoid any damage. Program the Key Programming the new key is crucial for it to work with your vehicle. Here’s a general guide: Insert the original key into the ignition and turn it to the ON position. Quickly remove the original key and insert the new key. Turn the new key to the ON position and wait for the security light to turn off. This might take a few minutes. Test the New Key After programming, it’s important to test the new key to ensure everything works properly. Check the following functions: Locking and unlocking the doors Starting the engine Any additional functions like remote trunk opening or proximity unlocking Troubleshooting Common Issues If your new key isn’t working as expected, don’t worry! Here are some common problems and their solutions: Key Not Recognized : Check if the transponder chip is properly placed in the key. Key Doesn’t Start the Car : Double-check the programming steps to ensure everything was done correctly. Buttons Don’t Work : Verify that the battery in the new key is properly installed and functional. If the problem persists, it’s best to consult a professional locksmith or visit your dealership for further assistance. Upgrading your car key is an excellent way to improve both the security and convenience of your vehicle. By following these steps, you’ll be able to transition smoothly to your new key. If you run into any issues, don’t hesitate to reach out to a professional locksmith who can help you along the way. Enjoy the benefits of your new car key and the added peace of mind that comes with enhanced security.

Chat with us