Post Name

Modern cars rely heavily on large navigation and infotainment screens. These displays are used constantly and exposed to scratches, fingerprints, dust, heat and direct sunlight. Repairs are expensive, and replacement screens can cost several hundred euros. A hydrogel screen protector adds a thin, flexible layer that guards the display without affecting clarity or touch response.

Premium and Luxury Models


Premium brands adopted large infotainment screens early, making them among the most likely to benefit.

BMW models such as the 3 Series, 5 Series and X5 use wide, high-resolution displays (up to 14.9”).

Audi cars like the A4, A6 and Q5 include 10–12” touchscreens.

Mercedes-Benz models such as the C-Class, E-Class and GLC use vertically oriented 11–12” MBUX screens.

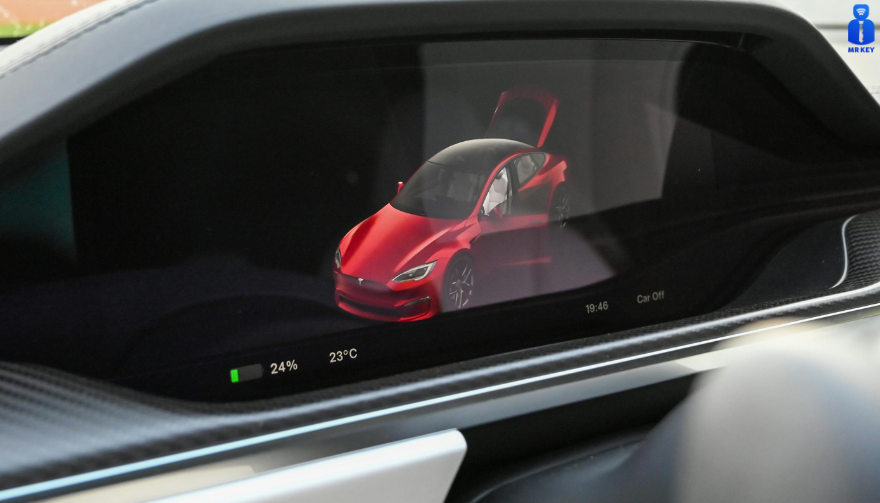
Porsche vehicles (Cayenne, Macan, Panamera) and Tesla models (Model 3, Y, S) use some of the largest screens in Europe.

These vehicles benefit significantly from a hydrogel protector thanks to their large surfaces and frequent touch use.

Popular European Models


Mainstream European cars now feature screens as large as luxury models.

Volkswagen offers 10–15” displays in models such as the Golf, Tiguan and Passat.

Škoda uses up to 13” screens in the Octavia, Superb and Kodiaq.

Dacia equips models like the Jogger, Duster and Sandero with 7–10” displays.

Toyota (Corolla, RAV4, Yaris Cross).

 Renault (Captur, Clio, Megane E-Tech).

Peugeot (208, 3008, 5008)

 Citroën (C4, C5 Aircross)

 Nissan (Qashqai, Juke, Leaf) 

Ford (Focus, Kuga)

Kia (Sportage, Ceed, Niro, Picanto, Stonic, Rio, Sorento)

all rely on large central touchscreens.

As screens grow in size across all price segments, protection becomes increasingly important.

Benefits of Hydrogel Screen Protectors


Hydrogel film is thin, flexible and adheres tightly. It works on flat and curved surfaces where tempered glass cannot. The material absorbs small impacts and can self-heal minor marks. With its anti-glare properties It keeps the display clear, maintains original brightness and preserves smooth touch performance. It also helps reduce smudges and makes daily cleaning easier.

Once you’ve chosen a hydrogel protector for your car, the next step is applying it correctly. Follow our step-by-step guide on how to install a hydrogel navigation screen protector for a perfect bubble-free result.

Who Needs Hydrogel Protection the Most?


Any car with:

a large touchscreen (8” or more)

glossy glass prone to fingerprints

curved edges

high cabin sun exposure

Hydrogel is especially useful for daily drivers, family cars and vehicles where multiple people interact with the system.

Rental, Company and Service Vehicles Benefit Even More


Cars used for business—such as rental cars, company vehicles, fleet cars, taxis, and service vehicles—experience significantly higher daily usage than private cars. Their navigation screens are touched constantly by different drivers, exposed to dust, temperature changes and frequent cleaning.

Because of this heavy wear, screens in rental and company vehicles are far more likely to show scratches, fingerprints and long-term damage. A hydrogel dashboard screen protector adds a durable layer that absorbs daily abuse, keeps the display clear for every driver and reduces maintenance costs for fleet managers.

For any vehicle that is shared or driven by multiple users, screen protection is not just useful—it’s essential.


FAQ


What is a hydrogel screen protector?

A thin, flexible film that protects a car’s navigation or dashboard display.

How is it installed?

Clean the screen, align the film and press it down. Dry installation is recommended.

What are the benefits?

Scratch resistance, impact absorption, reduced fingerprints and full coverage on curved screens.

Is it compatible with all cars?

Yes, if you choose a protector cut for your specific model.

Does it affect touch response?

No. Hydrogel keeps full touch accuracy.

How long does it last?

Usually 1–3 years, depending on use. Easy to replace.

Hydrogel vs tempered glass?

Hydrogel fits curved screens and absorbs impacts. Glass is harder but can crack and does not cover complex shapes. For more in depth guide check out Hydrogel vs Tempered Glass Navigation Protectors Comparison

How can I protect my car’s navigation screen from scratches and fingerprints?

If you want to know more about How to Protect Your Car’s Navigation Screen from Scratches and Fingerprints check out our guide.


Visit mr-key.com to find a custom-cut hydrogel protector for your car model.


Related Guides

How to Install a Hydrogel Navigation Screen Protector

How to Protect Your Car’s Navigation Screen from Scratches, Glare & Fingerprints

Hydrogel vs Tempered Glass Navigation Protectors Comparison

Related Posts

Simple Tips to Free a Stuck Lock: What You Need to Know

Simple Tips to Free a Stuck Lock: What You Need to Know

Locks are meant to provide security, but when they seize up, they can leave you feeling frustrated and helpless. Dealing with a stuck lock is more common than you might think, and thankfully, there are affordable and effective solutions to get it working smoothly again. Whether it's a car door, trunk, or your home lock, here are some tried-and-true methods to free up a jammed lock. Why Locks Seize Up Understanding the causes behind a stuck lock can help you prevent it from happening in the future. Locks can seize up for various reasons: Dirt and Debris : Over time, dust, grime, or even small particles can accumulate inside the lock mechanism, making it harder for the internal parts to move smoothly. Rust and Corrosion : Exposure to moisture, humidity, or salty air can lead to rust buildup on metal parts within the lock, which can prevent movement. Lack of Lubrication : Locks need to be lubricated occasionally to ensure smooth operation. Without lubrication, friction increases, and the lock may eventually jam. Now, let’s look at some simple steps to tackle a seized lock. Step 1: Use Graphite Powder or Dry Lubricant The first thing to try is applying a lubricant, but be careful about what type you use. Wet or oil-based lubricants can attract dust, which eventually clogs the lock. Graphite Powder : This is one of the best options for freeing up a stuck lock. Sprinkle a small amount of graphite powder into the keyhole, insert the key, and gently move it back and forth. This spreads the graphite, reducing friction and allowing the lock components to move more freely. Dry Lubricants : These are specifically designed for locks and are ideal for situations where you want to avoid residue buildup. Spray a small amount into the lock, then insert the key and gently turn it. Pro Tip : Avoid using regular WD-40 or other oil-based products, as they may lead to a buildup over time, making the problem worse. Step 2: Try the Key with Gentle Force If lubrication alone doesn’t do the trick, the next step is to use a little gentle force with your key. Be cautious here; applying too much force could break the key inside the lock. Insert the Key : Once the lubricant has been applied, insert the key fully into the lock. Wiggle Carefully : Gently wiggle and turn the key without applying too much force. This movement may help distribute the lubricant further and gradually loosen up any stuck components. Caution : If you feel excessive resistance, don’t force the key. Forcing it can cause damage or even snap the key, which would require additional assistance to remove. Step 3: Warm Up the Lock (Especially Useful for Cold Weather) Cold temperatures can cause locks to seize due to ice or metal contraction. If you suspect the cold is the issue, warming up the lock can be effective. Use a Hair Dryer : Direct warm air onto the lock for several minutes to allow the metal to expand and the ice (if any) to melt. Heat the Key : You can also try warming the key slightly with a lighter, but exercise caution and make sure it isn’t too hot before inserting it into the lock. Safety Note : Avoid open flames directly on the lock itself, as this can damage surrounding surfaces or even warp the lock mechanism. Step 4: Use a Vinegar Solution for Corroded Locks If rust is the culprit, vinegar is a great household solution for loosening rust and corrosion in a lock. Apply Vinegar : Put a few drops of vinegar on the key, insert it into the lock, and let it sit for a minute or two. Vinegar can help dissolve light rust, making it easier to turn the key. Follow with Lubricant : After using vinegar, apply a small amount of graphite powder or dry lubricant to ensure the lock remains smooth and functional. Step 5: Work with Compressed Air to Remove Debris If dirt or debris has accumulated inside the lock, compressed air is a quick and efficient way to clear it out. Blow Out Dust : Use a can of compressed air and direct the nozzle into the keyhole. Short bursts of air can blow out dust and small debris that may be obstructing the mechanism. Follow Up : After using compressed air, it’s a good idea to add a dry lubricant to prevent any remaining dust from causing future jams. How to Prevent Lock Seizure in the Future Once you’ve successfully freed a seized lock, it’s helpful to take steps to prevent it from happening again. Here are some preventive tips: Regularly Lubricate : Use a dry lubricant or graphite powder once or twice a year, especially if you live in a humid or dusty area. Keep Locks Clean : Wipe off any visible dirt or dust around the lock mechanism. If the lock is exposed to elements (like outdoor or car locks), covering it can help keep debris and moisture out. Avoid Overusing Keys : If your key shows signs of wear, consider getting a replacement. Worn-out keys can cause more friction inside the lock, leading to jams. When to Seek Professional Help Sometimes, despite your best efforts, a lock just won’t budge. In cases where the lock is significantly damaged, heavily corroded, or if the key breaks inside, it’s best to reach out for professional assistance. A professional has specialized tools and expertise to address these issues without causing further damage. Taking Care of Your Locks A stuck lock can be an inconvenience, but by following these simple steps and using a little patience, you can often resolve the issue without professional help. Keeping locks in good condition with regular care is the key to ensuring they function smoothly for years to come.

How to Clean and Maintain Your Car Key Fob Like a Pro

How to Clean and Maintain Your Car Key Fob Like a Pro

Your car key fob is one of the most used items in your daily life. You press it multiple times a day, carry it in your pocket or bag, toss it on desks, and sometimes accidentally drop it on the ground. But how often do you actually clean or check it? Most people only think about their key fob when it stops working. By then, it's often too late. The good news is, with a little attention and regular maintenance, you can keep your car key fob working perfectly for years to come. In this article, you'll learn how to clean and maintain your car key fob like a pro — so you can save money, avoid frustration, and get the best performance out of your key. Why Cleaning and Maintaining Your Key Fob Matters Car key fobs aren’t just simple remotes. They're packed with sensitive electronics, small batteries, and tiny contact points that can easily get damaged by dirt, moisture, or simple neglect. If you never clean or check your key fob, you might start to notice: Unresponsive buttons Reduced signal range Frequent battery issues Complete failure to unlock or start the car Most of these problems are avoidable with basic maintenance . Cleaning your key fob regularly helps keep it functional, protects its electronics, and ensures it lasts longer. It also saves you from spending money on costly repairs or total key replacements. How to Clean Your Car Key Fob: Step-by-Step Guide Step 1: Open the Key Fob Gently Start by carefully opening your key fob. Most models have a small groove or notch where you can insert a flathead screwdriver or a coin to separate the shell. Be gentle — forcing it open can crack the plastic or damage internal clips. If you're unsure, check your car’s manual or look up your key model online to find specific instructions. Step 2: Remove the Battery Once you open the key fob, always remove the battery before cleaning. This protects the electronic circuit from any accidental moisture and prevents short-circuiting. Set the battery aside in a dry, safe place. Step 3: Clean the Exterior Use a soft, dry microfiber cloth to wipe the outside of the key fob shell. For tougher dirt or sticky areas, slightly dampen the cloth with water or isopropyl alcohol (70% or higher). Avoid using harsh cleaning chemicals that could damage the plastic or remove painted symbols. Step 4: Clean the Buttons and Small Gaps Dirt, dust, and pocket debris often collect around the buttons. These particles can block the buttons from making proper contact or cause them to stick. Use a cotton swab or a soft toothbrush to gently clean around the edges and in between the buttons. For tight spaces, a toothpick can help dislodge stubborn dirt. If needed, lightly moisten the cotton swab with alcohol to break down grime. Always dry the key fob thoroughly after cleaning. Step 5: Inspect and Clean the Battery Contacts Battery contacts can become dirty or corroded over time, especially if the battery leaked or moisture got inside. Check the metal contact points carefully. If you see white powder or greenish residue (common signs of corrosion), gently clean them using a cotton swab dipped in isopropyl alcohol. Be extremely careful not to bend or scratch the contacts. If corrosion is too severe, the key fob might need professional repair or a replacement circuit board. Step 6: Replace the Battery if Needed Key fob batteries typically last between 1 to 2 years, but frequent use, weak signals, or exposure to extreme temperatures can shorten battery life. If your battery is old or low, replace it with a new one. Most car key fobs use CR2032 or CR2025 batteries. Always make sure you install the new battery in the correct position, respecting the polarity (+ / -). A fresh battery not only improves response time but also ensures the signal reaches your car reliably. Step 7: Reassemble the Key Fob Once everything is clean and fully dry, carefully snap the key fob back together. Make sure the casing is securely closed and the buttons feel smooth and responsive. Test the key fob to confirm that it works correctly. Pro Tips to Keep Your Car Key Fob in Top Shape A well-maintained key fob can last many years. Here’s how to keep it working perfectly: Keep it Dry: Most key fobs aren’t waterproof. Avoid rain, puddles, wet pockets, or any contact with liquids. Use a Protective Cover: A silicone or rubber key cover adds shock protection, keeps out dirt, and prevents scratches. Avoid Extreme Heat or Cold: Leaving your key fob in direct sunlight or in a freezing car can damage the battery and weaken plastic parts. Change the Battery Regularly: Don’t wait for your key fob to completely stop working. Weak batteries can lead to unreliable signals and unexpected failure. Don’t Drop It: Even though most key fobs can handle light drops, repeated impact can cause internal damage. When to Replace the Key Fob Shell If your key fob shell is cracked, worn, or no longer closes tightly, it’s time to replace it. A damaged shell can let moisture and dirt reach the electronics and cause long-term damage. Replacing the shell is a quick and affordable solution that can extend your key fob’s life significantly. At Mr. Key , we offer high-quality key fob shells, batteries, and repair kits that can help you refresh your key fob and save money compared to dealership prices. Explore our key fob repair kits, protective covers, and replacement batteries now at mr-key.com . Your car key fob may seem like a small detail, but it plays a huge role in your daily life. Without it, you can’t get in or even start your car. The good news is that taking care of your key fob is easy. With regular cleaning, battery checks, and some simple maintenance, you can keep it working reliably for years. And if you need to replace your battery, your key shell, or your entire key fob, Mr. Key is here to help. We provide everything you need to keep your keys in perfect shape, save money, and avoid unnecessary trips to the dealer.

How to Identify Your Key Type for Easy Replacement

How to Identify Your Key Type for Easy Replacement

Replacing a lost or broken key might seem straightforward, but identifying the correct type of key is crucial to getting an exact replacement. Whether you need a car key, a house key, or even a cabinet key, each type has specific features that determine its function and fit. Here’s a step-by-step guide to understanding your key type, so you can save time and avoid unnecessary frustration when ordering a replacement. Why Key Identification is Important Keys come in many shapes and sizes, each designed for specific types of locks. Understanding your key’s unique characteristics ensures you get the right replacement and avoid wasted time or money on mismatched keys. Avoid Extra Costs : Ordering the wrong key can mean additional fees for reordering. Save Time : Getting the right key from the start saves the hassle of sending it back and waiting for the correct replacement. Enhance Security : Accurate key identification ensures your security by avoiding compromised, incorrect key fits. Types of Keys: Which One is Yours? Understanding the different types of keys can help you determine what you have. Here are the common types and what makes each unique. 1. Household Keys Household keys are typically designed for residential locks like front doors, back doors, and garage doors. These keys are often small and have either a single or double-sided cut pattern along the edges. Some household keys are unique in design, making them specific to a particular lock type. Common Features : Smaller, single or double-sided cuts. Typical Use : Standard residential door locks, such as deadbolts and knob locks. Tip : Look for any identifying numbers or letters on the key itself. These may indicate a specific lock series, making it easier to identify. 2. Car Keys Car keys come in various styles, depending on the make, model, and year of the vehicle. While older cars may use basic metal keys, most modern vehicles use transponder keys or fob keys with embedded chips for added security. Basic Car Keys : Metal keys without electronic components. Transponder Keys : These have a small chip embedded in the head, which communicates with the car to prevent theft. Key Fobs : Some cars use a fob that contains a keyless entry system, which requires programming specific to your vehicle. Tip : If your car uses a transponder or fob key, you may need assistance programming the replacement. 3. Padlock Keys Keys for padlocks can be small and compact, with a straightforward design. These keys often have a unique series number printed on them, making it easier to match them to a specific lock model. Common Features : Small size, usually single-sided. Typical Use : Storage units, gym lockers, and outdoor gates. 4. Furniture and Cabinet Keys Furniture and cabinet keys are typically found on desks, filing cabinets, and other types of lockable furniture. These keys are generally small, with a straight or tubular shaft, and they often have numbers or letters for identification. Common Features : Compact, single or double-sided cuts, often with identification codes. Typical Use : Office furniture, personal storage, and older-style drawers. 5. High-Security Keys High-security keys are specifically designed to prevent unauthorized duplication. These keys have unique, intricate cut patterns and require special authorization for copying. Common Features : Complex, often multi-sided cuts with additional security features. Typical Use : High-security doors in residential or commercial settings, safes, and secure access points. Key Identification Tips: What to Look For Once you know the type of key, you’ll want to examine specific details that will help with identification. Here’s what to look for: Keyway and Shape : The groove pattern, or “keyway,” is specific to the key type. Take note of the key’s shape and groove configuration. Markings and Codes : Look for any numbers or letters printed on the key. These often refer to specific lock brands or key series. Size and Length : Measure your key’s length, as some keys are longer or shorter depending on the lock type. Metal Head Design : Certain keys, like car keys, may have plastic or rubberized heads, which can indicate the need for a transponder or chip inside. Steps to Identify Your Key Type Inspect for Markings : Look closely at your key for any stamped numbers, letters, or symbols. These markings can often be referenced to find a matching lock or brand series. Measure Your Key : Use a ruler or tape measure to record the length and width of your key. These dimensions can help narrow down the exact key type. Examine the Cut Pattern : Take note of the number of cuts and whether they are on one or both sides. Identify the Head Style : If it’s a car key with a transponder, the head might be plastic or rubber. Check for a Code on the Lock : Some padlocks and cabinet locks have codes printed on them that correspond to a specific key model. What to Do When You Can't Identify the Key If your key has no visible markings or the cuts are unusual, consider taking a photo to help in the identification process. For specialty keys or hard-to-identify types, you may want to seek professional help or consult a detailed online database for reference. Preventing Future Key Confusion Once you’ve identified your key, take a few steps to prevent future issues with identification. Label Your Keys : Adding a small tag with a brief description can help you remember the type of key. Keep Spare Keys in a Safe Place : Having a backup key prevents you from needing a replacement immediately. Store Key Codes or Information : If your key or lock has a series code, store it in a safe place in case you need it for future reference. Identifying your key type is essential for getting a precise replacement without unnecessary hassle. By taking the time to understand your key’s unique features, you can save both time and money when it’s time to replace it. Following these steps will help ensure that your replacement key works as smoothly as the original.

DIY Guide: How to Program or Sync Your Car Key Fob at Home

DIY Guide: How to Program or Sync Your Car Key Fob at Home

Programming a car key fob doesn’t always require a trip to the dealership or an expensive diagnostic tool. In many cases, you can program or resync your key fob at home—saving both time and money. Whether you’ve just replaced the battery, changed the shell, or purchased a new key fob entirely, this guide will walk you through the basics of syncing it with your vehicle. Why Program Your Key Fob? Key fobs are integral to modern car access and ignition systems. When you replace or reset your key, the vehicle and fob must reestablish communication. Without syncing, features like remote locking, trunk release, or even engine start may stop functioning. This synchronization process ensures your key fob and vehicle are electronically paired and communicate securely. Without it, even a new battery or case won’t make your remote functional again. Can You Program It Yourself? The answer depends largely on the make and model of your vehicle. Older vehicles with basic remote key fobs often support manual onboard programming that doesn’t require specialized equipment. These procedures typically involve inserting the key into the ignition, turning it in a specific sequence, and pressing buttons on the fob within a certain time frame. It’s a simple process, and many car owners are surprised at how effective these methods can be. In contrast, modern vehicles with smart keys or keyless entry systems usually require advanced programming tools. These keys often contain transponders that must be linked to the car’s electronic control unit, a task typically performed by dealerships or professional auto locksmiths. Still, if you own a basic Opel, Peugeot, or Citroën model, there’s a good chance you can complete the task yourself at home. How Onboard Programming Works If your vehicle supports onboard programming, the steps are often straightforward. While the exact process may vary depending on the model, the general method includes entering the vehicle, turning the ignition on and off several times, and pressing a button on the remote to complete pairing. You may receive confirmation through a dashboard light flash or an audible chime, indicating that the key fob is now synced. Take note, though: some vehicles require all remotes to be programmed in the same session, so if you have multiple key fobs, have them all with you before starting. If the procedure doesn’t work, don’t be discouraged—it may simply mean your car requires a more advanced programming approach. When Should You Call a Professional? Not all keys can be programmed at home. Smart keys, proximity sensors, and certain immobilizer systems are designed with enhanced security that requires proprietary equipment to program. If your vehicle doesn’t respond to onboard programming or your key fob is completely unresponsive, it’s best to seek assistance from a certified locksmith or dealership. Trying to force the programming process can sometimes cause more harm than good. If you’re unsure, always verify the requirements in your car’s manual or consult a trusted technician. Essential Tips for Success To avoid frustration, start with the basics: always use a fresh battery from a trusted brand such as Panasonic CR2032 . Clean the internal contacts and handle the circuit board carefully to prevent static damage. Don’t rush—take the time to follow steps precisely and test functionality before fully reassembling the key. When replacing the key shell, make sure it's compatible with your exact model and that the key blade, transponder chip, and electronics are properly seated. With a bit of patience and the right information, programming your car key fob at home can be a practical and satisfying DIY fix. For basic vehicles, it’s a task you can handle in minutes—saving the cost and hassle of dealership appointments. Understanding your vehicle’s requirements and using reliable parts makes all the difference. Whether you're refreshing an old key with a new case or pairing a new remote to your car, the ability to program it yourself puts control back in your hands. For a full selection of batteries, shells, and compatible accessories, visit mr-key.com .

Chat with us