Post Name

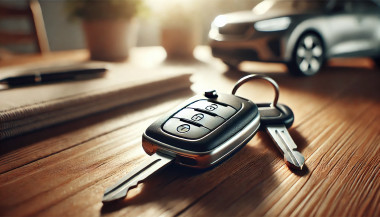
Car theft has entered the digital age — and unfortunately, so have the thieves. As car manufacturers move toward keyless technology, a new type of threat has emerged: the relay attack. Unlike traditional break-ins, this high-tech method allows criminals to steal a vehicle without touching the keys — or even breaking a window.

Imagine this: your car is parked safely outside your house. Your key fob is inside, hanging on a hook by the front door. You're fast asleep. But outside, two individuals with small electronic devices are working together. One stands near your front door, scanning for a signal from your key fob. The other waits by your car. Within seconds, your key’s signal is captured, extended, and transmitted to your car. It unlocks, starts, and drives away — and you might not notice until morning.

This is not science fiction. It's called a relay attack, and it's one of the fastest-growing vehicle theft methods worldwide.

Why Relay Attacks Are So Effective

The key to this technique is exploiting the constant communication between your car and its fob. Most keyless entry systems are designed for convenience — you don’t even need to press a button. The car automatically detects the presence of the key fob and unlocks when you approach.

This convenience is exactly what makes it vulnerable. Relay devices — which are cheap, portable, and easy to use — can mimic the signal and trick the car into thinking the key is nearby, even when it’s inside your home.

Security experts have raised the alarm about this method for years, but many drivers still don’t realize how easily their vehicles can be accessed. In the UK alone, keyless car theft now accounts for more than 90% of vehicle thefts involving high-end models, according to the AA. And with the rise of online tutorials and black-market tools, the problem is growing globally.

So, What Can You Do to Stay Safe?

Fortunately, protecting your vehicle doesn’t require advanced tech or a huge investment — just awareness and a few smart habits.

One of the most effective ways to block relay attacks is also the simplest: store your keys in a signal-blocking container. Often called a Faraday pouch or Faraday box, this lined case prevents radio signals from escaping. When your keys are stored inside, they can’t be scanned or cloned, no matter how close a thief gets to your home.

Placement also matters. Many drivers leave their keys near the front door or on an entryway table — spots that are easy to access from outside. Moving your keys to the center of your home, an upper floor, or even a metal box can reduce signal exposure dramatically.

Some newer key fobs allow you to manually disable the signal when it’s not in use. This feature is often hidden in the manual and rarely mentioned by dealers. Taking a moment to learn whether your key supports this — and how to activate it — can make a big difference.

It’s also worth checking whether your vehicle’s software is up to date. Many automakers periodically release firmware updates that strengthen encryption or reduce signal range. In some cases, updates can even detect and block suspicious unlock attempts.

And while it may seem old-fashioned, physical security still works. Devices like steering wheel locks or gear shift immobilisers can be powerful visual deterrents. Even if a thief manages to unlock your vehicle, the sight of a bulky lock inside may be enough to send them looking for an easier target.

If you're looking for practical solutions beyond GPS, check out our blog: Do Car Keys Have GPS? What You Need to Know About Key Tracking.

In summary, here are a few key takeaways to keep your keys and vehicle safer:

Store your fob in a signal-blocking pouch or metal container

Keep keys away from entry points like doors or windows

Disable keyless signals if your fob supports it

Update your car’s firmware regularly

Use visible anti-theft devices as a deterrent

Looking Ahead: Smarter Cars, Smarter Drivers

Relay attacks are part of a larger trend — one where modern technology makes life more convenient, but also creates new risks. Just like we’ve learned to secure our phones and passwords, we now need to think about how we secure our vehicles.

As carmakers explore more secure solutions — like Ultra Wideband (UWB) tech and biometric verification — drivers still need to take responsibility for their vehicle’s safety. The tools are already out there, and many of them cost less than a meal out. It’s not just about avoiding theft; it’s about peace of mind.

So next time you get home, before tossing your keys on the hallway table, take a second to think: are they really safe there?

Related Posts

How to Program a Car Key: A Step-by-Step Guide

How to Program a Car Key: A Step-by-Step Guide

Lost Your Car Key Programming? Here's What to Do Have you ever lost your car keys or found yourself with a spare key that doesn’t start your vehicle? While the process of programming a car key might seem intimidating, it’s often simpler than you’d expect. In many cases, car owners can program keys themselves without needing a visit to a dealership. This guide walks you through the essentials of car key programming, helping you save time, effort, and potentially a significant amount of money. Understanding Car Key Programming: The Basics Car key programming is the process of syncing a key with a car's internal computer so it can communicate securely. Modern vehicles use transponder keys or smart keys equipped with chips that emit a unique signal. Without proper programming, these keys won’t function, even if they fit perfectly into the ignition. While older mechanical keys didn’t require programming, today’s advanced systems add a layer of security, reducing the risk of car theft. However, this added sophistication means that replacing or reprogramming a key is no longer as simple as cutting a piece of metal. Quick Tip: Check your vehicle’s owner manual to see if programming your car key is a DIY-friendly process, as some models allow self-programming, while others require professional tools. Step-by-Step Guide to Programming a Car Key Before starting, ensure you have all necessary tools and information: The vehicle’s owner manual. All keys that need programming, including the functional ones. Step 1: Access Programming Mode Start by sitting in the driver’s seat with all the doors closed. Insert the already functional key into the ignition and turn it to the “on” position (do not start the engine). Some vehicles require you to cycle the key between “on” and “off” positions a specific number of times to enter programming mode. Step 2: Add the New Key Once in programming mode, remove the functional key and quickly insert the new key into the ignition. Turn it to the “on” position. The vehicle’s security light may flash to indicate the key has been successfully programmed. Step 3: Test the Key After programming, remove the new key and test it to ensure it can start the car and unlock the doors. Note: Each car manufacturer has unique programming steps. Be sure to consult your owner’s manual or the manufacturer’s website for specific instructions. When Professional Help Is Needed While many vehicles allow for DIY key programming, others require specialized equipment or software that only dealerships or locksmiths can access. This is particularly true for luxury or high-end cars with advanced encryption and security features. If your DIY efforts fail, it’s best to seek help from a certified professional. Visiting a dealership is a reliable, albeit more expensive, option. Alternatively, professional locksmiths often provide programming services at a lower cost, making them a practical choice for many drivers. Costs and Considerations The cost of programming a car key varies significantly based on the vehicle’s make and model. For basic models, self-programming might cost nothing if you already have a functional key. However, professional programming can range from $50 to $300 or more, especially for smart keys or proximity fobs. To minimize costs: Have a spare key : Always keep a functional spare to simplify programming if a replacement is needed. Research costs : Call local locksmiths or dealerships to compare pricing. Empower Yourself with Knowledge Programming a car key doesn’t have to be a daunting task. With the right tools and information, many car owners can handle the process themselves, saving time and money. However, it’s essential to recognize when professional assistance is necessary, particularly for complex key systems. By understanding the basics of car key programming and following a step-by-step approach, you can ensure your vehicle remains secure and functional. So, whether it’s a spare key or a replacement, you now have the confidence to tackle the task or know where to turn for help.

The Essential Guide to Understanding Detachable Tow Bars

The Essential Guide to Understanding Detachable Tow Bars

Detachable tow bars offer versatility and convenience for car owners who occasionally need to tow. Unlike fixed tow bars, they can be removed when not in use, maintaining your car's aesthetics and avoiding unnecessary bulk. However, understanding how they work, their benefits, and their maintenance requirements is essential to get the most out of your tow bar. Here’s what you need to know. Why Choose a Detachable Tow Bar? A detachable tow bar is an excellent solution if you only tow occasionally or prefer a clean look for your car when the tow bar is not in use. Here are some of its key advantages: Aesthetic Appeal : When removed, the tow bar does not interfere with the car's design. Convenience : Detachable tow bars are easy to attach and remove without tools, making them user-friendly. Versatility : They allow you to tow various loads, from trailers to bike racks, without permanently altering your car's appearance. Legal Compliance : In some regions, a visible, unused tow bar can lead to fines. A detachable option helps you avoid this. Types of Detachable Tow Bars Detachable tow bars come in different types, each suited to specific needs and preferences: Vertical Detachable Tow Bars Design : These tow bars fit seamlessly into your car’s underside, leaving no visible parts when removed. Best For : Those prioritizing aesthetics and a clean finish. Horizontal Detachable Tow Bars Design : These are partially visible but still maintain a low profile. Best For : Easier access and handling without compromising too much on appearance. Swan Neck Tow Bars Design : These have a slim, curved neck, making them stylish and less obtrusive. Best For : European-style vehicles and those who need a compact towing solution. How to Install and Use a Detachable Tow Bar Installing and using a detachable tow bar is straightforward, but following the proper steps ensures safety and efficiency: Read the Manual : Always start by reviewing the manufacturer’s instructions specific to your tow bar. Clean the Mounting Area : Dirt or debris can interfere with secure attachment. Secure the Tow Bar : Align the tow bar with the mounting bracket and ensure it clicks into place. Test Stability : Gently pull the tow bar to confirm it’s securely attached. Remove When Not in Use : Detach the tow bar and store it in a clean, dry place to prevent wear. Common Issues and Troubleshooting While detachable tow bars are convenient, they can occasionally present challenges. Here’s how to address some common problems: Stuck Tow Bar : If the tow bar is difficult to remove, check for rust or dirt in the mounting area. Use a lubricant to loosen it, but avoid using excessive force. Loose Connection : Ensure the tow bar clicks firmly into place during installation. A loose tow bar can be dangerous. Key Issues : If the locking mechanism doesn’t work, inspect the key and lock for dirt or damage. Sometimes, a replacement key may be necessary. Tips for Maintaining Your Detachable Tow Bar Proper maintenance can extend the life of your detachable tow bar and ensure its performance: Regular Cleaning : Clean the tow bar and mounting area to prevent rust and buildup. Lubricate Moving Parts : Apply a small amount of lubricant to the locking mechanism and other moving parts for smooth operation. Inspect for Damage : Check for signs of wear, cracks, or rust, especially if you tow frequently. Store Properly : When not in use, store the tow bar in a protective case or bag in a dry location. Safety Considerations When Towing Towing comes with responsibility. Here are some safety tips to keep in mind: Check Weight Limits : Never exceed your car or tow bar’s towing capacity. Inspect Connections : Ensure the tow bar and trailer hitch are secure before every trip. Test Lights : Verify that your trailer’s brake and signal lights are functioning properly. Drive Cautiously : Towing affects handling and braking. Allow extra time for stopping and maneuvering. Benefits of Investing in a Detachable Tow Bar For many drivers, a detachable tow bar offers the perfect balance of functionality and style. Whether you’re towing for leisure, work, or practicality, this option ensures: A clean car appearance when the tow bar is removed. Versatile use for different towing needs. Easy storage and maintenance. Detachable tow bars are a versatile and practical choice for occasional towing. With proper installation, regular maintenance, and a focus on safety, you can enjoy their convenience without compromising your car's aesthetics. Whether you're hauling a trailer or attaching a bike rack, a detachable tow bar offers flexibility and ease for all your towing needs. What Will You Receive When Your Order is Complete? When you place an order, you’ll receive two perfectly cut keys for Witter, GWD, TOW Trust, or Renz towbars, tailored to your original key code. These keys are compatible with lock codes within the ranges TR01-TR10 or 32001-32200. Simply select your code from the dropdown menu (e.g., TR03), and we’ll take care of the rest. Order Your Keys Today!

Jaguar and Land Rover Key Fobs: Common Problems & How to Fix Them

Jaguar and Land Rover Key Fobs: Common Problems & How to Fix Them

Owning a Jaguar or Land Rover means enjoying luxury, performance, and cutting-edge technology. But like any high-tech component, your key fob isn’t immune to problems. Whether you drive a Jaguar F-PACE, a Land Rover Discovery, or any other model, a malfunctioning key fob can quickly become an inconvenience. The good news is that most key fob issues can be resolved quickly and affordably . Here’s what you need to know about the most common Jaguar and Land Rover key fob problems and how you can fix them. Your Key Fob Isn’t Responding Pressing the button without any response is one of the most common issues. If your key fob isn’t unlocking or locking your car, the most likely culprit is a dead battery. Replacing it with a high-quality CR2032 battery is often the easiest fix. However, if the problem persists, your key fob may need reprogramming, or its internal electronic components might be damaged. Checking your vehicle’s manual for reprogramming instructions or visiting a dealership can help resolve the issue. In cases of water damage or physical impact, a complete key fob replacement might be necessary. Reduced Key Fob Signal Range If you notice that you need to be much closer to your car than usual for the key fob to work, the battery is likely weakening. Replacing the battery should be your first step. Other factors, such as interference from electronic devices like smartphones or WiFi routers, may also contribute to signal issues. Storing your key away from such devices can help. If these steps don’t improve the range, internal damage to the key fob’s antenna may require a replacement shell or an upgrade to a new key fob. Unresponsive or Sticking Buttons Over time, dirt and debris can accumulate under the buttons, making them less responsive or difficult to press. Cleaning the key fob with a soft cloth and isopropyl alcohol can help restore functionality. If the buttons feel loose or fail to click, a replacement shell might be necessary. In some cases, the internal button contacts wear out, requiring a full key fob upgrade. “Smart Key Not Found” or Keyless Start Issues If you see a “Key Not Found” message when trying to start your car, the issue may be a low battery in your key fob. Holding the key fob closer to the start button can sometimes override the problem, as many Jaguar and Land Rover models have a backup proximity sensor. If the issue persists, replacing the battery or consulting your vehicle’s manual for emergency start procedures might be required. If none of these solutions work, there may be a deeper issue with the vehicle’s keyless entry system. Spare Key Fob Not Working A backup key fob that hasn’t been used for a long time may no longer work when you need it. This can happen if the battery has drained due to inactivity or if the key has lost its programming. Regularly testing your spare key can prevent surprises. Replacing the battery should be the first step, and if the key has lost its programming, a visit to a professional or dealership may be necessary to restore its functionality. When to Replace Your Key Fob If you’ve tried all these fixes and your Jaguar or Land Rover key fob is still not working, it may be time for a replacement. Internal components wear out over time, and investing in a new key fob can save you from frustrating lockouts and start failures.

How to Take the Perfect Photo of Your Key for Easy Replacement

How to Take the Perfect Photo of Your Key for Easy Replacement

When you need a replacement key , taking a clear, detailed photo of your key can make the process much faster and more accurate. A high-quality image helps key makers understand the exact specifications, cuts, and dimensions of your key, which is especially important if you don’t have a spare. In this guide, we’ll walk you through the best practices for photographing your key so you can get an accurate replacement with ease. Why a Clear Key Photo Matters Photographing a key might sound simple, but it requires a bit of attention to detail. A well-taken photo captures the key’s grooves and unique cuts clearly, helping the key cutter replicate the exact pattern. Saves Time : A high-quality photo reduces the need for multiple attempts to cut a new key. Ensures Accuracy : Clear images help capture specific details, leading to a more precise fit. Convenient Process : With just a smartphone and a few tips, you can photograph your key from home without needing special equipment. Essential Tools for Photographing Your Key To take a clear photo of your key, you don’t need much beyond a few household items. Here’s what you’ll need: Smartphone or Camera : A phone camera is usually sufficient, but a standard digital camera works well too. Plain Background : Choose a neutral, solid-colored background like a piece of white paper or a smooth table surface. Good Lighting : Natural daylight or a bright room light helps capture details without shadows. Small Object for Elevation : A coin or similar item can lift the key slightly, making it easier to photograph. Step-by-Step Guide to Taking the Perfect Key Photo Follow these steps to take a photo that ensures clarity and accuracy for key replacement. 1. Set Up the Background Place a piece of plain white paper or another smooth, light-colored surface under your key. The solid color helps the details of the key stand out without any visual distractions. Tip : Avoid backgrounds with patterns or textures, as these can obscure the key’s features. 2. Position the Key Correctly Lay the key flat on the background, with the grooves and cuts facing up. The key should be positioned horizontally to allow a clear view of all its details. Side Profile : Make sure to capture the side profile that shows the cuts and grooves. Elevate Slightly : Place a coin or small object under one end of the key to angle it slightly toward the camera. This can help reduce shadows and improve focus on the cuts. 3. Adjust Lighting Good lighting is essential for capturing details. If possible, photograph your key in natural daylight near a window or use a well-lit room. Avoid Shadows : Ensure that no shadows fall across the key, as they can obscure details. Diffuse Light : If using a lamp, consider placing a thin cloth over it to diffuse the light and reduce harsh reflections. 4. Focus and Zoom Make sure your camera or smartphone is focused directly on the key. You may need to tap the screen to bring it into sharp focus. Zoom in Carefully : If you’re using a smartphone, zoom in slightly to capture the details, but avoid over-zooming, which can blur the image. Test Multiple Angles : Sometimes a slight adjustment in angle can capture the cuts more effectively, so take a few shots from slightly different perspectives. 5. Capture Multiple Photos It’s always a good idea to take several photos to ensure you have the best one. Try different angles and lighting adjustments to capture as many details as possible. Close-Up of the Grooves : Take one close-up image focusing on the cuts and grooves of the key. Overall Image : Include one full-length photo that shows the entire key from end to end. Try Different Angles : Slightly tilt the key or move the camera to see which angle best captures the detail of the cuts. Common Mistakes to Avoid When Photographing Your Key To get the best results, steer clear of these common issues that can impact the quality of your key photo: Blurry Images : If your hand shakes, use a small tripod or prop your phone on a stable surface. Poor Lighting : Avoid taking photos in dim rooms; use bright light to ensure the key is clearly visible. Obstructed Details : Make sure the entire length of the key is visible, without any part being cut off or covered. Tips for Ensuring a Smooth Replacement Process Once you have a clear photo of your key, there are a few final steps to make the replacement process as efficient as possible. Check the Photos : Look over your photos before sending them to ensure that they’re clear and detailed. Label the Key : If you’re photographing multiple keys, label each one in the image or add a note to avoid confusion. Include Measurements : If possible, add the measurements of the key’s length and width in your notes for added accuracy. A clear, detailed photo of your key can save you time and effort when seeking a replacement. By following these simple steps, you’ll provide all the necessary details to ensure your new key is an accurate match. Remember, good lighting, focus, and capturing all the unique cuts are essential to achieving the best results. With these guidelines, you’re set to take a photo that will make your key replacement process smooth and hassle-free.

Chat with us