Post Name

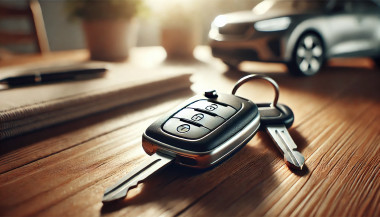
In an era of advanced automotive technology, key fobs have become an essential part of modern driving. From unlocking doors to starting engines remotely, these small yet powerful devices are a marvel of convenience. However, one question often looms in the minds of car owners: are key fobs waterproof? With water being a common hazard in everyday life, understanding the limitations and care requirements of your key fob is crucial.

Understanding Key Fob Technology

Key fobs are more than just electronic keys; they are compact computers that communicate with your car. Using radio frequency (RF) technology, they transmit encrypted signals to your vehicle, enabling features like remote locking, engine start, and even personalized settings. This intricate technology is housed in a small casing that protects the internal components.

While key fobs are designed to endure daily wear and tear, their resilience to water varies. Some models offer water resistance, but this is not synonymous with being fully waterproof. The degree of water resistance depends on the design and build quality of the key fob, which can differ significantly between manufacturers and models.

Are Key Fobs Waterproof or Water-Resistant?

The terms “waterproof” and “water-resistant” are often used interchangeably, but they have distinct meanings. Waterproof indicates that a device can be submerged in water without damage, while water-resistant means it can withstand splashes or brief exposure to water but not submersion.

Most key fobs fall into the latter category. For example, some car manufacturers claim their key fobs can handle minor splashes or light rain. However, prolonged exposure to water or immersion—such as dropping your fob into a pool—can damage the electronic components and render the device unusable.

Global Standards and Variability

Globally, there is no universal standard governing the water resistance of key fobs. Manufacturers often follow internal guidelines or industry best practices. In some regions, automakers have started offering key fobs with improved water resistance as a response to customer demands for greater durability. For instance, luxury brands like BMW and Mercedes-Benz have introduced models with enhanced protection, but even these devices are not guaranteed to survive complete immersion.

Comparatively, in markets where cost efficiency is prioritized, such as in certain developing countries, key fobs may lack advanced water-resistant features. This variability underscores the importance of checking the specifications of your specific key fob model.

What to Do If Your Key Fob Gets Wet

Accidents happen, and it’s not uncommon for key fobs to encounter water. If your key fob gets wet, quick action can often prevent permanent damage.

First, remove the key fob from water immediately and dry it thoroughly with a soft cloth. If possible, open the casing to allow air circulation and dry the internal components. Avoid using heat sources such as hair dryers, as excessive heat can warp the plastic casing or damage the sensitive electronics.

In cases of significant water exposure, placing the key fob in a container of uncooked rice or silica gel packets can help absorb moisture. However, this is not guaranteed to save a severely water-damaged key fob. If the device does not work after drying, contacting a professional locksmith or dealership for repair or replacement is the best course of action.

Tips for Protecting Your Key Fob

To minimize the risk of water damage, there are several precautions you can take:

  1. Use a protective case or cover designed specifically for key fobs. These accessories provide an added layer of protection against moisture and physical impacts.
  2. Avoid placing your key fob in pockets or bags where it may come into contact with liquids, such as water bottles or spilled drinks.
  3. Store your key fob in a designated dry area when not in use, particularly in environments where water exposure is likely, such as beaches or pools.

The Future of Waterproof Key Fobs

As technology advances, so does the potential for more robust key fobs. Automotive manufacturers are exploring the use of advanced materials and sealing techniques to create truly waterproof devices. Additionally, the rise of smartphone-based digital keys may eventually render physical key fobs obsolete, eliminating concerns about water damage altogether.

Internationally, innovations in waterproofing technology are being driven by consumer demand and environmental considerations. For example, in regions with high humidity or frequent rainfall, automakers are under pressure to offer more durable solutions. As a result, future key fobs may combine water resistance with other features, such as solar charging or biometric security.

Navigating the Realities of Key Fob Care

Key fobs are indispensable in modern driving, but they are not invincible. While some offer limited water resistance, the majority are vulnerable to prolonged exposure or immersion. Understanding these limitations and taking proactive measures to protect your key fob can save you time, money, and frustration.

As technology evolves, the prospect of waterproof or entirely digital keys becomes more realistic. For now, car owners should familiarize themselves with the specifications of their key fobs and follow best practices for care. Whether you’re navigating a sudden downpour or an accidental spill, a little knowledge and preparation can go a long way in safeguarding your key fob and ensuring uninterrupted access to your vehicle.

Related Posts

How to Take the Perfect Photo of Your Key for Easy Replacement

How to Take the Perfect Photo of Your Key for Easy Replacement

When you need a replacement key , taking a clear, detailed photo of your key can make the process much faster and more accurate. A high-quality image helps key makers understand the exact specifications, cuts, and dimensions of your key, which is especially important if you don’t have a spare. In this guide, we’ll walk you through the best practices for photographing your key so you can get an accurate replacement with ease. Why a Clear Key Photo Matters Photographing a key might sound simple, but it requires a bit of attention to detail. A well-taken photo captures the key’s grooves and unique cuts clearly, helping the key cutter replicate the exact pattern. Saves Time : A high-quality photo reduces the need for multiple attempts to cut a new key. Ensures Accuracy : Clear images help capture specific details, leading to a more precise fit. Convenient Process : With just a smartphone and a few tips, you can photograph your key from home without needing special equipment. Essential Tools for Photographing Your Key To take a clear photo of your key, you don’t need much beyond a few household items. Here’s what you’ll need: Smartphone or Camera : A phone camera is usually sufficient, but a standard digital camera works well too. Plain Background : Choose a neutral, solid-colored background like a piece of white paper or a smooth table surface. Good Lighting : Natural daylight or a bright room light helps capture details without shadows. Small Object for Elevation : A coin or similar item can lift the key slightly, making it easier to photograph. Step-by-Step Guide to Taking the Perfect Key Photo Follow these steps to take a photo that ensures clarity and accuracy for key replacement. 1. Set Up the Background Place a piece of plain white paper or another smooth, light-colored surface under your key. The solid color helps the details of the key stand out without any visual distractions. Tip : Avoid backgrounds with patterns or textures, as these can obscure the key’s features. 2. Position the Key Correctly Lay the key flat on the background, with the grooves and cuts facing up. The key should be positioned horizontally to allow a clear view of all its details. Side Profile : Make sure to capture the side profile that shows the cuts and grooves. Elevate Slightly : Place a coin or small object under one end of the key to angle it slightly toward the camera. This can help reduce shadows and improve focus on the cuts. 3. Adjust Lighting Good lighting is essential for capturing details. If possible, photograph your key in natural daylight near a window or use a well-lit room. Avoid Shadows : Ensure that no shadows fall across the key, as they can obscure details. Diffuse Light : If using a lamp, consider placing a thin cloth over it to diffuse the light and reduce harsh reflections. 4. Focus and Zoom Make sure your camera or smartphone is focused directly on the key. You may need to tap the screen to bring it into sharp focus. Zoom in Carefully : If you’re using a smartphone, zoom in slightly to capture the details, but avoid over-zooming, which can blur the image. Test Multiple Angles : Sometimes a slight adjustment in angle can capture the cuts more effectively, so take a few shots from slightly different perspectives. 5. Capture Multiple Photos It’s always a good idea to take several photos to ensure you have the best one. Try different angles and lighting adjustments to capture as many details as possible. Close-Up of the Grooves : Take one close-up image focusing on the cuts and grooves of the key. Overall Image : Include one full-length photo that shows the entire key from end to end. Try Different Angles : Slightly tilt the key or move the camera to see which angle best captures the detail of the cuts. Common Mistakes to Avoid When Photographing Your Key To get the best results, steer clear of these common issues that can impact the quality of your key photo: Blurry Images : If your hand shakes, use a small tripod or prop your phone on a stable surface. Poor Lighting : Avoid taking photos in dim rooms; use bright light to ensure the key is clearly visible. Obstructed Details : Make sure the entire length of the key is visible, without any part being cut off or covered. Tips for Ensuring a Smooth Replacement Process Once you have a clear photo of your key, there are a few final steps to make the replacement process as efficient as possible. Check the Photos : Look over your photos before sending them to ensure that they’re clear and detailed. Label the Key : If you’re photographing multiple keys, label each one in the image or add a note to avoid confusion. Include Measurements : If possible, add the measurements of the key’s length and width in your notes for added accuracy. A clear, detailed photo of your key can save you time and effort when seeking a replacement. By following these simple steps, you’ll provide all the necessary details to ensure your new key is an accurate match. Remember, good lighting, focus, and capturing all the unique cuts are essential to achieving the best results. With these guidelines, you’re set to take a photo that will make your key replacement process smooth and hassle-free.

Effortlessly Ordering Multiple Replacement Car Keys: A Step-by-Step Guide

Effortlessly Ordering Multiple Replacement Car Keys: A Step-by-Step Guide

As a car owner, managing multiple key replacements can be daunting. Fortunately, there's a streamlined method to order several keys simultaneously using a CSV file. Here's how you can simplify the process: 1. Prepare Your Key List Create a Spreadsheet: Use software like Microsoft Excel to list your key codes. Enter Details: In Column A, input each key code; in Column B, specify the quantity needed. Avoid Headers: Start directly with your data; do not include column titles. 2. Save as CSV Choose CSV Format: When saving, select 'CSV (Comma delimited)' from the 'Save as type' dropdown. Ensure Correct Format: Avoid other CSV formats to prevent compatibility issues. 3. Upload Your CSV File Access Your Account: Log into your trade account on the key replacement website. Navigate to Product Page: Find the specific key product you need. Upload CSV: Click the 'Upload a CSV' button above the key number entry field and select your file. Wait for Processing: Large files may take time to upload; remain on the page until completion. 4. Complete Your Order Add to Basket: Once uploaded, click 'Add to basket.' Proceed to Checkout: Follow the standard payment process to finalize your order. Important Considerations Separate Files for Different Keys: If ordering various key types or series, create individual CSV files for each. Trade Account Requirement: This feature is typically available to trade account holders; ensure you have the necessary access. By following these steps, you can efficiently manage bulk key replacements, saving time and ensuring accuracy.

How to Program a Spare Car Key: Should You DIY or Call a Pro?

How to Program a Spare Car Key: Should You DIY or Call a Pro?

You’ve got a spare car key in your hand and one big question on your mind: can you program it yourself, or should you visit a locksmith or dealer? The answer depends on your car and the key. In this guide, you'll discover when DIY programming is possible, when it's not, and how to avoid common mistakes. Whether you're aiming to save money or just want a backup key for peace of mind, here's everything you need to know. Types of Car Keys: What You’re Working With Not all car keys are the same—and that matters. Older vehicles often use simple metal keys or basic transponder keys, while modern cars rely on electronic fobs and smart keys with encrypted chips. If your car was built before the early 2000s, there’s a good chance you can program a spare yourself without any special tools. Newer vehicles, however, might require dealer-level software or diagnostic equipment to complete the job. Basic key types include: Non-transponder metal keys : can be copied at any key-cutting service. Transponder keys : contain a chip that communicates with your car’s immobilizer. Remote key fobs : combine keyless entry with a transponder chip. Smart/proximity keys : high-tech, often require dealer programming. How DIY Key Programming Works If your car supports on-board programming, you're in luck. Here’s how a common DIY method looks: Insert your original (master) key into the ignition and turn it to “on” (don’t start the engine). Leave it for five seconds, then remove it. Quickly insert the new spare key and turn it to “on.” Wait for the security light to blink or turn off—this confirms successful programming. Test the spare key by starting the engine. Note: This process varies by vehicle. Always consult your owner's manual or search for your specific make, model, and year online before starting. When You’ll Need a Professional DIY isn’t always an option. If your car uses advanced keyless systems, push-button start, or encrypted communication, programming usually requires access to manufacturer software and security codes. In these cases, a qualified locksmith or dealership is your best (and safest) bet. Also, if your vehicle requires a unique PIN to program a new key—and you don’t have it—don’t guess. Incorrect attempts could lock the system and result in costly reprogramming. Choosing the Right Spare Key Buying the correct spare key is critical for success. You’ll need: The correct transponder chip type (e.g., ID46, ID48, PCF7946 ) Matching blade shape or key profile The correct frequency (commonly 433MHz or 868MHz ) Avoid cheap generic blanks unless you're certain they’re compatible. Poor-quality keys may not accept programming or may fail shortly after. Quick DIY Checklist: Are You Ready? You already have a working master key Your vehicle supports on-board key programming The spare matches in chip, frequency, and blade You’re comfortable following time-sensitive steps You’re okay calling a pro if things don’t work If you checked most of those, DIY might be a great fit. If not, you’re better off with professional help—it could save you time, frustration, and possibly money in the long run. Be Smart with Your Spare Key Having a backup key is more than convenient—it’s essential. From lost keys to unexpected lockouts, a properly programmed spare key can save the day. If your vehicle allows DIY programming, take your time, follow instructions carefully, and double-check compatibility. If you hit a wall, don’t force it. Pros are there for a reason. No matter which route you take, you’ll thank yourself later for being prepared. Because when it comes to your car keys, one really isn’t enough.

How to Choose the Correct Key for Your Westfalia Towbar

How to Choose the Correct Key for Your Westfalia Towbar

Westfalia towbars are a common choice for many car owners due to their reliability and ease of use. However, because you may use your Westfalia towbar key sporadically throughout the year, it’s not uncommon to misplace it, often at the most inconvenient times—like when you're about to go on vacation. If you've lost your key , you might not know the number of the key you need to order a replacement. Fortunately, there is a way to determine this, depending on whether your towbar lock has a 3-digit or a 5-digit number. Step 1: Check the Number on Your Towbar Lock The first step is to inspect your towbar lock to see if it has a 3-digit or 5-digit number. Here’s what to do next: Sample picture of how 5-digits lock number looks like. If you have a 3-digit number: Unfortunately, the key code remains unknown based on this number alone. We can only manufacture a new key if you have at least one original key and can provide us with the W** or 2W** code from it. If you have a 5-digit number: You're in luck! You can easily determine the correct key code. The key code is based on the last two digits of the 5-digit lock number, prefixed with "2W". Step 2: Calculate Your Key Code If your towbar lock has a 5-digit number, simply ignore the first three digits and use the last two digits. Prepend "2W" to these digits to form the key code. For example, if the code on your lock is 33322 , then your key code is 2W22 . This code will be the number you provide when ordering a replacement key. Even if your 5-digit lock code starts with a different set of three digits, the method remains the same—ignore the first three and focus on the last two digits. For your convenience, we include our key code generator below. What to Do If You’ve Lost All Your Keys If you have lost all your keys and only have the 5-digit number on the lock, you can still determine the correct key using the method described above. Unfortunately, if your lock only has a 3-digit number, the specific key code cannot be determined based on the number alone. Remember, the key code is crucial for obtaining a replacement key. If the towbar was manufactured after 2008, the 5-digit code on the lock cylinder will allow you to identify the correct key. Simply use the last two digits and prefix them with "2W" to get the key code. If you're ever unsure, it's always a good idea to reach out to the manufacturer or a professional who can assist in identifying the correct key. Conclusion Choosing the correct key for your Westfalia towbar is straightforward if you know what to look for. By following these steps, you can quickly determine the correct key code and ensure you're never stuck without access to your towbar when you need it most. Be sure to keep your key code information safe, and consider having a spare key made to avoid future issues. Click Here To Order Your Westfalia Towbar Key >>

Chat with us