Post Name

In an age where technology is at the core of almost every part of a vehicle, car keys are no longer simple pieces of metal. They’ve become compact, electronic tools that combine convenience with security — from remote locking systems to transponder chips and push-start capabilities. However, like any piece of technology, car keys are not immune to wear, damage, or electronic failure. And when they stop working, most drivers are left with one essential question: does my key just need a new battery, or is it time for a full replacement?

This article dives deep into that very question. Understanding how to recognize the early signs of battery failure versus a complete key malfunction can save drivers from unnecessary frustration and expensive dealership visits. Whether you're dealing with a FIAT flip key, a HYUNDAI remote, or any modern fob, this guide will help you identify the issue and make an informed decision on what to do next.

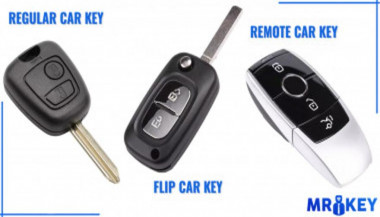
The Anatomy of a Modern Car Key

To understand why a key might stop working, it’s helpful to know what’s actually inside it. Most modern car keys—especially those from brands like FIAT, Hyundai, Kia, Peugeot, or Volkswagen—are composed of several key components.

At the core is a small lithium coin battery, typically a CR2032 or CR2025, which powers the key's remote functions. There's also a circuit board that contains the remote buttons and signal transmission systems. Some keys include a transponder chip, a tiny RFID device that communicates with your vehicle’s immobilizer system. Then there's the key blade—mechanical or flip-style—and the outer shell, which holds it all together and includes physical buttons.

When something goes wrong, the issue can stem from any one of these components. But most commonly, the culprit is either a drained battery or damage to the internal electronics or casing.

Early Warning Signs: Is It Just the Battery?

Many car key issues start with subtle signs that most drivers overlook. The key may still work occasionally, or it might only respond when standing close to the car. These are common indicators that the battery is on its way out, but hasn’t failed completely yet.

One of the first things a driver might notice is that the range of the remote decreases. You may find yourself needing to stand much closer to the vehicle than usual to lock or unlock it. In some cases, the key might require multiple button presses to get a response. If the key has a small LED light (common in many models), you might see it flicker weakly or stop lighting up altogether.

These are signs that the battery still has some life, but it's not providing the power needed for consistent performance. The good news? Replacing the battery is often a quick and inexpensive fix, especially if there are no signs of physical damage or moisture exposure.

How Long Does a Key Battery Last?

The battery inside your key is designed to last between 2 to 3 years under regular use. Factors like frequent use, temperature changes, or prolonged storage can reduce that lifespan. If your key has never had a battery change and it's approaching that age, a weak battery is the most likely cause of any issues.

Changing the battery is a simple task in most cases. Many key fobs can be gently pried open using a flathead screwdriver or a plastic tool. Inside, you’ll find the round battery, which can be swapped out for a new one. Always use a high-quality battery from a trusted brand like Panasonic or Maxell to ensure optimal performance.

After inserting a fresh battery, the key should immediately start functioning normally again. If it doesn't, then the issue likely runs deeper.

When It’s More Than Just the Battery

So what happens if you've replaced the battery and the key still doesn't work? This is when it’s time to look at other possibilities. A complete key failure doesn’t just affect the remote functions—it can also affect the chip, the buttons, or even the mechanical components.

For instance, if your car uses a push-to-start system and it no longer recognizes your key after a battery replacement, the issue may lie with the transponder chip. This chip is essential for starting the engine, and if it’s been damaged by a drop or water exposure, the car may not respond at all.

Keys that have been exposed to moisture, such as rain or accidental washing, are also at high risk. Even small amounts of water can short out the internal electronics or cause corrosion on the contacts, rendering the key useless. Similarly, keys that have been dropped or stepped on can suffer internal damage even if the outer shell looks fine.

Another common reason for total failure is button wear. Over time, the rubber buttons on a key can wear down or detach completely, making it difficult to send a signal to the car—even if the electronics are still working underneath.

Shell Damage vs. Internal Failure

It's important to distinguish between cosmetic damage and a true functional failure. A key with a cracked or broken shell may still work perfectly well, but using it daily becomes inconvenient—or risky, as it can fall apart further over time. In these cases, replacing only the key shell is often the most cost-effective solution.

Shell replacement kits are available for most makes and models, including popular FIAT and Hyundai keys. They allow users to transfer the internal electronics and battery into a new casing, restoring the look and feel of the original key without needing reprogramming or electronic parts.

However, if the circuit board inside the key is broken, or the transponder chip is no longer recognized by the vehicle, a complete key replacement will be necessary. This often requires purchasing a new key and having it programmed to your vehicle, either through a locksmith or via dealership-level tools.

Identifying the Right Replacement Solution

The path forward depends entirely on the root cause of the issue. Here’s how to decide:

If your key works intermittently and shows no physical damage, start with a battery replacement.

If the buttons are worn or the casing is cracked, but the electronics are fine, consider a shell replacement.

If the key doesn’t respond at all, even with a new battery, and has no LED or signal, a full replacement is likely needed.

If the mechanical blade is damaged, but the remote still functions, you can often just replace the key blade.

Replacing just the parts you need can save time and money. Reliable sellers, like mr-key.com, offer a wide range of high-quality key shells, batteries, blades, and even full replacement keys—including options for programming and compatibility details.

When your car key stops working, it’s natural to panic. But in most cases, the fix is far simpler than expected. A weak or dead battery accounts for the majority of key-related issues, and replacing it can restore full function within minutes. However, when the damage goes beyond the battery, identifying whether it’s the shell, chip, or internal electronics at fault will determine whether a full replacement is necessary.

Being able to recognize the difference between a temporary battery issue and a deeper hardware failure empowers car owners to take quick, cost-effective action. With the right tools and parts—and a little guidance—almost anyone can resolve a car key issue without visiting a dealership.

For a full range of replacement parts, including key shells, blades, batteries, and complete remote keys, visit mr-key.com and explore quality products that help restore your car key to like-new condition.

Related Posts

How to Upgrade Your Car Key: A Step-by-Step Guide

How to Upgrade Your Car Key: A Step-by-Step Guide

Upgrading your car key can significantly improve your vehicle’s security and make your daily routine more convenient. Whether you’re upgrading from a basic key to a remote key or stepping up to a smart key, this guide will take you through the entire process, step by step, ensuring a smooth transition. Understanding Your Key Type Before you start the upgrade process, it’s important to know which type of key you currently have. Here are the most common key types: Traditional Metal Keys : These are basic, mechanical keys, common in older vehicles. They don’t have any electronic components. Transponder Keys : These have an electronic chip inside the key head that communicates with the vehicle’s computer system for added security. Remote Keys : These keys have buttons to lock/unlock the doors remotely and usually have a physical blade as a backup. Understanding your current key type will help guide your decision on the best upgrade path. Choosing the Right Upgrade Once you know what type of key you have, you need to decide what features you want in your upgraded key. Some options to consider are: Remote Locking : Allows you to lock/unlock the doors from a distance. Keyless Entry : Lets you unlock the car without taking the key out of your pocket. Smart Key : Offers advanced functions such as proximity unlocking, push-button start, and remote engine start. Take some time to research the options available for your specific car model. Many car manufacturers offer compatible upgrades for different key types, so it’s important to consult your dealership or a trusted locksmith for recommendations. Gathering What You’ll Need Before starting the upgrade process, make sure you have the following materials: The New Key : This could be a transponder key, remote key, or smart key. Your Original Key : You’ll need this as a reference throughout the process. Key Programming Device : Some keys require a special device to pair the key with your car. Car Manual or Programming Guide : It’s always a good idea to have your car’s manual handy for specific instructions. Having everything ready will make the process much smoother. Step-by-Step Upgrade Process Purchase the New Key Start by purchasing your new key. You can buy it from your car’s dealership, a certified locksmith, or a trusted online retailer. Make sure that the key is compatible with your vehicle’s make and model. Transfer Electronics (if necessary) If your new key is just a shell, you will need to transfer the internal components from your old key. This includes the transponder chip and, if applicable, the key blade. Be careful when transferring the electronics to avoid any damage. Program the Key Programming the new key is crucial for it to work with your vehicle. Here’s a general guide: Insert the original key into the ignition and turn it to the ON position. Quickly remove the original key and insert the new key. Turn the new key to the ON position and wait for the security light to turn off. This might take a few minutes. Test the New Key After programming, it’s important to test the new key to ensure everything works properly. Check the following functions: Locking and unlocking the doors Starting the engine Any additional functions like remote trunk opening or proximity unlocking Troubleshooting Common Issues If your new key isn’t working as expected, don’t worry! Here are some common problems and their solutions: Key Not Recognized : Check if the transponder chip is properly placed in the key. Key Doesn’t Start the Car : Double-check the programming steps to ensure everything was done correctly. Buttons Don’t Work : Verify that the battery in the new key is properly installed and functional. If the problem persists, it’s best to consult a professional locksmith or visit your dealership for further assistance. Upgrading your car key is an excellent way to improve both the security and convenience of your vehicle. By following these steps, you’ll be able to transition smoothly to your new key. If you run into any issues, don’t hesitate to reach out to a professional locksmith who can help you along the way. Enjoy the benefits of your new car key and the added peace of mind that comes with enhanced security.

Why Your Motorcycle TFT Display Needs a Screen Protector (Before It’s Too Late)

Why Your Motorcycle TFT Display Needs a Screen Protector (Before It’s Too Late)

Modern motorcycles are smarter, more connected, and more expensive than ever. At the center of that evolution sits the TFT display—your bike’s digital command hub. Speed, revs, riding modes, navigation, calls, warnings. One exposed surface controls it all. And it’s far more vulnerable than most riders realise. A motorcycle screen protector isn’t an accessory. It’s preventive maintenance. Ignore it, and you’re gambling with one of the most expensive components on your bike. The Hidden Weak Point on Modern Motorcycles Motorcycle manufacturers invest heavily in engines, frames, and electronics. But the TFT display? It’s still a thin, exposed panel, mounted directly in the line of fire. Unlike a phone, it: Lives outdoors 24/7 Takes direct UV exposure Gets hit by dust, sand, insects, and road debris Is cleaned repeatedly—often incorrectly A single mistake is enough to leave permanent damage. TFT Displays Scratch Far Easier Than You Think Most motorcycle TFT screens are plastic-based or plastic-coated , not hardened glass like premium smartphones. That matters. Plastic scratches: From dust particles wiped across the surface From dry cloths or paper towels From jacket zippers or gloves Even from “careful” cleaning at fuel stops Once scratched, there is no polish, no fix, no reset . The damage is permanent. A motorcycle display protector absorbs this damage instead of the screen itself. Sunlight Is Quietly Destroying Your Display UV exposure doesn’t crack screens overnight. It does something worse. It slowly: Fades colours Reduces contrast Creates uneven patches Permanently dulls brightness After a few summers, the display that once looked sharp now looks tired—especially when riding in direct sunlight. A quality bike screen protector acts as a UV barrier, preserving clarity and colour accuracy for years. Glare Isn’t Just Annoying. It’s Dangerous. A washed-out screen at speed isn’t just inconvenient. It means: Missed warning lights Hard-to-read navigation prompts Delayed reaction times In bright sun, an unprotected TFT can become a mirror. Screen protectors designed for motorcycles reduce reflections and glare, improving readability in real-world riding conditions—not showroom lighting. Cleaning Your Screen Is Probably Damaging It Most riders clean their TFT displays the same way they clean helmets or windscreens. That’s a mistake. Common causes of micro-scratches: Dry wiping Paper towels Window cleaners Cloths contaminated with dust Over time, these tiny marks add up. The screen becomes hazy. Night riding gets worse. Contrast drops. A motorcycle screen protector takes that abuse instead—so you can replace the protector, not the display. The Real Cost of a Damaged Motorcycle TFT Display Here’s what many riders discover too late. Replacing a TFT display typically costs: €800–€1,200 for the part Labour and coding often extra In many cases, the bike must go to an authorised dealer Insurance often won’t cover cosmetic damage. Scratches don’t qualify as “failure.” A screen protector costs a fraction of that—and eliminates the risk entirely. Resale Value Takes a Direct Hit Buyers notice screens immediately. A scratched or faded TFT display: Signals neglect Raises questions about overall maintenance Lowers perceived value Even if the bike is mechanically perfect, a damaged display can knock hundreds off resale or trade-in value. Protecting the screen protects the bike’s future value. Why Motorcycle Displays Are More Vulnerable Than Phones It’s tempting to compare TFT displays to smartphones. That comparison fails. Motorcycle screens: Are permanently exposed to the elements Experience constant vibration Are cleaned in uncontrolled environments Sit at steep angles that catch sunlight They endure more abuse in one riding season than most phones do in five years. A dedicated motorcycle display protector is designed for exactly these conditions. Screen Protectors Don’t Affect Touch or Visibility A common myth: screen protectors reduce clarity or touch response. High-quality motorcycle screen protectors are: Ultra-thin Optically clear Designed for glove interaction Precisely cut for each display shape Once installed, most riders forget it’s even there—until it saves the screen. Installation Is Easier Than You Expect Modern protectors are made for DIY installation. Typically: No liquids required No permanent adhesives No tools beyond what’s included With careful alignment, installation takes minutes—and protects the display for years. Who Should Use a Motorcycle Screen Protector? Short answer: every rider. Especially if you: Park outdoors Ride in bright sun Tour long distances Use navigation or Bluetooth features Plan to keep or resell the bike If your motorcycle has a TFT display, it’s already at risk. FAQ Do motorcycle TFT displays scratch easily? Yes. Most TFT displays use plastic-based surfaces that scratch far more easily than smartphone glass—often from normal cleaning alone. Can a scratched motorcycle display be repaired? No. Scratches are permanent. The only true fix is replacing the entire display unit. How much does it cost to replace a motorcycle TFT screen? Replacement typically costs between €800 and €1,200, excluding labour and dealer programming. Does a screen protector affect brightness or touch sensitivity? No. Quality protectors are optically clear and maintain full touch responsiveness. Is a motorcycle screen protector worth it? Considering the replacement cost of a TFT display, a screen protector is one of the highest-value protective upgrades you can make. Can I remove or replace the protector later? Yes. Screen protectors are removable and replaceable without damaging the original display. Protect the Most Expensive Screen on Your Bike Your motorcycle’s TFT display is essential, fragile, and costly to replace. Damage doesn’t announce itself. It accumulates quietly—scratch by scratch, fade by fade—until it’s too late. Visit our shop at mr-key.com to explore our motorcycle screen protectors and protect your display before the damage becomes permanent.

The Secret to Smooth Locks: How (and Why) to Lubricate Your Locks Like a Pro

The Secret to Smooth Locks: How (and Why) to Lubricate Your Locks Like a Pro

Regular lock maintenance is essential to prevent key jamming or lock failure. Proper lubrication reduces wear and tear, ensures smooth operation, and extends the lifespan of your locks. A well-lubricated lock decreases the risk of your key getting stuck or breaking inside the lock—an inconvenient and costly problem. At MR-KEY , we understand the importance of well-maintained locks and want to help you keep yours in top condition. How Often Should You Lubricate Your Locks? For most locks, lubricating them every three to six months is sufficient. However, locks exposed to extreme weather conditions—such as those on towbars, roof racks, or outdoor gates—require more frequent maintenance. Rain, dust, and freezing temperatures can cause internal components to stick, making it difficult to insert or turn the key. If you notice resistance when using a lock, it’s time for lubrication. What Lubricant Should You Use for Locks? Choosing the right lubricant is crucial for long-term lock performance. Here are the best options: • Teflon-based (PTFE) spray – Forms a protective film inside the lock, reducing friction and repelling dust buildup. • Dry silicone spray – Excellent for outdoor locks as it resists moisture without attracting dirt. • WD-40 Specialist Dry PTFE or White Lithium Grease – Unlike regular WD-40, these provide long-lasting lubrication and protection against corrosion. • Graphite powder – A great choice for older locks but should not be used if there’s oil residue inside the lock. While WD-40 Multi-Use is a quick fix for stuck locks, it is primarily a cleaner rather than a long-term lubricant. If used, follow up with a dry lubricant to prevent dirt accumulation inside the lock. How to Lubricate a Lock If your lock is functioning properly but feels slightly stiff, follow these steps: 1. Clean the Lock – Insert and remove the key a few times to dislodge debris, wiping it clean each time. 2. Apply the Lubricant – Insert the spray straw into the keyhole and apply two short bursts of lubricant. 3. Work the Lock – Insert and turn the key multiple times to distribute the lubricant inside. 4. Wipe Excess Lubricant – Remove any residue from the key and lock exterior to prevent dirt buildup. For graphite powder , follow the manufacturer’s specific instructions, as overapplication can lead to clumping inside the lock. Special Care for Towbar and Roof Rack Locks Locks on towbars and roof racks are exposed to harsher conditions than typical door locks. To keep them in good shape: • Regularly inspect them for stiffness or corrosion. • Apply dry silicone spray or PTFE lubricant for lasting protection. • If the lock is exposed to frequent moisture, white lithium grease offers superior water resistance. Lock It in: The Key to Long-Lasting Security Regular lock maintenance is a small effort that prevents big problems. By keeping your locks clean and properly lubricated—especially those exposed to the elements—you can avoid costly repairs and ensure they function smoothly for years. For high-quality lock maintenance products, visit MR-KEY and keep your locks in perfect working condition. A little maintenance goes a long way in ensuring security and peace of mind!

Common Car Key Problems and Solutions Every Driver Should Know

Common Car Key Problems and Solutions Every Driver Should Know

There’s nothing quite as frustrating as standing outside your car, key in hand, only to realize something’s not working. Whether your key won’t turn, the remote isn’t responding, or the key itself has seen better days, car key problems seem to happen at the worst possible moment. The good news? Most of these issues are avoidable or fixable, and knowing what to expect can save you both time and stress. 1. Worn-Out Key Blades You might not notice it happening, but over time, your key blade wears down. Each time you insert it into the lock or ignition, tiny grooves and cuts on the blade experience friction. After years of use, the edges get smooth, and the key may stop fitting snugly. Suddenly, you find yourself jiggling or forcing it, risking more damage. The solution here is simple: if you start noticing that the key feels loose or takes a few tries to turn, it’s time to get a replacement cut based on the original code, not by copying the worn-out key. A fresh, precisely cut key blade will fit and function perfectly, preventing damage to your lock cylinder. 2. Dead Key Fob Battery Modern cars often come with remote keys or keyless entry systems, and while they offer convenience, they also rely on tiny batteries. One day, you press the button, and nothing happens—no lights, no unlock sound, no response. Before assuming the worst, check the battery. Typically, key fob batteries (like CR1620 or CR2032 types) are inexpensive and easy to replace. A quick change will often restore full functionality. Make it a habit to change your key battery every 1-2 years, especially if you notice reduced range or need to press the button multiple times. 3. Key Not Turning in the Ignition You get into your car, insert the key, and suddenly it won’t turn. You might try wiggling the steering wheel or pushing the key harder, but nothing works. More often than not, the problem is either with the steering lock mechanism being engaged or dirt buildup inside the ignition cylinder. First, try gently moving the steering wheel side-to-side while turning the key—sometimes the wheel locks under tension, and this simple trick unlocks it. If the problem persists, there could be debris inside the ignition. Using a can of compressed air to blow out dust and tiny particles can help, but if it continues, a professional cleaning or inspection might be necessary before the key or ignition gets damaged. 4. Broken or Bent Keys You might not think twice when you use your key to open a package or pry something open—but keys aren't made for multitasking. Over time, rough handling, bending, or dropping your key can weaken the metal. Eventually, you could end up with a bent key that struggles to fit, or worse, a snapped key stuck in your lock. If your key has visible bends or cracks, don’t wait. Replacing it before it breaks entirely can save you the headache of needing an extraction service. Also, always carry a spare key, just in case. 5. Key Programming Issues If your car uses a transponder key or a smart key, there’s more than just a metal blade involved. Inside is a chip programmed to communicate with your car’s immobilizer system. If your key loses synchronization—maybe after battery replacement, an electrical issue, or accidentally resetting your system—it can leave you unable to start your vehicle. In these cases, reprogramming the key is necessary. Some cars allow you to do this manually following specific sequences (like turning the ignition on and off), but others require specialized diagnostic tools. Familiarizing yourself with your car’s manual or researching the process beforehand helps avoid surprises. 6. Water Damage Dropped your key in water or left it exposed to rain? Electronics inside remote keys and smart keys aren’t waterproof. Moisture can short-circuit internal components, causing the key to stop functioning entirely. If this happens, act fast. Remove the battery immediately and dry out the key as thoroughly as possible. You can use silica gel packets or place the key in a bowl of rice overnight to absorb moisture. However, water damage isn’t always reversible, so keeping your key away from wet environments is the best precaution. Car key problems often feel like an emergency when they strike, but most of them are preventable or quickly fixable with a little know-how. Paying attention to the warning signs—whether it’s a key that’s worn, a fob that’s sluggish, or a key that won’t turn—allows you to act before things escalate. Understanding how your key works and handling it with care will save you from unnecessary stress (and unexpected expenses) down the road. So next time something feels off with your key, remember: a little attention now can prevent a major hassle later.

Chat with us