Post Name


The automotive industry has undergone extraordinary changes in the last 150 years. From the earliest steam-powered engines to today’s smart, electric vehicles, cars have become symbols of innovation, convenience, and human progress. This article explores the most groundbreaking innovations that have defined car history, driving us into the future.

1. The Birth of the Car (Late 19th Century)

The late 1800s marked the beginning of the automobile industry with the invention of the first cars.

  • Key Milestone: Karl Benz’s creation of the Benz Patent-Motorwagen in 1885-86 was a game-changer.
  • Impact: For the first time, individuals could travel independently without relying on horses or trains.

This innovation laid the foundation for a new era of personal transportation.

2. The Rise of Mass Production (Early 20th Century)

The early 1900s brought cars to the masses through assembly line production.

  • Key Milestone: Henry Ford’s introduction of the moving assembly line in 1913 revolutionized car manufacturing.
  • Impact: Cars became affordable and accessible to ordinary people, leading to the widespread adoption of automobiles.

The Model T became a symbol of this industrial transformation.

3. The Era of Safety Innovations (1950s–1970s)

As cars became common, safety innovations took center stage.

  • Key Milestones:
    • Seatbelts: Volvo introduced the modern three-point seatbelt in 1959.
    • Airbags: Developed in the 1970s to provide additional protection during crashes.
  • Impact: These innovations drastically reduced injuries and fatalities, making cars safer for all passengers.

Safety continues to be a driving force behind car innovations today.

4. Fuel Efficiency and Environmental Consciousness (1980s–2000s)

The late 20th century witnessed a shift towards eco-friendly car innovations.

  • Key Milestones:
    • Introduction of hybrid cars like the Toyota Prius (1997).
    • Stricter emission regulations led to cleaner, more efficient engines.
  • Impact: Consumers and manufacturers started prioritizing fuel efficiency and reducing environmental impact.

This period laid the groundwork for the electric car revolution.

5. The Digital Revolution in Cars (2000s–2020s)

Modern cars are no longer just machines; they’re smart devices on wheels.

  • Key Innovations:
    • GPS Navigation: Real-time navigation made travel simpler and safer.
    • Infotainment Systems: Touchscreens and voice controls for entertainment and information.
    • Driver Assistance: Features like parking sensors, adaptive cruise control, and collision alerts.
  • Impact: Technology has transformed driving into a more connected, comfortable, and efficient experience.

6. Electric and Autonomous Cars (The Future is Here)

The future of cars lies in sustainability and autonomy.

  • Key Innovations:
    • Electric Vehicles (EVs): Companies like Tesla popularized EVs, offering zero-emission driving.
    • Autonomous Driving: Self-driving technology is advancing rapidly, promising safer and more efficient transportation.
  • Impact: Electric and autonomous cars represent a monumental leap towards reducing environmental impact and redefining mobility.

The next 50 years will likely see even bolder transformations.

From steam engines to self-driving electric vehicles, the car has come a long way. Each era brought innovations that shaped not just how we travel but also how we live. As technology continues to evolve, the possibilities for cars seem endless. Whether it’s improving safety, reducing emissions, or offering autonomous capabilities, cars will remain at the heart of human progress.

Related Posts

How to Identify Your Key Type for Easy Replacement

How to Identify Your Key Type for Easy Replacement

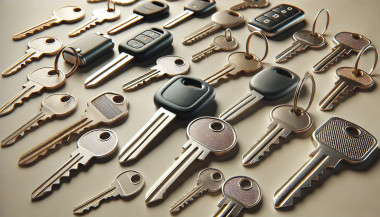
Replacing a lost or broken key might seem straightforward, but identifying the correct type of key is crucial to getting an exact replacement. Whether you need a car key, a house key, or even a cabinet key, each type has specific features that determine its function and fit. Here’s a step-by-step guide to understanding your key type, so you can save time and avoid unnecessary frustration when ordering a replacement. Why Key Identification is Important Keys come in many shapes and sizes, each designed for specific types of locks. Understanding your key’s unique characteristics ensures you get the right replacement and avoid wasted time or money on mismatched keys. Avoid Extra Costs : Ordering the wrong key can mean additional fees for reordering. Save Time : Getting the right key from the start saves the hassle of sending it back and waiting for the correct replacement. Enhance Security : Accurate key identification ensures your security by avoiding compromised, incorrect key fits. Types of Keys: Which One is Yours? Understanding the different types of keys can help you determine what you have. Here are the common types and what makes each unique. 1. Household Keys Household keys are typically designed for residential locks like front doors, back doors, and garage doors. These keys are often small and have either a single or double-sided cut pattern along the edges. Some household keys are unique in design, making them specific to a particular lock type. Common Features : Smaller, single or double-sided cuts. Typical Use : Standard residential door locks, such as deadbolts and knob locks. Tip : Look for any identifying numbers or letters on the key itself. These may indicate a specific lock series, making it easier to identify. 2. Car Keys Car keys come in various styles, depending on the make, model, and year of the vehicle. While older cars may use basic metal keys, most modern vehicles use transponder keys or fob keys with embedded chips for added security. Basic Car Keys : Metal keys without electronic components. Transponder Keys : These have a small chip embedded in the head, which communicates with the car to prevent theft. Key Fobs : Some cars use a fob that contains a keyless entry system, which requires programming specific to your vehicle. Tip : If your car uses a transponder or fob key, you may need assistance programming the replacement. 3. Padlock Keys Keys for padlocks can be small and compact, with a straightforward design. These keys often have a unique series number printed on them, making it easier to match them to a specific lock model. Common Features : Small size, usually single-sided. Typical Use : Storage units, gym lockers, and outdoor gates. 4. Furniture and Cabinet Keys Furniture and cabinet keys are typically found on desks, filing cabinets, and other types of lockable furniture. These keys are generally small, with a straight or tubular shaft, and they often have numbers or letters for identification. Common Features : Compact, single or double-sided cuts, often with identification codes. Typical Use : Office furniture, personal storage, and older-style drawers. 5. High-Security Keys High-security keys are specifically designed to prevent unauthorized duplication. These keys have unique, intricate cut patterns and require special authorization for copying. Common Features : Complex, often multi-sided cuts with additional security features. Typical Use : High-security doors in residential or commercial settings, safes, and secure access points. Key Identification Tips: What to Look For Once you know the type of key, you’ll want to examine specific details that will help with identification. Here’s what to look for: Keyway and Shape : The groove pattern, or “keyway,” is specific to the key type. Take note of the key’s shape and groove configuration. Markings and Codes : Look for any numbers or letters printed on the key. These often refer to specific lock brands or key series. Size and Length : Measure your key’s length, as some keys are longer or shorter depending on the lock type. Metal Head Design : Certain keys, like car keys, may have plastic or rubberized heads, which can indicate the need for a transponder or chip inside. Steps to Identify Your Key Type Inspect for Markings : Look closely at your key for any stamped numbers, letters, or symbols. These markings can often be referenced to find a matching lock or brand series. Measure Your Key : Use a ruler or tape measure to record the length and width of your key. These dimensions can help narrow down the exact key type. Examine the Cut Pattern : Take note of the number of cuts and whether they are on one or both sides. Identify the Head Style : If it’s a car key with a transponder, the head might be plastic or rubber. Check for a Code on the Lock : Some padlocks and cabinet locks have codes printed on them that correspond to a specific key model. What to Do When You Can't Identify the Key If your key has no visible markings or the cuts are unusual, consider taking a photo to help in the identification process. For specialty keys or hard-to-identify types, you may want to seek professional help or consult a detailed online database for reference. Preventing Future Key Confusion Once you’ve identified your key, take a few steps to prevent future issues with identification. Label Your Keys : Adding a small tag with a brief description can help you remember the type of key. Keep Spare Keys in a Safe Place : Having a backup key prevents you from needing a replacement immediately. Store Key Codes or Information : If your key or lock has a series code, store it in a safe place in case you need it for future reference. Identifying your key type is essential for getting a precise replacement without unnecessary hassle. By taking the time to understand your key’s unique features, you can save both time and money when it’s time to replace it. Following these steps will help ensure that your replacement key works as smoothly as the original.

Why Your Car Remote Isn’t Working and How to Fix It

Why Your Car Remote Isn’t Working and How to Fix It

Car remotes have become an essential part of modern vehicle ownership, offering convenience and added security. However, when they stop working, it can lead to frustration and delays. If you’ve ever faced a malfunctioning car remote, don’t worry—you’re not alone. Here’s a guide to help you understand the common reasons why your car remote might fail and how you can fix the issue quickly and affordably. 1. Dead Battery: The Usual Suspect One of the most common reasons for a non-functional car remote is a dead battery. Over time, the small coin batteries in your remote lose their charge, making the remote unusable. Signs of a Dead Battery: Reduced range, inconsistent functionality, or complete failure to respond. How to Fix It: Replace the battery with a compatible CR-type coin battery. Check your car manual or the remote’s casing for the correct battery type. Pro Tip: Always keep a spare battery in your glove compartment to avoid getting stranded. 2. Signal Interference: The Invisible Barrier Signal interference can block communication between your remote and your car. This can happen in areas with high electromagnetic activity or if the remote’s signal is weakened. Common Causes: Proximity to cell towers, Wi-Fi routers, or even other key fobs . How to Resolve It: Move closer to your car and try again. Change your location if you’re in a crowded parking area. Keep your remote away from other electronic devices that might cause interference. Prevention Tip: Avoid storing your car remote near electronics when not in use. 3. Remote Needs Reprogramming Sometimes, a car remote loses its programming, which is essential for communicating with your car. This can happen after battery replacement, electrical system resets, or software glitches. Signs Your Remote Needs Reprogramming: The buttons don’t respond, or the remote only works intermittently. What You Can Do: Check your car manual for DIY reprogramming instructions. If DIY methods fail, consult a professional locksmith or your car dealer for assistance. Pro Tip: Always reprogram your remote immediately after replacing its battery to avoid compatibility issues. 4. Physical Damage: More Than Just Wear and Tear Daily use, accidental drops, or exposure to moisture can damage your car remote, leading to malfunction. The internal components, such as the circuit board, are particularly sensitive. Signs of Damage: Cracks on the casing, loose buttons, or water ingress. How to Address It: For minor issues, replace the remote casing or repair loose buttons. If the circuit board is damaged, you’ll need a replacement remote. Preventative Measures: Use a protective key cover to shield your remote from damage. Keep your remote away from water and extreme temperatures. 5. Faulty Car Receiver: The Problem Isn’t Always the Remote In some cases, the issue lies with your car’s receiver rather than the remote. If the receiver is damaged or malfunctioning, it won’t recognize signals from the remote. How to Diagnose: If multiple remotes fail to work with the same car, the receiver might be the issue. Test your remote on a similar vehicle, if possible, to rule out the remote as the problem. How to Fix It: Consult a professional mechanic to inspect and repair the car’s receiver system. General Tips to Keep Your Car Remote Functional Prevention is better than cure, especially when it comes to car remotes. Here are some tips to avoid future issues: Regular Maintenance: Inspect your remote periodically for wear and tear. Store It Safely: Keep your remote in a safe, dry place to avoid accidental damage. Backup Plan: Always have a spare key or remote handy for emergencies. Invest in a Tracker: Attach a Bluetooth tracker to your remote for easy location if it gets misplaced. When to Seek Professional Help While many car remote issues can be resolved with DIY methods, some problems require professional assistance. If your remote still doesn’t work after troubleshooting, consult a locksmith or an automotive specialist. They can help with repairs, replacements, and reprogramming at an affordable cost. Don’t Let a Faulty Remote Slow You Down A malfunctioning car remote can be a hassle, but most issues are fixable with a little know-how. Whether it’s a dead battery, signal interference, or physical damage, understanding the root cause will help you resolve the problem efficiently. With proper care and maintenance, your car remote will continue to offer the convenience and security you rely on every day.

The Secret to Smooth Locks: How (and Why) to Lubricate Your Locks Like a Pro

The Secret to Smooth Locks: How (and Why) to Lubricate Your Locks Like a Pro

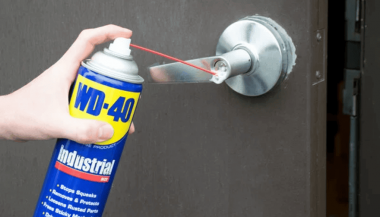
Regular lock maintenance is essential to prevent key jamming or lock failure. Proper lubrication reduces wear and tear, ensures smooth operation, and extends the lifespan of your locks. A well-lubricated lock decreases the risk of your key getting stuck or breaking inside the lock—an inconvenient and costly problem. At MR-KEY , we understand the importance of well-maintained locks and want to help you keep yours in top condition. How Often Should You Lubricate Your Locks? For most locks, lubricating them every three to six months is sufficient. However, locks exposed to extreme weather conditions—such as those on towbars, roof racks, or outdoor gates—require more frequent maintenance. Rain, dust, and freezing temperatures can cause internal components to stick, making it difficult to insert or turn the key. If you notice resistance when using a lock, it’s time for lubrication. What Lubricant Should You Use for Locks? Choosing the right lubricant is crucial for long-term lock performance. Here are the best options: • Teflon-based (PTFE) spray – Forms a protective film inside the lock, reducing friction and repelling dust buildup. • Dry silicone spray – Excellent for outdoor locks as it resists moisture without attracting dirt. • WD-40 Specialist Dry PTFE or White Lithium Grease – Unlike regular WD-40, these provide long-lasting lubrication and protection against corrosion. • Graphite powder – A great choice for older locks but should not be used if there’s oil residue inside the lock. While WD-40 Multi-Use is a quick fix for stuck locks, it is primarily a cleaner rather than a long-term lubricant. If used, follow up with a dry lubricant to prevent dirt accumulation inside the lock. How to Lubricate a Lock If your lock is functioning properly but feels slightly stiff, follow these steps: 1. Clean the Lock – Insert and remove the key a few times to dislodge debris, wiping it clean each time. 2. Apply the Lubricant – Insert the spray straw into the keyhole and apply two short bursts of lubricant. 3. Work the Lock – Insert and turn the key multiple times to distribute the lubricant inside. 4. Wipe Excess Lubricant – Remove any residue from the key and lock exterior to prevent dirt buildup. For graphite powder , follow the manufacturer’s specific instructions, as overapplication can lead to clumping inside the lock. Special Care for Towbar and Roof Rack Locks Locks on towbars and roof racks are exposed to harsher conditions than typical door locks. To keep them in good shape: • Regularly inspect them for stiffness or corrosion. • Apply dry silicone spray or PTFE lubricant for lasting protection. • If the lock is exposed to frequent moisture, white lithium grease offers superior water resistance. Lock It in: The Key to Long-Lasting Security Regular lock maintenance is a small effort that prevents big problems. By keeping your locks clean and properly lubricated—especially those exposed to the elements—you can avoid costly repairs and ensure they function smoothly for years. For high-quality lock maintenance products, visit MR-KEY and keep your locks in perfect working condition. A little maintenance goes a long way in ensuring security and peace of mind!

Removing Keys from Locks: A Comprehensive Guide

Removing Keys from Locks: A Comprehensive Guide

Removing a key from a lock may seem simple, but it can become tricky when dealing with stuck or broken keys. Whether you're dealing with a standard lock, padlock, or vehicle ignition, understanding the correct techniques can save you from damage and frustration. This guide will walk you through the essential steps for removing keys from various types of locks, offering practical advice and tips to ensure a smooth process. Common Scenarios and Challenges Keys can become stuck or difficult to remove for several reasons, including misalignment, wear and tear, or damage to the key or lock. Additionally, environmental factors like temperature changes can cause metals to expand or contract, making key removal more challenging. Recognizing the cause of the issue is the first step in effectively addressing it. Basic Techniques for Key Removal Gentle Wiggle and Pull: The first technique to try is a gentle wiggle and pull. Hold the key firmly and move it slightly up and down or side to side while pulling gently. This method works well if the key is simply stuck due to misalignment. Lubrication: If the key is difficult to remove, applying a small amount of graphite powder or a silicone-based lubricant into the keyhole can help. Avoid using oil-based lubricants, as they can attract dirt and grime, potentially worsening the problem. Tapping the Lock: For stubborn cases, lightly tapping the lock with a hammer while gently pulling the key can help dislodge it. This method is effective when the key is stuck due to debris or minor misalignments within the lock. Advanced Techniques for Stuck Keys Using a Key Extractor: If the key is broken off inside the lock, a key extractor tool can be very effective. Insert the tool into the keyhole, hook the broken key piece, and pull it out carefully. This method requires patience and a steady hand. Pliers and Tweezers: If part of the key is still protruding, you can use needle-nose pliers or tweezers to grip and pull the key out. Be careful not to apply too much force, as this can push the key further into the lock or damage the lock mechanism. Heat Application: In cold weather, metal contracts, which can cause the key to get stuck. Gently heating the key with a hairdryer or warm cloth can expand the metal slightly, making it easier to remove. However, avoid using an open flame, as it can damage the lock or key. Preventing Key Stuck Issues Prevention is always better than cure. Here are some tips to prevent keys from getting stuck in the future: Regular Maintenance: Keep your locks and keys clean and well-lubricated with appropriate materials. Regularly inspect for wear and tear, and replace any damaged keys or locks. Use Duplicate Keys: If you notice a key becoming difficult to use, have a duplicate made before it breaks or becomes stuck. This will save you the hassle of dealing with a stuck key. Avoid Excessive Force: Never force a key into a lock. If it doesn’t turn easily, stop and inspect both the key and the lock for damage or obstruction. When to Call a Professional While many stuck key issues can be resolved with the techniques mentioned above, there are times when professional assistance is necessary. If you’ve tried all the methods and the key remains stuck, or if you’re dealing with a high-security lock, it’s best to contact a professional locksmith. They have the tools and expertise to safely remove the key without damaging the lock or key further. Dealing with a stuck key can be frustrating, but understanding the proper techniques can save you time and prevent damage. From basic wiggling and lubrication to more advanced methods like using a key extractor, there are various approaches depending on the severity of the situation. Regular maintenance and careful handling can help prevent these issues from occurring in the first place. When in doubt, don’t hesitate to seek professional help to ensure your lock and key remain in good working condition.

Chat with us