Post Name

When you need a replacement key, taking a clear, detailed photo of your key can make the process much faster and more accurate. A high-quality image helps key makers understand the exact specifications, cuts, and dimensions of your key, which is especially important if you don’t have a spare. In this guide, we’ll walk you through the best practices for photographing your key so you can get an accurate replacement with ease.

Why a Clear Key Photo Matters

Photographing a key might sound simple, but it requires a bit of attention to detail. A well-taken photo captures the key’s grooves and unique cuts clearly, helping the key cutter replicate the exact pattern.

  • Saves Time: A high-quality photo reduces the need for multiple attempts to cut a new key.
  • Ensures Accuracy: Clear images help capture specific details, leading to a more precise fit.
  • Convenient Process: With just a smartphone and a few tips, you can photograph your key from home without needing special equipment.

Essential Tools for Photographing Your Key

To take a clear photo of your key, you don’t need much beyond a few household items. Here’s what you’ll need:

  • Smartphone or Camera: A phone camera is usually sufficient, but a standard digital camera works well too.
  • Plain Background: Choose a neutral, solid-colored background like a piece of white paper or a smooth table surface.
  • Good Lighting: Natural daylight or a bright room light helps capture details without shadows.
  • Small Object for Elevation: A coin or similar item can lift the key slightly, making it easier to photograph.

Step-by-Step Guide to Taking the Perfect Key Photo

Follow these steps to take a photo that ensures clarity and accuracy for key replacement.

1. Set Up the Background

Place a piece of plain white paper or another smooth, light-colored surface under your key. The solid color helps the details of the key stand out without any visual distractions.

Tip: Avoid backgrounds with patterns or textures, as these can obscure the key’s features.

2. Position the Key Correctly

Lay the key flat on the background, with the grooves and cuts facing up. The key should be positioned horizontally to allow a clear view of all its details.

  • Side Profile: Make sure to capture the side profile that shows the cuts and grooves.
  • Elevate Slightly: Place a coin or small object under one end of the key to angle it slightly toward the camera. This can help reduce shadows and improve focus on the cuts.

3. Adjust Lighting

Good lighting is essential for capturing details. If possible, photograph your key in natural daylight near a window or use a well-lit room.

  • Avoid Shadows: Ensure that no shadows fall across the key, as they can obscure details.
  • Diffuse Light: If using a lamp, consider placing a thin cloth over it to diffuse the light and reduce harsh reflections.

4. Focus and Zoom

Make sure your camera or smartphone is focused directly on the key. You may need to tap the screen to bring it into sharp focus.

  • Zoom in Carefully: If you’re using a smartphone, zoom in slightly to capture the details, but avoid over-zooming, which can blur the image.
  • Test Multiple Angles: Sometimes a slight adjustment in angle can capture the cuts more effectively, so take a few shots from slightly different perspectives.

5. Capture Multiple Photos

It’s always a good idea to take several photos to ensure you have the best one. Try different angles and lighting adjustments to capture as many details as possible.

  • Close-Up of the Grooves: Take one close-up image focusing on the cuts and grooves of the key.
  • Overall Image: Include one full-length photo that shows the entire key from end to end.
  • Try Different Angles: Slightly tilt the key or move the camera to see which angle best captures the detail of the cuts.

Common Mistakes to Avoid When Photographing Your Key

To get the best results, steer clear of these common issues that can impact the quality of your key photo:

  • Blurry Images: If your hand shakes, use a small tripod or prop your phone on a stable surface.
  • Poor Lighting: Avoid taking photos in dim rooms; use bright light to ensure the key is clearly visible.
  • Obstructed Details: Make sure the entire length of the key is visible, without any part being cut off or covered.

Tips for Ensuring a Smooth Replacement Process

Once you have a clear photo of your key, there are a few final steps to make the replacement process as efficient as possible.

  • Check the Photos: Look over your photos before sending them to ensure that they’re clear and detailed.
  • Label the Key: If you’re photographing multiple keys, label each one in the image or add a note to avoid confusion.
  • Include Measurements: If possible, add the measurements of the key’s length and width in your notes for added accuracy.

A clear, detailed photo of your key can save you time and effort when seeking a replacement. By following these simple steps, you’ll provide all the necessary details to ensure your new key is an accurate match. Remember, good lighting, focus, and capturing all the unique cuts are essential to achieving the best results.

With these guidelines, you’re set to take a photo that will make your key replacement process smooth and hassle-free.

Related Posts

How to Remove or Change a Roof Rack Lock Barrel Easily

How to Remove or Change a Roof Rack Lock Barrel Easily

Changing or removing the lock barrel on your roof rack may seem like a daunting task, but it’s actually simpler than you might think. Whether you need a replacement due to a lost key, wear and tear, or just want to swap out an old lock for a new one, following the right steps can make the process hassle-free. This guide will walk you through everything you need to know about handling a roof rack lock barrel with ease. Why You Might Need to Change a Roof Rack Lock Barrel ? There are several reasons why you may want to replace or remove your roof rack lock barrel: Lost Key : If you've misplaced the key, replacing the lock barrel is often the most practical solution. Upgrading the Lock : Maybe you want a more secure lock for added peace of mind. Routine Maintenance : Over time, lock barrels can wear down, making it harder to insert or turn the key. Uniformity : If you've recently changed your car key, you may want to match your roof rack lock with it. Knowing why you’re changing the lock barrel will help you determine the steps you need to follow. What You’ll Need Before you start, gather these essential tools and items: Replacement Lock Barrel : Ensure it’s compatible with your roof rack model. Master Key or Removal Key : Often required to remove the old lock barrel. New Key : The key that corresponds to the replacement lock barrel. Flathead Screwdriver : To gently pry and release certain parts if needed. Step-by-Step Guide to Removing a Roof Rack Lock Barrel Removing a lock barrel from your roof rack doesn’t require extensive mechanical skills. Just follow these straightforward steps: 1. Locate the Lock Barrel The lock barrel is usually situated in the center or side of the roof rack. Look for the small lock with the keyhole, as this is where you'll be inserting the master or removal key. 2. Insert the Master Key or Removal Key If you have a master or removal key, insert it into the lock. This is often a universal key provided by the lock manufacturer specifically for removing lock barrels. Once it’s inserted, turn the key slightly to unlock the barrel. Tip: If you don’t have a removal key, contact a professional or see if you can order one specifically for your model. 3. Pull the Lock Barrel Out With the removal key still in place, gently pull the lock barrel out. If it’s resistant, try wiggling it slightly while pulling. Avoid forcing it, as this could damage the lock or roof rack. In some cases, you may need a flathead screwdriver to help pry it out, but be careful not to scratch the surrounding area. 4. Check the Casing After removing the lock barrel, inspect the casing where the barrel was installed. Make sure it’s clean and free of debris. Any dirt or rust could interfere with the new lock barrel, so it’s a good idea to clean this area before proceeding. Installing the New Lock Barrel Once the old barrel is removed, you’re ready to install the new one. Here’s how: 1. Align the New Lock Barrel Take your new lock barrel and align it with the casing where the old one was. Most barrels are designed to fit in only one direction, so make sure you align it properly to avoid jamming. 2. Insert the New Barrel Push the new lock barrel into the casing until it clicks into place. This might require a bit of pressure, but it should fit snugly without needing excessive force. 3. Test the New Key After installing the new lock barrel, insert the new key and turn it to ensure it’s working smoothly. The key should turn easily and lock securely. This step verifies that the new lock is properly aligned and functional. Common Challenges and Solutions While changing a roof rack lock barrel is generally straightforward, you might encounter some challenges. Here’s how to troubleshoot common issues: Stuck Barrel : If the old barrel is stuck, apply a lubricant like WD-40 around the lock to help loosen it. No Removal Key : If you don’t have a master or removal key, consider reaching out to a locksmith or checking if the manufacturer offers a replacement. Barrel Won’t Fit : Ensure you’ve purchased a compatible lock barrel. Even slight differences in design can prevent it from fitting properly. Tips for Maintaining Your Roof Rack Lock To keep your new lock barrel in good condition and prevent the need for frequent replacements, consider these maintenance tips: Regular Cleaning : Dirt and grime can accumulate inside the lock over time, making it harder to operate. Clean the lock regularly to prevent this. Use Lubricant : Apply a small amount of lubricant inside the lock barrel periodically to keep the key turning smoothly. Protect from Rust : If your roof rack is exposed to rain and humidity, use a protective cover or shield to keep moisture out of the lock barrel. Check Key Fit : Avoid using a damaged or bent key, as this can wear out the lock barrel more quickly. When to Seek Professional Help In some cases, removing or replacing a roof rack lock barrel might require assistance from a professional: Lost or Damaged Keys : If both your main key and master key are lost or damaged, a professional can help retrieve or replace the lock barrel. Damaged Lock Mechanism : If the lock itself is damaged or jammed, forcing it can make things worse. A professional locksmith can safely remove and replace it. Replacing or removing a roof rack lock barrel is an affordable and manageable task for most car owners. By following the right steps and keeping up with regular maintenance, you can ensure your roof rack lock stays functional and secure. Whether you’re upgrading for security or replacing a worn-out lock, a new lock barrel can make all the difference in keeping your roof rack safe. Effortless Key Replacement for a Variety of Locks Order 2x Union Keys FT Series, custom-cut to your original key code, for a hassle-free replacement. Compatible with a range of locks, including those from Aston Martin, Jaguar, Land Rover, and more, these keys are perfect for classic cars, caravans, petrol caps, roof racks, and truck canopies. Simply find your lock code (e.g., FT101-FT360) on the lock face and enjoy fast delivery of high-quality spare keys.

Cold Weather and Your Car Key Fob: What You Need to Know

Cold Weather and Your Car Key Fob: What You Need to Know

As the temperature drops and winter approaches, it’s not just your car’s engine that needs extra attention. Your car’s key fob is also affected by the cold weather, and it’s important to understand how frigid temperatures can impact its performance. In this article, we’ll explore how cold weather can affect your key fob and what you can do to prevent it from causing you frustration during the colder months. How Cold Weather Affects Your Key Fob Key fobs are small electronic devices designed to make our lives easier. They allow us to lock, unlock, and start our cars without ever having to take the key out of our pocket or bag. However, like any electronic device, key fobs are sensitive to extreme temperatures. When the temperature drops, the battery inside the key fob can be affected. Cold weather causes the battery’s chemical reactions to slow down, which can lead to a reduced charge or even a complete failure to operate. If your key fob suddenly stops working or becomes unresponsive, it's likely due to the cold weather affecting the battery's ability to function properly. In addition to battery performance, the cold can also cause the internal components of the key fob to contract. This may interfere with the fob’s functionality, causing it to not respond when you press the buttons. Furthermore, moisture from snow, rain, or condensation can get into the fob, which can cause short circuits or further damage. Signs Your Key Fob May Be Affected by the Cold If you live in an area where cold temperatures are common, it’s essential to be aware of the signs that your key fob might be struggling with the weather. Here are some indicators that the cold is affecting your key fob: Unresponsive buttons : If you press the buttons on your key fob and nothing happens, it may be due to the battery or the internal components not responding correctly to the cold. Delayed reactions : If you notice a delay in your fob’s response, where the locks or alarm take longer than usual to react, this is another sign of cold-induced malfunction. Reduced range : If your key fob is working, but only from a very short distance, it could be due to the battery’s reduced performance in the cold. If you notice these issues, don’t immediately panic. There are simple fixes and preventative steps you can take to resolve the issue. What You Can Do to Protect Your Key Fob in the Cold Fortunately, there are several things you can do to ensure that your key fob continues to work properly during cold weather. By taking a few precautions, you can protect the battery and internal components of your key fob from extreme temperatures: Keep Your Key Fob Warm One of the easiest ways to prevent cold weather from affecting your key fob is to keep it warm. If you're going outside during cold weather, keep your key fob in your coat pocket or a warm, insulated area. You can even use a small pouch or key fob holder with insulation to protect it from the cold. Replace the Battery Before Winter If your key fob is already showing signs of battery issues, consider replacing the battery before winter hits. Even if it’s not quite dead yet, replacing the battery can help ensure that your key fob works smoothly during colder months. Many key fob batteries are easy to replace and can be done at home with a simple tool. Use a Backup Key If you anticipate being in extremely cold conditions or live in a particularly harsh climate, consider having a backup key. Many cars come with a traditional key hidden inside the key fob, which you can use if the key fob stops working in the cold. Having this backup can save you a lot of hassle if your fob stops working unexpectedly. Avoid Moisture Exposure It’s important to keep your key fob dry, especially in winter, when snow, rain, and condensation can cause moisture to build up inside. If your fob does get wet, dry it thoroughly as soon as possible and avoid leaving it outside in damp conditions. If moisture persists, it may cause the internal components to fail. Test Your Key Fob Regularly To ensure that everything is working properly, make a habit of testing your key fob regularly, especially during the colder months. If you notice any signs of malfunction early, you can address the issue before it gets worse. What to Do If Your Key Fob Stops Working If your key fob stops working despite taking preventative measures, don’t panic. There are a few things you can do: Warm up the Fob : Try warming up the fob by placing it in your pocket for a few minutes or rubbing it in your hands. This can help restore some functionality if the battery has slowed down due to the cold. Replace the Battery : If the fob still isn’t working, it may be time to replace the battery. A new battery can often resolve issues related to cold weather. Contact a Professional : If the fob continues to malfunction after changing the battery, it may be time to take it to a professional locksmith or the dealership to check for internal damage. While it’s easy to overlook the impact that cold weather can have on your car’s key fob, it’s important to understand the effects that extreme temperatures can have on its performance. By taking simple precautions and knowing the signs of potential issues, you can help ensure that your key fob continues to work smoothly throughout the colder months. From keeping it warm to regular maintenance, there are several ways to protect your key fob and avoid the frustration of a malfunction during the winter. So, this season, take a few extra steps to care for your key fob, and you’ll be able to unlock and start your car with ease, no matter how cold it gets outside.

Programming Your Car’s Keyless Remote: A Simple Guide for Every Car Owner

Programming Your Car’s Keyless Remote: A Simple Guide for Every Car Owner

When it comes to convenience, car keyless remotes have revolutionized the way we interact with our vehicles. No more fumbling with traditional keys or worrying about locking yourself out. With just a push of a button, you can lock, unlock, and even start your vehicle. But what happens when your keyless remote stops working, or when you need to program a new one? Here’s a simple guide to help you program your car's keyless remote, regardless of your vehicle's make or model. Understanding Keyless Remotes Before jumping into the programming process, it’s important to understand what a keyless remote is and how it works. Essentially, a keyless remote allows you to interact with your vehicle without needing to physically insert a key. Instead of using a traditional metal key, your car’s electronic system communicates wirelessly with the remote, allowing you to lock, unlock, and sometimes even start your vehicle, all with the push of a button. These remotes typically use a radio frequency to communicate with your car, sending a signal that’s encrypted for security. Most modern cars use transponder technology, which makes the system more secure and resistant to hacking or copying. This means that the remote must be properly programmed to your vehicle’s system to function correctly. When Do You Need to Program a Keyless Remote? There are several situations in which you might need to program your keyless remote: Replacing a Lost or Damaged Remote : If you’ve lost your keyless remote or it’s no longer functioning properly, you’ll need to get a replacement. This may require programming the new remote to sync with your vehicle. Adding a New Remote : If you’ve bought an additional keyless remote for your car (for a spouse, child, or other family member), you’ll need to program it so that it works with your vehicle. Battery Replacement : Sometimes, replacing the battery in your remote can cause the programming to reset, meaning you’ll need to reprogram the remote for it to work again. Changing or Resetting Vehicle Settings : Occasionally, vehicle settings or remotes can be reset or reprogrammed as part of regular maintenance, requiring you to program new or additional remotes. How to Program Your Car’s Keyless Remote Programming a keyless remote is easier than you might think, and in most cases, it can be done by following a few simple steps. The process varies slightly depending on the make and model of your car, but here’s a general overview of the steps involved: Get Your New or Replacement Remote : Ensure that your remote is compatible with your car’s system. If you're not sure, you can check with your car's manufacturer or an authorized dealership. Some remotes require specific codes to be programmed. Sit Inside Your Vehicle : For safety and security reasons, most cars require you to be inside the vehicle while programming the remote. Insert the Key in the Ignition : Insert the key into the ignition and turn it to the "ON" position without starting the engine. For cars with push-to-start systems, you may need to press the start button without pressing the brake pedal. Activate the Programming Mode : Depending on your car’s system, you’ll need to follow a sequence of steps to enter programming mode. This could involve turning the key on and off several times, or pressing certain buttons in a specific order. Refer to your vehicle’s manual for the exact steps, as the process can differ from one model to another. Program the Remote : Once your car is in programming mode, you’ll need to press the button on your keyless remote that you want to program. Usually, you’ll hear a chime or see the lights flash, indicating that the remote has been successfully programmed. Some cars may require you to press the button several times to ensure proper synchronization. Test the Remote : After programming, test the remote to make sure it works properly. Try locking and unlocking the doors or starting the engine. If everything works as expected, you’re done! Exit Programming Mode : To finish the process, simply turn off the ignition and remove the key. This should exit programming mode. If you have additional remotes to program, repeat the steps above for each one. What to Do if Programming Doesn’t Work While programming a keyless remote is usually a straightforward process, there are instances where things don’t go as planned. If your remote isn’t syncing with your car after following the steps, here are a few troubleshooting tips: Check the Battery : If the remote’s battery is dead or weak, it won’t transmit the signal to your car. Replace the battery and try programming again. Verify the Compatibility : Make sure that the remote is compatible with your vehicle’s make, model, and year. Some vehicles require special remotes that can only be programmed by the manufacturer or an authorized locksmith. Reset Your Vehicle’s System : In some cases, you might need to reset the car’s system to clear previous programming attempts. Check your owner’s manual or consult a professional for assistance. Consult a Professional : If you continue to have issues, it might be time to visit a dealership or a certified locksmith. These professionals have the tools and experience to program the remote correctly and ensure everything works seamlessly. Why Programming Your Keyless Remote Is Important Programming your keyless remote is a simple but important task that helps ensure your car’s security and convenience. By understanding how the process works and what to do if things go wrong, you’ll be able to troubleshoot and solve any issues quickly. Whether you’re replacing a lost remote or adding a new one to your collection, knowing how to program your remote saves time and money compared to visiting a dealership or locksmith. With the increased reliance on keyless remotes for unlocking and starting vehicles, it’s essential for every car owner to be familiar with this process. By keeping your remote in good working condition and knowing how to program it when necessary, you’ll enjoy a smoother, more efficient experience with your vehicle.

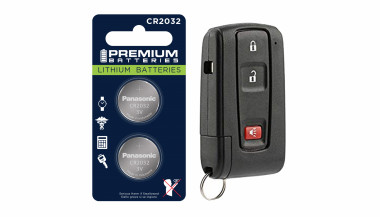
How to Choose the Right Car Key Shell for Your Vehicle + Why We Recommend Panasonic CR2032 Batteries

How to Choose the Right Car Key Shell for Your Vehicle + Why We Recommend Panasonic CR2032 Batteries

Your car key is one of those things you don’t really think about — until it breaks. Whether it’s the worn-out buttons, a cracked shell, or a battery that gives up at the worst possible moment, an aging car key can cause more than just annoyance. But here's the good news: you can restore your key to like-new condition easily, affordably, and from the comfort of your home. In this complete guide, we’ll show you how to choose the right replacement key shell for your car and why the Panasonic CR2032 battery is a trusted choice to keep your key fob performing reliably. Part 1: How to Choose the Right Car Key Shell Think of your key shell as a protective layer. It shields the sensitive electronics inside — the buttons, circuit board, and transponder chip — all of which are essential to operating your vehicle. When the case begins to wear down or fall apart, it’s time to replace it. 1. Know Your Car's Make, Model, and Year Key shells are made to fit specific car models and years. For instance: Flip key shells for Opel are commonly used on models from 2010 to 2024. Audi smart key shells are dependent on the platform code (like A3 8Y or A4 B9). Consult your owner's manual or use a compatibility tool like this one to confirm fitment. 2. Match the Key Blade Blades come in various formats like HU162, VA2, or HU100. Even a slight variation in shape or groove pattern can render the key useless in your ignition or door locks. Carefully compare the blade on your current key to the one listed for any replacement shell. 3. Button Layout and Functionality Make sure the number and positioning of buttons on the replacement shell matches your original. If not, the rubber pads may not line up with the contact points on your key’s circuit board, making the buttons unresponsive. 4. Interior Design and Compatibility The outside might look the same, but inside layouts often differ. Ensure that your circuit board, battery slot, and chip all fit securely inside the new shell. Misalignment can cause rattling, failure to start the car, or buttons that don’t function correctly. 5. Material Quality Avoid very cheap replacements with thin plastic and soft rubber. A good quality shell should be durable, with solid construction and tactile buttons that don't wear out quickly. For example, this Opel flip key shell combines strength with excellent fit. Part 2: Why We Recommend Panasonic CR2032 Batteries When your key fob starts failing — maybe the range drops or it takes multiple presses to unlock — chances are the battery is low. Many car owners replace the shell without considering the battery, only to find the problem persists. Understanding the CR2032 The CR2032 is a 3-volt lithium coin battery, commonly used in remote keys and small electronic devices. It’s compact, stable, and specifically suited for low-power, long-term applications. What Makes Panasonic CR2032 Stand Out? Panasonic’s version of the CR2032 is known for its consistency and reliability. It offers: A stable voltage output, ensuring your key communicates with your car effectively Longer life compared to many generic brands Resistance to leaks, which protects internal circuits from corrosion Choosing a battery from a trusted manufacturer can save you from unexpected failures, especially in colder climates where battery performance matters most. We recommend the Panasonic CR2032 battery for its excellent balance of performance and reliability. Refreshing Your Car Key: A Practical Approach If your car key is showing signs of age, it's usually best to replace both the shell and the battery. The process is simple: Open the old shell carefully, using a flat tool if needed. Remove the circuit board, chip, and battery. Clean the components gently with a dry brush. Place them into the new shell, ensuring alignment. Insert a fresh CR2032 battery. Close and secure the new shell. After completing these steps, your key should be more responsive, look better, and feel sturdier in your hand.

Chat with us