Post Name

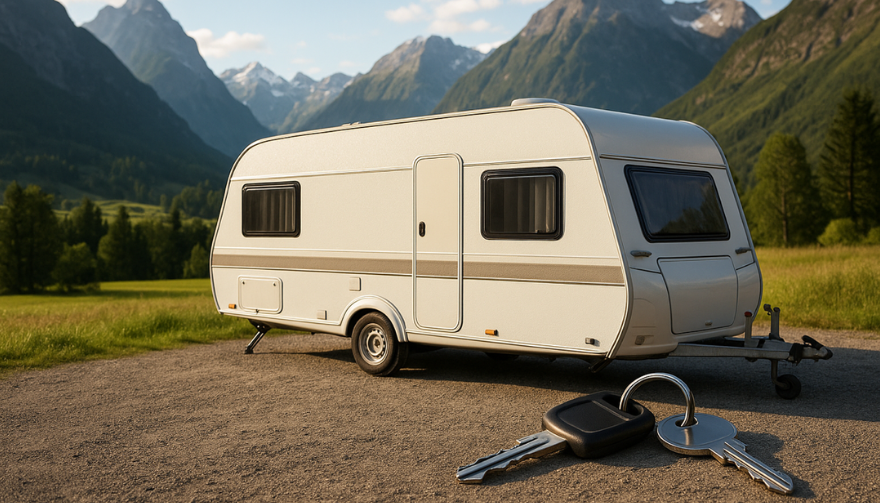
Before every caravan trip, owners plan routes, book campsites, check electrics and pack supplies. Yet one small detail is often forgotten until it’s too late — the spare caravan key.

Losing access to your caravan while traveling can instantly turn a holiday into a stressful, expensive problem. Being locked out of your own caravan or motorhome is more common than most people think, and it usually happens far from home.

A spare key is not an accessory. It’s insurance.

The real risk of traveling with only one caravan key


Caravan keys are easy to lose.

They fall out of pockets while setting up awnings.

They get misplaced during campsite check-ins.

They’re locked inside caravans more often than most owners admit.

Unlike car keys, caravan keys are rarely duplicated by default. Many owners travel with a single original key that may already be years old.

If that key breaks, bends, or disappears, access to the caravan stops instantly.

No entry.

No access to personal belongings.

No overnight stay.

In some cases, insurance claims are delayed because forced entry damages locks or doors.

Why a spare caravan key is no longer optional


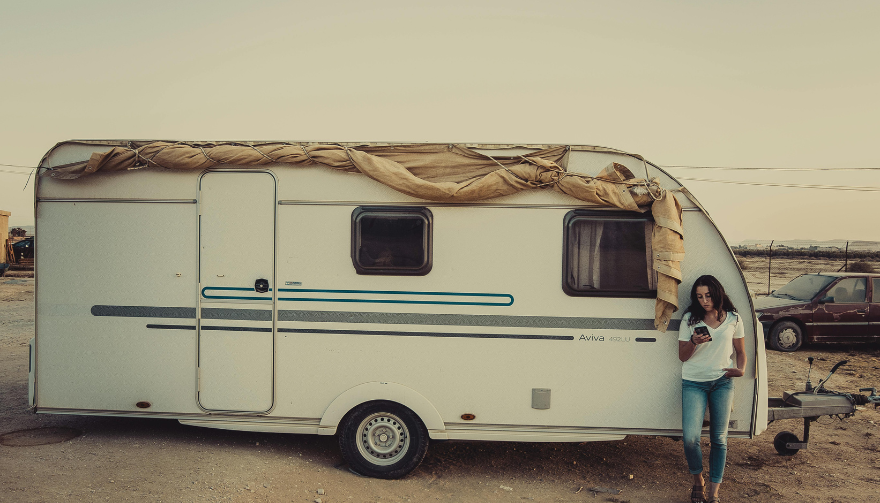
Modern caravan travel is more international than ever. Owners regularly cross borders, take ferries, and stay in remote locations where help is limited.

A spare caravan key gives you:

• Immediate access if the original is lost

• Freedom to leave one key with a travel partner

• Security if a lock mechanism fails

• Peace of mind when moving between countries

Many experienced caravan owners now carry two spare keys, not one — one kept in the tow vehicle, another stored securely.

The cost of producing a spare key before traveling is minimal compared to emergency lockouts abroad.

Why caravan key replacement is difficult on the road


Caravan keys are not universal.

Most campsites and local locksmiths do not stock caravan-specific blanks. Unlike house keys, caravan keys are often brand-specific and cut to manufacturer profiles.

Finding a replacement locally can be slow or impossible.

Common problems include:

• Locksmiths refusing caravan keys

• Incorrect blanks being used

• Locks damaged by forced opening

• Waiting days for parts

This is why caravan key replacement should never be left until after a key is lost — especially while traveling.

Different caravan keys require different solutions


Not all caravan keys are the same.

We at MR-KEY offer a large variety of caravan and motorhome keys, including many popular and hard-to-find models used across Europe.

Some of the keys caravan owners commonly need include:

ZADI caravan and motorhome keys

Eurolocks caravan keys

Union and Yale caravan door keys

HUWIL and HUF caravan keys

DOM caravan and utility locks

Weco and Abus caravan keys

Each manufacturer uses different key profiles, depths, and tolerances. A correct match matters.

Having a properly cut spare key — not a generic copy — ensures smooth operation and avoids lock wear.

Replacement key delivery vs local locksmiths


When keys are lost during a trip, caravan owners usually face two options:


Option 1: Local locksmith


This rarely works well for caravan keys.

Most locksmiths focus on domestic locks and vehicles. Caravan keys require the correct blank and accurate cutting. In many regions, locksmiths simply don’t stock caravan blanks at all.


Option 2: Replacement key delivery


A specialist service that offers replacement key delivery can often deliver the correct spare key directly to your campsite, hotel, or ferry terminal.

This approach:

• Avoids damaging the lock

• Uses the correct key profile

• Works even when abroad

• Saves time and stress

Pre-travel preparation makes replacement faster if something goes wrong.

What to do immediately if you lose your caravan keys


If your caravan or motorhome keys are lost during a trip, time matters.

Your first step is to assess whether access is possible without forcing the lock. Forced entry often causes expensive damage and may invalidate insurance claims.

If you’re unsure how to proceed, read this in-depth guide on what to do if you lose your caravan, motorhome, or camper keys. It explains safe options, next steps, and how to avoid costly mistakes.

Knowing what not to do is just as important as knowing what to do.

The hidden costs of not having a spare key


Many caravan owners assume key loss is rare.

Insurance providers see it differently.

Emergency call-outs, replacement locks, accommodation changes, and trip delays quickly add up. In some cases, caravan doors or lockers are permanently damaged due to incorrect entry attempts.

A spare key prevents most of these scenarios entirely.

According to caravan safety organisations and consumer travel reports, lockouts are among the most common non-mechanical travel disruptions for leisure vehicles.


For broader caravan travel safety guidance, reliable resources include:

The Camping and Caravanning Club (UK)

The NCC (National Caravan Council)

These organisations consistently recommend preparing spare access solutions before travel.


FAQ's


How many spare caravan keys should I carry?

At least one spare is essential. Two spares are recommended for longer or international trips.

Can caravan keys be copied from photos?

In some cases yes, but accuracy depends on the key type. For best results, providing the key number or lock code is safer.

Are caravan door keys different from locker keys?

Yes. Caravan exterior doors, storage lockers, toilet hatches and gas compartments often use different locks and keys.

Is caravan key replacement expensive?

No. Preparing a spare key in advance is inexpensive compared to emergency lock replacement abroad.

Can replacement keys be delivered while traveling?

Yes. With specialist services offering replacement key delivery, keys can be shipped to many locations across Europe.


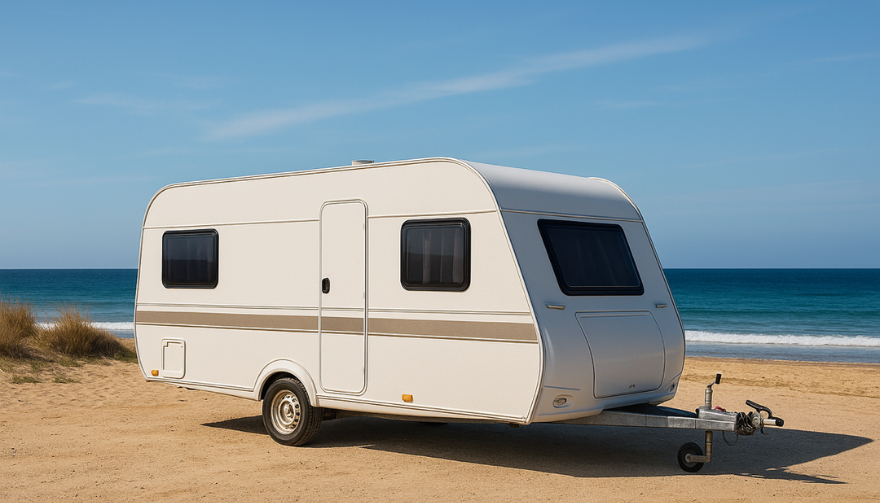
Don’t leave without a spare


Every serious caravan trip deserves proper preparation.

A spare caravan key is one of the smallest items you can pack — and one of the most valuable when something goes wrong.

If you’re preparing for your next journey, make sure you’re covered.

Visit mr-key.com and secure the right spare key before you travel.


Related guides


What to Do If You Lose Your Caravan, Motorhome or Camper Keys?

Related Posts

Dead Pixels on a Motorcycle TFT Display: What They Mean & When Replacement Is Inevitable

Dead Pixels on a Motorcycle TFT Display: What They Mean & When Replacement Is Inevitable

Dead pixels on a motorcycle TFT display are rarely “just cosmetic”. On modern bikes, the TFT dashboard is a sealed, laminated electronic unit exposed to sun, heat, vibration, rain, and pressure washing . When pixels fail, it often signals structural damage inside the display , not a surface defect. This article explains what TFT display dead pixels really mean, why they appear, how to diagnose them correctly, and the point where replacement becomes unavoidable . What riders mean by “dead pixels” — and why it matters The term motorcycle display dead pixels is used loosely. In practice, three very different faults exist. True dead pixels (permanently black) A true dead pixel is a pixel transistor that no longer functions. It stays black on all backgrounds and during startup screens. This is a hardware failure inside the LCD matrix . It does not self-heal. Stuck pixels (fixed bright color) A stuck pixel remains red, green, blue, or white. On phones or TVs, this can sometimes be intermittent. On motorcycle TFTs, stuck pixels are often caused by heat stress or internal pressure and frequently progress into permanent failure. Lines or blocks of dead pixels A vertical or horizontal line of missing pixels is not a pixel issue. It indicates row or column driver failure inside the panel — a structural defect of the display module. Once this appears, replacement is usually inevitable. Why TFT dead pixels appear on motorcycles Dead pixels on a dashboard are rarely random. They follow consistent mechanical and environmental causes. Heat and UV exposure Motorcycle TFTs sit in direct sunlight. Daily heat cycles expand and contract the laminated layers inside the display. Over time, this stresses internal bonds and pixel drivers. A single failed pixel can become a cluster. Micro-impact and pressure A light impact that doesn’t crack the glass can still damage the internal LCD stack. This is common on naked bikes and adventure models where the display is more exposed. Moisture ingress and condensation Condensation inside a TFT display is a critical warning sign. It means the factory seal has been compromised. Moisture accelerates corrosion on connectors and display drivers, often leading to dead pixels followed by total blackout. Electrical stress Voltage fluctuations or grounding issues can contribute, but if the pixel defect appears in the same physical location across reboots , the issue is almost always panel-level, not wiring. Brand examples: how this appears in real motorcycles Dead pixel reports follow similar patterns across brands. BMW TFT clusters: pixel lines or dark zones often appear after heat exposure or condensation events. Clusters are fully integrated and typically replaced as a unit. Yamaha TFT dashboards: isolated dead pixels may appear first, followed by spreading rows on models parked outdoors long-term. Kawasaki TFT displays: line failures are commonly reported after pressure washing or heavy rain use. Honda TFT dashboards: less frequent, but once pixel clusters appear, dealers usually recommend full replacement. Across all brands, panel repair is not part of standard dealer service . Fast diagnosis: how to tell if the damage is permanent You can determine the seriousness in minutes. Check startup screens If the pixel defect appears during the boot logo or splash screen, it is hardware, not software. Test multiple backgrounds Switch themes or display modes: Always black → dead pixel Always bright or colored → stuck pixel Straight line → driver failure Look for progression A defect that grows over weeks is not stable. Progression is a replacement signal. Inspect for condensation Any fogging or haze inside the screen means moisture ingress. Pixel failure combined with condensation almost always worsens. When TFT display replacement is inevitable Replacement is not about annoyance. It’s about predictable failure . Replacement becomes inevitable when any of the following occur: A row or column of dead pixels appears Dead pixels spread over time Dead pixels appear together with condensation The defect blocks speed, warnings, or riding data The bike relies on the TFT for ride modes or system alerts At this stage, the TFT is no longer a reliable instrument cluster. Why TFT displays are rarely repaired A motorcycle TFT is not a standalone screen. It is: Laminated glass + LCD + polarizer Sealed against weather Electronically paired to the motorcycle Separating and rebuilding this stack requires specialized industrial equipment. As a result, OEMs replace the entire unit . Used clusters introduce risks: coding issues, immobilizer pairing, mileage discrepancies, and unknown moisture history. Cost reality in Europe In Europe, OEM motorcycle TFT replacement typically ranges from: €600–€1,200 for mid-range models €1,500–€2,500+ for premium or integrated systems This includes coding and calibration, not just the display itself. That’s why a small dashboard pixel issue deserves early attention. Can dead pixels be prevented? You cannot prevent internal electronic aging. You can reduce the most common triggers: Surface scratches that weaken seals Micro-impacts UV exposure Moisture pooling around edges A properly fitted screen protector does not fix dead pixels, but it reduces the external damage pathways that often lead to full TFT failure. If you want to reduce the risk of turning a small pixel defect into a four-figure repair, you can protect the display surface early — explore motorcycle TFT screen protectors at mr-key.com FAQ: TFT display dead pixels Are dead pixels dangerous? They are not dangerous by themselves, but they often indicate deeper display degradation. Can software updates fix dead pixels? No. If the defect appears in the same physical location during startup, it is hardware. Will one dead pixel spread? Sometimes. Spread is common when heat or moisture is involved. Is condensation inside the TFT serious? Yes. Condensation indicates seal failure and greatly increases the risk of progressive damage. Is replacement always required? Not for a single stable pixel. Replacement becomes unavoidable with progression, lines, or moisture involvement.

Inside a Key Rescue: How to Salvage a Wet or Flooded Car Key

Inside a Key Rescue: How to Salvage a Wet or Flooded Car Key

Water damage is one of the most common – and most stressful – problems car key owners face. Whether your key fell into a puddle, went through the wash, or was simply caught in a downpour, it can stop working in an instant. But does water exposure always mean you need to buy a new key? Not necessarily. In many cases, a quick and proper response can save your key, restore its function, and spare you an expensive replacement. This guide walks you through how to rescue a wet or flooded car key, what not to do, and how to know when it’s beyond repair. How Car Keys Get Wet Modern car keys, especially keyless remotes and fobs, aren’t designed to be waterproof. Even small amounts of moisture can cause damage if the internal components are exposed. Some of the most common causes of water-damaged keys include: Being left in clothing and run through the washing machine Falling into sinks, toilets, or puddles Exposure to rain, snow, or slush Dropped at the beach or near pools Stored in damp gym bags or jackets Once water enters the key shell, it can corrode the circuit board, damage the battery, or short-circuit the transponder chip. What to Do Immediately After Getting Your Key Wet The first few minutes after exposure are critical. Acting quickly can mean the difference between a working key and a dead one. 1. Remove the Key from the Water Take the key out of the water as quickly as possible. The longer it sits, the more damage can occur inside. 2. Open the Key Shell If your key has a removable shell, gently open it using a small screwdriver or plastic tool. This allows you to access the internal parts and dry them properly. If you’re unsure how to open it, look up a video or guide specific to your car model. 3. Take Out the Battery Immediately remove the battery. A wet battery in contact with electronics can cause short circuits and corrosion. Do not reinstall the same battery later; it may be compromised. 4. Dry the Internal Components Gently pat all visible parts dry with a lint-free cloth. Do not use paper towels, as they can leave behind fibers. Then allow the key to air-dry using one of the following methods: Option A: Use Silica Gel or Desiccant Packs Place the opened key and all components in an airtight container with silica gel packets. Leave it sealed for at least 24 to 48 hours. Option B: Use Uncooked Rice If silica gel isn’t available, uncooked rice can work as an alternative. Place the key in a bowl of rice and cover it completely. Leave it for 2 to 3 days. Do not use a hair dryer, microwave, or place the key near a heater. High heat can warp the plastic shell and damage sensitive electronics. After Drying: Will the Key Work Again? After a full drying period, insert a new battery and test the key. In many cases, it will begin working again — especially if water exposure was brief and the board was not damaged. If the key still doesn’t respond, try the following steps: Inspect the circuit board for corrosion or residue Try replacing the outer shell if buttons feel worn or unresponsive Check if the vehicle recognizes the transponder chip If none of these steps work, the internal chip or electronics may be permanently damaged. When to Replace the Key Sometimes the damage goes beyond what cleaning and drying can fix. You’ll likely need a full replacement if: The key no longer sends a signal The LED light doesn’t flash when pressing buttons There is visible corrosion on the circuit board The transponder chip fails to communicate with the vehicle Buttons are physically damaged or unresponsive The key was underwater for an extended time In these situations, replacing the key is often the most reliable solution. Don’t Wait Until It’s Too Late – Keep a Spare Key If you’ve experienced water damage once, there’s a good chance it could happen again. Keeping a backup key stored in a safe, dry location is one of the best precautions you can take. You can find replacement key shells, blades, batteries, and fully programmed keys for most vehicle brands at mr-key.com . Investing in a spare can save time, money, and stress. Final Tips for Car Key Water Damage Act fast and remove the battery as soon as possible Use silica gel or rice for slow, safe drying Avoid heat, rubbing, or shaking the electronics Replace the shell if it’s worn, cracked, or damaged If in doubt, test with a new battery before replacing the entire key Need Replacement Parts? Whether you need a new shell, battery, or a complete key, visit mr-key.com to find compatible parts for a wide range of vehicles. Our selection includes: Key shells for all major brands CR2032 batteries Key blades and electronics Fully assembled remote keys with chip and programming options If your key has been exposed to water, don’t panic. With the right steps, many keys can be rescued — and if not, we’re here to help you find the right replacement.

The Environmental Impact of Car Manufacturing: A Deep Dive into Its Global Consequences

The Environmental Impact of Car Manufacturing: A Deep Dive into Its Global Consequences

The automobile industry has long been a driving force of economic growth and technological advancement. However, beneath its sleek exteriors and high-speed innovations lies a significant environmental footprint. From the extraction of raw materials to the assembly line and eventual disposal, every stage of a car's life cycle carries substantial ecological consequences. As the world grapples with climate change and resource depletion, it is imperative to assess the environmental impact of car manufacturing and explore sustainable alternatives. Resource Extraction: The Hidden Cost of Manufacturing Before a car even reaches the production line, the journey begins with the extraction of raw materials. The automotive industry relies heavily on metals such as steel, aluminum, and lithium, all of which require energy-intensive mining operations. Steel and aluminum production involve large-scale mining activities that contribute to deforestation, soil degradation, and biodiversity loss. The World Steel Association estimates that steel production alone accounts for 7-9% of global CO2 emissions. The demand for lithium and cobalt, key materials in battery production, has led to extensive mining operations in countries like Chile and the Democratic Republic of Congo. These activities have been linked to water shortages, toxic waste, and human rights violations. The environmental impact of resource extraction does not end at the mines. Refining these materials also emits significant greenhouse gases and pollutants that affect both the atmosphere and local ecosystems. Energy Consumption and Carbon Footprint in Production The manufacturing process itself is a major contributor to carbon emissions. Producing a single vehicle requires immense amounts of energy, primarily derived from fossil fuels. Car factories depend on energy-intensive machinery for stamping, welding, painting, and assembling components, with most facilities still relying on non-renewable energy sources, exacerbating their carbon footprint. According to the International Energy Agency (IEA), the automotive industry accounts for roughly 10% of total global CO2 emissions. While traditional internal combustion engine (ICE) vehicles release an average of 4.6 metric tons of CO2 annually, even EV production is not emission-free due to battery manufacturing. Water Usage and Pollution in Car Manufacturing Water is a crucial resource in vehicle production, used for cooling systems, paint shops, and cleaning processes. On average, it takes up to 151 cubic meters of water to manufacture a single car. This excessive water consumption poses a severe strain on local water supplies, especially in arid regions. Furthermore, wastewater from factories often contains hazardous chemicals, heavy metals, and microplastics. If not properly treated, these contaminants can seep into local water bodies, affecting marine ecosystems and public health. Air Pollution and Toxic Emissions Beyond CO2, car manufacturing emits various pollutants that contribute to poor air quality and respiratory illnesses. The painting and coating processes release volatile organic compounds (VOCs), which contribute to smog formation and have been linked to lung diseases. Emissions from factory operations and power plants used to supply energy to car manufacturing facilities contribute to nitrogen oxides (NOx) and particulate matter pollution, leading to acid rain and cardiovascular diseases. Waste Generation and Recycling Challenges The car manufacturing process generates vast amounts of waste, from metal scraps and plastic components to hazardous chemicals and non-recyclable materials. While a large percentage of scrap metal can be recycled, many plastic and composite materials used in modern cars are difficult to process. With the rise of EVs, battery disposal is a growing concern. Many lithium-ion batteries contain toxic elements like lead and cadmium, posing environmental hazards if not properly recycled. Global Efforts Toward Sustainable Car Manufacturing Recognizing the urgency of reducing their ecological impact, car manufacturers are gradually shifting toward greener alternatives. Companies like Tesla and BMW are integrating solar and wind power into their production facilities to reduce reliance on fossil fuels. Some automakers are exploring the use of recycled aluminum, biodegradable plastics, and sustainable textiles to minimize waste. Many factories are implementing closed-loop water recycling systems to reduce water consumption and prevent pollution. Efforts to promote sustainability in the industry include: The use of renewable energy sources such as solar and wind in manufacturing plants. Innovative recycling programs that repurpose old car parts and materials. Improvements in energy efficiency within production lines to reduce emissions. Adoption of cleaner, alternative materials for car interiors and body structures. Electric Vehicles: A Double-Edged Sword? While EVs are often touted as the future of sustainable transportation, their production still presents environmental challenges. The extraction and refining of lithium, nickel, and cobalt require vast amounts of energy and water, sometimes offsetting the carbon savings of driving an EV. An EV’s overall sustainability depends on the energy grid it charges from. In coal-dependent regions, EVs may not offer a significant reduction in emissions compared to efficient hybrid vehicles. The Road Ahead for a Greener Auto Industry The environmental impact of car manufacturing is a multifaceted challenge that requires a collaborative effort from governments, corporations, and consumers. Transitioning toward sustainable production practices, investing in recycling infrastructure, and promoting clean energy solutions are crucial steps in mitigating the industry's ecological footprint. As consumers, we can contribute by supporting manufacturers committed to sustainability, opting for fuel-efficient or electric vehicles, and advocating for stricter environmental policies. The road to a greener automotive industry is long, but with continued innovation and commitment, a more sustainable future is within reach.

Why Your Motorcycle TFT Display Needs a Screen Protector (Before It’s Too Late)

Why Your Motorcycle TFT Display Needs a Screen Protector (Before It’s Too Late)

Modern motorcycles are smarter, more connected, and more expensive than ever. At the center of that evolution sits the TFT display—your bike’s digital command hub. Speed, revs, riding modes, navigation, calls, warnings. One exposed surface controls it all. And it’s far more vulnerable than most riders realise. A motorcycle screen protector isn’t an accessory. It’s preventive maintenance. Ignore it, and you’re gambling with one of the most expensive components on your bike. The Hidden Weak Point on Modern Motorcycles Motorcycle manufacturers invest heavily in engines, frames, and electronics. But the TFT display? It’s still a thin, exposed panel, mounted directly in the line of fire. Unlike a phone, it: Lives outdoors 24/7 Takes direct UV exposure Gets hit by dust, sand, insects, and road debris Is cleaned repeatedly—often incorrectly A single mistake is enough to leave permanent damage. TFT Displays Scratch Far Easier Than You Think Most motorcycle TFT screens are plastic-based or plastic-coated , not hardened glass like premium smartphones. That matters. Plastic scratches: From dust particles wiped across the surface From dry cloths or paper towels From jacket zippers or gloves Even from “careful” cleaning at fuel stops Once scratched, there is no polish, no fix, no reset . The damage is permanent. A motorcycle display protector absorbs this damage instead of the screen itself. Sunlight Is Quietly Destroying Your Display UV exposure doesn’t crack screens overnight. It does something worse. It slowly: Fades colours Reduces contrast Creates uneven patches Permanently dulls brightness After a few summers, the display that once looked sharp now looks tired—especially when riding in direct sunlight. A quality bike screen protector acts as a UV barrier, preserving clarity and colour accuracy for years. Glare Isn’t Just Annoying. It’s Dangerous. A washed-out screen at speed isn’t just inconvenient. It means: Missed warning lights Hard-to-read navigation prompts Delayed reaction times In bright sun, an unprotected TFT can become a mirror. Screen protectors designed for motorcycles reduce reflections and glare, improving readability in real-world riding conditions—not showroom lighting. Cleaning Your Screen Is Probably Damaging It Most riders clean their TFT displays the same way they clean helmets or windscreens. That’s a mistake. Common causes of micro-scratches: Dry wiping Paper towels Window cleaners Cloths contaminated with dust Over time, these tiny marks add up. The screen becomes hazy. Night riding gets worse. Contrast drops. A motorcycle screen protector takes that abuse instead—so you can replace the protector, not the display. The Real Cost of a Damaged Motorcycle TFT Display Here’s what many riders discover too late. Replacing a TFT display typically costs: €800–€1,200 for the part Labour and coding often extra In many cases, the bike must go to an authorised dealer Insurance often won’t cover cosmetic damage. Scratches don’t qualify as “failure.” A screen protector costs a fraction of that—and eliminates the risk entirely. Resale Value Takes a Direct Hit Buyers notice screens immediately. A scratched or faded TFT display: Signals neglect Raises questions about overall maintenance Lowers perceived value Even if the bike is mechanically perfect, a damaged display can knock hundreds off resale or trade-in value. Protecting the screen protects the bike’s future value. Why Motorcycle Displays Are More Vulnerable Than Phones It’s tempting to compare TFT displays to smartphones. That comparison fails. Motorcycle screens: Are permanently exposed to the elements Experience constant vibration Are cleaned in uncontrolled environments Sit at steep angles that catch sunlight They endure more abuse in one riding season than most phones do in five years. A dedicated motorcycle display protector is designed for exactly these conditions. Screen Protectors Don’t Affect Touch or Visibility A common myth: screen protectors reduce clarity or touch response. High-quality motorcycle screen protectors are: Ultra-thin Optically clear Designed for glove interaction Precisely cut for each display shape Once installed, most riders forget it’s even there—until it saves the screen. Installation Is Easier Than You Expect Modern protectors are made for DIY installation. Typically: No liquids required No permanent adhesives No tools beyond what’s included With careful alignment, installation takes minutes—and protects the display for years. Who Should Use a Motorcycle Screen Protector? Short answer: every rider. Especially if you: Park outdoors Ride in bright sun Tour long distances Use navigation or Bluetooth features Plan to keep or resell the bike If your motorcycle has a TFT display, it’s already at risk. FAQ Do motorcycle TFT displays scratch easily? Yes. Most TFT displays use plastic-based surfaces that scratch far more easily than smartphone glass—often from normal cleaning alone. Can a scratched motorcycle display be repaired? No. Scratches are permanent. The only true fix is replacing the entire display unit. How much does it cost to replace a motorcycle TFT screen? Replacement typically costs between €800 and €1,200, excluding labour and dealer programming. Does a screen protector affect brightness or touch sensitivity? No. Quality protectors are optically clear and maintain full touch responsiveness. Is a motorcycle screen protector worth it? Considering the replacement cost of a TFT display, a screen protector is one of the highest-value protective upgrades you can make. Can I remove or replace the protector later? Yes. Screen protectors are removable and replaceable without damaging the original display. Protect the Most Expensive Screen on Your Bike Your motorcycle’s TFT display is essential, fragile, and costly to replace. Damage doesn’t announce itself. It accumulates quietly—scratch by scratch, fade by fade—until it’s too late. Visit our shop at mr-key.com to explore our motorcycle screen protectors and protect your display before the damage becomes permanent.

Chat with us