Post Name

When it comes to convenience, car keyless remotes have revolutionized the way we interact with our vehicles. No more fumbling with traditional keys or worrying about locking yourself out. With just a push of a button, you can lock, unlock, and even start your vehicle. But what happens when your keyless remote stops working, or when you need to program a new one? Here’s a simple guide to help you program your car's keyless remote, regardless of your vehicle's make or model.

Understanding Keyless Remotes

Before jumping into the programming process, it’s important to understand what a keyless remote is and how it works. Essentially, a keyless remote allows you to interact with your vehicle without needing to physically insert a key. Instead of using a traditional metal key, your car’s electronic system communicates wirelessly with the remote, allowing you to lock, unlock, and sometimes even start your vehicle, all with the push of a button.

These remotes typically use a radio frequency to communicate with your car, sending a signal that’s encrypted for security. Most modern cars use transponder technology, which makes the system more secure and resistant to hacking or copying. This means that the remote must be properly programmed to your vehicle’s system to function correctly.

When Do You Need to Program a Keyless Remote?

There are several situations in which you might need to program your keyless remote:

Replacing a Lost or Damaged Remote: If you’ve lost your keyless remote or it’s no longer functioning properly, you’ll need to get a replacement. This may require programming the new remote to sync with your vehicle.

Adding a New Remote: If you’ve bought an additional keyless remote for your car (for a spouse, child, or other family member), you’ll need to program it so that it works with your vehicle.

Battery Replacement: Sometimes, replacing the battery in your remote can cause the programming to reset, meaning you’ll need to reprogram the remote for it to work again.

Changing or Resetting Vehicle Settings: Occasionally, vehicle settings or remotes can be reset or reprogrammed as part of regular maintenance, requiring you to program new or additional remotes.

How to Program Your Car’s Keyless Remote

Programming a keyless remote is easier than you might think, and in most cases, it can be done by following a few simple steps. The process varies slightly depending on the make and model of your car, but here’s a general overview of the steps involved:

Get Your New or Replacement Remote: Ensure that your remote is compatible with your car’s system. If you're not sure, you can check with your car's manufacturer or an authorized dealership. Some remotes require specific codes to be programmed.

Sit Inside Your Vehicle: For safety and security reasons, most cars require you to be inside the vehicle while programming the remote.

Insert the Key in the Ignition: Insert the key into the ignition and turn it to the "ON" position without starting the engine. For cars with push-to-start systems, you may need to press the start button without pressing the brake pedal.

Activate the Programming Mode: Depending on your car’s system, you’ll need to follow a sequence of steps to enter programming mode. This could involve turning the key on and off several times, or pressing certain buttons in a specific order. Refer to your vehicle’s manual for the exact steps, as the process can differ from one model to another.

Program the Remote: Once your car is in programming mode, you’ll need to press the button on your keyless remote that you want to program. Usually, you’ll hear a chime or see the lights flash, indicating that the remote has been successfully programmed. Some cars may require you to press the button several times to ensure proper synchronization.

Test the Remote: After programming, test the remote to make sure it works properly. Try locking and unlocking the doors or starting the engine. If everything works as expected, you’re done!

Exit Programming Mode: To finish the process, simply turn off the ignition and remove the key. This should exit programming mode. If you have additional remotes to program, repeat the steps above for each one.

What to Do if Programming Doesn’t Work

While programming a keyless remote is usually a straightforward process, there are instances where things don’t go as planned. If your remote isn’t syncing with your car after following the steps, here are a few troubleshooting tips:

  • Check the Battery: If the remote’s battery is dead or weak, it won’t transmit the signal to your car. Replace the battery and try programming again.
  • Verify the Compatibility: Make sure that the remote is compatible with your vehicle’s make, model, and year. Some vehicles require special remotes that can only be programmed by the manufacturer or an authorized locksmith.
  • Reset Your Vehicle’s System: In some cases, you might need to reset the car’s system to clear previous programming attempts. Check your owner’s manual or consult a professional for assistance.
  • Consult a Professional: If you continue to have issues, it might be time to visit a dealership or a certified locksmith. These professionals have the tools and experience to program the remote correctly and ensure everything works seamlessly.

Why Programming Your Keyless Remote Is Important

Programming your keyless remote is a simple but important task that helps ensure your car’s security and convenience. By understanding how the process works and what to do if things go wrong, you’ll be able to troubleshoot and solve any issues quickly. Whether you’re replacing a lost remote or adding a new one to your collection, knowing how to program your remote saves time and money compared to visiting a dealership or locksmith.

With the increased reliance on keyless remotes for unlocking and starting vehicles, it’s essential for every car owner to be familiar with this process. By keeping your remote in good working condition and knowing how to program it when necessary, you’ll enjoy a smoother, more efficient experience with your vehicle.

Related Posts

The Evolution of BMW: A Journey Through Innovation and Design

The Evolution of BMW: A Journey Through Innovation and Design

BMW, a name synonymous with luxury, precision, and performance, has a fascinating history marked by relentless innovation. Its journey, from humble beginnings to becoming a global icon of the automotive industry, reflects an enduring commitment to engineering excellence and design evolution. Let’s take a closer look at how BMW’s story has unfolded over the decades, captivating car enthusiasts around the world. The Early Days: Born in Aviation BMW’s story began in the early 20th century, not with cars but with aircraft engines. The company’s roots in aviation are symbolized in its logo, representing a propeller against a blue sky. During World War I, BMW earned recognition for its groundbreaking aircraft engine designs, which were known for their power and reliability. However, with the end of the war came restrictions on aircraft production, prompting BMW to pivot its focus. By the 1920s, BMW shifted gears, literally and figuratively, entering the motorcycle and automotive markets. This transition laid the foundation for the brand’s future. Breaking Into the Automotive World In 1928, BMW launched its first car, the Dixi 3/15, a licensed version of the British Austin 7. Though modest, this compact car symbolized the brand’s entry into the competitive automotive industry. By the 1930s, BMW began developing its own models, showcasing innovation with designs like the 328 Roadster. Known for its sleek aesthetics and impressive performance, the 328 became a motorsport legend, solidifying BMW’s reputation for engineering excellence. Post-War Challenges and Resilience World War II brought both opportunities and challenges for BMW. The company produced military vehicles and engines, which left its facilities heavily damaged by the end of the war. Faced with a ban on manufacturing vehicles, BMW pivoted once again, producing household appliances and bicycles to survive. It wasn’t until the 1950s that BMW returned to car manufacturing, introducing models like the BMW 501. This period was marked by financial struggles, but BMW’s resilience paid off with the release of the Isetta microcar. Affectionately called the “bubble car,” the Isetta was a quirky, affordable solution for post-war consumers, helping the brand regain stability. The 1960s: A New Era of Innovation The 1960s marked a turning point for BMW, as the company introduced the New Class (Neue Klasse) series. These sporty sedans, including the iconic BMW 2002, combined performance with practicality, appealing to a growing market of car enthusiasts. This era also saw the birth of BMW’s reputation for building “ultimate driving machines,” emphasizing driving pleasure as a core philosophy. With its newfound success, BMW expanded globally, entering new markets and establishing a loyal fan base. The New Class not only saved the company from financial troubles but also set the stage for its future success. The Rise of Luxury and Performance By the 1970s and 1980s, BMW had firmly established itself as a luxury brand, offering high-performance vehicles that appealed to both casual drivers and motorsport enthusiasts. The introduction of the BMW 3 Series in 1975 marked the beginning of an enduring legacy. Known for its dynamic handling and elegant design, the 3 Series became a benchmark for compact executive cars. During this time, BMW also made significant strides in motorsport, launching its iconic M division. The BMW M1 supercar and the high-performance M3 further cemented the brand’s position as a leader in both luxury and performance. Embracing Technology and Sustainability The late 20th and early 21st centuries brought rapid technological advancements, and BMW was quick to adapt. The brand embraced cutting-edge features like navigation systems, adaptive cruise control, and hybrid powertrains, blending innovation with sustainability. The introduction of the BMW i Series marked a bold step toward electric mobility. Models like the i3 and i8 showcased the brand’s commitment to reducing emissions while maintaining its signature performance and luxury. A Glimpse Into the Future Today, BMW continues to evolve, pushing the boundaries of automotive technology. From autonomous driving to AI-powered interfaces, the brand is redefining what it means to drive in the 21st century. The development of fully electric models, like the BMW iX , reflects the brand’s vision for a sustainable future. Why BMW’s Evolution Matters Understanding BMW’s journey helps you appreciate the brand’s dedication to innovation and quality. Whether you’re a loyal BMW owner or an aspiring enthusiast, knowing the history of this iconic brand highlights why it remains a top choice for drivers worldwide. Pro Tips for BMW Owners Maintain Regular Service: Keep your BMW in top condition with regular maintenance. Use Genuine Parts: Opt for authentic components to ensure reliability and performance. Stay Informed: Familiarize yourself with your BMW’s features and innovations to maximize its potential. A Legacy of Excellence From crafting propellers to creating luxury vehicles, BMW’s evolution is a testament to its commitment to innovation and performance. The brand’s ability to adapt and excel through challenges has earned it a permanent place in automotive history. As BMW continues to innovate, one thing remains constant: its promise to deliver an unparalleled driving experience.

The Ultimate Checklist for Maintaining Your Car's Electronic Systems

The Ultimate Checklist for Maintaining Your Car's Electronic Systems

Why Regular Car Maintenance Matters Taking care of your car is more than just keeping it clean; it's about ensuring it stays reliable, safe, and efficient. When you stick to a regular maintenance schedule, you save yourself from costly repairs down the road and improve your vehicle’s lifespan. Whether you drive daily or occasionally, routine maintenance is something every car owner should prioritize. Here’s a simple breakdown of what you should check and when, so you can keep your car in top shape without breaking the bank. The Basics: Monthly Car Maintenance Checklist Think of this checklist as your car’s health routine. Performing these quick checks every month will help catch minor issues before they turn into big (and expensive) problems: Check the Oil Level : Pull out the dipstick, wipe it clean, reinsert, and check the level. Low oil can damage your engine over time. Inspect the Tire Pressure : Use a pressure gauge to ensure your tires are inflated to the recommended PSI. Under-inflated tires wear faster and decrease fuel efficiency. Top Off Windshield Washer Fluid : Keeping your windshield clean improves visibility and safety. Look for Visible Leaks : Check under your car for any oil, coolant, or fluid leaks. If you spot something unusual, it’s time to consult a professional. Test the Lights : Make sure all your lights—headlights, brake lights, and signals—are working properly. These tasks take less than 10 minutes and can help you avoid unexpected surprises on the road. Every 3,000–5,000 Miles: Oil Changes and Inspections Oil is your engine's lifeblood. Over time, oil breaks down, causing it to lose its ability to lubricate and protect your engine. Changing the oil regularly—about every 3,000 to 5,000 miles, depending on your vehicle—is crucial. What to do: Replace the oil filter alongside the oil to ensure clean circulation. Inspect the belts, hoses, and filters for any cracks or wear. Rotate your tires to promote even tread wear and extend their lifespan. Following this schedule will improve engine performance and fuel efficiency while reducing wear and tear. 6-Month Maintenance: A Deeper Look Every six months (or around 6,000–7,500 miles), it’s time to give your car a more thorough inspection. This ensures that everything continues to operate as it should: Check the Battery : Look for corrosion on the terminals and ensure the battery has enough charge. A weak battery can leave you stranded. Inspect Brake Pads and Rotors : Squealing or grinding noises may indicate it’s time for new brake pads. Safe brakes are non-negotiable. Replace Wiper Blades : Worn-out wipers reduce visibility during rain or snow. Swap them out for a clear view. Check Fluid Levels : Inspect coolant, transmission fluid, and brake fluid. Top them off if necessary or replace them according to your vehicle’s manual. Annual Car Maintenance: Keep It Running Like New Your annual maintenance routine focuses on long-term performance and reliability. Here’s what to prioritize: Replace the Air Filter : A clean air filter improves engine efficiency and fuel economy. Examine the Suspension and Alignment : If your car pulls to one side or the ride feels bumpy, it’s time to get your alignment and suspension checked. Flush and Replace Fluids : This includes coolant, brake fluid, and transmission fluid. Over time, these break down and need to be replaced to prevent damage. Inspect the Exhaust System : Check for leaks, damage, or unusual noises. A faulty exhaust can impact fuel efficiency and safety. Annual checkups ensure your car remains reliable for years to come, saving you money on unexpected repairs. Pro Tip: Pay Attention to Your Car’s Warning Signs Your car has built-in systems to tell you when something’s wrong. Ignoring these warning signs could lead to bigger issues down the road: Check Engine Light : Don’t dismiss this. It’s your car’s way of saying it needs immediate attention. Strange Noises : Grinding, squealing, or clunking sounds are often red flags for underlying problems. Vibrations or Pulling : This could signal alignment issues, tire imbalances, or suspension problems. If you notice any of these, act quickly. Addressing small concerns early can prevent expensive breakdowns later. Why Routine Car Maintenance Saves You Money Regular maintenance may seem like an extra expense, but it’s far more affordable than major repairs. For example: A routine oil change costs far less than replacing a damaged engine. Keeping tires properly inflated extends their life and improves fuel efficiency. Replacing brake pads is much cheaper than repairing damaged rotors or calipers. By investing a little time and effort into routine checks, you avoid costly breakdowns and ensure your car stays reliable.

What You Need To Know About BMW  Swirl Flaps and How To Solve The Problem With Them

What You Need To Know About BMW  Swirl Flaps and How To Solve The Problem With Them

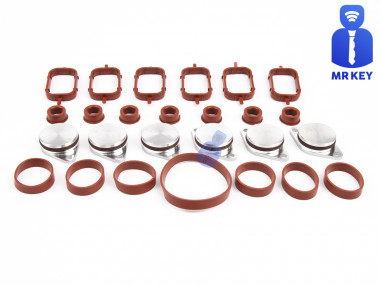
Swirl flaps are a BMW system that has been introduced to help burn the fuel mixture in the cylinder better due to the fact that diesel engines do not have throttle valves and it is not possible to adjust the air-fuel ratio. A diesel engine without vortex valves operates between a poor and a rich fuel mixture, because the only way to regulate it is through fuel injection. Design of the first generation swirl flaps that are made of made of metal. Unfortunately, swirl flaps are responsible for countless damaged engines and costly repairs due to design errors or metal fatigue. Once damaged, the cylinder sucks them in and causes great damage. This is how damaged valves damage the cylinder. Typical swirl flaps suction damage. The vortex valves are positioned in the inlet and are controlled by vacuum (DDE 4.0) or electrically (DDE5.0 / DDE6.4) by the engine ECU. Effects of malfunctioning valves: Swirl valves are stuck in open position: Deterioration of exhaust gas performance at lower speeds. Swirl valves are stuck in closed position: Approximate power loss of 10% at high engine speeds. How swirl flaps work: Performance characteristics: The vortex valves are in the closed position, at low engine speeds and small amounts of fuel injected (controlled by the ECU card). They open under the following conditions: coolant temperature <14 ° C OR * fuel quantity> 24 mg OR 2. engine speed 2250 rpm OR 3. inlet air temperature <-5 ° C. BMW and Pierburg have decided to produce diesel engines with metal vortex valves. The speed at which the pistons in the diesel engine operate is at least 60 rpm, so a sucked vortex valve will break and cause a number of damages inside the engine. In most cases, one or more pistons are severely damaged, as a bonus you get valves, in some cases a head or turbocharger. And this combination with a BMW engine is like a cumulative jackpot 🙂 In 2004, BMW began work on the problem and improved the design, however, a number of owners reported ongoing problems in this area. The solution to this problem is by removing the vortex valves and plugging, which does not affect the performance of the engine and at the same time, you can safely pass the exhaust test. Engines: M47 (136hp VP44 fuel pump) has no valves. M47N common rail engine (including M47N / M47TU / M47TUD20) (150hp. Face lift model from 2001 -) has valves. M57 engines (M57D) (525d & 187hp. 330d) cars with manual transmission do not have valves, but those with automatic have. M57N engines (M57TUD) (525d & 330d 204hp) have vortex valves. Ruined swirl flapss: The plugs that replace the vortex valves are easy to find on the internet, but you can also find them here on our website. Typical plugs: Disassembly of vortex valves: The vortex valves can be safely dismantled and in most cases if they are removed properly no loss of power is felt. Final list of models for which vortex valves are installed: Engine: M47N/M47TU/M47TUD20 Applications: * 110 kW (148 hp) and 330 N·m (243 lb·ft) o E46 320d 2001-2005 o E83 X3 2.0d (up to end of 2006) Engine: M47TU2D20 The engine was updated again in 2004 as the M47TU2D20. Still at 1995 cc, it produced more power across the range. Applications: * 120 kW (161 hp) and 340 N·m (251 lb·ft) E60/E61 520d E87 120d E90/E91 320d E83 X3 2.0d (end of 2006 onwards) Engine: M57/M57D25 M57D25 was introduced in 2000. Applications: * 166 PS (122 kW; 164 hp) at 4000 rpm, 350 N·m (260 lb·ft) at 2000-2500 rpm with a 4750 rpm redline, models: 2000-2003 E39 525d *Vehicles With Automatic Transmission ONLY* Engine: M57N/M57TU/M57TUD25 M57TUD25 was introduced in 2004. Applications: * 177 PS (130 kW; 175 hp) at 4000 rpm, 400 N·m (300 lb·ft) at 2000-2750 rpm models: E60/E61 525d Engine: M57/M57D30 M57D30, also called M57D29, was introduced in 1998. Applications: * 184 PS (135 kW; 181 hp)@4000, 390 N·m (290 lb·ft)@1750-3200 models: E39 530d *Vehicles With Automatic Transmission ONLY* E46 330d/330xd *Vehicles With Automatic Transmission ONLY* * 184 PS (135 kW; 181 hp)@4000, 410 N·m (300 lb·ft)@2000-3000 models: E38 730d *Vehicles With Automatic Transmission ONLY* E53 X5 3.0d * 193 PS (142 kW; 190 hp)@4000, 410 N·m (300 lb·ft)@1750-3000 models: E38 730d E39 530d Engine: M57N/M57TU/M57TUD30 M57TUD30 was introduced in 2002. It originally produced 160 kW (215 hp) at 4000 rpm and 500 N·m (370 lb·ft) at 2000-2750 rpm, but was tweaked for 150 kW (201 hp) at 4000 rpm and 410 N·m (300 lb·ft) at 1500-3250 rpm for 2003 and again for 200 kW (268 hp) at 4000 rpm and 560 N·m (410 lb·ft) at 2000-2250 rpm in 2004. Applications: * 204 PS (150 kW; 201 hp)@4000, 410 N·m (300 lb·ft)@1500-3250 models: E46 330d/330Cd/330xd E83 X3 3.0d * 218 PS (160 kW; 215 hp)@4000, 500 N·m (370 lb·ft)@2000-2750 models: E53 X5 3.0d E60/E61 530d/530xd E65 730d * 272 PS (200 kW; 268 hp)@4000, 560 N·m (410 lb·ft)@2000-2250 E60/E61 535d * 245 PS (180 kW; 242 hp)@4000, 500 N·m (370 lb·ft)@2000-2250 * 286 PS (210 kW; 282 hp)@4000, 580 N·m (430 lb·ft)@2000-2250 Engine: M57TU2D30 M57TU2D30 was introduced in 2007, making its debut in the facelifted E60 and E61. * M57TU2D30-UL: 197 PS (145 kW; 194 hp) * M57TU2D30-OL: 235 PS (173 kW; 232 hp)@4000, 500 N·m (370 lb·ft)@2000-2750 * M57TU2D30-TOP: 286 PS (210 kW; 282 hp), 580 N·m (430 lb·ft) Applications: * 197 PS (145 kW; 194 hp), 400 N·m (300 lb·ft) models: E90/E91/E92 325d E60/E61 525d/525xd * 231 PS (170 kW; 228 hp)@4000, 500 N·m (370 lb·ft)@2000-2750 models: E65 730d E90/E91 325d E90/E91 330d/330xd * 235 PS (173 kW; 232 hp) models: E60/E61, BMW E70, BMW E71 * 286 PS (210 kW; 282 hp), 580 N·m (430 lb·ft) models: E60/E61 535d E70 X5 3.0sd E71 X6 xDrive35d E83 X3 3.0sd E90/E91 335d The above models are listed for information only if you want to to make sure your engine has valves installed, please contact a competent person. Please note that the information described above is for informational purposes only and does not claim to be reliable. Mr-key.com is not responsible for any repair work you undertake that is related to the topic described in this article.

The Secret to Smooth Locks: How (and Why) to Lubricate Your Locks Like a Pro

The Secret to Smooth Locks: How (and Why) to Lubricate Your Locks Like a Pro

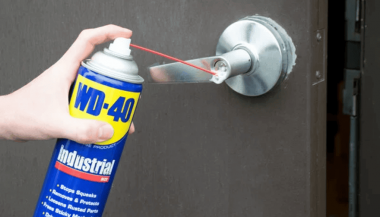
Regular lock maintenance is essential to prevent key jamming or lock failure. Proper lubrication reduces wear and tear, ensures smooth operation, and extends the lifespan of your locks. A well-lubricated lock decreases the risk of your key getting stuck or breaking inside the lock—an inconvenient and costly problem. At MR-KEY , we understand the importance of well-maintained locks and want to help you keep yours in top condition. How Often Should You Lubricate Your Locks? For most locks, lubricating them every three to six months is sufficient. However, locks exposed to extreme weather conditions—such as those on towbars, roof racks, or outdoor gates—require more frequent maintenance. Rain, dust, and freezing temperatures can cause internal components to stick, making it difficult to insert or turn the key. If you notice resistance when using a lock, it’s time for lubrication. What Lubricant Should You Use for Locks? Choosing the right lubricant is crucial for long-term lock performance. Here are the best options: • Teflon-based (PTFE) spray – Forms a protective film inside the lock, reducing friction and repelling dust buildup. • Dry silicone spray – Excellent for outdoor locks as it resists moisture without attracting dirt. • WD-40 Specialist Dry PTFE or White Lithium Grease – Unlike regular WD-40, these provide long-lasting lubrication and protection against corrosion. • Graphite powder – A great choice for older locks but should not be used if there’s oil residue inside the lock. While WD-40 Multi-Use is a quick fix for stuck locks, it is primarily a cleaner rather than a long-term lubricant. If used, follow up with a dry lubricant to prevent dirt accumulation inside the lock. How to Lubricate a Lock If your lock is functioning properly but feels slightly stiff, follow these steps: 1. Clean the Lock – Insert and remove the key a few times to dislodge debris, wiping it clean each time. 2. Apply the Lubricant – Insert the spray straw into the keyhole and apply two short bursts of lubricant. 3. Work the Lock – Insert and turn the key multiple times to distribute the lubricant inside. 4. Wipe Excess Lubricant – Remove any residue from the key and lock exterior to prevent dirt buildup. For graphite powder , follow the manufacturer’s specific instructions, as overapplication can lead to clumping inside the lock. Special Care for Towbar and Roof Rack Locks Locks on towbars and roof racks are exposed to harsher conditions than typical door locks. To keep them in good shape: • Regularly inspect them for stiffness or corrosion. • Apply dry silicone spray or PTFE lubricant for lasting protection. • If the lock is exposed to frequent moisture, white lithium grease offers superior water resistance. Lock It in: The Key to Long-Lasting Security Regular lock maintenance is a small effort that prevents big problems. By keeping your locks clean and properly lubricated—especially those exposed to the elements—you can avoid costly repairs and ensure they function smoothly for years. For high-quality lock maintenance products, visit MR-KEY and keep your locks in perfect working condition. A little maintenance goes a long way in ensuring security and peace of mind!

Chat with us