Post Name

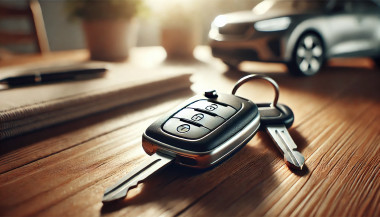
When it comes to convenience, car keyless remotes have revolutionized the way we interact with our vehicles. No more fumbling with traditional keys or worrying about locking yourself out. With just a push of a button, you can lock, unlock, and even start your vehicle. But what happens when your keyless remote stops working, or when you need to program a new one? Here’s a simple guide to help you program your car's keyless remote, regardless of your vehicle's make or model.

Understanding Keyless Remotes

Before jumping into the programming process, it’s important to understand what a keyless remote is and how it works. Essentially, a keyless remote allows you to interact with your vehicle without needing to physically insert a key. Instead of using a traditional metal key, your car’s electronic system communicates wirelessly with the remote, allowing you to lock, unlock, and sometimes even start your vehicle, all with the push of a button.

These remotes typically use a radio frequency to communicate with your car, sending a signal that’s encrypted for security. Most modern cars use transponder technology, which makes the system more secure and resistant to hacking or copying. This means that the remote must be properly programmed to your vehicle’s system to function correctly.

When Do You Need to Program a Keyless Remote?

There are several situations in which you might need to program your keyless remote:

Replacing a Lost or Damaged Remote: If you’ve lost your keyless remote or it’s no longer functioning properly, you’ll need to get a replacement. This may require programming the new remote to sync with your vehicle.

Adding a New Remote: If you’ve bought an additional keyless remote for your car (for a spouse, child, or other family member), you’ll need to program it so that it works with your vehicle.

Battery Replacement: Sometimes, replacing the battery in your remote can cause the programming to reset, meaning you’ll need to reprogram the remote for it to work again.

Changing or Resetting Vehicle Settings: Occasionally, vehicle settings or remotes can be reset or reprogrammed as part of regular maintenance, requiring you to program new or additional remotes.

How to Program Your Car’s Keyless Remote

Programming a keyless remote is easier than you might think, and in most cases, it can be done by following a few simple steps. The process varies slightly depending on the make and model of your car, but here’s a general overview of the steps involved:

Get Your New or Replacement Remote: Ensure that your remote is compatible with your car’s system. If you're not sure, you can check with your car's manufacturer or an authorized dealership. Some remotes require specific codes to be programmed.

Sit Inside Your Vehicle: For safety and security reasons, most cars require you to be inside the vehicle while programming the remote.

Insert the Key in the Ignition: Insert the key into the ignition and turn it to the "ON" position without starting the engine. For cars with push-to-start systems, you may need to press the start button without pressing the brake pedal.

Activate the Programming Mode: Depending on your car’s system, you’ll need to follow a sequence of steps to enter programming mode. This could involve turning the key on and off several times, or pressing certain buttons in a specific order. Refer to your vehicle’s manual for the exact steps, as the process can differ from one model to another.

Program the Remote: Once your car is in programming mode, you’ll need to press the button on your keyless remote that you want to program. Usually, you’ll hear a chime or see the lights flash, indicating that the remote has been successfully programmed. Some cars may require you to press the button several times to ensure proper synchronization.

Test the Remote: After programming, test the remote to make sure it works properly. Try locking and unlocking the doors or starting the engine. If everything works as expected, you’re done!

Exit Programming Mode: To finish the process, simply turn off the ignition and remove the key. This should exit programming mode. If you have additional remotes to program, repeat the steps above for each one.

What to Do if Programming Doesn’t Work

While programming a keyless remote is usually a straightforward process, there are instances where things don’t go as planned. If your remote isn’t syncing with your car after following the steps, here are a few troubleshooting tips:

  • Check the Battery: If the remote’s battery is dead or weak, it won’t transmit the signal to your car. Replace the battery and try programming again.
  • Verify the Compatibility: Make sure that the remote is compatible with your vehicle’s make, model, and year. Some vehicles require special remotes that can only be programmed by the manufacturer or an authorized locksmith.
  • Reset Your Vehicle’s System: In some cases, you might need to reset the car’s system to clear previous programming attempts. Check your owner’s manual or consult a professional for assistance.
  • Consult a Professional: If you continue to have issues, it might be time to visit a dealership or a certified locksmith. These professionals have the tools and experience to program the remote correctly and ensure everything works seamlessly.

Why Programming Your Keyless Remote Is Important

Programming your keyless remote is a simple but important task that helps ensure your car’s security and convenience. By understanding how the process works and what to do if things go wrong, you’ll be able to troubleshoot and solve any issues quickly. Whether you’re replacing a lost remote or adding a new one to your collection, knowing how to program your remote saves time and money compared to visiting a dealership or locksmith.

With the increased reliance on keyless remotes for unlocking and starting vehicles, it’s essential for every car owner to be familiar with this process. By keeping your remote in good working condition and knowing how to program it when necessary, you’ll enjoy a smoother, more efficient experience with your vehicle.

Related Posts

The Complete Guide to Car Key Cutting: Everything You Need to Know

The Complete Guide to Car Key Cutting: Everything You Need to Know

Unlocking the Mysteries of Car Key Cutting Have you ever been in a situation where you needed a spare car key or had to replace a lost one? Car key cutting is an essential process for creating duplicate keys or replacements, but it’s often misunderstood. From traditional keys to modern transponder and smart keys, the art of key cutting has evolved dramatically with advancements in technology. This guide will walk you through the key cutting process, its types, and when professional help is required, helping you navigate the complexities of car key duplication with confidence. What Is Car Key Cutting? Car key cutting is the process of creating a new key that matches the physical shape and specifications of your vehicle’s locks and ignition. This process involves cutting the metal key blade to fit the car’s lock mechanism precisely. For modern cars, this may also include programming the electronic components of the key, such as transponder chips or remote controls. The method used for cutting a car key depends on the type of key and the car model. Traditional keys are simpler to cut, while transponder and smart keys require specialized tools and expertise. Types of Car Keys and Cutting Methods Traditional Keys These are the classic mechanical keys used in older vehicles. Cutting these keys involves duplicating the grooves and ridges of the original key using a key-cutting machine. Transponder Keys Found in most modern cars, transponder keys contain a microchip that communicates with the car’s computer. After cutting the blade, these keys must also be programmed to function. Smart Keys These advanced keys use wireless communication to interact with the car. They don’t require physical cutting but involve programming to sync with the vehicle. Each type of key requires a different approach and level of expertise, making it essential to know what kind of key you have before proceeding with duplication. The Key Cutting Process: Step by Step Identify the Key Type Determine whether you have a traditional, transponder, or smart key. This will dictate the tools and process needed for cutting and programming. Gather Required Information Provide the key cutter with details about your car, such as the make, model, and year. For some keys, a Vehicle Identification Number (VIN) may be required. Cutting the Key Blade For traditional and transponder keys, the blade is cut using a key duplicator or a laser key-cutting machine. Precision is crucial to ensure the key fits perfectly in the lock. Programming (if required) For transponder and smart keys, the key must be programmed to the car’s computer system. This step may require specialized equipment or professional expertise. When to Seek Professional Help While traditional keys can often be duplicated at local hardware stores, transponder and smart keys typically require specialized tools and knowledge. Professional locksmiths and dealerships are equipped to handle these advanced key types, ensuring proper cutting and programming. Reasons to choose a professional: Complexity: Smart and transponder keys require technical expertise. Accuracy: Professionals use precise equipment to ensure the key functions flawlessly. Programming Needs: Only trained specialists can program keys to sync with your vehicle. Cost of Car Key Cutting The cost of cutting a car key varies depending on the type of key and the service provider. Traditional keys are the most affordable, typically costing between $10 and $50. Transponder and smart keys, however, can range from $50 to $300 or more due to the additional programming required. Tips to save money: Have a spare key: This simplifies the duplication process and reduces costs. Compare prices: Contact multiple locksmiths or dealerships to find the best deal. Be Prepared for Every Key Emergency Car key cutting is a vital service for any car owner, whether you’re duplicating a spare key or replacing a lost one. Understanding the process and knowing when to seek professional help can save you time, money, and frustration. By staying informed and proactive, you can ensure that your vehicle remains accessible and secure, no matter what challenges arise.

Understanding the Different Types of Car Keys and Their Functions

Understanding the Different Types of Car Keys and Their Functions

Unlocking the World of Car Keys Car keys have come a long way from simple metal tools to high-tech devices designed to enhance convenience and security. As vehicles evolve, so do the keys that unlock and operate them. Whether you’re a car enthusiast or a driver navigating modern technology, understanding the different types of car keys and their functions can help you appreciate their role in your vehicle’s performance and safety. This guide explores various car key types, their unique features, and the technologies behind them. Traditional Car Keys: The Classics Traditional car keys, often referred to as mechanical keys, are the simplest type of car keys. These are commonly found in older vehicles and rely on a basic metal blade that fits into the car’s ignition and door locks. Key Features of Traditional Keys: Require no electronic components. Depend on physical alignment to operate the lock or ignition. Can be duplicated easily using a standard key-cutting machine. While these keys are straightforward to use and replace, they lack the advanced security features of modern alternatives, making them more vulnerable to theft. Transponder Keys: Enhanced Security Transponder keys are a significant upgrade from traditional keys, incorporating a small electronic chip inside the plastic head of the key. This chip communicates with the vehicle's computer system to authenticate the key before the car starts. How Transponder Keys Work: The chip transmits a unique signal to the car’s receiver when the key is turned in the ignition. If the signal matches, the car starts; if not, the engine remains immobilized. Benefits of Transponder Keys: Reduced risk of car theft due to their encryption technology. Widely used in most vehicles manufactured after the mid-1990s. However, duplicating or replacing a transponder key requires specialized equipment, making it more expensive than traditional keys. Smart Keys: The Modern Marvels Smart keys represent a leap into advanced automotive technology. These keys are typically used in vehicles with keyless entry and push-button start systems. Instead of inserting a key into the ignition, drivers simply need to have the smart key inside the vehicle. Key Features of Smart Keys: Allow for keyless entry and ignition. Use radio frequency identification (RFID) or Bluetooth technology to communicate with the car. Often come with additional functions, such as opening the trunk or remotely starting the vehicle. Advantages of Smart Keys: Enhanced convenience and ease of use. Advanced security features to deter theft. Despite their benefits, smart keys are expensive to replace and rely heavily on battery power. Remote Keys: A Blend of Mechanical and Digital Remote keys, often combined with transponder technology, offer the ability to lock and unlock car doors at the push of a button. They are commonly included in modern car key fobs and sometimes have a physical blade as a backup. Features of Remote Keys: Control doors, windows, and sometimes the trunk remotely. Combine traditional key functions with modern convenience. These keys are versatile and user-friendly but may require reprogramming if the battery is replaced or the signal becomes disrupted. Key Cards: Compact and Stylish Key cards are a relatively new addition to the world of car keys, commonly used in high-end and electric vehicles. These slim, credit card-sized devices function like smart keys and communicate wirelessly with the vehicle. Advantages of Key Cards: Compact and easy to carry. Offer the same functionality as smart keys, including keyless entry and ignition. While key cards are sleek and innovative, they are prone to damage due to their thin design and may not be as durable as traditional keys. Valet Keys: Limited Access Valet keys are designed to offer restricted functionality, allowing a valet or another driver to operate the car without accessing certain areas, such as the glove compartment or trunk. Purpose of Valet Keys: Provide limited access to the vehicle for security purposes. Prevent unauthorized access to personal belongings. Valet keys are a practical solution for safeguarding your possessions while still enabling temporary access to your car. Digital Keys: The Future of Key Technology Digital keys are the latest innovation in car key technology, allowing drivers to use their smartphones or smartwatches to unlock and start their vehicles. How Digital Keys Work: Use NFC (Near Field Communication) or Bluetooth to interact with the vehicle. Allow for remote access, such as locking or unlocking the car from a distance. Benefits of Digital Keys: Eliminate the need for a physical key. Offer enhanced customization, such as granting temporary access to other users. As convenient as they are, digital keys rely on smartphone technology and can be vulnerable to hacking if not properly secured. Choosing the Right Key for Your Needs Car keys have evolved into sophisticated devices that combine functionality, convenience, and security. Whether you’re using a traditional key or embracing the future with a digital key, understanding the type of key your vehicle uses can help you maintain it properly and replace it if necessary. By staying informed about the different types of car keys and their unique functions, you can make smarter choices when it comes to safeguarding your vehicle and enjoying the driving experience to the fullest.

How to Take the Perfect Photo of Your Key for Easy Replacement

How to Take the Perfect Photo of Your Key for Easy Replacement

When you need a replacement key , taking a clear, detailed photo of your key can make the process much faster and more accurate. A high-quality image helps key makers understand the exact specifications, cuts, and dimensions of your key, which is especially important if you don’t have a spare. In this guide, we’ll walk you through the best practices for photographing your key so you can get an accurate replacement with ease. Why a Clear Key Photo Matters Photographing a key might sound simple, but it requires a bit of attention to detail. A well-taken photo captures the key’s grooves and unique cuts clearly, helping the key cutter replicate the exact pattern. Saves Time : A high-quality photo reduces the need for multiple attempts to cut a new key. Ensures Accuracy : Clear images help capture specific details, leading to a more precise fit. Convenient Process : With just a smartphone and a few tips, you can photograph your key from home without needing special equipment. Essential Tools for Photographing Your Key To take a clear photo of your key, you don’t need much beyond a few household items. Here’s what you’ll need: Smartphone or Camera : A phone camera is usually sufficient, but a standard digital camera works well too. Plain Background : Choose a neutral, solid-colored background like a piece of white paper or a smooth table surface. Good Lighting : Natural daylight or a bright room light helps capture details without shadows. Small Object for Elevation : A coin or similar item can lift the key slightly, making it easier to photograph. Step-by-Step Guide to Taking the Perfect Key Photo Follow these steps to take a photo that ensures clarity and accuracy for key replacement. 1. Set Up the Background Place a piece of plain white paper or another smooth, light-colored surface under your key. The solid color helps the details of the key stand out without any visual distractions. Tip : Avoid backgrounds with patterns or textures, as these can obscure the key’s features. 2. Position the Key Correctly Lay the key flat on the background, with the grooves and cuts facing up. The key should be positioned horizontally to allow a clear view of all its details. Side Profile : Make sure to capture the side profile that shows the cuts and grooves. Elevate Slightly : Place a coin or small object under one end of the key to angle it slightly toward the camera. This can help reduce shadows and improve focus on the cuts. 3. Adjust Lighting Good lighting is essential for capturing details. If possible, photograph your key in natural daylight near a window or use a well-lit room. Avoid Shadows : Ensure that no shadows fall across the key, as they can obscure details. Diffuse Light : If using a lamp, consider placing a thin cloth over it to diffuse the light and reduce harsh reflections. 4. Focus and Zoom Make sure your camera or smartphone is focused directly on the key. You may need to tap the screen to bring it into sharp focus. Zoom in Carefully : If you’re using a smartphone, zoom in slightly to capture the details, but avoid over-zooming, which can blur the image. Test Multiple Angles : Sometimes a slight adjustment in angle can capture the cuts more effectively, so take a few shots from slightly different perspectives. 5. Capture Multiple Photos It’s always a good idea to take several photos to ensure you have the best one. Try different angles and lighting adjustments to capture as many details as possible. Close-Up of the Grooves : Take one close-up image focusing on the cuts and grooves of the key. Overall Image : Include one full-length photo that shows the entire key from end to end. Try Different Angles : Slightly tilt the key or move the camera to see which angle best captures the detail of the cuts. Common Mistakes to Avoid When Photographing Your Key To get the best results, steer clear of these common issues that can impact the quality of your key photo: Blurry Images : If your hand shakes, use a small tripod or prop your phone on a stable surface. Poor Lighting : Avoid taking photos in dim rooms; use bright light to ensure the key is clearly visible. Obstructed Details : Make sure the entire length of the key is visible, without any part being cut off or covered. Tips for Ensuring a Smooth Replacement Process Once you have a clear photo of your key, there are a few final steps to make the replacement process as efficient as possible. Check the Photos : Look over your photos before sending them to ensure that they’re clear and detailed. Label the Key : If you’re photographing multiple keys, label each one in the image or add a note to avoid confusion. Include Measurements : If possible, add the measurements of the key’s length and width in your notes for added accuracy. A clear, detailed photo of your key can save you time and effort when seeking a replacement. By following these simple steps, you’ll provide all the necessary details to ensure your new key is an accurate match. Remember, good lighting, focus, and capturing all the unique cuts are essential to achieving the best results. With these guidelines, you’re set to take a photo that will make your key replacement process smooth and hassle-free.

How to Identify the Right Replacement Key Shell for Your Car

How to Identify the Right Replacement Key Shell for Your Car

If your car key shell is cracked, worn, or the buttons no longer press properly, replacing it with a new shell is often the most affordable and effective solution. But one major challenge stands in the way: figuring out exactly which replacement shell you need. With so many variations in blade types, button layouts, and internal compatibility, it’s easy to buy the wrong part—and waste both time and money. This guide breaks down how to identify the correct key shell for your car, so you can upgrade or replace your damaged remote housing without confusion. Step 1: Identify Your Key Blade Type One of the most important features is the key blade. Even within the same car brand, different models and years may use different blade types. Two of the most common are: HU83 blade – Used by many Peugeot and Citroën models. It has a curved groove on both sides. VA2 blade – Similar in appearance but has a flat groove instead of a curve. Other types include TOY43, TOY47, and SIP22, often used in Toyota, Fiat, and other manufacturers. If you're unsure, comparing your blade side-by-side with online reference images helps avoid errors. Tip: Never rely only on the number of buttons—focus on the blade profile first. Step 2: Count and Match the Button Layout Next, verify how many buttons your original key has, and in what layout. Common options include: 2 buttons: Lock / Unlock 3 buttons: Lock / Unlock / Trunk Smart keys: May have a more complex layout or hidden emergency blade Even a small difference in layout can prevent the rubber buttons from pressing the internal switches correctly. Also check whether the button pad is integrated into the case or if it’s a separate piece. That may affect your fit. Step 3: Check the Internal Electronics Placement When swapping a shell, you’ll be transferring the circuit board and (in most cases) a transponder chip. The replacement case must have: The same mounting points and slots Space for the battery (check if yours is CR1620, CR2032, etc.) A similar design to support the flip mechanism, if your original key has one If the internal layout doesn’t match, your circuit board may not sit securely—or your buttons may not work. Bonus tip: Open your old key carefully and take photos of the internal structure before ordering a shell. Step 4: Consider the Key Type – Flip or Fixed There are two main styles: Flip keys: Blade folds into the case and pops out with a button press Fixed blade keys: Blade is static and exposed You must match your replacement with the original style, unless you're intentionally upgrading. Flip key conversions are popular, but they require extra parts and a bit more installation effort. Step 5: Check the Model Compatibility List Many key shells are marketed as being compatible with a range of car models. Look for a list that includes: Your vehicle’s make and model The production years (e.g., “Peugeot 207 2010–2014”) Even then, cross-reference with your physical key—models change subtly across production years. Step 6: Know What You're Not Getting A replacement key shell typically does not include: The circuit board (you must transfer it from your old key) The transponder chip A pre-cut blade (unless stated) You’ll likely need to cut the new blade or reuse the old one if it's detachable. Choosing the right replacement key shell doesn't have to be trial and error. By focusing on blade type, button layout, and internal structure, you can confidently find a case that fits your needs—and your key electronics. It’s a simple fix that extends the life of your existing key without the cost of a full replacement. Just take your time, check the details, and match your original key carefully. A few minutes of inspection now can save hours of hassle later.

Chat with us