Post Name

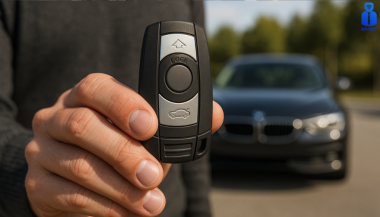
Modern car keys have come a long way from the traditional cut metal blades of the past. What was once a simple tool for turning an ignition has evolved into a smart, encrypted device with layers of built-in security. Among the most critical components in today’s car keys is the transponder chip — a small but vital element that could be the reason your car doesn’t start after replacing your key shell.

If you've recently changed the shell or casing of your key and suddenly find that your car won’t start, you're not alone. This is one of the most common (and frustrating) issues car owners face when performing a key repair or upgrade. So let’s break down what’s really happening — and how you can fix it.


What Is a Transponder and What Does It Do?

A transponder chip (short for “transmitter-responder”) is a small electronic component embedded in your car key. Its purpose is to communicate with your vehicle’s immobilizer system to authorize ignition.

Here’s how it works:

When you insert your key and turn the ignition, your car sends out a radio signal.

The transponder chip in your key responds with a coded signal unique to your car.

If the code is correct, the car’s computer disables the immobilizer and allows the engine to start.

If the chip is missing, broken, or the code doesn’t match — the engine won’t start, even if the key blade physically turns.

This system is an anti-theft measure, and it's present in most vehicles manufactured after the late 1990s. Without a functional transponder, your key may unlock the doors but it will not allow the car to start. This ensures that even if someone manages to copy the physical blade of your key, they still can’t steal your car.


Why Your Key Might Not Work After Shell Replacement

Changing your key shell (also called a case or housing) can seem like a simple cosmetic repair — but it’s easy to overlook the importance of transferring the transponder chip during the process.

If your key no longer starts the car after a shell replacement, the most likely reason is:

You forgot to move the transponder chip into the new shell.

In many keys, the chip is not part of the electronics board. It’s often a tiny black or glass capsule, sometimes hidden in a small compartment within the key shell — completely separate from the buttons and battery. If you didn’t see it, it’s probably still sitting inside the old casing.

Some people assume that simply moving over the circuit board and battery is enough — but without the transponder, your key won’t be recognized by the car’s immobilizer. This results in the engine failing to start, even though the buttons may still lock and unlock the doors.


Symptoms of a Missing or Misplaced Transponder

If your key turns in the ignition but:

The car does not crank or start

You see a flashing key icon or immobilizer warning on the dashboard

The central locking might still work, but the engine won’t respond

You hear a clicking sound but no ignition occurs

Then it’s almost certainly a transponder issue. The car's system is waiting for a valid coded signal from the key — and without it, the start command is rejected.


How to Fix It: What You Need to Do

Here’s how to get your car running again:

1. Check Your Old Key Shell

Open the old casing and look for a small black or clear capsule (typically rice-sized). That’s your transponder chip. Some are glued in place and may require careful prying.

2. Transfer the Chip

Carefully remove it and insert it into the correct compartment in your new key shell. Some aftermarket shells have a specific slot for it, while others require a bit of creativity to keep it securely in place. In some cases, adhesive putty or double-sided tape can help hold it.

3. Reassemble and Test

Put your key back together and try starting the car again. If the chip is correctly placed, it should work immediately — no reprogramming needed. Always test both ignition and door lock/unlock functions.


What If You Lost the Chip?

Unfortunately, if the chip is damaged or lost, the key will no longer be able to start your vehicle. In this case, you’ll need to:

Contact a professional auto locksmith

Have a new transponder chip programmed to your car’s immobilizer system

Provide proof of ownership (such as your vehicle logbook or registration) in most cases

Depending on the make and model of your car, programming a new chip may cost anywhere from $50 to $250, and it typically requires special diagnostic equipment.

It’s worth noting that some dealerships may charge significantly more than independent auto locksmiths — and you may have to wait longer for service.


Pro Tips When Replacing Your Key Shell

Always examine the inside of your old shell carefully before throwing it away.

Take photos before disassembly so you know where each component goes.

If you're unsure where the chip is or how to transfer it, look for DIY videos specific to your key model.

Use tweezers and caution — the chip is fragile.

Avoid static electricity or contact with magnets during the transfer process.

Some modern keys have transponders integrated into the circuit board, in which case no separate chip needs to be moved.

If you’re working with a smart key or proximity key, additional steps may be required. These typically involve re-synchronization with the vehicle’s system and may not function correctly without professional assistance.


Small Chip, Big Consequences

It’s incredible how something as small as a transponder chip can control such a major function. Replacing your key shell is a great way to refresh the look and feel of your key — but it’s vital not to overlook the importance of transferring every component, especially the transponder.

Many DIY repairs are abandoned or lead to confusion simply because of this overlooked step. Fortunately, it’s one of the easiest problems to fix once you understand what to look for.

If your key looks brand new but your car won’t start, don’t panic. Chances are, the solution is sitting inside your old key shell — quietly waiting to be moved over.

Related Posts

Car Key Replacement: What to Do, How It Works, and When DIY Saves You Money

Car Key Replacement: What to Do, How It Works, and When DIY Saves You Money

Losing or breaking your car key can feel like a full-blown emergency. Whether your key won’t turn in the ignition, your remote suddenly stops responding, or you’ve misplaced the whole thing entirely, one thing is certain: you need a replacement—and fast. While most people assume that replacing a car key requires a trip to the dealership and a hefty bill, that’s no longer the only option. In fact, depending on your situation and car model, you may be able to handle it yourself with minimal cost and effort. Here’s what you need to know. Why Car Keys Are More Complicated Than You Think Gone are the days when a spare key meant heading to your local hardware store and getting a basic metal key cut in minutes. Today’s car keys are advanced devices that often include transponder chips, remote locking systems, and built-in immobilizers. Some even come as proximity fobs that allow push-button starting without ever taking the key out of your pocket. Because of this, replacing a lost or damaged key isn’t just about cutting a new blade—it often involves electronic programming and matching frequencies to your specific vehicle. Dealer, Locksmith, or DIY? Your Replacement Options When it comes to replacing a car key, you typically have three choices: Dealership : Offers official replacements, but often at the highest cost. Auto Locksmith : Generally more affordable and mobile, but availability varies. DIY : Ideal for shell replacements, battery swaps, and some remote keys—if you already have a functioning spare key or understand your model's programming process. If you’ve damaged your key shell or the battery has died, DIY is a surprisingly good option—especially if you’re comfortable working with small components. The Rise of DIY: Save Time, Learn Something, and Avoid Dealer Fees More and more drivers are discovering how easy it can be to fix their own car keys. Whether it’s replacing a worn key case, changing a battery, or even installing electronics into a new shell, DIY key repair is growing in popularity. To support that trend, we’ve created a full library of free video tutorials showing how to disassemble and reassemble key fobs for dozens of car models—from BMW and Audi to Peugeot, Fiat, and Toyota. These easy-to-follow guides show exactly how to change a key battery, switch a shell, or upgrade to a new case in minutes. 👉 Check out the full tutorial playlist on our YouTube channel: Mr-Key DIY Tutorials Step-by-Step: Replacing a Battery or Shell at Home Let’s say your remote still works but the case is cracked or the buttons are worn down. In that case, replacing just the outer shell is often all you need to do. Here’s a quick look at what that might involve: Carefully open the old key shell using a flat screwdriver. Remove the internal electronics and transponder chip. Insert them into your new replacement shell. Reinstall the battery or replace it with a fresh one (typically a CR2032 or CR1620). Snap everything together and test the key. If you already have a functioning key and just want a backup, some car models even allow you to program a new key yourself. Always check your owner’s manual or look up on-board programming methods by vehicle brand. Choosing the Right Key or Shell Not all replacement keys are created equal. Here’s what to consider: Chip Type : Most modern cars use a transponder chip (like ID46, PCF7946, etc.). Make sure your new key has the correct one. Blade Profile : HU83, VA2, TOY43—these are just a few examples. Match your key blade exactly. Frequency : Remote keys operate on specific frequencies (433MHz and 868MHz are most common in Europe). You can find affordable, compatible replacement shells and key fobs at reputable online stores like mr-key.com . When to Call a Pro There are still some situations where professional help is the smarter option: You’ve lost all copies of your key. Your car requires encrypted key coding with dealer-only tools. Your key has a broken or unresponsive transponder chip. In those cases, a locksmith or dealership may be necessary. Don’t Overpay—Just Be Prepared Car key replacement doesn’t have to be expensive, stressful, or time-consuming. In many cases, you can replace the shell, battery, or even the entire fob yourself—especially with a little guidance. Our Mr-Key YouTube channel is here to walk you through it. Whether you’re fixing a key today or preparing for the future, knowing your options puts you in control. And sometimes, the right tutorial is all it takes to save the day (and a lot of money).

What You Need To Know About BMW  Swirl Flaps and How To Solve The Problem With Them

What You Need To Know About BMW  Swirl Flaps and How To Solve The Problem With Them

Swirl flaps are a BMW system that has been introduced to help burn the fuel mixture in the cylinder better due to the fact that diesel engines do not have throttle valves and it is not possible to adjust the air-fuel ratio. A diesel engine without vortex valves operates between a poor and a rich fuel mixture, because the only way to regulate it is through fuel injection. Design of the first generation swirl flaps that are made of made of metal. Unfortunately, swirl flaps are responsible for countless damaged engines and costly repairs due to design errors or metal fatigue. Once damaged, the cylinder sucks them in and causes great damage. This is how damaged valves damage the cylinder. Typical swirl flaps suction damage. The vortex valves are positioned in the inlet and are controlled by vacuum (DDE 4.0) or electrically (DDE5.0 / DDE6.4) by the engine ECU. Effects of malfunctioning valves: Swirl valves are stuck in open position: Deterioration of exhaust gas performance at lower speeds. Swirl valves are stuck in closed position: Approximate power loss of 10% at high engine speeds. How swirl flaps work: Performance characteristics: The vortex valves are in the closed position, at low engine speeds and small amounts of fuel injected (controlled by the ECU card). They open under the following conditions: coolant temperature <14 ° C OR * fuel quantity> 24 mg OR 2. engine speed 2250 rpm OR 3. inlet air temperature <-5 ° C. BMW and Pierburg have decided to produce diesel engines with metal vortex valves. The speed at which the pistons in the diesel engine operate is at least 60 rpm, so a sucked vortex valve will break and cause a number of damages inside the engine. In most cases, one or more pistons are severely damaged, as a bonus you get valves, in some cases a head or turbocharger. And this combination with a BMW engine is like a cumulative jackpot 🙂 In 2004, BMW began work on the problem and improved the design, however, a number of owners reported ongoing problems in this area. The solution to this problem is by removing the vortex valves and plugging, which does not affect the performance of the engine and at the same time, you can safely pass the exhaust test. Engines: M47 (136hp VP44 fuel pump) has no valves. M47N common rail engine (including M47N / M47TU / M47TUD20) (150hp. Face lift model from 2001 -) has valves. M57 engines (M57D) (525d & 187hp. 330d) cars with manual transmission do not have valves, but those with automatic have. M57N engines (M57TUD) (525d & 330d 204hp) have vortex valves. Ruined swirl flapss: The plugs that replace the vortex valves are easy to find on the internet, but you can also find them here on our website. Typical plugs: Disassembly of vortex valves: The vortex valves can be safely dismantled and in most cases if they are removed properly no loss of power is felt. Final list of models for which vortex valves are installed: Engine: M47N/M47TU/M47TUD20 Applications: * 110 kW (148 hp) and 330 N·m (243 lb·ft) o E46 320d 2001-2005 o E83 X3 2.0d (up to end of 2006) Engine: M47TU2D20 The engine was updated again in 2004 as the M47TU2D20. Still at 1995 cc, it produced more power across the range. Applications: * 120 kW (161 hp) and 340 N·m (251 lb·ft) E60/E61 520d E87 120d E90/E91 320d E83 X3 2.0d (end of 2006 onwards) Engine: M57/M57D25 M57D25 was introduced in 2000. Applications: * 166 PS (122 kW; 164 hp) at 4000 rpm, 350 N·m (260 lb·ft) at 2000-2500 rpm with a 4750 rpm redline, models: 2000-2003 E39 525d *Vehicles With Automatic Transmission ONLY* Engine: M57N/M57TU/M57TUD25 M57TUD25 was introduced in 2004. Applications: * 177 PS (130 kW; 175 hp) at 4000 rpm, 400 N·m (300 lb·ft) at 2000-2750 rpm models: E60/E61 525d Engine: M57/M57D30 M57D30, also called M57D29, was introduced in 1998. Applications: * 184 PS (135 kW; 181 hp)@4000, 390 N·m (290 lb·ft)@1750-3200 models: E39 530d *Vehicles With Automatic Transmission ONLY* E46 330d/330xd *Vehicles With Automatic Transmission ONLY* * 184 PS (135 kW; 181 hp)@4000, 410 N·m (300 lb·ft)@2000-3000 models: E38 730d *Vehicles With Automatic Transmission ONLY* E53 X5 3.0d * 193 PS (142 kW; 190 hp)@4000, 410 N·m (300 lb·ft)@1750-3000 models: E38 730d E39 530d Engine: M57N/M57TU/M57TUD30 M57TUD30 was introduced in 2002. It originally produced 160 kW (215 hp) at 4000 rpm and 500 N·m (370 lb·ft) at 2000-2750 rpm, but was tweaked for 150 kW (201 hp) at 4000 rpm and 410 N·m (300 lb·ft) at 1500-3250 rpm for 2003 and again for 200 kW (268 hp) at 4000 rpm and 560 N·m (410 lb·ft) at 2000-2250 rpm in 2004. Applications: * 204 PS (150 kW; 201 hp)@4000, 410 N·m (300 lb·ft)@1500-3250 models: E46 330d/330Cd/330xd E83 X3 3.0d * 218 PS (160 kW; 215 hp)@4000, 500 N·m (370 lb·ft)@2000-2750 models: E53 X5 3.0d E60/E61 530d/530xd E65 730d * 272 PS (200 kW; 268 hp)@4000, 560 N·m (410 lb·ft)@2000-2250 E60/E61 535d * 245 PS (180 kW; 242 hp)@4000, 500 N·m (370 lb·ft)@2000-2250 * 286 PS (210 kW; 282 hp)@4000, 580 N·m (430 lb·ft)@2000-2250 Engine: M57TU2D30 M57TU2D30 was introduced in 2007, making its debut in the facelifted E60 and E61. * M57TU2D30-UL: 197 PS (145 kW; 194 hp) * M57TU2D30-OL: 235 PS (173 kW; 232 hp)@4000, 500 N·m (370 lb·ft)@2000-2750 * M57TU2D30-TOP: 286 PS (210 kW; 282 hp), 580 N·m (430 lb·ft) Applications: * 197 PS (145 kW; 194 hp), 400 N·m (300 lb·ft) models: E90/E91/E92 325d E60/E61 525d/525xd * 231 PS (170 kW; 228 hp)@4000, 500 N·m (370 lb·ft)@2000-2750 models: E65 730d E90/E91 325d E90/E91 330d/330xd * 235 PS (173 kW; 232 hp) models: E60/E61, BMW E70, BMW E71 * 286 PS (210 kW; 282 hp), 580 N·m (430 lb·ft) models: E60/E61 535d E70 X5 3.0sd E71 X6 xDrive35d E83 X3 3.0sd E90/E91 335d The above models are listed for information only if you want to to make sure your engine has valves installed, please contact a competent person. Please note that the information described above is for informational purposes only and does not claim to be reliable. Mr-key.com is not responsible for any repair work you undertake that is related to the topic described in this article.

How to Clean and Maintain Your Car Key Fob Like a Pro

How to Clean and Maintain Your Car Key Fob Like a Pro

Your car key fob is one of the most used items in your daily life. You press it multiple times a day, carry it in your pocket or bag, toss it on desks, and sometimes accidentally drop it on the ground. But how often do you actually clean or check it? Most people only think about their key fob when it stops working. By then, it's often too late. The good news is, with a little attention and regular maintenance, you can keep your car key fob working perfectly for years to come. In this article, you'll learn how to clean and maintain your car key fob like a pro — so you can save money, avoid frustration, and get the best performance out of your key. Why Cleaning and Maintaining Your Key Fob Matters Car key fobs aren’t just simple remotes. They're packed with sensitive electronics, small batteries, and tiny contact points that can easily get damaged by dirt, moisture, or simple neglect. If you never clean or check your key fob, you might start to notice: Unresponsive buttons Reduced signal range Frequent battery issues Complete failure to unlock or start the car Most of these problems are avoidable with basic maintenance . Cleaning your key fob regularly helps keep it functional, protects its electronics, and ensures it lasts longer. It also saves you from spending money on costly repairs or total key replacements. How to Clean Your Car Key Fob: Step-by-Step Guide Step 1: Open the Key Fob Gently Start by carefully opening your key fob. Most models have a small groove or notch where you can insert a flathead screwdriver or a coin to separate the shell. Be gentle — forcing it open can crack the plastic or damage internal clips. If you're unsure, check your car’s manual or look up your key model online to find specific instructions. Step 2: Remove the Battery Once you open the key fob, always remove the battery before cleaning. This protects the electronic circuit from any accidental moisture and prevents short-circuiting. Set the battery aside in a dry, safe place. Step 3: Clean the Exterior Use a soft, dry microfiber cloth to wipe the outside of the key fob shell. For tougher dirt or sticky areas, slightly dampen the cloth with water or isopropyl alcohol (70% or higher). Avoid using harsh cleaning chemicals that could damage the plastic or remove painted symbols. Step 4: Clean the Buttons and Small Gaps Dirt, dust, and pocket debris often collect around the buttons. These particles can block the buttons from making proper contact or cause them to stick. Use a cotton swab or a soft toothbrush to gently clean around the edges and in between the buttons. For tight spaces, a toothpick can help dislodge stubborn dirt. If needed, lightly moisten the cotton swab with alcohol to break down grime. Always dry the key fob thoroughly after cleaning. Step 5: Inspect and Clean the Battery Contacts Battery contacts can become dirty or corroded over time, especially if the battery leaked or moisture got inside. Check the metal contact points carefully. If you see white powder or greenish residue (common signs of corrosion), gently clean them using a cotton swab dipped in isopropyl alcohol. Be extremely careful not to bend or scratch the contacts. If corrosion is too severe, the key fob might need professional repair or a replacement circuit board. Step 6: Replace the Battery if Needed Key fob batteries typically last between 1 to 2 years, but frequent use, weak signals, or exposure to extreme temperatures can shorten battery life. If your battery is old or low, replace it with a new one. Most car key fobs use CR2032 or CR2025 batteries. Always make sure you install the new battery in the correct position, respecting the polarity (+ / -). A fresh battery not only improves response time but also ensures the signal reaches your car reliably. Step 7: Reassemble the Key Fob Once everything is clean and fully dry, carefully snap the key fob back together. Make sure the casing is securely closed and the buttons feel smooth and responsive. Test the key fob to confirm that it works correctly. Pro Tips to Keep Your Car Key Fob in Top Shape A well-maintained key fob can last many years. Here’s how to keep it working perfectly: Keep it Dry: Most key fobs aren’t waterproof. Avoid rain, puddles, wet pockets, or any contact with liquids. Use a Protective Cover: A silicone or rubber key cover adds shock protection, keeps out dirt, and prevents scratches. Avoid Extreme Heat or Cold: Leaving your key fob in direct sunlight or in a freezing car can damage the battery and weaken plastic parts. Change the Battery Regularly: Don’t wait for your key fob to completely stop working. Weak batteries can lead to unreliable signals and unexpected failure. Don’t Drop It: Even though most key fobs can handle light drops, repeated impact can cause internal damage. When to Replace the Key Fob Shell If your key fob shell is cracked, worn, or no longer closes tightly, it’s time to replace it. A damaged shell can let moisture and dirt reach the electronics and cause long-term damage. Replacing the shell is a quick and affordable solution that can extend your key fob’s life significantly. At Mr. Key , we offer high-quality key fob shells, batteries, and repair kits that can help you refresh your key fob and save money compared to dealership prices. Explore our key fob repair kits, protective covers, and replacement batteries now at mr-key.com . Your car key fob may seem like a small detail, but it plays a huge role in your daily life. Without it, you can’t get in or even start your car. The good news is that taking care of your key fob is easy. With regular cleaning, battery checks, and some simple maintenance, you can keep it working reliably for years. And if you need to replace your battery, your key shell, or your entire key fob, Mr. Key is here to help. We provide everything you need to keep your keys in perfect shape, save money, and avoid unnecessary trips to the dealer.

How to Choose the Correct Key for Your Westfalia Towbar

How to Choose the Correct Key for Your Westfalia Towbar

Westfalia towbars are a common choice for many car owners due to their reliability and ease of use. However, because you may use your Westfalia towbar key sporadically throughout the year, it’s not uncommon to misplace it, often at the most inconvenient times—like when you're about to go on vacation. If you've lost your key , you might not know the number of the key you need to order a replacement. Fortunately, there is a way to determine this, depending on whether your towbar lock has a 3-digit or a 5-digit number. Step 1: Check the Number on Your Towbar Lock The first step is to inspect your towbar lock to see if it has a 3-digit or 5-digit number. Here’s what to do next: Sample picture of how 5-digits lock number looks like. If you have a 3-digit number: Unfortunately, the key code remains unknown based on this number alone. We can only manufacture a new key if you have at least one original key and can provide us with the W** or 2W** code from it. If you have a 5-digit number: You're in luck! You can easily determine the correct key code. The key code is based on the last two digits of the 5-digit lock number, prefixed with "2W". Step 2: Calculate Your Key Code If your towbar lock has a 5-digit number, simply ignore the first three digits and use the last two digits. Prepend "2W" to these digits to form the key code. For example, if the code on your lock is 33322 , then your key code is 2W22 . This code will be the number you provide when ordering a replacement key. Even if your 5-digit lock code starts with a different set of three digits, the method remains the same—ignore the first three and focus on the last two digits. For your convenience, we include our key code generator below. What to Do If You’ve Lost All Your Keys If you have lost all your keys and only have the 5-digit number on the lock, you can still determine the correct key using the method described above. Unfortunately, if your lock only has a 3-digit number, the specific key code cannot be determined based on the number alone. Remember, the key code is crucial for obtaining a replacement key. If the towbar was manufactured after 2008, the 5-digit code on the lock cylinder will allow you to identify the correct key. Simply use the last two digits and prefix them with "2W" to get the key code. If you're ever unsure, it's always a good idea to reach out to the manufacturer or a professional who can assist in identifying the correct key. Conclusion Choosing the correct key for your Westfalia towbar is straightforward if you know what to look for. By following these steps, you can quickly determine the correct key code and ensure you're never stuck without access to your towbar when you need it most. Be sure to keep your key code information safe, and consider having a spare key made to avoid future issues. Click Here To Order Your Westfalia Towbar Key >>

Chat with us