Post Name

Unveiling the Anatomy of Your Car

Your car is more than just a mode of transportation—it's a complex machine composed of various parts working in harmony to ensure smooth and safe driving. Understanding these essential car parts not only helps you appreciate your vehicle better but also empowers you to identify issues, perform basic maintenance, and communicate effectively with mechanics. In this guide, we’ll explore the key components that keep your car running and why they’re vital for optimal performance.

1. Engine: The Heart of Your Vehicle

The engine is the powerhouse of your car, converting fuel into energy to propel the vehicle forward. There are various types of engines, including:

  • Internal Combustion Engines (ICE): Common in most vehicles, using gasoline or diesel.
  • Hybrid Engines: Combining a traditional engine with an electric motor for better efficiency.
  • Electric Motors: Found in EVs, powered by rechargeable batteries.

Key components within the engine include pistons, the crankshaft, and the timing belt. Regular maintenance like oil changes and timely inspections are crucial for keeping the engine in good condition.

2. Transmission: Changing Gears Made Easy

The transmission system ensures that power from the engine is transferred to the wheels at the correct speed and torque. There are two main types of transmissions:

  • Manual Transmission: Requires the driver to shift gears manually.
  • Automatic Transmission: Shifts gears automatically, providing greater convenience.

Proper transmission fluid levels are essential for smooth gear transitions and the longevity of the system.

3. Battery: Your Vehicle's Power Source

The car battery supplies the electrical power needed to start the engine and operate various electrical systems, such as lights, wipers, and infotainment. Modern vehicles may also include auxiliary batteries for additional power needs.

Maintenance Tip: Regularly check battery terminals for corrosion and ensure proper voltage levels, especially in extreme weather conditions.

4. Braking System: Your Lifeline on the Road

The braking system ensures the vehicle slows down or stops when needed, making it a critical safety component. Key parts include:

  • Brake Pads and Rotors: Convert kinetic energy into heat, slowing the car down.
  • Brake Fluid: Transfers force from the brake pedal to the braking mechanism.

Regular inspection of the braking system can prevent wear and ensure reliability.

5. Tires and Wheels: Where the Rubber Meets the Road

Tires and wheels are vital for traction, handling, and overall vehicle stability. There are various types of tires designed for specific conditions, such as all-season, winter, and performance tires.

Maintenance Tip: Regularly check tire pressure, alignment, and tread depth to ensure safe driving and optimal fuel efficiency.

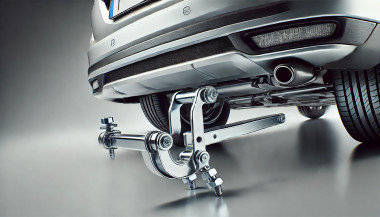
6. Suspension System: Smoothing Out the Ride

The suspension system absorbs shocks from uneven road surfaces, ensuring a smooth and stable ride. Key components include:

  • Shock Absorbers: Reduce impact from road irregularities.
  • Struts and Springs: Provide structural support and maintain balance.

A well-maintained suspension system enhances comfort and handling.

7. Exhaust System: Keeping Emissions in Check

The exhaust system directs harmful gases away from the engine and reduces emissions. Key components include the muffler, catalytic converter, and exhaust pipes.

Environmental Note: A faulty exhaust system can increase emissions and negatively impact air quality. Regular checks are essential for compliance with emission standards.

8. Cooling System: Preventing Overheating

The cooling system regulates the engine's temperature to prevent overheating. It includes components like the radiator, coolant, and thermostat.

Maintenance Tip: Regularly check coolant levels and inspect hoses for leaks to ensure efficient cooling.

9. Fuel System: Delivering Energy to the Engine

The fuel system stores and supplies fuel to the engine for combustion. Key parts include the fuel pump, injectors, and fuel tank.

Efficiency Tip: Clean fuel injectors and replace the fuel filter as needed to maintain optimal fuel efficiency.

10. Electrical System: Powering Your Vehicle's Features

From the headlights to the infotainment system, the electrical system powers numerous features in your car. It includes wiring, alternators, and fuses.

Maintenance Tip: Inspect fuses and ensure the alternator is functioning properly to avoid electrical issues.

 Empowering Yourself Through Knowledge

Understanding the essential parts of your car equips you with the knowledge to maintain your vehicle effectively and address issues proactively. By staying informed, you can extend the life of your car, save on repair costs, and ensure a safer driving experience.

Whether you’re a car enthusiast or a regular driver, knowing your vehicle’s anatomy is the first step toward smarter car ownership.

Related Posts

The Essential Guide to Understanding Detachable Tow Bars

The Essential Guide to Understanding Detachable Tow Bars

Detachable tow bars offer versatility and convenience for car owners who occasionally need to tow. Unlike fixed tow bars, they can be removed when not in use, maintaining your car's aesthetics and avoiding unnecessary bulk. However, understanding how they work, their benefits, and their maintenance requirements is essential to get the most out of your tow bar. Here’s what you need to know. Why Choose a Detachable Tow Bar? A detachable tow bar is an excellent solution if you only tow occasionally or prefer a clean look for your car when the tow bar is not in use. Here are some of its key advantages: Aesthetic Appeal : When removed, the tow bar does not interfere with the car's design. Convenience : Detachable tow bars are easy to attach and remove without tools, making them user-friendly. Versatility : They allow you to tow various loads, from trailers to bike racks, without permanently altering your car's appearance. Legal Compliance : In some regions, a visible, unused tow bar can lead to fines. A detachable option helps you avoid this. Types of Detachable Tow Bars Detachable tow bars come in different types, each suited to specific needs and preferences: Vertical Detachable Tow Bars Design : These tow bars fit seamlessly into your car’s underside, leaving no visible parts when removed. Best For : Those prioritizing aesthetics and a clean finish. Horizontal Detachable Tow Bars Design : These are partially visible but still maintain a low profile. Best For : Easier access and handling without compromising too much on appearance. Swan Neck Tow Bars Design : These have a slim, curved neck, making them stylish and less obtrusive. Best For : European-style vehicles and those who need a compact towing solution. How to Install and Use a Detachable Tow Bar Installing and using a detachable tow bar is straightforward, but following the proper steps ensures safety and efficiency: Read the Manual : Always start by reviewing the manufacturer’s instructions specific to your tow bar. Clean the Mounting Area : Dirt or debris can interfere with secure attachment. Secure the Tow Bar : Align the tow bar with the mounting bracket and ensure it clicks into place. Test Stability : Gently pull the tow bar to confirm it’s securely attached. Remove When Not in Use : Detach the tow bar and store it in a clean, dry place to prevent wear. Common Issues and Troubleshooting While detachable tow bars are convenient, they can occasionally present challenges. Here’s how to address some common problems: Stuck Tow Bar : If the tow bar is difficult to remove, check for rust or dirt in the mounting area. Use a lubricant to loosen it, but avoid using excessive force. Loose Connection : Ensure the tow bar clicks firmly into place during installation. A loose tow bar can be dangerous. Key Issues : If the locking mechanism doesn’t work, inspect the key and lock for dirt or damage. Sometimes, a replacement key may be necessary. Tips for Maintaining Your Detachable Tow Bar Proper maintenance can extend the life of your detachable tow bar and ensure its performance: Regular Cleaning : Clean the tow bar and mounting area to prevent rust and buildup. Lubricate Moving Parts : Apply a small amount of lubricant to the locking mechanism and other moving parts for smooth operation. Inspect for Damage : Check for signs of wear, cracks, or rust, especially if you tow frequently. Store Properly : When not in use, store the tow bar in a protective case or bag in a dry location. Safety Considerations When Towing Towing comes with responsibility. Here are some safety tips to keep in mind: Check Weight Limits : Never exceed your car or tow bar’s towing capacity. Inspect Connections : Ensure the tow bar and trailer hitch are secure before every trip. Test Lights : Verify that your trailer’s brake and signal lights are functioning properly. Drive Cautiously : Towing affects handling and braking. Allow extra time for stopping and maneuvering. Benefits of Investing in a Detachable Tow Bar For many drivers, a detachable tow bar offers the perfect balance of functionality and style. Whether you’re towing for leisure, work, or practicality, this option ensures: A clean car appearance when the tow bar is removed. Versatile use for different towing needs. Easy storage and maintenance. Detachable tow bars are a versatile and practical choice for occasional towing. With proper installation, regular maintenance, and a focus on safety, you can enjoy their convenience without compromising your car's aesthetics. Whether you're hauling a trailer or attaching a bike rack, a detachable tow bar offers flexibility and ease for all your towing needs. What Will You Receive When Your Order is Complete? When you place an order, you’ll receive two perfectly cut keys for Witter, GWD, TOW Trust, or Renz towbars, tailored to your original key code. These keys are compatible with lock codes within the ranges TR01-TR10 or 32001-32200. Simply select your code from the dropdown menu (e.g., TR03), and we’ll take care of the rest. Order Your Keys Today!

How to Upgrade Your Car Key: A Step-by-Step Guide

How to Upgrade Your Car Key: A Step-by-Step Guide

Upgrading your car key can significantly improve your vehicle’s security and make your daily routine more convenient. Whether you’re upgrading from a basic key to a remote key or stepping up to a smart key, this guide will take you through the entire process, step by step, ensuring a smooth transition. Understanding Your Key Type Before you start the upgrade process, it’s important to know which type of key you currently have. Here are the most common key types: Traditional Metal Keys : These are basic, mechanical keys, common in older vehicles. They don’t have any electronic components. Transponder Keys : These have an electronic chip inside the key head that communicates with the vehicle’s computer system for added security. Remote Keys : These keys have buttons to lock/unlock the doors remotely and usually have a physical blade as a backup. Understanding your current key type will help guide your decision on the best upgrade path. Choosing the Right Upgrade Once you know what type of key you have, you need to decide what features you want in your upgraded key. Some options to consider are: Remote Locking : Allows you to lock/unlock the doors from a distance. Keyless Entry : Lets you unlock the car without taking the key out of your pocket. Smart Key : Offers advanced functions such as proximity unlocking, push-button start, and remote engine start. Take some time to research the options available for your specific car model. Many car manufacturers offer compatible upgrades for different key types, so it’s important to consult your dealership or a trusted locksmith for recommendations. Gathering What You’ll Need Before starting the upgrade process, make sure you have the following materials: The New Key : This could be a transponder key, remote key, or smart key. Your Original Key : You’ll need this as a reference throughout the process. Key Programming Device : Some keys require a special device to pair the key with your car. Car Manual or Programming Guide : It’s always a good idea to have your car’s manual handy for specific instructions. Having everything ready will make the process much smoother. Step-by-Step Upgrade Process Purchase the New Key Start by purchasing your new key. You can buy it from your car’s dealership, a certified locksmith, or a trusted online retailer. Make sure that the key is compatible with your vehicle’s make and model. Transfer Electronics (if necessary) If your new key is just a shell, you will need to transfer the internal components from your old key. This includes the transponder chip and, if applicable, the key blade. Be careful when transferring the electronics to avoid any damage. Program the Key Programming the new key is crucial for it to work with your vehicle. Here’s a general guide: Insert the original key into the ignition and turn it to the ON position. Quickly remove the original key and insert the new key. Turn the new key to the ON position and wait for the security light to turn off. This might take a few minutes. Test the New Key After programming, it’s important to test the new key to ensure everything works properly. Check the following functions: Locking and unlocking the doors Starting the engine Any additional functions like remote trunk opening or proximity unlocking Troubleshooting Common Issues If your new key isn’t working as expected, don’t worry! Here are some common problems and their solutions: Key Not Recognized : Check if the transponder chip is properly placed in the key. Key Doesn’t Start the Car : Double-check the programming steps to ensure everything was done correctly. Buttons Don’t Work : Verify that the battery in the new key is properly installed and functional. If the problem persists, it’s best to consult a professional locksmith or visit your dealership for further assistance. Upgrading your car key is an excellent way to improve both the security and convenience of your vehicle. By following these steps, you’ll be able to transition smoothly to your new key. If you run into any issues, don’t hesitate to reach out to a professional locksmith who can help you along the way. Enjoy the benefits of your new car key and the added peace of mind that comes with enhanced security.

How to Program a Car Key: A Step-by-Step Guide

How to Program a Car Key: A Step-by-Step Guide

Lost Your Car Key Programming? Here's What to Do Have you ever lost your car keys or found yourself with a spare key that doesn’t start your vehicle? While the process of programming a car key might seem intimidating, it’s often simpler than you’d expect. In many cases, car owners can program keys themselves without needing a visit to a dealership. This guide walks you through the essentials of car key programming, helping you save time, effort, and potentially a significant amount of money. Understanding Car Key Programming: The Basics Car key programming is the process of syncing a key with a car's internal computer so it can communicate securely. Modern vehicles use transponder keys or smart keys equipped with chips that emit a unique signal. Without proper programming, these keys won’t function, even if they fit perfectly into the ignition. While older mechanical keys didn’t require programming, today’s advanced systems add a layer of security, reducing the risk of car theft. However, this added sophistication means that replacing or reprogramming a key is no longer as simple as cutting a piece of metal. Quick Tip: Check your vehicle’s owner manual to see if programming your car key is a DIY-friendly process, as some models allow self-programming, while others require professional tools. Step-by-Step Guide to Programming a Car Key Before starting, ensure you have all necessary tools and information: The vehicle’s owner manual. All keys that need programming, including the functional ones. Step 1: Access Programming Mode Start by sitting in the driver’s seat with all the doors closed. Insert the already functional key into the ignition and turn it to the “on” position (do not start the engine). Some vehicles require you to cycle the key between “on” and “off” positions a specific number of times to enter programming mode. Step 2: Add the New Key Once in programming mode, remove the functional key and quickly insert the new key into the ignition. Turn it to the “on” position. The vehicle’s security light may flash to indicate the key has been successfully programmed. Step 3: Test the Key After programming, remove the new key and test it to ensure it can start the car and unlock the doors. Note: Each car manufacturer has unique programming steps. Be sure to consult your owner’s manual or the manufacturer’s website for specific instructions. When Professional Help Is Needed While many vehicles allow for DIY key programming, others require specialized equipment or software that only dealerships or locksmiths can access. This is particularly true for luxury or high-end cars with advanced encryption and security features. If your DIY efforts fail, it’s best to seek help from a certified professional. Visiting a dealership is a reliable, albeit more expensive, option. Alternatively, professional locksmiths often provide programming services at a lower cost, making them a practical choice for many drivers. Costs and Considerations The cost of programming a car key varies significantly based on the vehicle’s make and model. For basic models, self-programming might cost nothing if you already have a functional key. However, professional programming can range from $50 to $300 or more, especially for smart keys or proximity fobs. To minimize costs: Have a spare key : Always keep a functional spare to simplify programming if a replacement is needed. Research costs : Call local locksmiths or dealerships to compare pricing. Empower Yourself with Knowledge Programming a car key doesn’t have to be a daunting task. With the right tools and information, many car owners can handle the process themselves, saving time and money. However, it’s essential to recognize when professional assistance is necessary, particularly for complex key systems. By understanding the basics of car key programming and following a step-by-step approach, you can ensure your vehicle remains secure and functional. So, whether it’s a spare key or a replacement, you now have the confidence to tackle the task or know where to turn for help.

Everything You Should Know About Key Fob Battery Life, Leaks, and Temperature Effects

Everything You Should Know About Key Fob Battery Life, Leaks, and Temperature Effects

The convenience of a modern car key fob is hard to overstate — it unlocks doors, starts engines, and sometimes even controls your car remotely. But at the heart of all these features lies a small coin battery, usually a CR2032, that powers your fob’s every function. Like all batteries, it doesn’t last forever, and certain conditions can shorten its lifespan or cause unexpected problems like leaks. In this guide, we’ll explore how long your key fob battery should last, what causes leaks, and how temperature plays a critical role in battery performance. How Long Do Key Fob Batteries Typically Last? Most key fobs use lithium coin batteries like the CR2032. These are designed for small electronic devices and typically last between two to four years, depending on how often you use your fob and how close it stays to your vehicle. Constant use — such as frequent locking and unlocking — can deplete the battery faster. If your smart key remains within range of your car at all times, it may draw more power passively. Another key factor is the quality of the battery. High-grade batteries like those from Panasonic usually last longer and offer more consistent voltage. You’ll know it’s time for a replacement when the fob works only at short distances, you need to press buttons more than once, or the indicator light becomes dim or fails to light up at all. Catching these early signs is important, as a simple battery replacement can prevent unexpected lockouts or costly service calls. Battery Leaks in Key Fobs: Risks and Prevention Though not as common, a leaking battery can be far more destructive than a dead one. Leakage can corrode the internal components of your key fob, sometimes making it unusable. Signs of a leak include white residue inside the battery compartment, visible corrosion on the metal contacts, or a strange smell or dampness near the battery slot. Leaks often occur in batteries that are expired, low-quality, or exposed to extreme heat or moisture. To reduce the risk of leaks, it's a good idea to replace your key fob battery every two years, regardless of performance. Always use reputable brands such as Panasonic CR2032 , and store spare batteries in a cool, dry place. Also avoid mixing new and old batteries, even temporarily. If you notice any signs of leakage, remove the battery promptly and clean the compartment using a cotton swab and isopropyl alcohol. If the corrosion is severe, replacing the key fob casing or consulting a specialist may be necessary. How Temperature Affects Your Key Fob Battery Life Ambient temperature can have a major effect on battery efficiency. In cold conditions, the chemical reactions within a lithium coin battery slow down, resulting in reduced voltage and sluggish or inconsistent performance. A key fob left overnight in freezing temperatures might stop working until it warms up. On the flip side, high temperatures accelerate battery depletion. Leaving your key fob inside a hot car or near a heat source can shorten its lifespan and, in rare cases, even cause the battery to leak. Heat can also warp internal components, especially in compact spaces like key fobs. To protect your battery, avoid exposing your key fob to direct sunlight or intense heat for long periods. Don’t store it in jackets or compartments that get hot in summer, and try to keep a spare battery handy if you live in an area with extreme seasonal swings. Choosing temperature-resistant batteries — like those from Panasonic — adds another layer of protection. Key fob batteries are small but essential parts of modern car ownership. Understanding their typical lifespan, recognizing early signs of failure or leakage, and knowing how temperature affects their performance can help you avoid unpleasant surprises. With a little foresight, you can keep your key fob working smoothly for years. Replace the battery every two to three years, choose high-quality brands, and take precautions during temperature extremes. A few minutes of care now can save you from frustration later.

Chat with us