Post Name

Car remotes have become an essential part of modern vehicle ownership, offering convenience and added security. However, when they stop working, it can lead to frustration and delays. If you’ve ever faced a malfunctioning car remote, don’t worry—you’re not alone. Here’s a guide to help you understand the common reasons why your car remote might fail and how you can fix the issue quickly and affordably.

1. Dead Battery: The Usual Suspect

One of the most common reasons for a non-functional car remote is a dead battery. Over time, the small coin batteries in your remote lose their charge, making the remote unusable.

  • Signs of a Dead Battery: Reduced range, inconsistent functionality, or complete failure to respond.
  • How to Fix It: Replace the battery with a compatible CR-type coin battery. Check your car manual or the remote’s casing for the correct battery type.
  • Pro Tip: Always keep a spare battery in your glove compartment to avoid getting stranded.

2. Signal Interference: The Invisible Barrier

Signal interference can block communication between your remote and your car. This can happen in areas with high electromagnetic activity or if the remote’s signal is weakened.

  • Common Causes: Proximity to cell towers, Wi-Fi routers, or even other key fobs.
  • How to Resolve It:
    • Move closer to your car and try again.
    • Change your location if you’re in a crowded parking area.
    • Keep your remote away from other electronic devices that might cause interference.
  • Prevention Tip: Avoid storing your car remote near electronics when not in use.

3. Remote Needs Reprogramming

Sometimes, a car remote loses its programming, which is essential for communicating with your car. This can happen after battery replacement, electrical system resets, or software glitches.

  • Signs Your Remote Needs Reprogramming: The buttons don’t respond, or the remote only works intermittently.
  • What You Can Do:
    • Check your car manual for DIY reprogramming instructions.
    • If DIY methods fail, consult a professional locksmith or your car dealer for assistance.
  • Pro Tip: Always reprogram your remote immediately after replacing its battery to avoid compatibility issues.

4. Physical Damage: More Than Just Wear and Tear

Daily use, accidental drops, or exposure to moisture can damage your car remote, leading to malfunction. The internal components, such as the circuit board, are particularly sensitive.

  • Signs of Damage: Cracks on the casing, loose buttons, or water ingress.
  • How to Address It:
    • For minor issues, replace the remote casing or repair loose buttons.
    • If the circuit board is damaged, you’ll need a replacement remote.
  • Preventative Measures:
    • Use a protective key cover to shield your remote from damage.
    • Keep your remote away from water and extreme temperatures.

5. Faulty Car Receiver: The Problem Isn’t Always the Remote

In some cases, the issue lies with your car’s receiver rather than the remote. If the receiver is damaged or malfunctioning, it won’t recognize signals from the remote.

  • How to Diagnose:
    • If multiple remotes fail to work with the same car, the receiver might be the issue.
    • Test your remote on a similar vehicle, if possible, to rule out the remote as the problem.
  • How to Fix It: Consult a professional mechanic to inspect and repair the car’s receiver system.

General Tips to Keep Your Car Remote Functional

Prevention is better than cure, especially when it comes to car remotes. Here are some tips to avoid future issues:

  • Regular Maintenance: Inspect your remote periodically for wear and tear.
  • Store It Safely: Keep your remote in a safe, dry place to avoid accidental damage.
  • Backup Plan: Always have a spare key or remote handy for emergencies.
  • Invest in a Tracker: Attach a Bluetooth tracker to your remote for easy location if it gets misplaced.

When to Seek Professional Help

While many car remote issues can be resolved with DIY methods, some problems require professional assistance. If your remote still doesn’t work after troubleshooting, consult a locksmith or an automotive specialist. They can help with repairs, replacements, and reprogramming at an affordable cost.

Don’t Let a Faulty Remote Slow You Down

A malfunctioning car remote can be a hassle, but most issues are fixable with a little know-how. Whether it’s a dead battery, signal interference, or physical damage, understanding the root cause will help you resolve the problem efficiently. With proper care and maintenance, your car remote will continue to offer the convenience and security you rely on every day.

Related Posts

Programming Your Car’s Keyless Remote: A Simple Guide for Every Car Owner

Programming Your Car’s Keyless Remote: A Simple Guide for Every Car Owner

When it comes to convenience, car keyless remotes have revolutionized the way we interact with our vehicles. No more fumbling with traditional keys or worrying about locking yourself out. With just a push of a button, you can lock, unlock, and even start your vehicle. But what happens when your keyless remote stops working, or when you need to program a new one? Here’s a simple guide to help you program your car's keyless remote, regardless of your vehicle's make or model. Understanding Keyless Remotes Before jumping into the programming process, it’s important to understand what a keyless remote is and how it works. Essentially, a keyless remote allows you to interact with your vehicle without needing to physically insert a key. Instead of using a traditional metal key, your car’s electronic system communicates wirelessly with the remote, allowing you to lock, unlock, and sometimes even start your vehicle, all with the push of a button. These remotes typically use a radio frequency to communicate with your car, sending a signal that’s encrypted for security. Most modern cars use transponder technology, which makes the system more secure and resistant to hacking or copying. This means that the remote must be properly programmed to your vehicle’s system to function correctly. When Do You Need to Program a Keyless Remote? There are several situations in which you might need to program your keyless remote: Replacing a Lost or Damaged Remote : If you’ve lost your keyless remote or it’s no longer functioning properly, you’ll need to get a replacement. This may require programming the new remote to sync with your vehicle. Adding a New Remote : If you’ve bought an additional keyless remote for your car (for a spouse, child, or other family member), you’ll need to program it so that it works with your vehicle. Battery Replacement : Sometimes, replacing the battery in your remote can cause the programming to reset, meaning you’ll need to reprogram the remote for it to work again. Changing or Resetting Vehicle Settings : Occasionally, vehicle settings or remotes can be reset or reprogrammed as part of regular maintenance, requiring you to program new or additional remotes. How to Program Your Car’s Keyless Remote Programming a keyless remote is easier than you might think, and in most cases, it can be done by following a few simple steps. The process varies slightly depending on the make and model of your car, but here’s a general overview of the steps involved: Get Your New or Replacement Remote : Ensure that your remote is compatible with your car’s system. If you're not sure, you can check with your car's manufacturer or an authorized dealership. Some remotes require specific codes to be programmed. Sit Inside Your Vehicle : For safety and security reasons, most cars require you to be inside the vehicle while programming the remote. Insert the Key in the Ignition : Insert the key into the ignition and turn it to the "ON" position without starting the engine. For cars with push-to-start systems, you may need to press the start button without pressing the brake pedal. Activate the Programming Mode : Depending on your car’s system, you’ll need to follow a sequence of steps to enter programming mode. This could involve turning the key on and off several times, or pressing certain buttons in a specific order. Refer to your vehicle’s manual for the exact steps, as the process can differ from one model to another. Program the Remote : Once your car is in programming mode, you’ll need to press the button on your keyless remote that you want to program. Usually, you’ll hear a chime or see the lights flash, indicating that the remote has been successfully programmed. Some cars may require you to press the button several times to ensure proper synchronization. Test the Remote : After programming, test the remote to make sure it works properly. Try locking and unlocking the doors or starting the engine. If everything works as expected, you’re done! Exit Programming Mode : To finish the process, simply turn off the ignition and remove the key. This should exit programming mode. If you have additional remotes to program, repeat the steps above for each one. What to Do if Programming Doesn’t Work While programming a keyless remote is usually a straightforward process, there are instances where things don’t go as planned. If your remote isn’t syncing with your car after following the steps, here are a few troubleshooting tips: Check the Battery : If the remote’s battery is dead or weak, it won’t transmit the signal to your car. Replace the battery and try programming again. Verify the Compatibility : Make sure that the remote is compatible with your vehicle’s make, model, and year. Some vehicles require special remotes that can only be programmed by the manufacturer or an authorized locksmith. Reset Your Vehicle’s System : In some cases, you might need to reset the car’s system to clear previous programming attempts. Check your owner’s manual or consult a professional for assistance. Consult a Professional : If you continue to have issues, it might be time to visit a dealership or a certified locksmith. These professionals have the tools and experience to program the remote correctly and ensure everything works seamlessly. Why Programming Your Keyless Remote Is Important Programming your keyless remote is a simple but important task that helps ensure your car’s security and convenience. By understanding how the process works and what to do if things go wrong, you’ll be able to troubleshoot and solve any issues quickly. Whether you’re replacing a lost remote or adding a new one to your collection, knowing how to program your remote saves time and money compared to visiting a dealership or locksmith. With the increased reliance on keyless remotes for unlocking and starting vehicles, it’s essential for every car owner to be familiar with this process. By keeping your remote in good working condition and knowing how to program it when necessary, you’ll enjoy a smoother, more efficient experience with your vehicle.

The Secret to Smooth Locks: How (and Why) to Lubricate Your Locks Like a Pro

The Secret to Smooth Locks: How (and Why) to Lubricate Your Locks Like a Pro

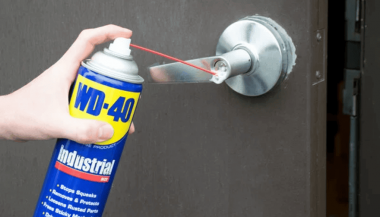
Regular lock maintenance is essential to prevent key jamming or lock failure. Proper lubrication reduces wear and tear, ensures smooth operation, and extends the lifespan of your locks. A well-lubricated lock decreases the risk of your key getting stuck or breaking inside the lock—an inconvenient and costly problem. At MR-KEY , we understand the importance of well-maintained locks and want to help you keep yours in top condition. How Often Should You Lubricate Your Locks? For most locks, lubricating them every three to six months is sufficient. However, locks exposed to extreme weather conditions—such as those on towbars, roof racks, or outdoor gates—require more frequent maintenance. Rain, dust, and freezing temperatures can cause internal components to stick, making it difficult to insert or turn the key. If you notice resistance when using a lock, it’s time for lubrication. What Lubricant Should You Use for Locks? Choosing the right lubricant is crucial for long-term lock performance. Here are the best options: • Teflon-based (PTFE) spray – Forms a protective film inside the lock, reducing friction and repelling dust buildup. • Dry silicone spray – Excellent for outdoor locks as it resists moisture without attracting dirt. • WD-40 Specialist Dry PTFE or White Lithium Grease – Unlike regular WD-40, these provide long-lasting lubrication and protection against corrosion. • Graphite powder – A great choice for older locks but should not be used if there’s oil residue inside the lock. While WD-40 Multi-Use is a quick fix for stuck locks, it is primarily a cleaner rather than a long-term lubricant. If used, follow up with a dry lubricant to prevent dirt accumulation inside the lock. How to Lubricate a Lock If your lock is functioning properly but feels slightly stiff, follow these steps: 1. Clean the Lock – Insert and remove the key a few times to dislodge debris, wiping it clean each time. 2. Apply the Lubricant – Insert the spray straw into the keyhole and apply two short bursts of lubricant. 3. Work the Lock – Insert and turn the key multiple times to distribute the lubricant inside. 4. Wipe Excess Lubricant – Remove any residue from the key and lock exterior to prevent dirt buildup. For graphite powder , follow the manufacturer’s specific instructions, as overapplication can lead to clumping inside the lock. Special Care for Towbar and Roof Rack Locks Locks on towbars and roof racks are exposed to harsher conditions than typical door locks. To keep them in good shape: • Regularly inspect them for stiffness or corrosion. • Apply dry silicone spray or PTFE lubricant for lasting protection. • If the lock is exposed to frequent moisture, white lithium grease offers superior water resistance. Lock It in: The Key to Long-Lasting Security Regular lock maintenance is a small effort that prevents big problems. By keeping your locks clean and properly lubricated—especially those exposed to the elements—you can avoid costly repairs and ensure they function smoothly for years. For high-quality lock maintenance products, visit MR-KEY and keep your locks in perfect working condition. A little maintenance goes a long way in ensuring security and peace of mind!

5 Reasons Why Your Car Remote Isn’t Working and How to Fix It

5 Reasons Why Your Car Remote Isn’t Working and How to Fix It

In an age where convenience is king, keyless entry systems have revolutionized how we interact with our vehicles. Gone are the days of fumbling for physical keys—today’s drivers rely heavily on the sleek, compact functionality of car remotes. However, what happens when this modern convenience fails you? Few things are more frustrating than standing beside your car, repeatedly pressing your remote, only to be met with silence. Understanding why your car remote isn’t working can save you from unnecessary panic, costly repairs, and inconvenient lockouts. This comprehensive guide explores the five most common reasons your remote may malfunction and offers in-depth, actionable solutions to get you back on the road quickly. 1. Battery Depletion: The Silent Saboteur The number one reason for car remote failure is, unsurprisingly, a dead or depleted battery. Though seemingly small, the battery inside your remote plays a crucial role in its operation. Most key fobs use lithium coin batteries (commonly CR2025 or CR2032), known for their durability and longevity. But even these reliable power sources don’t last forever. Factors contributing to faster battery depletion include: Frequent use (especially for remote start and lock/unlock functions) Extreme temperature exposure (both heat and cold reduce battery life) Long periods of inactivity (leading to gradual discharge) Solution: Replacing your key fob battery is a simple, cost-effective fix. Always consult your vehicle’s manual to identify the correct battery type. When replacing, ensure the new battery is seated correctly to avoid poor contact. Proactively changing the battery every 1-2 years, even before it’s fully drained, can prevent sudden failures. 2. Signal Interference: The Invisible Obstacle Key fobs communicate with your vehicle via radio frequencies. However, various external factors can interfere with this communication. Living in urban environments, parking in underground garages, or being near large electronic devices (such as cell towers, Wi-Fi routers, or even other vehicles) can disrupt the signal between your remote and car. Solution: If you suspect signal interference: Move closer to your vehicle or try unlocking it from a different angle. Step away from potential sources of interference like electronic devices or heavy machinery. Hold the key fob higher or away from your body to improve signal transmission. While occasional interference is common, if the problem persists across multiple locations, consider resetting or reprogramming your fob. 3. Desynchronization: Losing Connection Sometimes, your key fob may lose synchronization with your vehicle’s receiver—especially after events like a battery change or extended periods of non-use. When this happens, the fob and vehicle are essentially "speaking different languages," resulting in non-responsiveness. Solution: Check your vehicle's manual, as many manufacturers provide step-by-step instructions to manually re-sync the fob. Typically, this involves a sequence like inserting and turning the ignition key, pressing specific buttons, or opening and closing the doors in a set pattern. If manual reprogramming fails, you may need assistance from a dealership or certified locksmith equipped with the necessary diagnostic tools. 4. Physical Damage: The Wear and Tear Factor Remote key fobs, despite their solid appearance, are not invincible. Everyday handling—dropping the remote, spilling liquids, or even rough storage—can cause internal components to malfunction. Moisture exposure, in particular, is a key offender, leading to corrosion or short-circuiting of the circuitry inside. Solution: Inspect your remote regularly for: Visible cracks, chips, or signs of wear Sticky buttons or unresponsive keys Water damage indicators If damage is evident, replacing the remote may be your best bet. For minor issues, cleaning the interior components (after carefully opening the casing) with a soft cloth and isopropyl alcohol can sometimes restore functionality. Consider investing in a protective cover to prevent future damage. 5. Vehicle Receiver Issues: The Hidden Problem While the key fob often gets the blame, sometimes the issue lies within your vehicle’s receiver system. If the receiver—which detects and processes the signal from your remote—is malfunctioning, your remote will appear useless regardless of its condition. Solution: One telltale sign of a faulty receiver is if multiple remotes fail to operate the car. In this case, the problem is likely internal. Diagnosing and fixing receiver issues typically requires professional assistance, either from a dealership or an experienced automotive technician equipped with specialized diagnostic tools. Global Context: Keyless Challenges Worldwide The rise of keyless systems isn't limited to one region—it’s a global phenomenon. However, as technology advances, so do the challenges. For instance, key signal cloning and relay attacks have become prevalent, particularly in Europe and North America, prompting manufacturers to enhance security measures continually. Understanding the basics of how your key fob works and its vulnerabilities can help protect against both everyday failures and more sophisticated threats. Stay Ahead of the Problem Modern car remotes offer unmatched convenience, but when they fail, the disruption can be significant. Whether it’s a dead battery, signal interference, synchronization glitch, physical damage, or vehicle receiver issue, knowing how to identify and fix the problem puts you in control. Take proactive steps—replace batteries regularly, handle your remote with care, and familiarize yourself with your vehicle’s reprogramming process. A small investment of time today could save you from major headaches tomorrow. Stay informed. Stay prepared. And keep your car remote working seamlessly, wherever the road takes you.

What You Need To Know About BMW  Swirl Flaps and How To Solve The Problem With Them

What You Need To Know About BMW Swirl Flaps and How To Solve The Problem With Them

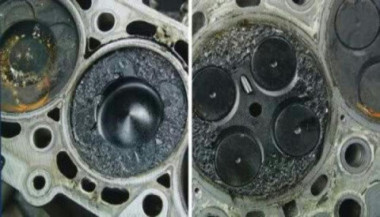
Swirl flaps are a BMW system that has been introduced to help burn the fuel mixture in the cylinder better due to the fact that diesel engines do not have throttle valves and it is not possible to adjust the air-fuel ratio. A diesel engine without vortex valves operates between a poor and a rich fuel mixture, because the only way to regulate it is through fuel injection. Design of the first generation swirl flaps that are made of made of metal. Unfortunately, swirl flaps are responsible for countless damaged engines and costly repairs due to design errors or metal fatigue. Once damaged, the cylinder sucks them in and causes great damage. This is how damaged valves damage the cylinder. Typical swirl flaps suction damage. The vortex valves are positioned in the inlet and are controlled by vacuum (DDE 4.0) or electrically (DDE5.0 / DDE6.4) by the engine ECU. Effects of malfunctioning valves: Swirl valves are stuck in open position: Deterioration of exhaust gas performance at lower speeds. Swirl valves are stuck in closed position: Approximate power loss of 10% at high engine speeds. How swirl flaps work: Performance characteristics: The vortex valves are in the closed position, at low engine speeds and small amounts of fuel injected (controlled by the ECU card). They open under the following conditions: coolant temperature <14 ° C OR * fuel quantity> 24 mg OR engine speed 2250 rpm OR inlet air temperature <-5 ° C BMW and Pierburg have decided to produce diesel engines with metal vortex valves. The speed at which the pistons in the diesel engine operate is at least 60 rpm, so a sucked vortex valve will break and cause a number of damages inside the engine. In most cases, one or more pistons are severely damaged, as a bonus you get valves, in some cases a head or turbocharger. And this combination with a BMW engine is like a cumulative jackpot 🙂 In 2004, BMW began work on the problem and improved the design, however, a number of owners reported ongoing problems in this area. The solution to this problem is by removing the vortex valves and plugging, which does not affect the performance of the engine and at the same time, you can safely pass the exhaust test. Engines: M47 (136hp VP44 fuel pump) has no valves. M47N common rail engine (including M47N / M47TU / M47TUD20) (150hp. Face lift model from 2001 -) has valves. M57 engines (M57D) (525d & 187hp. 330d) cars with manual transmission do not have valves, but those with automatic have. M57N engines (M57TUD) (525d & 330d 204hp) have vortex valves. Ruined swirl flaps: The plugs that replace the vortex valves are easy to find on the internet, but you can also find them here on our website. Typical plugs: Disassembly of vortex valves: The vortex valves can be safely dismantled and in most cases if they are removed properly no loss of power is felt. Final list of models for which vortex valves are installed: Engine: M47N/M47TU/M47TUD20 Applications: * 110 kW (148 hp) and 330 N·m (243 lb·ft) o E46 320d 2001-2005 o E83 X3 2.0d (up to end of 2006) Engine: M47TU2D20 The engine was updated again in 2004 as the M47TU2D20. Still at 1995 cc, it produced more power across the range. Applications: * 120 kW (161 hp) and 340 N·m (251 lb·ft) E60/E61 520d E87 120d E90/E91 320d E83 X3 2.0d (end of 2006 onwards) Engine: M57/M57D25 M57D25 was introduced in 2000. Applications: * 166 PS (122 kW; 164 hp) at 4000 rpm, 350 N·m (260 lb·ft) at 2000-2500 rpm with a 4750 rpm redline, models: 2000-2003 E39 525d *Vehicles With Automatic Transmission ONLY* Engine: M57N/M57TU/M57TUD25 M57TUD25 was introduced in 2004. Applications: * 177 PS (130 kW; 175 hp) at 4000 rpm, 400 N·m (300 lb·ft) at 2000-2750 rpm models: E60/E61 525d Engine: M57/M57D30 M57D30, also called M57D29, was introduced in 1998. Applications: * 184 PS (135 kW; 181 hp)@4000, 390 N·m (290 lb·ft)@1750-3200 models: E39 530d *Vehicles With Automatic Transmission ONLY* E46 330d/330xd *Vehicles With Automatic Transmission ONLY* * 184 PS (135 kW; 181 hp)@4000, 410 N·m (300 lb·ft)@2000-3000 models: E38 730d *Vehicles With Automatic Transmission ONLY* E53 X5 3.0d * 193 PS (142 kW; 190 hp)@4000, 410 N·m (300 lb·ft)@1750-3000 models: E38 730d E39 530d Engine: M57N/M57TU/M57TUD30 M57TUD30 was introduced in 2002. It originally produced 160 kW (215 hp) at 4000 rpm and 500 N·m (370 lb·ft) at 2000-2750 rpm, but was tweaked for 150 kW (201 hp) at 4000 rpm and 410 N·m (300 lb·ft) at 1500-3250 rpm for 2003 and again for 200 kW (268 hp) at 4000 rpm and 560 N·m (410 lb·ft) at 2000-2250 rpm in 2004. Applications: * 204 PS (150 kW; 201 hp)@4000, 410 N·m (300 lb·ft)@1500-3250 models: E46 330d/330Cd/330xd E83 X3 3.0d * 218 PS (160 kW; 215 hp)@4000, 500 N·m (370 lb·ft)@2000-2750 models: E53 X5 3.0d E60/E61 530d/530xd E65 730d * 272 PS (200 kW; 268 hp)@4000, 560 N·m (410 lb·ft)@2000-2250 E60/E61 535d * 245 PS (180 kW; 242 hp)@4000, 500 N·m (370 lb·ft)@2000-2250 * 286 PS (210 kW; 282 hp)@4000, 580 N·m (430 lb·ft)@2000-2250 Engine: M57TU2D30 M57TU2D30 was introduced in 2007, making its debut in the facelifted E60 and E61. * M57TU2D30-UL: 197 PS (145 kW; 194 hp) * M57TU2D30-OL: 235 PS (173 kW; 232 hp)@4000, 500 N·m (370 lb·ft)@2000-2750 * M57TU2D30-TOP: 286 PS (210 kW; 282 hp), 580 N·m (430 lb·ft) Applications: * 197 PS (145 kW; 194 hp), 400 N·m (300 lb·ft) models: E90/E91/E92 325d E60/E61 525d/525xd * 231 PS (170 kW; 228 hp)@4000, 500 N·m (370 lb·ft)@2000-2750 models: E65 730d E90/E91 325d E90/E91 330d/330xd * 235 PS (173 kW; 232 hp) models: E60/E61, BMW E70, BMW E71 * 286 PS (210 kW; 282 hp), 580 N·m (430 lb·ft) models: E60/E61 535d E70 X5 3.0sd E71 X6 xDrive35d E83 X3 3.0sd E90/E91 335d The above models are listed for information only if you want to to make sure your engine has valves installed, please contact a competent person. Please note that the information described above is for informational purposes only and does not claim to be reliable. Mr-key.com is not responsible for any repair work you undertake that is related to the topic described in this article.

Chat with us