Post Name

How to Spot a Car Key Cloning Scam: Warning Signs and Prevention Tips

Car theft doesn’t always involve smashing windows or forced ignition anymore. These days, all it might take is a thief standing a few feet away from you — equipped with a small electronic device and a plan to clone your car key without ever touching it.

Welcome to the age of car key cloning. Fast, silent, and nearly untraceable, this high-tech method of theft is on the rise, and many drivers don’t even know it exists. In this article, we’ll walk you through how it works, what red flags to watch for, and how to protect yourself from becoming the next victim.

What Is Car Key Cloning and How Does It Work?

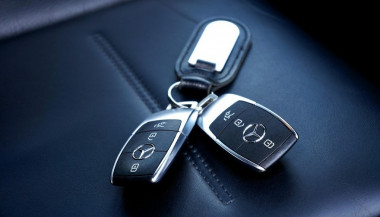
Car key cloning is the process of copying the signal emitted by your key fob and using that signal to unlock and even start your car. Thieves use tools like signal amplifiers, cloning software, or plug-in programming devices to mimic the electronic code stored in your key.

In most cases, they don’t even need to touch your key. They just need to be close enough — in a parking lot, next to your front door, or even in a restaurant — to intercept the signal when you lock or unlock your car. That signal is then copied and stored on another device or blank key fob.

In some instances, criminals will break into your car and access the OBD port (the vehicle’s diagnostic system) to directly program a new key.

This means they can drive off in your car with a cloned key, and you may not even know how they got in.

Why This Scam Is Spreading So Quickly

Key cloning was once limited to high-end criminal operations, but now the tools are cheap, easy to find, and widely available online. Some fob cloning devices are openly sold on marketplaces, making it simple for even low-level criminals to learn the trade.

A cloned key leaves no trace of forced entry, no damage, and often no evidence — making it harder for insurance claims to be validated and for stolen cars to be recovered.

The rise in keyless entry systems means millions of drivers are potential targets, whether they realize it or not.

According to The Sun, cloning devices sold online can program new keys in under 30 minutes.

5 Warning Signs You May Be Targeted

Strange behavior from your key fob – If the range suddenly becomes shorter or the buttons stop responding consistently, your signal may have been intercepted.

Unfamiliar devices or people near your car – Be cautious if you see people lingering nearby with phone-like devices or bags near your car.

Your car unlocks by itself – This could mean someone nearby is mimicking your key’s signal.

You find marks or loose panels near the OBD port – Some thieves break in to plug in programming devices.

You lose access to your spare key – It’s possible a third key was added to your system, locking the others out.

How to Prevent Car Key Cloning

While key cloning can be hard to detect, it's relatively easy to prevent if you're proactive. Here’s how to stay protected:

Use a Faraday pouch: These small, signal-blocking cases prevent your key’s signal from being intercepted when not in use.

Don’t store keys near doors or windows: Keep your keys at least 5–10 meters from exterior walls.

Disable keyless entry if possible: Some vehicles allow you to turn off proximity unlocking in the settings.

Invest in physical security: Steering wheel locks, OBD port locks, and even wheel clamps act as strong deterrents.

Audit your key system: A locksmith can check how many keys are programmed to your vehicle and delete unauthorized ones.

If you're ever in doubt, replace your key and reprogram your system. It may cost a bit up front, but it's cheaper than replacing a stolen car.

Need a secure replacement key or a Faraday pouch? Browse our car key and accessories collection for trusted, secure options.

Know the Risk, Beat the Scam

Car key cloning scams are evolving — and fast. The combination of wireless technology, smart cars, and openly available tools has created the perfect storm for high-tech theft. But with a little awareness and some simple precautions, you can stay one step ahead.

Don’t wait until it happens to you. Know the signs, protect your keys, and take action now — because in a world of silent theft, what you don’t see can hurt you.

Related Posts

What’s the Difference Between Immobilizer, Transponder Chip, and Key Fob?

What’s the Difference Between Immobilizer, Transponder Chip, and Key Fob?

In modern vehicles, the once simple car key has evolved into a sophisticated piece of technology. With built-in electronics, anti-theft features, and remote functions, today’s car key is part of a broader ecosystem designed for both convenience and security. Yet with all this advancement comes confusion. Many drivers aren’t sure what terms like immobilizer , transponder chip , and key fob actually mean—or how they relate to one another. This guide breaks down these components in detail, explains how they work together, and clarifies why it matters when you’re replacing, reprogramming, or troubleshooting your car key. What Is an Immobilizer? An immobilizer is an electronic security device installed in most modern cars. Its purpose is to prevent the engine from starting unless the correct key—specifically, the correct coded signal—is detected. When you attempt to start your vehicle, the system searches for a signal from a registered transponder chip. If that signal is missing or incorrect, the immobilizer blocks the ignition system. This means the engine won’t crank or turn over, even if the physical key fits. Immobilizers are embedded in the car’s engine control unit (ECU) and became standard in vehicles after the late 1990s in many countries, in response to rising car theft. They offer a silent, invisible layer of protection against common theft techniques like hotwiring. Without the correct digital authentication, the car simply will not start. What Is a Transponder Chip? The transponder chip is a small electronic microchip located inside the car key or key fob. The word “transponder” is a combination of “transmitter” and “responder.” It is designed to emit a unique code that the car's immobilizer can recognize. When you insert the key into the ignition or bring a key fob close to a push-start system, the chip sends a signal to the car’s ECU. If the code matches the one stored in the car’s database, the immobilizer disables itself and allows the engine to start. Transponder chips are passive. They do not require a battery and are activated by electromagnetic energy from the ignition coil or receiver unit inside the vehicle. Without a functioning or correctly programmed transponder chip, your car will not start—even if the metal key turns in the ignition. What Is a Key Fob? A key fob is the remote control device you carry that allows you to perform functions like locking or unlocking your car, opening the trunk, and activating panic alarms. In modern vehicles, key fobs may also control remote start or proximity-based unlocking features. While key fobs often include a transponder chip inside them, they serve a different function. The key fob operates remote commands via short-range radio signals. The transponder chip, on the other hand, is responsible for enabling or disabling the engine. Smart key fobs, found in many recent vehicles, don’t require insertion into the ignition. Instead, the car detects the fob nearby and permits the engine to start with a button press. If your key fob battery dies, you might still be able to start the car manually if the transponder chip is present and recognized. Most fobs also have a hidden mechanical key inside, which can be used to unlock the door if the electronics fail. How They Work Together Although they are distinct components, the immobilizer, transponder chip, and key fob all work in harmony to secure and operate your vehicle. The immobilizer controls whether the engine is allowed to start. The transponder chip provides the digital identity that must be verified by the immobilizer. The key fob provides wireless control of non-engine functions like locking, unlocking, and trunk access. In most modern cars: You approach the vehicle with the key fob. The fob unlocks the doors. When you start the vehicle, the transponder chip sends a signal to the immobilizer. If the code matches, the engine is authorized to start. If the code doesn’t match, or if the chip is missing or damaged, the engine remains disabled—even if the rest of the key’s functions work perfectly. Why This Knowledge Matters Understanding how your car key works is essential when: Replacing a lost or broken key Buying a spare or duplicate Diagnosing why your car won’t start Choosing between locksmith and dealership services For example, if your key fob unlocks your car but won’t start it, the issue may lie with the transponder chip, not the battery. Conversely, if your fob doesn’t lock or unlock the car remotely, the chip may still be functional, and the issue could simply be a dead battery. Replacing a key without properly programming the transponder chip will result in a non-starting vehicle, even if the key physically fits and the remote works. For reliable replacement keys, fobs, batteries, and accessories, visit our Car Key Collection. Car keys are no longer just mechanical tools. They’re complex, multi-function devices that combine security, convenience, and connectivity. By understanding the role of the immobilizer , transponder chip , and key fob , you’ll not only protect your vehicle better, but also avoid costly mistakes when dealing with repairs or replacements. Whether you’re troubleshooting a non-starting car or simply trying to replace a damaged key, knowing the difference between these three elements gives you the clarity and confidence to take the right action.

5 Reasons Why Your Car Remote Isn’t Working and How to Fix It

5 Reasons Why Your Car Remote Isn’t Working and How to Fix It

In an age where convenience is king, keyless entry systems have revolutionized how we interact with our vehicles. Gone are the days of fumbling for physical keys—today’s drivers rely heavily on the sleek, compact functionality of car remotes. However, what happens when this modern convenience fails you? Few things are more frustrating than standing beside your car, repeatedly pressing your remote, only to be met with silence. Understanding why your car remote isn’t working can save you from unnecessary panic, costly repairs, and inconvenient lockouts. This comprehensive guide explores the five most common reasons your remote may malfunction and offers in-depth, actionable solutions to get you back on the road quickly. 1. Battery Depletion: The Silent Saboteur The number one reason for car remote failure is, unsurprisingly, a dead or depleted battery. Though seemingly small, the battery inside your remote plays a crucial role in its operation. Most key fobs use lithium coin batteries (commonly CR2025 or CR2032), known for their durability and longevity. But even these reliable power sources don’t last forever. Factors contributing to faster battery depletion include: Frequent use (especially for remote start and lock/unlock functions) Extreme temperature exposure (both heat and cold reduce battery life) Long periods of inactivity (leading to gradual discharge) Solution: Replacing your key fob battery is a simple, cost-effective fix. Always consult your vehicle’s manual to identify the correct battery type. When replacing, ensure the new battery is seated correctly to avoid poor contact. Proactively changing the battery every 1-2 years, even before it’s fully drained, can prevent sudden failures. 2. Signal Interference: The Invisible Obstacle Key fobs communicate with your vehicle via radio frequencies. However, various external factors can interfere with this communication. Living in urban environments, parking in underground garages, or being near large electronic devices (such as cell towers, Wi-Fi routers, or even other vehicles) can disrupt the signal between your remote and car. Solution: If you suspect signal interference: Move closer to your vehicle or try unlocking it from a different angle. Step away from potential sources of interference like electronic devices or heavy machinery. Hold the key fob higher or away from your body to improve signal transmission. While occasional interference is common, if the problem persists across multiple locations, consider resetting or reprogramming your fob. 3. Desynchronization: Losing Connection Sometimes, your key fob may lose synchronization with your vehicle’s receiver—especially after events like a battery change or extended periods of non-use. When this happens, the fob and vehicle are essentially "speaking different languages," resulting in non-responsiveness. Solution: Check your vehicle's manual, as many manufacturers provide step-by-step instructions to manually re-sync the fob. Typically, this involves a sequence like inserting and turning the ignition key, pressing specific buttons, or opening and closing the doors in a set pattern. If manual reprogramming fails, you may need assistance from a dealership or certified locksmith equipped with the necessary diagnostic tools. 4. Physical Damage: The Wear and Tear Factor Remote key fobs, despite their solid appearance, are not invincible. Everyday handling—dropping the remote, spilling liquids, or even rough storage—can cause internal components to malfunction. Moisture exposure, in particular, is a key offender, leading to corrosion or short-circuiting of the circuitry inside. Solution: Inspect your remote regularly for: Visible cracks, chips, or signs of wear Sticky buttons or unresponsive keys Water damage indicators If damage is evident, replacing the remote may be your best bet. For minor issues, cleaning the interior components (after carefully opening the casing) with a soft cloth and isopropyl alcohol can sometimes restore functionality. Consider investing in a protective cover to prevent future damage. 5. Vehicle Receiver Issues: The Hidden Problem While the key fob often gets the blame, sometimes the issue lies within your vehicle’s receiver system. If the receiver—which detects and processes the signal from your remote—is malfunctioning, your remote will appear useless regardless of its condition. Solution: One telltale sign of a faulty receiver is if multiple remotes fail to operate the car. In this case, the problem is likely internal. Diagnosing and fixing receiver issues typically requires professional assistance, either from a dealership or an experienced automotive technician equipped with specialized diagnostic tools. Global Context: Keyless Challenges Worldwide The rise of keyless systems isn't limited to one region—it’s a global phenomenon. However, as technology advances, so do the challenges. For instance, key signal cloning and relay attacks have become prevalent, particularly in Europe and North America, prompting manufacturers to enhance security measures continually. Understanding the basics of how your key fob works and its vulnerabilities can help protect against both everyday failures and more sophisticated threats. Stay Ahead of the Problem Modern car remotes offer unmatched convenience, but when they fail, the disruption can be significant. Whether it’s a dead battery, signal interference, synchronization glitch, physical damage, or vehicle receiver issue, knowing how to identify and fix the problem puts you in control. Take proactive steps—replace batteries regularly, handle your remote with care, and familiarize yourself with your vehicle’s reprogramming process. A small investment of time today could save you from major headaches tomorrow. Stay informed. Stay prepared. And keep your car remote working seamlessly, wherever the road takes you.

Dead Pixels on a Motorcycle TFT Display: What They Mean & When Replacement Is Inevitable

Dead Pixels on a Motorcycle TFT Display: What They Mean & When Replacement Is Inevitable

Dead pixels on a motorcycle TFT display are rarely “just cosmetic”. On modern bikes, the TFT dashboard is a sealed, laminated electronic unit exposed to sun, heat, vibration, rain, and pressure washing . When pixels fail, it often signals structural damage inside the display , not a surface defect. This article explains what TFT display dead pixels really mean, why they appear, how to diagnose them correctly, and the point where replacement becomes unavoidable . What riders mean by “dead pixels” — and why it matters The term motorcycle display dead pixels is used loosely. In practice, three very different faults exist. True dead pixels (permanently black) A true dead pixel is a pixel transistor that no longer functions. It stays black on all backgrounds and during startup screens. This is a hardware failure inside the LCD matrix . It does not self-heal. Stuck pixels (fixed bright color) A stuck pixel remains red, green, blue, or white. On phones or TVs, this can sometimes be intermittent. On motorcycle TFTs, stuck pixels are often caused by heat stress or internal pressure and frequently progress into permanent failure. Lines or blocks of dead pixels A vertical or horizontal line of missing pixels is not a pixel issue. It indicates row or column driver failure inside the panel — a structural defect of the display module. Once this appears, replacement is usually inevitable. Why TFT dead pixels appear on motorcycles Dead pixels on a dashboard are rarely random. They follow consistent mechanical and environmental causes. Heat and UV exposure Motorcycle TFTs sit in direct sunlight. Daily heat cycles expand and contract the laminated layers inside the display. Over time, this stresses internal bonds and pixel drivers. A single failed pixel can become a cluster. Micro-impact and pressure A light impact that doesn’t crack the glass can still damage the internal LCD stack. This is common on naked bikes and adventure models where the display is more exposed. Moisture ingress and condensation Condensation inside a TFT display is a critical warning sign. It means the factory seal has been compromised. Moisture accelerates corrosion on connectors and display drivers, often leading to dead pixels followed by total blackout. Electrical stress Voltage fluctuations or grounding issues can contribute, but if the pixel defect appears in the same physical location across reboots , the issue is almost always panel-level, not wiring. Brand examples: how this appears in real motorcycles Dead pixel reports follow similar patterns across brands. BMW TFT clusters: pixel lines or dark zones often appear after heat exposure or condensation events. Clusters are fully integrated and typically replaced as a unit. Yamaha TFT dashboards: isolated dead pixels may appear first, followed by spreading rows on models parked outdoors long-term. Kawasaki TFT displays: line failures are commonly reported after pressure washing or heavy rain use. Honda TFT dashboards: less frequent, but once pixel clusters appear, dealers usually recommend full replacement. Across all brands, panel repair is not part of standard dealer service . Fast diagnosis: how to tell if the damage is permanent You can determine the seriousness in minutes. Check startup screens If the pixel defect appears during the boot logo or splash screen, it is hardware, not software. Test multiple backgrounds Switch themes or display modes: Always black → dead pixel Always bright or colored → stuck pixel Straight line → driver failure Look for progression A defect that grows over weeks is not stable. Progression is a replacement signal. Inspect for condensation Any fogging or haze inside the screen means moisture ingress. Pixel failure combined with condensation almost always worsens. When TFT display replacement is inevitable Replacement is not about annoyance. It’s about predictable failure . Replacement becomes inevitable when any of the following occur: A row or column of dead pixels appears Dead pixels spread over time Dead pixels appear together with condensation The defect blocks speed, warnings, or riding data The bike relies on the TFT for ride modes or system alerts At this stage, the TFT is no longer a reliable instrument cluster. Why TFT displays are rarely repaired A motorcycle TFT is not a standalone screen. It is: Laminated glass + LCD + polarizer Sealed against weather Electronically paired to the motorcycle Separating and rebuilding this stack requires specialized industrial equipment. As a result, OEMs replace the entire unit . Used clusters introduce risks: coding issues, immobilizer pairing, mileage discrepancies, and unknown moisture history. Cost reality in Europe In Europe, OEM motorcycle TFT replacement typically ranges from: €600–€1,200 for mid-range models €1,500–€2,500+ for premium or integrated systems This includes coding and calibration, not just the display itself. That’s why a small dashboard pixel issue deserves early attention. Can dead pixels be prevented? You cannot prevent internal electronic aging. You can reduce the most common triggers: Surface scratches that weaken seals Micro-impacts UV exposure Moisture pooling around edges A properly fitted screen protector does not fix dead pixels, but it reduces the external damage pathways that often lead to full TFT failure. If you want to reduce the risk of turning a small pixel defect into a four-figure repair, you can protect the display surface early — explore motorcycle TFT screen protectors at mr-key.com FAQ: TFT display dead pixels Are dead pixels dangerous? They are not dangerous by themselves, but they often indicate deeper display degradation. Can software updates fix dead pixels? No. If the defect appears in the same physical location during startup, it is hardware. Will one dead pixel spread? Sometimes. Spread is common when heat or moisture is involved. Is condensation inside the TFT serious? Yes. Condensation indicates seal failure and greatly increases the risk of progressive damage. Is replacement always required? Not for a single stable pixel. Replacement becomes unavoidable with progression, lines, or moisture involvement.

How to Remove or Change a Roof Rack Lock Barrel Easily

How to Remove or Change a Roof Rack Lock Barrel Easily

Changing or removing the lock barrel on your roof rack may seem like a daunting task, but it’s actually simpler than you might think. Whether you need a replacement due to a lost key, wear and tear, or just want to swap out an old lock for a new one, following the right steps can make the process hassle-free. This guide will walk you through everything you need to know about handling a roof rack lock barrel with ease. Why You Might Need to Change a Roof Rack Lock Barrel ? There are several reasons why you may want to replace or remove your roof rack lock barrel: Lost Key : If you've misplaced the key, replacing the lock barrel is often the most practical solution. Upgrading the Lock : Maybe you want a more secure lock for added peace of mind. Routine Maintenance : Over time, lock barrels can wear down, making it harder to insert or turn the key. Uniformity : If you've recently changed your car key, you may want to match your roof rack lock with it. Knowing why you’re changing the lock barrel will help you determine the steps you need to follow. What You’ll Need Before you start, gather these essential tools and items: Replacement Lock Barrel : Ensure it’s compatible with your roof rack model. Master Key or Removal Key : Often required to remove the old lock barrel. New Key : The key that corresponds to the replacement lock barrel. Flathead Screwdriver : To gently pry and release certain parts if needed. Step-by-Step Guide to Removing a Roof Rack Lock Barrel Removing a lock barrel from your roof rack doesn’t require extensive mechanical skills. Just follow these straightforward steps: 1. Locate the Lock Barrel The lock barrel is usually situated in the center or side of the roof rack. Look for the small lock with the keyhole, as this is where you'll be inserting the master or removal key. 2. Insert the Master Key or Removal Key If you have a master or removal key, insert it into the lock. This is often a universal key provided by the lock manufacturer specifically for removing lock barrels. Once it’s inserted, turn the key slightly to unlock the barrel. Tip: If you don’t have a removal key, contact a professional or see if you can order one specifically for your model. 3. Pull the Lock Barrel Out With the removal key still in place, gently pull the lock barrel out. If it’s resistant, try wiggling it slightly while pulling. Avoid forcing it, as this could damage the lock or roof rack. In some cases, you may need a flathead screwdriver to help pry it out, but be careful not to scratch the surrounding area. 4. Check the Casing After removing the lock barrel, inspect the casing where the barrel was installed. Make sure it’s clean and free of debris. Any dirt or rust could interfere with the new lock barrel, so it’s a good idea to clean this area before proceeding. Installing the New Lock Barrel Once the old barrel is removed, you’re ready to install the new one. Here’s how: 1. Align the New Lock Barrel Take your new lock barrel and align it with the casing where the old one was. Most barrels are designed to fit in only one direction, so make sure you align it properly to avoid jamming. 2. Insert the New Barrel Push the new lock barrel into the casing until it clicks into place. This might require a bit of pressure, but it should fit snugly without needing excessive force. 3. Test the New Key After installing the new lock barrel, insert the new key and turn it to ensure it’s working smoothly. The key should turn easily and lock securely. This step verifies that the new lock is properly aligned and functional. Common Challenges and Solutions While changing a roof rack lock barrel is generally straightforward, you might encounter some challenges. Here’s how to troubleshoot common issues: Stuck Barrel : If the old barrel is stuck, apply a lubricant like WD-40 around the lock to help loosen it. No Removal Key : If you don’t have a master or removal key, consider reaching out to a locksmith or checking if the manufacturer offers a replacement. Barrel Won’t Fit : Ensure you’ve purchased a compatible lock barrel. Even slight differences in design can prevent it from fitting properly. Tips for Maintaining Your Roof Rack Lock To keep your new lock barrel in good condition and prevent the need for frequent replacements, consider these maintenance tips: Regular Cleaning : Dirt and grime can accumulate inside the lock over time, making it harder to operate. Clean the lock regularly to prevent this. Use Lubricant : Apply a small amount of lubricant inside the lock barrel periodically to keep the key turning smoothly. Protect from Rust : If your roof rack is exposed to rain and humidity, use a protective cover or shield to keep moisture out of the lock barrel. Check Key Fit : Avoid using a damaged or bent key, as this can wear out the lock barrel more quickly. When to Seek Professional Help In some cases, removing or replacing a roof rack lock barrel might require assistance from a professional: Lost or Damaged Keys : If both your main key and master key are lost or damaged, a professional can help retrieve or replace the lock barrel. Damaged Lock Mechanism : If the lock itself is damaged or jammed, forcing it can make things worse. A professional locksmith can safely remove and replace it. Replacing or removing a roof rack lock barrel is an affordable and manageable task for most car owners. By following the right steps and keeping up with regular maintenance, you can ensure your roof rack lock stays functional and secure. Whether you’re upgrading for security or replacing a worn-out lock, a new lock barrel can make all the difference in keeping your roof rack safe. Effortless Key Replacement for a Variety of Locks Order 2x Union Keys FT Series, custom-cut to your original key code, for a hassle-free replacement. Compatible with a range of locks, including those from Aston Martin, Jaguar, Land Rover, and more, these keys are perfect for classic cars, caravans, petrol caps, roof racks, and truck canopies. Simply find your lock code (e.g., FT101-FT360) on the lock face and enjoy fast delivery of high-quality spare keys.

Chat with us