Post Name

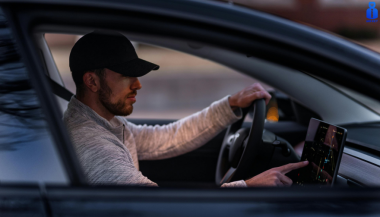
Programming a car key fob doesn’t always require a trip to the dealership or an expensive diagnostic tool. In many cases, you can program or resync your key fob at home—saving both time and money. Whether you’ve just replaced the battery, changed the shell, or purchased a new key fob entirely, this guide will walk you through the basics of syncing it with your vehicle.

Why Program Your Key Fob?

Key fobs are integral to modern car access and ignition systems. When you replace or reset your key, the vehicle and fob must reestablish communication. Without syncing, features like remote locking, trunk release, or even engine start may stop functioning. This synchronization process ensures your key fob and vehicle are electronically paired and communicate securely. Without it, even a new battery or case won’t make your remote functional again.

Can You Program It Yourself?

The answer depends largely on the make and model of your vehicle. Older vehicles with basic remote key fobs often support manual onboard programming that doesn’t require specialized equipment. These procedures typically involve inserting the key into the ignition, turning it in a specific sequence, and pressing buttons on the fob within a certain time frame. It’s a simple process, and many car owners are surprised at how effective these methods can be.

In contrast, modern vehicles with smart keys or keyless entry systems usually require advanced programming tools. These keys often contain transponders that must be linked to the car’s electronic control unit, a task typically performed by dealerships or professional auto locksmiths. Still, if you own a basic Opel, Peugeot, or Citroën model, there’s a good chance you can complete the task yourself at home.

How Onboard Programming Works

If your vehicle supports onboard programming, the steps are often straightforward. While the exact process may vary depending on the model, the general method includes entering the vehicle, turning the ignition on and off several times, and pressing a button on the remote to complete pairing. You may receive confirmation through a dashboard light flash or an audible chime, indicating that the key fob is now synced.

Take note, though: some vehicles require all remotes to be programmed in the same session, so if you have multiple key fobs, have them all with you before starting. If the procedure doesn’t work, don’t be discouraged—it may simply mean your car requires a more advanced programming approach.

When Should You Call a Professional?

Not all keys can be programmed at home. Smart keys, proximity sensors, and certain immobilizer systems are designed with enhanced security that requires proprietary equipment to program. If your vehicle doesn’t respond to onboard programming or your key fob is completely unresponsive, it’s best to seek assistance from a certified locksmith or dealership.

Trying to force the programming process can sometimes cause more harm than good. If you’re unsure, always verify the requirements in your car’s manual or consult a trusted technician.

Essential Tips for Success

To avoid frustration, start with the basics: always use a fresh battery from a trusted brand such as Panasonic CR2032. Clean the internal contacts and handle the circuit board carefully to prevent static damage. Don’t rush—take the time to follow steps precisely and test functionality before fully reassembling the key. When replacing the key shell, make sure it's compatible with your exact model and that the key blade, transponder chip, and electronics are properly seated.

With a bit of patience and the right information, programming your car key fob at home can be a practical and satisfying DIY fix. For basic vehicles, it’s a task you can handle in minutes—saving the cost and hassle of dealership appointments. Understanding your vehicle’s requirements and using reliable parts makes all the difference.

Whether you're refreshing an old key with a new case or pairing a new remote to your car, the ability to program it yourself puts control back in your hands. For a full selection of batteries, shells, and compatible accessories, visit mr-key.com.

Related Posts

Removing Keys from Locks: A Comprehensive Guide

Removing Keys from Locks: A Comprehensive Guide

Removing a key from a lock may seem simple, but it can become tricky when dealing with stuck or broken keys. Whether you're dealing with a standard lock, padlock, or vehicle ignition, understanding the correct techniques can save you from damage and frustration. This guide will walk you through the essential steps for removing keys from various types of locks, offering practical advice and tips to ensure a smooth process. Common Scenarios and Challenges Keys can become stuck or difficult to remove for several reasons, including misalignment, wear and tear, or damage to the key or lock. Additionally, environmental factors like temperature changes can cause metals to expand or contract, making key removal more challenging. Recognizing the cause of the issue is the first step in effectively addressing it. Basic Techniques for Key Removal Gentle Wiggle and Pull: The first technique to try is a gentle wiggle and pull. Hold the key firmly and move it slightly up and down or side to side while pulling gently. This method works well if the key is simply stuck due to misalignment. Lubrication: If the key is difficult to remove, applying a small amount of graphite powder or a silicone-based lubricant into the keyhole can help. Avoid using oil-based lubricants, as they can attract dirt and grime, potentially worsening the problem. Tapping the Lock: For stubborn cases, lightly tapping the lock with a hammer while gently pulling the key can help dislodge it. This method is effective when the key is stuck due to debris or minor misalignments within the lock. Advanced Techniques for Stuck Keys Using a Key Extractor: If the key is broken off inside the lock, a key extractor tool can be very effective. Insert the tool into the keyhole, hook the broken key piece, and pull it out carefully. This method requires patience and a steady hand. Pliers and Tweezers: If part of the key is still protruding, you can use needle-nose pliers or tweezers to grip and pull the key out. Be careful not to apply too much force, as this can push the key further into the lock or damage the lock mechanism. Heat Application: In cold weather, metal contracts, which can cause the key to get stuck. Gently heating the key with a hairdryer or warm cloth can expand the metal slightly, making it easier to remove. However, avoid using an open flame, as it can damage the lock or key. Preventing Key Stuck Issues Prevention is always better than cure. Here are some tips to prevent keys from getting stuck in the future: Regular Maintenance: Keep your locks and keys clean and well-lubricated with appropriate materials. Regularly inspect for wear and tear, and replace any damaged keys or locks. Use Duplicate Keys: If you notice a key becoming difficult to use, have a duplicate made before it breaks or becomes stuck. This will save you the hassle of dealing with a stuck key. Avoid Excessive Force: Never force a key into a lock. If it doesn’t turn easily, stop and inspect both the key and the lock for damage or obstruction. When to Call a Professional While many stuck key issues can be resolved with the techniques mentioned above, there are times when professional assistance is necessary. If you’ve tried all the methods and the key remains stuck, or if you’re dealing with a high-security lock, it’s best to contact a professional locksmith. They have the tools and expertise to safely remove the key without damaging the lock or key further. Dealing with a stuck key can be frustrating, but understanding the proper techniques can save you time and prevent damage. From basic wiggling and lubrication to more advanced methods like using a key extractor, there are various approaches depending on the severity of the situation. Regular maintenance and careful handling can help prevent these issues from occurring in the first place. When in doubt, don’t hesitate to seek professional help to ensure your lock and key remain in good working condition.

Effortlessly Ordering Multiple Replacement Car Keys: A Step-by-Step Guide

Effortlessly Ordering Multiple Replacement Car Keys: A Step-by-Step Guide

As a car owner, managing multiple key replacements can be daunting. Fortunately, there's a streamlined method to order several keys simultaneously using a CSV file. Here's how you can simplify the process: 1. Prepare Your Key List Create a Spreadsheet: Use software like Microsoft Excel to list your key codes. Enter Details: In Column A, input each key code; in Column B, specify the quantity needed. Avoid Headers: Start directly with your data; do not include column titles. 2. Save as CSV Choose CSV Format: When saving, select 'CSV (Comma delimited)' from the 'Save as type' dropdown. Ensure Correct Format: Avoid other CSV formats to prevent compatibility issues. 3. Upload Your CSV File Access Your Account: Log into your trade account on the key replacement website. Navigate to Product Page: Find the specific key product you need. Upload CSV: Click the 'Upload a CSV' button above the key number entry field and select your file. Wait for Processing: Large files may take time to upload; remain on the page until completion. 4. Complete Your Order Add to Basket: Once uploaded, click 'Add to basket.' Proceed to Checkout: Follow the standard payment process to finalize your order. Important Considerations Separate Files for Different Keys: If ordering various key types or series, create individual CSV files for each. Trade Account Requirement: This feature is typically available to trade account holders; ensure you have the necessary access. By following these steps, you can efficiently manage bulk key replacements, saving time and ensuring accuracy.

Which Cars Benefit Most From Hydrogel Navigation Protection? (2026 Overview)

Which Cars Benefit Most From Hydrogel Navigation Protection? (2026 Overview)

Modern cars rely heavily on large navigation and infotainment screens. These displays are used constantly and exposed to scratches, fingerprints, dust, heat and direct sunlight. Repairs are expensive, and replacement screens can cost several hundred euros. A hydrogel screen protector adds a thin, flexible layer that guards the display without affecting clarity or touch response. Premium and Luxury Models Premium brands adopted large infotainment screens early, making them among the most likely to benefit. BMW models such as the 3 Series , 5 Series and X5 use wide, high-resolution displays (up to 14.9”). Audi cars like the A4 , A6 and Q5 include 10–12” touchscreens. Mercedes-Benz models such as the C-Class , E-Class and GLC use vertically oriented 11–12” MBUX screens. Porsche vehicles (Cayenne, Macan, Panamera) and Tesla models (Model 3, Y, S) use some of the largest screens in Europe. These vehicles benefit significantly from a hydrogel protector thanks to their large surfaces and frequent touch use. Popular European Models Mainstream European cars now feature screens as large as luxury models. Volkswagen offers 10–15” displays in models such as the Golf , Tiguan and Passat . Škoda uses up to 13” screens in the Octavia , Superb and Kodiaq . Dacia equips models like the Jogger , Duster and Sandero with 7–10” displays. Toyota (Corolla, RAV4, Yaris Cross). Renault (Captur, Clio, Megane E-Tech). Peugeot (208, 3008, 5008) Citroën (C4, C5 Aircross) Nissan (Qashqai, Juke, Leaf) Ford (Focus, Kuga) Kia (Sportage, Ceed, Niro, Picanto, Stonic, Rio, Sorento) all rely on large central touchscreens. As screens grow in size across all price segments, protection becomes increasingly important. Benefits of Hydrogel Screen Protectors Hydrogel film is thin, flexible and adheres tightly. It works on flat and curved surfaces where tempered glass cannot. The material absorbs small impacts and can self-heal minor marks. With its anti-glare properties It keeps the display clear, maintains original brightness and preserves smooth touch performance. It also helps reduce smudges and makes daily cleaning easier. Once you’ve chosen a hydrogel protector for your car, the next step is applying it correctly. Follow our step-by-step guide on how to install a hydrogel navigation screen protector for a perfect bubble-free result. Who Needs Hydrogel Protection the Most? Any car with: a large touchscreen (8” or more) glossy glass prone to fingerprints curved edges high cabin sun exposure Hydrogel is especially useful for daily drivers, family cars and vehicles where multiple people interact with the system. Rental, Company and Service Vehicles Benefit Even More Cars used for business—such as rental cars , company vehicles , fleet cars , taxis , and service vehicles —experience significantly higher daily usage than private cars. Their navigation screens are touched constantly by different drivers, exposed to dust, temperature changes and frequent cleaning. Because of this heavy wear, screens in rental and company vehicles are far more likely to show scratches, fingerprints and long-term damage. A hydrogel dashboard screen protector adds a durable layer that absorbs daily abuse, keeps the display clear for every driver and reduces maintenance costs for fleet managers. For any vehicle that is shared or driven by multiple users, screen protection is not just useful—it’s essential . FAQ What is a hydrogel screen protector? A thin, flexible film that protects a car’s navigation or dashboard display. How is it installed? Clean the screen, align the film and press it down. Dry installation is recommended. What are the benefits? Scratch resistance, impact absorption, reduced fingerprints and full coverage on curved screens. Is it compatible with all cars? Yes, if you choose a protector cut for your specific model. Does it affect touch response? No. Hydrogel keeps full touch accuracy. How long does it last? Usually 1–3 years, depending on use. Easy to replace. Hydrogel vs tempered glass? Hydrogel fits curved screens and absorbs impacts. Glass is harder but can crack and does not cover complex shapes. For more in depth guide check out Hydrogel vs Tempered Glass Navigation Protectors Comparison How can I protect my car’s navigation screen from scratches and fingerprints? If you want to know more about How to Protect Your Car’s Navigation Screen from Scratches and Fingerprints check out our guide. Visit mr-key.com to find a custom-cut hydrogel protector for your car model. Related Guides How to Install a Hydrogel Navigation Screen Protector How to Protect Your Car’s Navigation Screen from Scratches, Glare & Fingerprints Hydrogel vs Tempered Glass Navigation Protectors Comparison

The Essential Guide to Understanding Detachable Tow Bars

The Essential Guide to Understanding Detachable Tow Bars

Detachable tow bars offer versatility and convenience for car owners who occasionally need to tow. Unlike fixed tow bars, they can be removed when not in use, maintaining your car's aesthetics and avoiding unnecessary bulk. However, understanding how they work, their benefits, and their maintenance requirements is essential to get the most out of your tow bar. Here’s what you need to know. Why Choose a Detachable Tow Bar? A detachable tow bar is an excellent solution if you only tow occasionally or prefer a clean look for your car when the tow bar is not in use. Here are some of its key advantages: Aesthetic Appeal : When removed, the tow bar does not interfere with the car's design. Convenience : Detachable tow bars are easy to attach and remove without tools, making them user-friendly. Versatility : They allow you to tow various loads, from trailers to bike racks, without permanently altering your car's appearance. Legal Compliance : In some regions, a visible, unused tow bar can lead to fines. A detachable option helps you avoid this. Types of Detachable Tow Bars Detachable tow bars come in different types, each suited to specific needs and preferences: Vertical Detachable Tow Bars Design : These tow bars fit seamlessly into your car’s underside, leaving no visible parts when removed. Best For : Those prioritizing aesthetics and a clean finish. Horizontal Detachable Tow Bars Design : These are partially visible but still maintain a low profile. Best For : Easier access and handling without compromising too much on appearance. Swan Neck Tow Bars Design : These have a slim, curved neck, making them stylish and less obtrusive. Best For : European-style vehicles and those who need a compact towing solution. How to Install and Use a Detachable Tow Bar Installing and using a detachable tow bar is straightforward, but following the proper steps ensures safety and efficiency: Read the Manual : Always start by reviewing the manufacturer’s instructions specific to your tow bar. Clean the Mounting Area : Dirt or debris can interfere with secure attachment. Secure the Tow Bar : Align the tow bar with the mounting bracket and ensure it clicks into place. Test Stability : Gently pull the tow bar to confirm it’s securely attached. Remove When Not in Use : Detach the tow bar and store it in a clean, dry place to prevent wear. Common Issues and Troubleshooting While detachable tow bars are convenient, they can occasionally present challenges. Here’s how to address some common problems: Stuck Tow Bar : If the tow bar is difficult to remove, check for rust or dirt in the mounting area. Use a lubricant to loosen it, but avoid using excessive force. Loose Connection : Ensure the tow bar clicks firmly into place during installation. A loose tow bar can be dangerous. Key Issues : If the locking mechanism doesn’t work, inspect the key and lock for dirt or damage. Sometimes, a replacement key may be necessary. Tips for Maintaining Your Detachable Tow Bar Proper maintenance can extend the life of your detachable tow bar and ensure its performance: Regular Cleaning : Clean the tow bar and mounting area to prevent rust and buildup. Lubricate Moving Parts : Apply a small amount of lubricant to the locking mechanism and other moving parts for smooth operation. Inspect for Damage : Check for signs of wear, cracks, or rust, especially if you tow frequently. Store Properly : When not in use, store the tow bar in a protective case or bag in a dry location. Safety Considerations When Towing Towing comes with responsibility. Here are some safety tips to keep in mind: Check Weight Limits : Never exceed your car or tow bar’s towing capacity. Inspect Connections : Ensure the tow bar and trailer hitch are secure before every trip. Test Lights : Verify that your trailer’s brake and signal lights are functioning properly. Drive Cautiously : Towing affects handling and braking. Allow extra time for stopping and maneuvering. Benefits of Investing in a Detachable Tow Bar For many drivers, a detachable tow bar offers the perfect balance of functionality and style. Whether you’re towing for leisure, work, or practicality, this option ensures: A clean car appearance when the tow bar is removed. Versatile use for different towing needs. Easy storage and maintenance. Detachable tow bars are a versatile and practical choice for occasional towing. With proper installation, regular maintenance, and a focus on safety, you can enjoy their convenience without compromising your car's aesthetics. Whether you're hauling a trailer or attaching a bike rack, a detachable tow bar offers flexibility and ease for all your towing needs. What Will You Receive When Your Order is Complete? When you place an order, you’ll receive two perfectly cut keys for Witter, GWD, TOW Trust, or Renz towbars, tailored to your original key code. These keys are compatible with lock codes within the ranges TR01-TR10 or 32001-32200. Simply select your code from the dropdown menu (e.g., TR03), and we’ll take care of the rest. Order Your Keys Today!

Chat with us