Post Name

Programming a car key fob doesn’t always require a trip to the dealership or an expensive diagnostic tool. In many cases, you can program or resync your key fob at home—saving both time and money. Whether you’ve just replaced the battery, changed the shell, or purchased a new key fob entirely, this guide will walk you through the basics of syncing it with your vehicle.

Why Program Your Key Fob?

Key fobs are integral to modern car access and ignition systems. When you replace or reset your key, the vehicle and fob must reestablish communication. Without syncing, features like remote locking, trunk release, or even engine start may stop functioning. This synchronization process ensures your key fob and vehicle are electronically paired and communicate securely. Without it, even a new battery or case won’t make your remote functional again.

Can You Program It Yourself?

The answer depends largely on the make and model of your vehicle. Older vehicles with basic remote key fobs often support manual onboard programming that doesn’t require specialized equipment. These procedures typically involve inserting the key into the ignition, turning it in a specific sequence, and pressing buttons on the fob within a certain time frame. It’s a simple process, and many car owners are surprised at how effective these methods can be.

In contrast, modern vehicles with smart keys or keyless entry systems usually require advanced programming tools. These keys often contain transponders that must be linked to the car’s electronic control unit, a task typically performed by dealerships or professional auto locksmiths. Still, if you own a basic Opel, Peugeot, or Citroën model, there’s a good chance you can complete the task yourself at home.

How Onboard Programming Works

If your vehicle supports onboard programming, the steps are often straightforward. While the exact process may vary depending on the model, the general method includes entering the vehicle, turning the ignition on and off several times, and pressing a button on the remote to complete pairing. You may receive confirmation through a dashboard light flash or an audible chime, indicating that the key fob is now synced.

Take note, though: some vehicles require all remotes to be programmed in the same session, so if you have multiple key fobs, have them all with you before starting. If the procedure doesn’t work, don’t be discouraged—it may simply mean your car requires a more advanced programming approach.

When Should You Call a Professional?

Not all keys can be programmed at home. Smart keys, proximity sensors, and certain immobilizer systems are designed with enhanced security that requires proprietary equipment to program. If your vehicle doesn’t respond to onboard programming or your key fob is completely unresponsive, it’s best to seek assistance from a certified locksmith or dealership.

Trying to force the programming process can sometimes cause more harm than good. If you’re unsure, always verify the requirements in your car’s manual or consult a trusted technician.

Essential Tips for Success

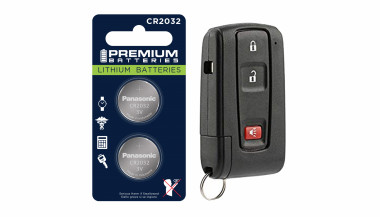
To avoid frustration, start with the basics: always use a fresh battery from a trusted brand such as Panasonic CR2032. Clean the internal contacts and handle the circuit board carefully to prevent static damage. Don’t rush—take the time to follow steps precisely and test functionality before fully reassembling the key. When replacing the key shell, make sure it's compatible with your exact model and that the key blade, transponder chip, and electronics are properly seated.

With a bit of patience and the right information, programming your car key fob at home can be a practical and satisfying DIY fix. For basic vehicles, it’s a task you can handle in minutes—saving the cost and hassle of dealership appointments. Understanding your vehicle’s requirements and using reliable parts makes all the difference.

Whether you're refreshing an old key with a new case or pairing a new remote to your car, the ability to program it yourself puts control back in your hands. For a full selection of batteries, shells, and compatible accessories, visit mr-key.com.

Related Posts

The Essential Guide to Understanding Detachable Tow Bars

The Essential Guide to Understanding Detachable Tow Bars

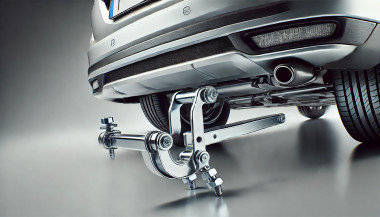
Detachable tow bars offer versatility and convenience for car owners who occasionally need to tow. Unlike fixed tow bars, they can be removed when not in use, maintaining your car's aesthetics and avoiding unnecessary bulk. However, understanding how they work, their benefits, and their maintenance requirements is essential to get the most out of your tow bar. Here’s what you need to know. Why Choose a Detachable Tow Bar? A detachable tow bar is an excellent solution if you only tow occasionally or prefer a clean look for your car when the tow bar is not in use. Here are some of its key advantages: Aesthetic Appeal : When removed, the tow bar does not interfere with the car's design. Convenience : Detachable tow bars are easy to attach and remove without tools, making them user-friendly. Versatility : They allow you to tow various loads, from trailers to bike racks, without permanently altering your car's appearance. Legal Compliance : In some regions, a visible, unused tow bar can lead to fines. A detachable option helps you avoid this. Types of Detachable Tow Bars Detachable tow bars come in different types, each suited to specific needs and preferences: Vertical Detachable Tow Bars Design : These tow bars fit seamlessly into your car’s underside, leaving no visible parts when removed. Best For : Those prioritizing aesthetics and a clean finish. Horizontal Detachable Tow Bars Design : These are partially visible but still maintain a low profile. Best For : Easier access and handling without compromising too much on appearance. Swan Neck Tow Bars Design : These have a slim, curved neck, making them stylish and less obtrusive. Best For : European-style vehicles and those who need a compact towing solution. How to Install and Use a Detachable Tow Bar Installing and using a detachable tow bar is straightforward, but following the proper steps ensures safety and efficiency: Read the Manual : Always start by reviewing the manufacturer’s instructions specific to your tow bar. Clean the Mounting Area : Dirt or debris can interfere with secure attachment. Secure the Tow Bar : Align the tow bar with the mounting bracket and ensure it clicks into place. Test Stability : Gently pull the tow bar to confirm it’s securely attached. Remove When Not in Use : Detach the tow bar and store it in a clean, dry place to prevent wear. Common Issues and Troubleshooting While detachable tow bars are convenient, they can occasionally present challenges. Here’s how to address some common problems: Stuck Tow Bar : If the tow bar is difficult to remove, check for rust or dirt in the mounting area. Use a lubricant to loosen it, but avoid using excessive force. Loose Connection : Ensure the tow bar clicks firmly into place during installation. A loose tow bar can be dangerous. Key Issues : If the locking mechanism doesn’t work, inspect the key and lock for dirt or damage. Sometimes, a replacement key may be necessary. Tips for Maintaining Your Detachable Tow Bar Proper maintenance can extend the life of your detachable tow bar and ensure its performance: Regular Cleaning : Clean the tow bar and mounting area to prevent rust and buildup. Lubricate Moving Parts : Apply a small amount of lubricant to the locking mechanism and other moving parts for smooth operation. Inspect for Damage : Check for signs of wear, cracks, or rust, especially if you tow frequently. Store Properly : When not in use, store the tow bar in a protective case or bag in a dry location. Safety Considerations When Towing Towing comes with responsibility. Here are some safety tips to keep in mind: Check Weight Limits : Never exceed your car or tow bar’s towing capacity. Inspect Connections : Ensure the tow bar and trailer hitch are secure before every trip. Test Lights : Verify that your trailer’s brake and signal lights are functioning properly. Drive Cautiously : Towing affects handling and braking. Allow extra time for stopping and maneuvering. Benefits of Investing in a Detachable Tow Bar For many drivers, a detachable tow bar offers the perfect balance of functionality and style. Whether you’re towing for leisure, work, or practicality, this option ensures: A clean car appearance when the tow bar is removed. Versatile use for different towing needs. Easy storage and maintenance. Detachable tow bars are a versatile and practical choice for occasional towing. With proper installation, regular maintenance, and a focus on safety, you can enjoy their convenience without compromising your car's aesthetics. Whether you're hauling a trailer or attaching a bike rack, a detachable tow bar offers flexibility and ease for all your towing needs. What Will You Receive When Your Order is Complete? When you place an order, you’ll receive two perfectly cut keys for Witter, GWD, TOW Trust, or Renz towbars, tailored to your original key code. These keys are compatible with lock codes within the ranges TR01-TR10 or 32001-32200. Simply select your code from the dropdown menu (e.g., TR03), and we’ll take care of the rest. Order Your Keys Today!

How to Choose the Right Car Key Shell for Your Vehicle + Why We Recommend Panasonic CR2032 Batteries

How to Choose the Right Car Key Shell for Your Vehicle + Why We Recommend Panasonic CR2032 Batteries

Your car key is one of those things you don’t really think about — until it breaks. Whether it’s the worn-out buttons, a cracked shell, or a battery that gives up at the worst possible moment, an aging car key can cause more than just annoyance. But here's the good news: you can restore your key to like-new condition easily, affordably, and from the comfort of your home. In this complete guide, we’ll show you how to choose the right replacement key shell for your car and why the Panasonic CR2032 battery is a trusted choice to keep your key fob performing reliably. Part 1: How to Choose the Right Car Key Shell Think of your key shell as a protective layer. It shields the sensitive electronics inside — the buttons, circuit board, and transponder chip — all of which are essential to operating your vehicle. When the case begins to wear down or fall apart, it’s time to replace it. 1. Know Your Car's Make, Model, and Year Key shells are made to fit specific car models and years. For instance: Flip key shells for Opel are commonly used on models from 2010 to 2024. Audi smart key shells are dependent on the platform code (like A3 8Y or A4 B9). Consult your owner's manual or use a compatibility tool like this one to confirm fitment. 2. Match the Key Blade Blades come in various formats like HU162, VA2, or HU100. Even a slight variation in shape or groove pattern can render the key useless in your ignition or door locks. Carefully compare the blade on your current key to the one listed for any replacement shell. 3. Button Layout and Functionality Make sure the number and positioning of buttons on the replacement shell matches your original. If not, the rubber pads may not line up with the contact points on your key’s circuit board, making the buttons unresponsive. 4. Interior Design and Compatibility The outside might look the same, but inside layouts often differ. Ensure that your circuit board, battery slot, and chip all fit securely inside the new shell. Misalignment can cause rattling, failure to start the car, or buttons that don’t function correctly. 5. Material Quality Avoid very cheap replacements with thin plastic and soft rubber. A good quality shell should be durable, with solid construction and tactile buttons that don't wear out quickly. For example, this Opel flip key shell combines strength with excellent fit. Part 2: Why We Recommend Panasonic CR2032 Batteries When your key fob starts failing — maybe the range drops or it takes multiple presses to unlock — chances are the battery is low. Many car owners replace the shell without considering the battery, only to find the problem persists. Understanding the CR2032 The CR2032 is a 3-volt lithium coin battery, commonly used in remote keys and small electronic devices. It’s compact, stable, and specifically suited for low-power, long-term applications. What Makes Panasonic CR2032 Stand Out? Panasonic’s version of the CR2032 is known for its consistency and reliability. It offers: A stable voltage output, ensuring your key communicates with your car effectively Longer life compared to many generic brands Resistance to leaks, which protects internal circuits from corrosion Choosing a battery from a trusted manufacturer can save you from unexpected failures, especially in colder climates where battery performance matters most. We recommend the Panasonic CR2032 battery for its excellent balance of performance and reliability. Refreshing Your Car Key: A Practical Approach If your car key is showing signs of age, it's usually best to replace both the shell and the battery. The process is simple: Open the old shell carefully, using a flat tool if needed. Remove the circuit board, chip, and battery. Clean the components gently with a dry brush. Place them into the new shell, ensuring alignment. Insert a fresh CR2032 battery. Close and secure the new shell. After completing these steps, your key should be more responsive, look better, and feel sturdier in your hand.

How to Remove or Change a Roof Rack Lock Barrel Easily

How to Remove or Change a Roof Rack Lock Barrel Easily

Changing or removing the lock barrel on your roof rack may seem like a daunting task, but it’s actually simpler than you might think. Whether you need a replacement due to a lost key, wear and tear, or just want to swap out an old lock for a new one, following the right steps can make the process hassle-free. This guide will walk you through everything you need to know about handling a roof rack lock barrel with ease. Why You Might Need to Change a Roof Rack Lock Barrel ? There are several reasons why you may want to replace or remove your roof rack lock barrel: Lost Key : If you've misplaced the key, replacing the lock barrel is often the most practical solution. Upgrading the Lock : Maybe you want a more secure lock for added peace of mind. Routine Maintenance : Over time, lock barrels can wear down, making it harder to insert or turn the key. Uniformity : If you've recently changed your car key, you may want to match your roof rack lock with it. Knowing why you’re changing the lock barrel will help you determine the steps you need to follow. What You’ll Need Before you start, gather these essential tools and items: Replacement Lock Barrel : Ensure it’s compatible with your roof rack model. Master Key or Removal Key : Often required to remove the old lock barrel. New Key : The key that corresponds to the replacement lock barrel. Flathead Screwdriver : To gently pry and release certain parts if needed. Step-by-Step Guide to Removing a Roof Rack Lock Barrel Removing a lock barrel from your roof rack doesn’t require extensive mechanical skills. Just follow these straightforward steps: 1. Locate the Lock Barrel The lock barrel is usually situated in the center or side of the roof rack. Look for the small lock with the keyhole, as this is where you'll be inserting the master or removal key. 2. Insert the Master Key or Removal Key If you have a master or removal key, insert it into the lock. This is often a universal key provided by the lock manufacturer specifically for removing lock barrels. Once it’s inserted, turn the key slightly to unlock the barrel. Tip: If you don’t have a removal key, contact a professional or see if you can order one specifically for your model. 3. Pull the Lock Barrel Out With the removal key still in place, gently pull the lock barrel out. If it’s resistant, try wiggling it slightly while pulling. Avoid forcing it, as this could damage the lock or roof rack. In some cases, you may need a flathead screwdriver to help pry it out, but be careful not to scratch the surrounding area. 4. Check the Casing After removing the lock barrel, inspect the casing where the barrel was installed. Make sure it’s clean and free of debris. Any dirt or rust could interfere with the new lock barrel, so it’s a good idea to clean this area before proceeding. Installing the New Lock Barrel Once the old barrel is removed, you’re ready to install the new one. Here’s how: 1. Align the New Lock Barrel Take your new lock barrel and align it with the casing where the old one was. Most barrels are designed to fit in only one direction, so make sure you align it properly to avoid jamming. 2. Insert the New Barrel Push the new lock barrel into the casing until it clicks into place. This might require a bit of pressure, but it should fit snugly without needing excessive force. 3. Test the New Key After installing the new lock barrel, insert the new key and turn it to ensure it’s working smoothly. The key should turn easily and lock securely. This step verifies that the new lock is properly aligned and functional. Common Challenges and Solutions While changing a roof rack lock barrel is generally straightforward, you might encounter some challenges. Here’s how to troubleshoot common issues: Stuck Barrel : If the old barrel is stuck, apply a lubricant like WD-40 around the lock to help loosen it. No Removal Key : If you don’t have a master or removal key, consider reaching out to a locksmith or checking if the manufacturer offers a replacement. Barrel Won’t Fit : Ensure you’ve purchased a compatible lock barrel. Even slight differences in design can prevent it from fitting properly. Tips for Maintaining Your Roof Rack Lock To keep your new lock barrel in good condition and prevent the need for frequent replacements, consider these maintenance tips: Regular Cleaning : Dirt and grime can accumulate inside the lock over time, making it harder to operate. Clean the lock regularly to prevent this. Use Lubricant : Apply a small amount of lubricant inside the lock barrel periodically to keep the key turning smoothly. Protect from Rust : If your roof rack is exposed to rain and humidity, use a protective cover or shield to keep moisture out of the lock barrel. Check Key Fit : Avoid using a damaged or bent key, as this can wear out the lock barrel more quickly. When to Seek Professional Help In some cases, removing or replacing a roof rack lock barrel might require assistance from a professional: Lost or Damaged Keys : If both your main key and master key are lost or damaged, a professional can help retrieve or replace the lock barrel. Damaged Lock Mechanism : If the lock itself is damaged or jammed, forcing it can make things worse. A professional locksmith can safely remove and replace it. Replacing or removing a roof rack lock barrel is an affordable and manageable task for most car owners. By following the right steps and keeping up with regular maintenance, you can ensure your roof rack lock stays functional and secure. Whether you’re upgrading for security or replacing a worn-out lock, a new lock barrel can make all the difference in keeping your roof rack safe. Effortless Key Replacement for a Variety of Locks Order 2x Union Keys FT Series, custom-cut to your original key code, for a hassle-free replacement. Compatible with a range of locks, including those from Aston Martin, Jaguar, Land Rover, and more, these keys are perfect for classic cars, caravans, petrol caps, roof racks, and truck canopies. Simply find your lock code (e.g., FT101-FT360) on the lock face and enjoy fast delivery of high-quality spare keys.

5 Reasons Why Your Car Remote Isn’t Working and How to Fix It

5 Reasons Why Your Car Remote Isn’t Working and How to Fix It

In an age where convenience is king, keyless entry systems have revolutionized how we interact with our vehicles. Gone are the days of fumbling for physical keys—today’s drivers rely heavily on the sleek, compact functionality of car remotes. However, what happens when this modern convenience fails you? Few things are more frustrating than standing beside your car, repeatedly pressing your remote, only to be met with silence. Understanding why your car remote isn’t working can save you from unnecessary panic, costly repairs, and inconvenient lockouts. This comprehensive guide explores the five most common reasons your remote may malfunction and offers in-depth, actionable solutions to get you back on the road quickly. 1. Battery Depletion: The Silent Saboteur The number one reason for car remote failure is, unsurprisingly, a dead or depleted battery. Though seemingly small, the battery inside your remote plays a crucial role in its operation. Most key fobs use lithium coin batteries (commonly CR2025 or CR2032), known for their durability and longevity. But even these reliable power sources don’t last forever. Factors contributing to faster battery depletion include: Frequent use (especially for remote start and lock/unlock functions) Extreme temperature exposure (both heat and cold reduce battery life) Long periods of inactivity (leading to gradual discharge) Solution: Replacing your key fob battery is a simple, cost-effective fix. Always consult your vehicle’s manual to identify the correct battery type. When replacing, ensure the new battery is seated correctly to avoid poor contact. Proactively changing the battery every 1-2 years, even before it’s fully drained, can prevent sudden failures. 2. Signal Interference: The Invisible Obstacle Key fobs communicate with your vehicle via radio frequencies. However, various external factors can interfere with this communication. Living in urban environments, parking in underground garages, or being near large electronic devices (such as cell towers, Wi-Fi routers, or even other vehicles) can disrupt the signal between your remote and car. Solution: If you suspect signal interference: Move closer to your vehicle or try unlocking it from a different angle. Step away from potential sources of interference like electronic devices or heavy machinery. Hold the key fob higher or away from your body to improve signal transmission. While occasional interference is common, if the problem persists across multiple locations, consider resetting or reprogramming your fob. 3. Desynchronization: Losing Connection Sometimes, your key fob may lose synchronization with your vehicle’s receiver—especially after events like a battery change or extended periods of non-use. When this happens, the fob and vehicle are essentially "speaking different languages," resulting in non-responsiveness. Solution: Check your vehicle's manual, as many manufacturers provide step-by-step instructions to manually re-sync the fob. Typically, this involves a sequence like inserting and turning the ignition key, pressing specific buttons, or opening and closing the doors in a set pattern. If manual reprogramming fails, you may need assistance from a dealership or certified locksmith equipped with the necessary diagnostic tools. 4. Physical Damage: The Wear and Tear Factor Remote key fobs, despite their solid appearance, are not invincible. Everyday handling—dropping the remote, spilling liquids, or even rough storage—can cause internal components to malfunction. Moisture exposure, in particular, is a key offender, leading to corrosion or short-circuiting of the circuitry inside. Solution: Inspect your remote regularly for: Visible cracks, chips, or signs of wear Sticky buttons or unresponsive keys Water damage indicators If damage is evident, replacing the remote may be your best bet. For minor issues, cleaning the interior components (after carefully opening the casing) with a soft cloth and isopropyl alcohol can sometimes restore functionality. Consider investing in a protective cover to prevent future damage. 5. Vehicle Receiver Issues: The Hidden Problem While the key fob often gets the blame, sometimes the issue lies within your vehicle’s receiver system. If the receiver—which detects and processes the signal from your remote—is malfunctioning, your remote will appear useless regardless of its condition. Solution: One telltale sign of a faulty receiver is if multiple remotes fail to operate the car. In this case, the problem is likely internal. Diagnosing and fixing receiver issues typically requires professional assistance, either from a dealership or an experienced automotive technician equipped with specialized diagnostic tools. Global Context: Keyless Challenges Worldwide The rise of keyless systems isn't limited to one region—it’s a global phenomenon. However, as technology advances, so do the challenges. For instance, key signal cloning and relay attacks have become prevalent, particularly in Europe and North America, prompting manufacturers to enhance security measures continually. Understanding the basics of how your key fob works and its vulnerabilities can help protect against both everyday failures and more sophisticated threats. Stay Ahead of the Problem Modern car remotes offer unmatched convenience, but when they fail, the disruption can be significant. Whether it’s a dead battery, signal interference, synchronization glitch, physical damage, or vehicle receiver issue, knowing how to identify and fix the problem puts you in control. Take proactive steps—replace batteries regularly, handle your remote with care, and familiarize yourself with your vehicle’s reprogramming process. A small investment of time today could save you from major headaches tomorrow. Stay informed. Stay prepared. And keep your car remote working seamlessly, wherever the road takes you.

Chat with us