Post Name

The ignition switch is one of the most important electrical components in any car. When it starts to fail, the symptoms can appear suddenly, seem unrelated, and quickly leave you stranded. This guide explains the real-world signs, the common causes, the most accurate diagnosis steps, and a clear ignition switch replacement guide that helps any driver understand what’s happening and what to do next.

If you’re dealing with car ignition lock problems, this article gives you the clarity you need to fix the issue fast and safely.


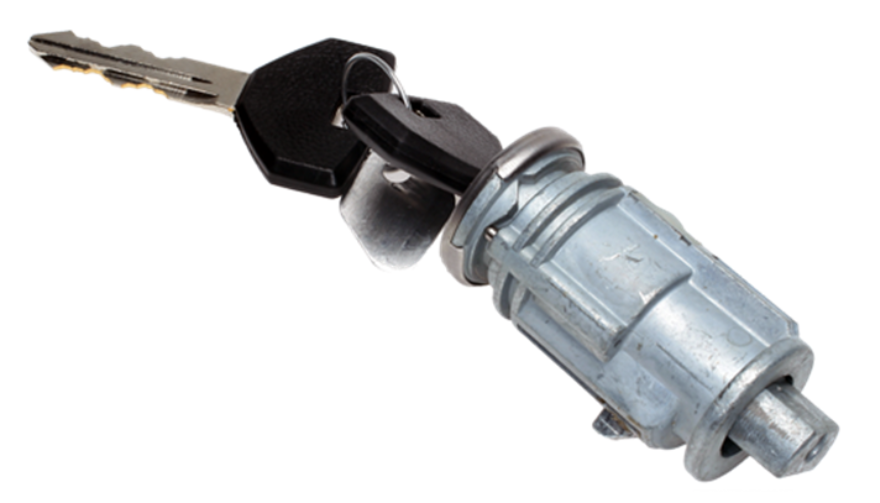
What the Ignition Switch Actually Does

The ignition switch has two critical jobs:

1. Electrical power distribution

It sends power to the dashboard, fuel pump, ignition system, starter motor, and electronic modules.

2. Starting the engine

When you turn the key (or press the button), it bridges electrical circuits, enabling the starter motor to crank the engine.

When the ignition switch begins failing, even slightly, it disrupts these circuits. That’s why symptoms can range from flickering dash lights to complete engine shutdown.


Symptoms of a Failing Ignition Switch


These are the most common, proven symptoms that mechanics use to identify ignition switch problems.

1. Car Won’t Start or Cranks Intermittently


If turning the key does nothing—or the engine cranks sometimes but not always—the ignition switch may not be sending power consistently to the starter relay.

Typical behavior includes:

Silence when turning the key

Clicks but no cranking

Starts only after multiple attempts

Total power loss during cranking

This is one of the most classic ignition switch symptoms.

2. Stalling While Driving


A failing ignition switch can cut power to the engine while you’re moving.

Common signs:

Sudden stall for no reason

All dash lights go off instantly

Engine dies when hitting bumps

Engine cuts out but restarts immediately

This is dangerous and needs urgent attention.

3. Dashboard Lights Flickering or Turning Off


When the internal contacts inside the switch wear out, they create tiny power interruptions.

You may see:

Speedometer drops to zero

Warning lights randomly appear

Interior electronics momentarily cut out

Radio resets or flickers

These short power losses are a major red flag.

4. Key Feels Hot or Hard to Turn


If the key is warm after driving, the switch may be overheating internally.

If the key becomes difficult to rotate, the ignition cylinder (mechanical part) may be worn — which often leads to switch failure later.

5. Accessories Don’t Work in ACC Mode


If turning the key to ACC does not activate:

radio

wipers

power windows

heater fan

…the accessory circuit inside the switch may be failing.

6. No Sound from the Fuel Pump When Turning the Key


You should hear a soft humming for 1–2 seconds.

If you don’t, it may mean the ignition switch isn’t powering the pump relay.


What Causes Ignition Switch Problems?


Ignition switches fail for predictable and well-documented reasons.

1. Internal Wear Over Time


Inside the ignition switch are metal contact plates.

After thousands of cycles, these contacts burn, corrode, or lose tension.

Symptoms develop slowly:


random stalling

needing to wiggle the key

intermittent power

This is the most common cause.

2. Heavy Keychains


Many drivers don’t realise this:

A heavy keychain constantly pulls on the ignition cylinder.

Over years, this causes:

internal looseness

misalignment

premature switch failure

If your keychain has more than a few items, it may be contributing.

3. Heat and Electrical Overload


Faulty relays, worn fuel pumps, or aftermarket accessories can overload the ignition switch.

Excess heat damages the internal copper contacts, causing:

hot key symptoms

partial circuit failure

total switch burnout

4. Moisture or Dirt in the Cylinder


Moisture or dust causes the mechanical part of the ignition to jam or bind.

This forces extra pressure onto the switch every time the key turns.


5. Faulty Key or Worn Key Blade


If your key doesn’t rotate smoothly, it can damage both the cylinder and the switch.

Worn keys often lead to electrical faults later.


How to Diagnose Ignition Switch Problems Accurately


Before replacing parts, you should confirm the ignition switch is truly the issue. These steps follow the same logic professional mechanics use.


1. Check if Dashboard Lights Turn On


Turn the key to ON without starting the engine.

If:

no lights come on

lights flicker

radio stays off

…the ignition switch might not be sending voltage.

2. Try Starting with Accessories On


Turn the key to ACC.

If the accessories work in ACC but the engine won’t start, the “start circuit” inside the ignition switch may be failing.


3. Wiggle Test


Gently wiggle the key while:

trying to start

with ACC on

with the engine idling


If wiggling makes electronics turn on/off, the switch is internally worn.

4. Bump Test While Driving


If the car stalls when hitting bumps or potholes, the switch is losing internal contact momentarily.

This is one of the strongest indicators of a failing switch.

5. Test Voltage at the Ignition Switch (Advanced)


Using a multimeter, check for:

constant power

switched power

accessory power

start signal power

If any circuit fails randomly, it confirms an ignition switch fault.


If you need a safety reference for electrical testing, you can check the UK Government’s general vehicle safety guidance here:


Prevention: How to Avoid Ignition Switch Problems


Ignition switch failures can often be prevented with small habits.

1. Keep Your Keychain Light


Remove heavy accessories.

This reduces stress on the ignition cylinder and switch dramatically.

2. Avoid Resting Hands on the Key While Driving


Constant pressure on the key twists the internal contacts.

3. Only Use Correct, Undamaged Keys


Bent, cracked, or worn keys can damage:

the cylinder

the switch

the steering lock


If your key is worn, replace it before it causes further problems.


4. Address Electrical Problems Early


A failing alternator, weak battery, or short circuits can overload the ignition switch.

If you notice dim headlights or battery warnings, fix those early.

5. Keep Dust and Moisture Out of the Cylinder


Avoid spraying WD-40 or household lubricants into the ignition—it attracts dust.

Use proper graphite lock lubricant if needed.


Ignition Switch Replacement Guide


You should only replace the ignition switch if diagnosis confirms it.

Below is a clear replacement overview used by both DIYers and technicians.


Note: Procedures vary by vehicle, but the overall steps are similar.

1. Disconnect the Battery


Always disconnect the negative terminal.

This prevents:

accidental airbag deployment

electrical shorts

damage to modules

2. Remove Steering Column Covers


Most cars use simple screws underneath.

Once removed, the top and bottom covers split apart.

3. Locate the Ignition Switch Module


It is usually mounted behind the ignition cylinder.

Depending on the car:

it may be held by two screws

or secured with clips

or integrated into a combined steering lock module

4. Remove the Electrical Connector


Ignition switches usually have one large multi-pin connector.

Release the locking tab and pull it gently.

5. Remove and Replace the Switch


Install the new switch in the exact orientation as the old one.

Common mistakes to avoid:

misaligning the switch’s internal slot

tightening screws unevenly

damaging wiring during removal

6. Reassemble and Test Thoroughly


After reassembly, test:

ACC mode

ON mode

engine start

headlights

indicators

wipers

radio

If everything works consistently, the replacement is successful.


Is It Safe to Drive with a Bad Ignition Switch?


Usually no.

A failing ignition switch can:

stall the engine suddenly

disable power steering

shutdown ABS

cut power to headlights at night


The RAC warns that electrical failures causing engine cut-outs are a serious safety risk.

If your switch is failing, get it inspected immediately.


FAQ: Car Ignition Switch Problems


1. How much does ignition switch replacement cost?

Most replacements cost £80–£300 depending on the vehicle. Some modern cars require coding, making the cost higher.

2. Can a bad ignition switch cause the car to stall?

Yes. Loss of electrical contact in the switch can cut power to the engine instantly.

3. Is a failing ignition switch the same as a bad starter?

No.

A bad starter prevents the engine from cranking.

A bad ignition switch prevents power from reaching the starter or other systems.

4. Can a locksmith replace an ignition switch?

In many cases, yes — especially for older vehicles.

For modern immobilizer systems, a vehicle technician may be required.

5. Can I drive with ignition switch problems?

It’s unsafe. The engine can cut out while driving, especially on bumps or turns.

6. Does a bad ignition switch affect accessories only?

It can affect:

accessories

engine start

fuel pump

dashboard power

ECU communication

It depends on which internal circuit fails.

7. What’s the lifespan of an ignition switch?

Most last between 10–15 years, depending on usage and electrical load.

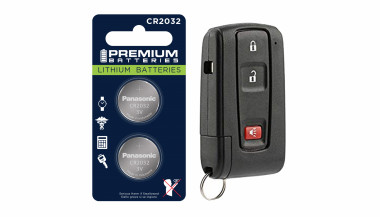
8. Do push-button cars have ignition switches?

Yes — they use an electronic ignition switch module instead of a mechanical one.

Failure symptoms are similar.

9. What does a worn key have to do with ignition switch problems?

A badly worn key can cause mechanical strain on the cylinder, which then stresses the electrical switch linked behind it.

10. Can I prevent ignition switch issues?

Yes — keep your keychain light, avoid forcing the key, and keep electrical systems maintained.


For high-quality replacement automotive parts and spare key, visit our shop at mr-key.com.

Related Posts

What You Need To Know About BMW  Swirl Flaps and How To Solve The Problem With Them

What You Need To Know About BMW Swirl Flaps and How To Solve The Problem With Them

Swirl flaps are a BMW system that has been introduced to help burn the fuel mixture in the cylinder better due to the fact that diesel engines do not have throttle valves and it is not possible to adjust the air-fuel ratio. A diesel engine without vortex valves operates between a poor and a rich fuel mixture, because the only way to regulate it is through fuel injection. Design of the first generation swirl flaps that are made of made of metal. Unfortunately, swirl flaps are responsible for countless damaged engines and costly repairs due to design errors or metal fatigue. Once damaged, the cylinder sucks them in and causes great damage. This is how damaged valves damage the cylinder. Typical swirl flaps suction damage. The vortex valves are positioned in the inlet and are controlled by vacuum (DDE 4.0) or electrically (DDE5.0 / DDE6.4) by the engine ECU. Effects of malfunctioning valves: Swirl valves are stuck in open position: Deterioration of exhaust gas performance at lower speeds. Swirl valves are stuck in closed position: Approximate power loss of 10% at high engine speeds. How swirl flaps work: Performance characteristics: The vortex valves are in the closed position, at low engine speeds and small amounts of fuel injected (controlled by the ECU card). They open under the following conditions: coolant temperature <14 ° C OR * fuel quantity> 24 mg OR engine speed 2250 rpm OR inlet air temperature <-5 ° C BMW and Pierburg have decided to produce diesel engines with metal vortex valves. The speed at which the pistons in the diesel engine operate is at least 60 rpm, so a sucked vortex valve will break and cause a number of damages inside the engine. In most cases, one or more pistons are severely damaged, as a bonus you get valves, in some cases a head or turbocharger. And this combination with a BMW engine is like a cumulative jackpot 🙂 In 2004, BMW began work on the problem and improved the design, however, a number of owners reported ongoing problems in this area. The solution to this problem is by removing the vortex valves and plugging, which does not affect the performance of the engine and at the same time, you can safely pass the exhaust test. Engines: M47 (136hp VP44 fuel pump) has no valves. M47N common rail engine (including M47N / M47TU / M47TUD20) (150hp. Face lift model from 2001 -) has valves. M57 engines (M57D) (525d & 187hp. 330d) cars with manual transmission do not have valves, but those with automatic have. M57N engines (M57TUD) (525d & 330d 204hp) have vortex valves. Ruined swirl flaps: The plugs that replace the vortex valves are easy to find on the internet, but you can also find them here on our website. Typical plugs: Disassembly of vortex valves: The vortex valves can be safely dismantled and in most cases if they are removed properly no loss of power is felt. Final list of models for which vortex valves are installed: Engine: M47N/M47TU/M47TUD20 Applications: * 110 kW (148 hp) and 330 N·m (243 lb·ft) o E46 320d 2001-2005 o E83 X3 2.0d (up to end of 2006) Engine: M47TU2D20 The engine was updated again in 2004 as the M47TU2D20. Still at 1995 cc, it produced more power across the range. Applications: * 120 kW (161 hp) and 340 N·m (251 lb·ft) E60/E61 520d E87 120d E90/E91 320d E83 X3 2.0d (end of 2006 onwards) Engine: M57/M57D25 M57D25 was introduced in 2000. Applications: * 166 PS (122 kW; 164 hp) at 4000 rpm, 350 N·m (260 lb·ft) at 2000-2500 rpm with a 4750 rpm redline, models: 2000-2003 E39 525d *Vehicles With Automatic Transmission ONLY* Engine: M57N/M57TU/M57TUD25 M57TUD25 was introduced in 2004. Applications: * 177 PS (130 kW; 175 hp) at 4000 rpm, 400 N·m (300 lb·ft) at 2000-2750 rpm models: E60/E61 525d Engine: M57/M57D30 M57D30, also called M57D29, was introduced in 1998. Applications: * 184 PS (135 kW; 181 hp)@4000, 390 N·m (290 lb·ft)@1750-3200 models: E39 530d *Vehicles With Automatic Transmission ONLY* E46 330d/330xd *Vehicles With Automatic Transmission ONLY* * 184 PS (135 kW; 181 hp)@4000, 410 N·m (300 lb·ft)@2000-3000 models: E38 730d *Vehicles With Automatic Transmission ONLY* E53 X5 3.0d * 193 PS (142 kW; 190 hp)@4000, 410 N·m (300 lb·ft)@1750-3000 models: E38 730d E39 530d Engine: M57N/M57TU/M57TUD30 M57TUD30 was introduced in 2002. It originally produced 160 kW (215 hp) at 4000 rpm and 500 N·m (370 lb·ft) at 2000-2750 rpm, but was tweaked for 150 kW (201 hp) at 4000 rpm and 410 N·m (300 lb·ft) at 1500-3250 rpm for 2003 and again for 200 kW (268 hp) at 4000 rpm and 560 N·m (410 lb·ft) at 2000-2250 rpm in 2004. Applications: * 204 PS (150 kW; 201 hp)@4000, 410 N·m (300 lb·ft)@1500-3250 models: E46 330d/330Cd/330xd E83 X3 3.0d * 218 PS (160 kW; 215 hp)@4000, 500 N·m (370 lb·ft)@2000-2750 models: E53 X5 3.0d E60/E61 530d/530xd E65 730d * 272 PS (200 kW; 268 hp)@4000, 560 N·m (410 lb·ft)@2000-2250 E60/E61 535d * 245 PS (180 kW; 242 hp)@4000, 500 N·m (370 lb·ft)@2000-2250 * 286 PS (210 kW; 282 hp)@4000, 580 N·m (430 lb·ft)@2000-2250 Engine: M57TU2D30 M57TU2D30 was introduced in 2007, making its debut in the facelifted E60 and E61. * M57TU2D30-UL: 197 PS (145 kW; 194 hp) * M57TU2D30-OL: 235 PS (173 kW; 232 hp)@4000, 500 N·m (370 lb·ft)@2000-2750 * M57TU2D30-TOP: 286 PS (210 kW; 282 hp), 580 N·m (430 lb·ft) Applications: * 197 PS (145 kW; 194 hp), 400 N·m (300 lb·ft) models: E90/E91/E92 325d E60/E61 525d/525xd * 231 PS (170 kW; 228 hp)@4000, 500 N·m (370 lb·ft)@2000-2750 models: E65 730d E90/E91 325d E90/E91 330d/330xd * 235 PS (173 kW; 232 hp) models: E60/E61, BMW E70, BMW E71 * 286 PS (210 kW; 282 hp), 580 N·m (430 lb·ft) models: E60/E61 535d E70 X5 3.0sd E71 X6 xDrive35d E83 X3 3.0sd E90/E91 335d The above models are listed for information only if you want to to make sure your engine has valves installed, please contact a competent person. Please note that the information described above is for informational purposes only and does not claim to be reliable. Mr-key.com is not responsible for any repair work you undertake that is related to the topic described in this article.

The Importance of Having a Spare Car Key: What Every Driver Should Know

The Importance of Having a Spare Car Key: What Every Driver Should Know

When it comes to car ownership, many of us take pride in maintaining our vehicles. We keep up with oil changes, tire rotations, and insurance renewals. But there’s one crucial aspect that many drivers overlook: having a spare car key. It might seem like a small detail, but nearly 40% of car owners don’t have a backup key for their vehicle. That’s a risk you might not want to take. Let’s explore why having a spare car key is so important and how it can save you time, money, and frustration. The Hidden Risks of Having Only One Key You may think that having just one car key is fine—after all, you always know where it is, right? But life has a funny way of surprising us, and car keys get lost or damaged more often than you might think. Here are some common risks you face when relying on just one key: Lost Keys : Losing your only car key can leave you stranded. Whether you're in a rush for work or on your way to an important event, misplacing your key means you're stuck until you find it—or worse, until you get a replacement. Key Damage : Keys, like anything else, wear out over time. A bent or broken key can cause problems with your car’s ignition, and if it's your only one, you’re in for a headache. Lockouts : It’s easy to accidentally lock your keys inside your car. Without a spare key, you’ll need to figure out how to regain access—both costly and inconvenient. Theft : If someone steals your key, not only are you locked out of your car, but you also face a potential security risk. A spare key can give you quick access and peace of mind while you handle the situation. Why a Spare Key Is a Lifesaver Having a spare key is more than just a backup plan; it’s a practical solution that can save you in many situations. Here’s why having a spare key should be on your to-do list: Saves You Time : If you’ve ever lost a key, you know how time-consuming it can be to get a replacement. With a spare key, you can avoid the wait and get back on the road quickly. Prevents Expensive Lockouts : Getting locked out of your car is stressful and costly. Emergency situations like this can cost you not just time but money, and depending on the circumstances, you might even need additional assistance. Convenience for Multiple Drivers : If you share your car with a spouse, roommate, or family member, having a spare key allows both of you to have access without needing to coordinate every trip. Peace of Mind : With a spare key, you won’t have to worry about the “what if” scenarios. It’s a simple safety net that ensures you’re never completely stranded. Affordable Solutions for Replacing Your Car Key You might be wondering how to go about getting a spare key. Fortunately, the process has never been easier or more affordable. Gone are the days when you had to rely on expensive or complicated processes to secure a replacement key. Here are some practical ways to get a spare key: Online Key Replacement Services : Many services offer easy, affordable options for getting a spare car key. Simply upload a photo of your key, and you’ll receive a replacement. Automotive Dealerships : Dealerships provide spare keys for almost any car make or model. However, this option is often more costly and may require you to bring the car in for verification and programming. How to Choose the Right Key Replacement Option When deciding on how to get a spare key, consider these factors: Cost : Depending on the service or method you choose, prices can vary. Evaluate your budget and the type of key your car requires before proceeding. Convenience : For some, the most convenient option is one that doesn’t require in-person visits. Research which option offers the best balance between time and convenience for your needs. Speed : Depending on your urgency, choose an option that fits your timeframe. Some services offer express options, while others may take longer. Don’t Wait Until It’s Too Late Many car owners don’t think about getting a spare key until they’re faced with an emergency. Don’t let that be you. Having a backup key is a small investment that can save you from significant stress and financial strain down the line. Take action today and make sure you have a spare key for your vehicle. Whether it’s for a just-in-case moment or for daily convenience, having that extra key can make all the difference when you need it most.

How to Install a Hydrogel Navigation Screen Protector

How to Install a Hydrogel Navigation Screen Protector

Nowadays car interiors rely heavily on touchscreens. Whether you drive a BMW 3 Series , VW Golf , Audi A4 , Mercedes A-Class , Peugeot 3008 , or Skoda Octavia , your infotainment display is the centre of navigation, settings, entertainment and safety features. But these screens are also fragile—prone to scratches , fingerprints , micro-abrasions , and glare . A hydrogel navigation screen protector is one of the best ways to protect your car touchscreen without affecting clarity or touch sensitivity. This guide shows you exactly how to install a hydrogel protector , step by step, with expert tips, mistakes to avoid, and a few insider tricks that most guides miss. What Is a Hydrogel Screen Protector? Hydrogel is a soft, self-healing, flexible material used widely in phone protection and now increasingly in automotive displays. Unlike tempered glass, it adapts to curved edges and eliminates small bubbles over time. For more technical background, you can read the scientific definition on hydrogels Hydrogel is ideal for infotainment screen protection because it: Reduces glare Absorbs micro-scratches Maintains full touch sensitivity Adapts to curved and angled car screens Self-heals small marks over 24–48 hours It’s especially useful for European cars where screens are large and glossy, such as: Mercedes MBUX screens (A-Class, C-Class, GLC) Volkswagen MIB systems (Golf, Passat, Tiguan) BMW iDrive displays (3 Series, X1, X3) Audi MMI touchscreens (A4, A3, Q5) Peugeot i-Cockpit models Renault Clio, Captur, Megane Skoda Octavia, Superb, Scala Curious which specific models benefit the most from hydrogel protection? Check out our full guide on which cars benefit most from hydrogel navigation protection . Before You Start: Essential Preparation Installing a hydrogel protector takes only a few minutes, but the preparation stage determines whether the final result looks factory-perfect . You Will Need Hydrogel screen protector Microfiber cloth Screen-cleaning wipe (wet & dry) Dust-removal sticker (optional but recommended) Small squeegee / card Choose the Right Environment Install the protector in: A dust-free space (car parked indoors is ideal) Soft lighting (so dust particles are visible) A still environment (no wind, no blowing air) Avoid doing it outside or while standing near open windows. Step-by-Step: How to Install a Hydrogel Navigation Screen Protector 1. Clean the Navigation Screen Thoroughly Use a wet wipe first, then a dry microfiber cloth. Focus on: Corners Edges Around the frame Any oily fingerprints Tip: Turn the screen off to see dust more easily. 2. Remove All Dust Particles Even one small dust speck can create a permanent bubble. Use: Dust-removal stickers A clean microfiber cloth Hold the screen at an angle and look under the light. If perfectionism matters anywhere, it’s here. 3. Peel the First Protective Layer Most hydrogel protectors have two layers . Peel Layer 1 halfway and align the protector with: Left and right edges Upper frame Any curved edges Do not peel it completely yet. 4. Align and Apply the Protector Once aligned: Press the top centre gently Slowly drag your finger downward Peel off the rest of Layer 1 as you go The film will naturally stick without much force. 5. Use the Squeegee to Push Out Air Work from centre outward , using firm but controlled pressure. Hydrogel is self-healing , so small micro-bubbles usually disappear within 24–48 hours . 6. Remove the Final Top Layer After application: Peel Layer 2 from one corner Pull slowly to avoid lifting the protector This reveals a glossy, clear surface below. 7. Allow 24 Hours for Full Adhesion Do not touch the screen too much during this period. Avoid: Heat exposure Cleaning sprays Aggressive pressing Hydrogel needs time to “settle” and self-heal. Common Mistakes to Avoid Even a perfect protector can be ruined by simple errors. Installing in a dusty environment Fibres, dust and hair easily get trapped. Touching the sticky side This leaves permanent marks. Rushing the alignment Hydrogel is flexible but not stretch-proof. Cleaning with alcohol after installation This can damage the outer coating. Installing on a hot screen Heat weakens adhesion and causes micro-bubbles. For a complete walkthrough , see our guide on how to protect your car’s navigation screen . Why Hydrogel Is Better Than Tempered Glass for Car Screens Tempered glass works well for smartphones—but not for car navigation screens. Hydrogel performs better because: It bends and adapts to curved displays It doesn’t create raised edges It avoids touchscreen sensitivity issues It self-heals micro-abrasions It provides better Anti-Glare performance If you want to see more in depth guide on why hydrogel protectors are better check out our guide on Hydrogel vs Tempered Glass Navigation Protectors Comparison FAQs 1. Does a hydrogel protector reduce screen sensitivity No. Hydrogel maintains full touch responsiveness because the material is soft and pressure-adaptive. 2. Can I reuse a hydrogel screen protector? No. Once removed, it cannot be reinstalled cleanly. 3. How long do micro-bubbles take to disappear? Usually 24–48 hours. Stubborn ones may take up to 72 hours if the screen is curved. 4. Will the protector affect brightness or clarity? High-quality hydrogel preserves original screen clarity. Matte versions reduce glare but may slightly soften reflections. 5. Is hydrogel safe for anti-reflective or coated screens? Yes. Hydrogel adhesive is gentle and does not damage coatings. If you want premium hydrogel protectors for BMW, Audi, Mercedes, VW, Peugeot, Renault, Skoda and more, explore our full selection today. Visit our shop at mr-key.com Related Guides Which cars benefit most from hydrogel navigation protection How to Protect Your Car’s Navigation Screen from Scratches,Glare & Fingerprints Hydrogel vs Tempered Glass Navigation Protectors Comparison

Removing Keys from Locks: A Comprehensive Guide

Removing Keys from Locks: A Comprehensive Guide

Removing a key from a lock may seem simple, but it can become tricky when dealing with stuck or broken keys. Whether you're dealing with a standard lock, padlock, or vehicle ignition, understanding the correct techniques can save you from damage and frustration. This guide will walk you through the essential steps for removing keys from various types of locks, offering practical advice and tips to ensure a smooth process. Common Scenarios and Challenges Keys can become stuck or difficult to remove for several reasons, including misalignment, wear and tear, or damage to the key or lock. Additionally, environmental factors like temperature changes can cause metals to expand or contract, making key removal more challenging. Recognizing the cause of the issue is the first step in effectively addressing it. Basic Techniques for Key Removal Gentle Wiggle and Pull: The first technique to try is a gentle wiggle and pull. Hold the key firmly and move it slightly up and down or side to side while pulling gently. This method works well if the key is simply stuck due to misalignment. Lubrication: If the key is difficult to remove, applying a small amount of graphite powder or a silicone-based lubricant into the keyhole can help. Avoid using oil-based lubricants, as they can attract dirt and grime, potentially worsening the problem. Tapping the Lock: For stubborn cases, lightly tapping the lock with a hammer while gently pulling the key can help dislodge it. This method is effective when the key is stuck due to debris or minor misalignments within the lock. Advanced Techniques for Stuck Keys Using a Key Extractor: If the key is broken off inside the lock, a key extractor tool can be very effective. Insert the tool into the keyhole, hook the broken key piece, and pull it out carefully. This method requires patience and a steady hand. Pliers and Tweezers: If part of the key is still protruding, you can use needle-nose pliers or tweezers to grip and pull the key out. Be careful not to apply too much force, as this can push the key further into the lock or damage the lock mechanism. Heat Application: In cold weather, metal contracts, which can cause the key to get stuck. Gently heating the key with a hairdryer or warm cloth can expand the metal slightly, making it easier to remove. However, avoid using an open flame, as it can damage the lock or key. Preventing Key Stuck Issues Prevention is always better than cure. Here are some tips to prevent keys from getting stuck in the future: Regular Maintenance: Keep your locks and keys clean and well-lubricated with appropriate materials. Regularly inspect for wear and tear, and replace any damaged keys or locks. Use Duplicate Keys: If you notice a key becoming difficult to use, have a duplicate made before it breaks or becomes stuck. This will save you the hassle of dealing with a stuck key. Avoid Excessive Force: Never force a key into a lock. If it doesn’t turn easily, stop and inspect both the key and the lock for damage or obstruction. When to Call a Professional While many stuck key issues can be resolved with the techniques mentioned above, there are times when professional assistance is necessary. If you’ve tried all the methods and the key remains stuck, or if you’re dealing with a high-security lock, it’s best to contact a professional locksmith. They have the tools and expertise to safely remove the key without damaging the lock or key further. Dealing with a stuck key can be frustrating, but understanding the proper techniques can save you time and prevent damage. From basic wiggling and lubrication to more advanced methods like using a key extractor, there are various approaches depending on the severity of the situation. Regular maintenance and careful handling can help prevent these issues from occurring in the first place. When in doubt, don’t hesitate to seek professional help to ensure your lock and key remain in good working condition.

Chat with us