Post Name

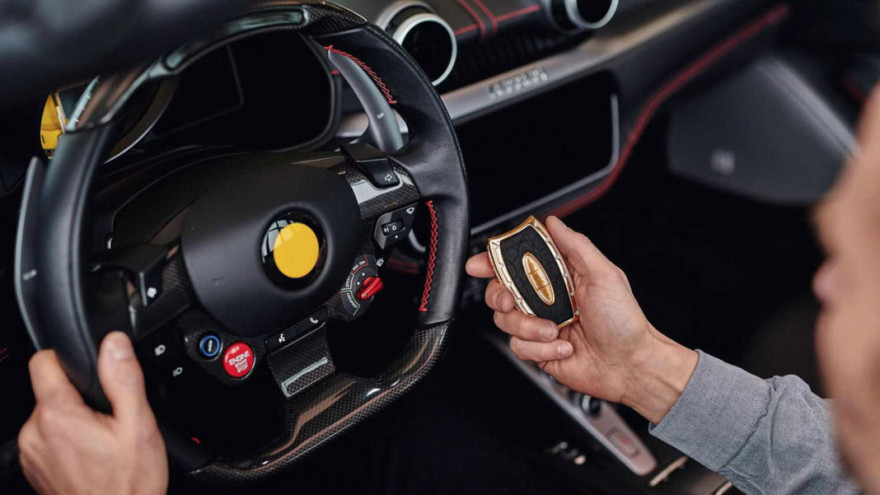
In today’s world, unlocking your car or starting the engine has never been easier. With a simple press of a button, the days of fumbling for traditional keys are behind us. Car key fobs are the modern solution that offer a blend of convenience, security, and technology. But how do these small, often overlooked devices work, and why are they so crucial in today’s automotive world? In this blog, we will dive into the mechanics of car key fobs, their benefits, and why you should understand their functionality.

The Evolution of the Car Key Fob

Car key fobs, as we know them today, are a far cry from the traditional metal keys that dominated the automotive world for centuries. The shift from traditional keys to key fobs began in the 1980s and 1990s, as automakers sought more efficient and secure ways to unlock vehicles and enable keyless entry.

The first remote keyless entry (RKE) systems were introduced to the market in the 1980s. These systems allowed car owners to unlock their doors remotely without inserting a physical key. Over time, the technology evolved further, incorporating additional functions like starting the engine, opening the trunk, and even controlling the vehicle’s security systems—all from a single device. Today, most new vehicles come equipped with key fobs, and many modern models include advanced features like proximity sensing and even remote start capabilities.

How Do Car Key Fobs Work?

Car key fobs operate on radio frequency identification (RFID) or infrared (IR) technology to communicate with the car’s locking system. The process is relatively simple but requires precise technology to ensure security and functionality.

Radio Frequency Communication (RF): When you press a button on your key fob, it sends out a low-frequency signal to the car's receiver. This signal contains encrypted information, such as the command to unlock the doors or start the engine. The receiver in the car decodes the signal and executes the command.

Encryption for Security: One of the key benefits of car key fobs is the security they offer. The signal transmitted by the fob is encrypted, making it difficult for hackers or thieves to intercept and clone the signal. In addition, many fobs are programmed with rolling codes, meaning the signal changes each time the fob is used, further reducing the risk of duplication.

Proximity Sensors and Keyless Entry: Modern key fobs often include proximity sensors, which allow the car to detect when the fob is nearby. This enables keyless entry systems that unlock your car automatically as you approach. The fob only needs to be within a certain range—often just a few feet—for the car to recognize it.

Battery-Powered: Key fobs rely on small batteries to function. Most key fobs use lithium coin cell batteries, which typically last between one and five years, depending on usage. The battery powers the transmitter, receiver, and any additional features (such as a display or remote start).

Why Are Car Key Fobs Essential?

In addition to their basic function of locking and unlocking a car, key fobs have become essential components for vehicle security and convenience. Below are several reasons why these devices are more than just an accessory:

1. Enhanced Security

As vehicle theft has evolved, so too has the need for better security measures. Traditional car keys are relatively easy to copy, especially for older models. In contrast, key fobs provide far superior protection due to their encrypted signals and rolling code technology. This makes them much harder to duplicate or hack.

Moreover, many key fobs are linked to sophisticated alarm systems. If an unauthorized attempt is made to start the vehicle without the fob’s signal, an alarm will sound, and the engine will not start. This extra layer of security significantly reduces the chances of vehicle theft.

2. Convenience and Ease of Use

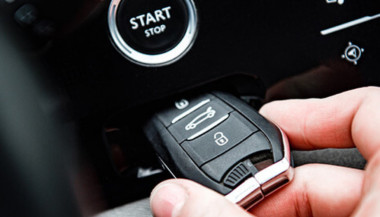
The days of manually unlocking a car with a metal key are long gone. Key fobs offer unprecedented convenience. With a simple button press, you can lock or unlock your doors, open the trunk, and even start the engine without removing the fob from your pocket or bag. This hands-free operation makes accessing your vehicle faster and easier, especially when carrying groceries or dealing with inclement weather.

The proximity sensing technology also adds an extra layer of convenience, allowing you to unlock and start your car without needing to press any buttons—ideal for those busy days when you’re juggling multiple tasks.

3. Keyless Entry and Remote Start

One of the most exciting features of modern car key fobs is the keyless entry and remote start functionality. These features have revolutionized how people interact with their vehicles. Keyless entry allows you to enter your car simply by being in close proximity, while remote start lets you start the engine from a distance, often via a smartphone app or by pressing a button on the fob itself.

Remote start is particularly useful during the winter months. It allows you to start the car in advance, so the engine and cabin are warmed up before you even step inside. Similarly, in hot climates, remote start can be used to cool the cabin, making the car more comfortable when you enter.

Global Adoption and Future Trends

Car key fobs have become a global standard, with nearly all major automakers offering this feature in their vehicles. As more people embrace technology, the demand for even smarter key fobs continues to rise.

In the future, we are likely to see further advancements in key fob technology. For instance, some manufacturers are already exploring biometric security features, such as fingerprint or facial recognition, to enhance the security of key fobs even further. Additionally, smartphone integration is becoming more widespread, allowing car owners to use their phones as key fobs, eliminating the need for a physical device altogether.

While car key fobs have transformed the automotive landscape, they also raise new concerns, particularly regarding privacy and hacking risks. As technology advances, automakers and tech companies will need to stay ahead of potential security vulnerabilities to ensure that key fobs continue to serve as effective and secure tools for car owners.

Car key fobs are no longer just a convenience—they have become an essential part of modern car ownership. From enhanced security features to the convenience of keyless entry and remote start, key fobs offer a range of benefits that make them indispensable for drivers around the world. As technology continues to evolve, we can expect even more advanced features to be integrated into future key fobs, further improving both convenience and security.

Understanding how key fobs work and why they’re important is crucial for anyone who wants to make the most of their vehicle's technology. As we look to the future, it’s clear that key fobs will continue to play a central role in how we access and interact with our cars—an innovation that started with simple remote locking and has now become a vital aspect of our daily driving experience.

Related Posts

How to Install a Hydrogel Navigation Screen Protector

How to Install a Hydrogel Navigation Screen Protector

Nowadays car interiors rely heavily on touchscreens. Whether you drive a BMW 3 Series , VW Golf , Audi A4 , Mercedes A-Class , Peugeot 3008 , or Skoda Octavia , your infotainment display is the centre of navigation, settings, entertainment and safety features. But these screens are also fragile—prone to scratches , fingerprints , micro-abrasions , and glare . A hydrogel navigation screen protector is one of the best ways to protect your car touchscreen without affecting clarity or touch sensitivity. This guide shows you exactly how to install a hydrogel protector , step by step, with expert tips, mistakes to avoid, and a few insider tricks that most guides miss. What Is a Hydrogel Screen Protector? Hydrogel is a soft, self-healing, flexible material used widely in phone protection and now increasingly in automotive displays. Unlike tempered glass, it adapts to curved edges and eliminates small bubbles over time. For more technical background, you can read the scientific definition on hydrogels Hydrogel is ideal for infotainment screen protection because it: Reduces glare Absorbs micro-scratches Maintains full touch sensitivity Adapts to curved and angled car screens Self-heals small marks over 24–48 hours It’s especially useful for European cars where screens are large and glossy, such as: Mercedes MBUX screens (A-Class, C-Class, GLC) Volkswagen MIB systems (Golf, Passat, Tiguan) BMW iDrive displays (3 Series, X1, X3) Audi MMI touchscreens (A4, A3, Q5) Peugeot i-Cockpit models Renault Clio, Captur, Megane Skoda Octavia, Superb, Scala Curious which specific models benefit the most from hydrogel protection? Check out our full guide on which cars benefit most from hydrogel navigation protection . Before You Start: Essential Preparation Installing a hydrogel protector takes only a few minutes, but the preparation stage determines whether the final result looks factory-perfect . You Will Need Hydrogel screen protector Microfiber cloth Screen-cleaning wipe (wet & dry) Dust-removal sticker (optional but recommended) Small squeegee / card Choose the Right Environment Install the protector in: A dust-free space (car parked indoors is ideal) Soft lighting (so dust particles are visible) A still environment (no wind, no blowing air) Avoid doing it outside or while standing near open windows. Step-by-Step: How to Install a Hydrogel Navigation Screen Protector 1. Clean the Navigation Screen Thoroughly Use a wet wipe first, then a dry microfiber cloth. Focus on: Corners Edges Around the frame Any oily fingerprints Tip: Turn the screen off to see dust more easily. 2. Remove All Dust Particles Even one small dust speck can create a permanent bubble. Use: Dust-removal stickers A clean microfiber cloth Hold the screen at an angle and look under the light. If perfectionism matters anywhere, it’s here. 3. Peel the First Protective Layer Most hydrogel protectors have two layers . Peel Layer 1 halfway and align the protector with: Left and right edges Upper frame Any curved edges Do not peel it completely yet. 4. Align and Apply the Protector Once aligned: Press the top centre gently Slowly drag your finger downward Peel off the rest of Layer 1 as you go The film will naturally stick without much force. 5. Use the Squeegee to Push Out Air Work from centre outward , using firm but controlled pressure. Hydrogel is self-healing , so small micro-bubbles usually disappear within 24–48 hours . 6. Remove the Final Top Layer After application: Peel Layer 2 from one corner Pull slowly to avoid lifting the protector This reveals a glossy, clear surface below. 7. Allow 24 Hours for Full Adhesion Do not touch the screen too much during this period. Avoid: Heat exposure Cleaning sprays Aggressive pressing Hydrogel needs time to “settle” and self-heal. Common Mistakes to Avoid Even a perfect protector can be ruined by simple errors. Installing in a dusty environment Fibres, dust and hair easily get trapped. Touching the sticky side This leaves permanent marks. Rushing the alignment Hydrogel is flexible but not stretch-proof. Cleaning with alcohol after installation This can damage the outer coating. Installing on a hot screen Heat weakens adhesion and causes micro-bubbles. For a complete walkthrough , see our guide on how to protect your car’s navigation screen . Why Hydrogel Is Better Than Tempered Glass for Car Screens Tempered glass works well for smartphones—but not for car navigation screens. Hydrogel performs better because: It bends and adapts to curved displays It doesn’t create raised edges It avoids touchscreen sensitivity issues It self-heals micro-abrasions It provides better Anti-Glare performance If you want to see more in depth guide on why hydrogel protectors are better check out our guide on Hydrogel vs Tempered Glass Navigation Protectors Comparison FAQs 1. Does a hydrogel protector reduce screen sensitivity No. Hydrogel maintains full touch responsiveness because the material is soft and pressure-adaptive. 2. Can I reuse a hydrogel screen protector? No. Once removed, it cannot be reinstalled cleanly. 3. How long do micro-bubbles take to disappear? Usually 24–48 hours. Stubborn ones may take up to 72 hours if the screen is curved. 4. Will the protector affect brightness or clarity? High-quality hydrogel preserves original screen clarity. Matte versions reduce glare but may slightly soften reflections. 5. Is hydrogel safe for anti-reflective or coated screens? Yes. Hydrogel adhesive is gentle and does not damage coatings. If you want premium hydrogel protectors for BMW, Audi, Mercedes, VW, Peugeot, Renault, Skoda and more, explore our full selection today. Visit our shop at mr-key.com Related Guides Which cars benefit most from hydrogel navigation protection How to Protect Your Car’s Navigation Screen from Scratches,Glare & Fingerprints Hydrogel vs Tempered Glass Navigation Protectors Comparison

Cold Weather and Your Car Key Fob: What You Need to Know

Cold Weather and Your Car Key Fob: What You Need to Know

As the temperature drops and winter approaches, it’s not just your car’s engine that needs extra attention. Your car’s key fob is also affected by the cold weather, and it’s important to understand how frigid temperatures can impact its performance. In this article, we’ll explore how cold weather can affect your key fob and what you can do to prevent it from causing you frustration during the colder months. How Cold Weather Affects Your Key Fob Key fobs are small electronic devices designed to make our lives easier. They allow us to lock, unlock, and start our cars without ever having to take the key out of our pocket or bag. However, like any electronic device, key fobs are sensitive to extreme temperatures. When the temperature drops, the battery inside the key fob can be affected. Cold weather causes the battery’s chemical reactions to slow down, which can lead to a reduced charge or even a complete failure to operate. If your key fob suddenly stops working or becomes unresponsive, it's likely due to the cold weather affecting the battery's ability to function properly. In addition to battery performance, the cold can also cause the internal components of the key fob to contract. This may interfere with the fob’s functionality, causing it to not respond when you press the buttons. Furthermore, moisture from snow, rain, or condensation can get into the fob, which can cause short circuits or further damage. Signs Your Key Fob May Be Affected by the Cold If you live in an area where cold temperatures are common, it’s essential to be aware of the signs that your key fob might be struggling with the weather. Here are some indicators that the cold is affecting your key fob: Unresponsive buttons : If you press the buttons on your key fob and nothing happens, it may be due to the battery or the internal components not responding correctly to the cold. Delayed reactions : If you notice a delay in your fob’s response, where the locks or alarm take longer than usual to react, this is another sign of cold-induced malfunction. Reduced range : If your key fob is working, but only from a very short distance, it could be due to the battery’s reduced performance in the cold. If you notice these issues, don’t immediately panic. There are simple fixes and preventative steps you can take to resolve the issue. What You Can Do to Protect Your Key Fob in the Cold Fortunately, there are several things you can do to ensure that your key fob continues to work properly during cold weather. By taking a few precautions, you can protect the battery and internal components of your key fob from extreme temperatures: Keep Your Key Fob Warm One of the easiest ways to prevent cold weather from affecting your key fob is to keep it warm. If you're going outside during cold weather, keep your key fob in your coat pocket or a warm, insulated area. You can even use a small pouch or key fob holder with insulation to protect it from the cold. Replace the Battery Before Winter If your key fob is already showing signs of battery issues, consider replacing the battery before winter hits. Even if it’s not quite dead yet, replacing the battery can help ensure that your key fob works smoothly during colder months. Many key fob batteries are easy to replace and can be done at home with a simple tool. Use a Backup Key If you anticipate being in extremely cold conditions or live in a particularly harsh climate, consider having a backup key. Many cars come with a traditional key hidden inside the key fob, which you can use if the key fob stops working in the cold. Having this backup can save you a lot of hassle if your fob stops working unexpectedly. Avoid Moisture Exposure It’s important to keep your key fob dry, especially in winter, when snow, rain, and condensation can cause moisture to build up inside. If your fob does get wet, dry it thoroughly as soon as possible and avoid leaving it outside in damp conditions. If moisture persists, it may cause the internal components to fail. Test Your Key Fob Regularly To ensure that everything is working properly, make a habit of testing your key fob regularly, especially during the colder months. If you notice any signs of malfunction early, you can address the issue before it gets worse. What to Do If Your Key Fob Stops Working If your key fob stops working despite taking preventative measures, don’t panic. There are a few things you can do: Warm up the Fob : Try warming up the fob by placing it in your pocket for a few minutes or rubbing it in your hands. This can help restore some functionality if the battery has slowed down due to the cold. Replace the Battery : If the fob still isn’t working, it may be time to replace the battery. A new battery can often resolve issues related to cold weather. Contact a Professional : If the fob continues to malfunction after changing the battery, it may be time to take it to a professional locksmith or the dealership to check for internal damage. While it’s easy to overlook the impact that cold weather can have on your car’s key fob, it’s important to understand the effects that extreme temperatures can have on its performance. By taking simple precautions and knowing the signs of potential issues, you can help ensure that your key fob continues to work smoothly throughout the colder months. From keeping it warm to regular maintenance, there are several ways to protect your key fob and avoid the frustration of a malfunction during the winter. So, this season, take a few extra steps to care for your key fob, and you’ll be able to unlock and start your car with ease, no matter how cold it gets outside.

Lost Your Westfalia Towbar Key? Here's What to Do

Lost Your Westfalia Towbar Key? Here's What to Do

Have you lost your Westfalia towbar key just before a long-planned trip or an important towing job? Don’t worry, you’re not alone. Every year, thousands of drivers face the same issue: the towbar key disappears right when it's needed most. Westfalia detachable towbar keys are usually used only a few times per year – often for summer holidays, camping trips, towing, or moving. Because they are used so rarely, they often get forgotten for months. It's easy to lose track of where they were last placed: in the glove compartment, a drawer in the garage, or a coat pocket? Fortunately, there's a simple solution – without having to replace the entire towbar system. Step 1: Check the Lock Cylinder for a 5-Digit Code Take a close look at the front of your Westfalia towbar lock, around the keyhole. Many models have a 5-digit code engraved directly into the metal. If the code is between 20000 and 50000, it is your personal key code. This code allows professional key services (like MR-KEY) to create a perfectly matched replacement key – without the original. Examples of valid codes: 23456 27891 49821 You can enter this code directly into an online order form. Order a replacement key here: https://mr-key.com/cat/towbars-keys What if You Only See 3 Digits? Sometimes, you might only find a 3-digit number on the lock body (e.g., 104, 287). Unfortunately, these numbers are not valid key codes . They usually refer to batch numbers or internal components. In this case, we recommend: Conducting a thorough search for the original key (glove compartment, toolbox, jacket pockets, etc.) If the key cannot be found, consider replacing the towbar locking mechanism Tip: Make a Spare Key While You Still Can If you still have your original Westfalia towbar key, now is the perfect time to make a copy . Many Westfalia keys show a code like: 2W01 to 2W50 This code is usually engraved on the metal shaft of the key and matches your towbar lock. With this code, we can quickly and affordably produce a precise duplicate. Why make a spare key? Avoid last-minute panic before departure Reduce costs by preventing lock replacement Fast delivery when ordering by code Order here: https://mr-key.com/cat/towbars-keys Fast and Professional Westfalia Key Service At MR-KEY , we specialize in duplicating Westfalia towbar keys by code. Our service is fast, precise, and hassle-free: Simply provide the 5-digit lock code (20000–50000) We cut the key using high-precision machines Every key is checked before shipping In most cases, shipping is completed within 24 hours . Quick Overview Situation Can a New Key Be Made? What to Do 5-digit code on the lock (20000–50000) Yes Order a key by code Only 3-digit number on the lock No Search for the key or replace the lock Original key with "2W" code present Yes Have a spare key made Tips: How to Avoid Losing Your Key in the Future To avoid ending up in this situation again, follow these simple tips: Store your spare key in your vehicle documents folder or glove box Label your keychain with "Towbar" for easy identification Take a photo of your key code and save it on your phone or in the cloud These small steps can save you time, stress, and money. Losing your Westfalia towbar key doesn't have to ruin your travel plans. As long as your lock has a valid 5-digit code between 20000 and 50000 , a replacement key can be made and shipped quickly. And if you still have the original key? Make a copy now – a small investment for long-term peace of mind. Order your Westfalia replacement key now: https://mr-key.com/cat/towbars-keys Safe travels!

How to Take the Perfect Photo of Your Key for Easy Replacement

How to Take the Perfect Photo of Your Key for Easy Replacement

When you need a replacement key , taking a clear, detailed photo of your key can make the process much faster and more accurate. A high-quality image helps key makers understand the exact specifications, cuts, and dimensions of your key, which is especially important if you don’t have a spare. In this guide, we’ll walk you through the best practices for photographing your key so you can get an accurate replacement with ease. Why a Clear Key Photo Matters Photographing a key might sound simple, but it requires a bit of attention to detail. A well-taken photo captures the key’s grooves and unique cuts clearly, helping the key cutter replicate the exact pattern. Saves Time : A high-quality photo reduces the need for multiple attempts to cut a new key . Ensures Accuracy : Clear images help capture specific details, leading to a more precise fit. Convenient Process : With just a smartphone and a few tips, you can photograph your key from home without needing special equipment. Essential Tools for Photographing Your Key To take a clear photo of your key, you don’t need much beyond a few household items. Here’s what you’ll need: Smartphone or Camera : A phone camera is usually sufficient, but a standard digital camera works well too. Plain Background : Choose a neutral, solid-colored background like a piece of white paper or a smooth table surface. Good Lighting : Natural daylight or a bright room light helps capture details without shadows. Small Object for Elevation : A coin or similar item can lift the key slightly, making it easier to photograph. Step-by-Step Guide to Taking the Perfect Key Photo Follow these steps to take a photo that ensures clarity and accuracy for key replacement. 1. Set Up the Background Place a piece of plain white paper or another smooth, light-colored surface under your key. The solid color helps the details of the key stand out without any visual distractions. Tip : Avoid backgrounds with patterns or textures, as these can obscure the key’s features. 2. Position the Key Correctly Lay the key flat on the background, with the grooves and cuts facing up. The key should be positioned horizontally to allow a clear view of all its details. Side Profile : Make sure to capture the side profile that shows the cuts and grooves. Elevate Slightly : Place a coin or small object under one end of the key to angle it slightly toward the camera. This can help reduce shadows and improve focus on the cuts. 3. Adjust Lighting Good lighting is essential for capturing details. If possible, photograph your key in natural daylight near a window or use a well-lit room. Avoid Shadows : Ensure that no shadows fall across the key, as they can obscure details. Diffuse Light : If using a lamp, consider placing a thin cloth over it to diffuse the light and reduce harsh reflections. 4. Focus and Zoom Make sure your camera or smartphone is focused directly on the key. You may need to tap the screen to bring it into sharp focus. Zoom in Carefully : If you’re using a smartphone, zoom in slightly to capture the details, but avoid over-zooming, which can blur the image. Test Multiple Angles : Sometimes a slight adjustment in angle can capture the cuts more effectively, so take a few shots from slightly different perspectives. 5. Capture Multiple Photos It’s always a good idea to take several photos to ensure you have the best one. Try different angles and lighting adjustments to capture as many details as possible. Close-Up of the Grooves : Take one close-up image focusing on the cuts and grooves of the key. Overall Image : Include one full-length photo that shows the entire key from end to end. Try Different Angles : Slightly tilt the key or move the camera to see which angle best captures the detail of the cuts. Common Mistakes to Avoid When Photographing Your Key To get the best results, steer clear of these common issues that can impact the quality of your key photo: Blurry Images : If your hand shakes, use a small tripod or prop your phone on a stable surface. Poor Lighting : Avoid taking photos in dim rooms; use bright light to ensure the key is clearly visible. Obstructed Details : Make sure the entire length of the key is visible, without any part being cut off or covered. Tips for Ensuring a Smooth Replacement Process Once you have a clear photo of your key, there are a few final steps to make the replacement process as efficient as possible. Check the Photos : Look over your photos before sending them to ensure that they’re clear and detailed. Label the Key : If you’re photographing multiple keys, label each one in the image or add a note to avoid confusion. Include Measurements : If possible, add the measurements of the key’s length and width in your notes for added accuracy. A clear, detailed photo of your key can save you time and effort when seeking a replacement. By following these simple steps, you’ll provide all the necessary details to ensure your new key is an accurate match. Remember, good lighting, focus, and capturing all the unique cuts are essential to achieving the best results. With these guidelines, you’re set to take a photo that will make your key replacement process smooth and hassle-free.

Chat with us