Post Name

Car key programming is one of the most misunderstood parts of modern car ownership. Many drivers assume that only a dealership can program a key—and that doing anything else is risky, illegal, or impossible.

That’s not true.

This immobilizer key guide explains, clearly and factually, how car key programming works in Europe, what dealer software actually does, when it’s required, and when it isn’t. If you’re a car owner or DIYer, this article will save you time, money, and confusion.

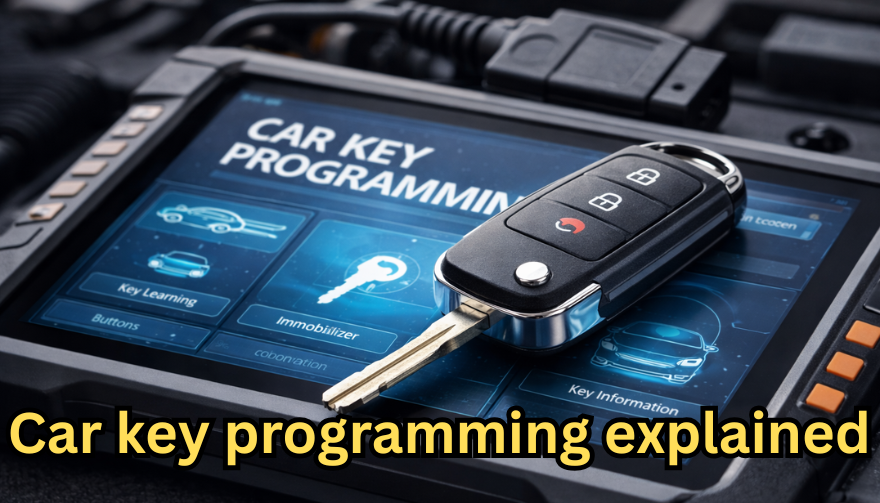
What “Car Key Programming” Actually Means
Car key programming is the process of pairing a key with your vehicle’s immobilizer system so the engine is allowed to start.
Most modern European vehicles (post-1998) use:
An electronic immobilizer
A transponder chip inside the key
A coded handshake between the key and the car

If the code is not recognized, the engine will crank—or not—but will not start.

This is not about cutting metal. It’s about digital authorization.

The Role of the Transponder Chip
A transponder chip is a small RFID device embedded in the key head or remote.
During ignition:
The car sends a challenge signal
The transponder responds with an encrypted code
The immobilizer verifies the code
The engine is enabled

This process happens in milliseconds and cannot be bypassed without authorization.

That’s why transponder key setup is central to modern car key programming.

Immobilizer Systems in European Cars
Most European manufacturers use rolling or encrypted immobilizer systems, including:
Fixed code (older systems)
Rolling code
Crypto transponder systems (Philips, Megamos, Texas Instruments)

The immobilizer typically communicates with:
ECU
BCM
Instrument cluster (on some models)

Programming a key means writing the transponder ID into one or more of these modules.

What Dealer Software Really Does
Dealer software (such as OEM diagnostic platforms) provides:
Secure access to immobilizer modulesOnline authentication with manufacturer servers
PIN or token-based authorization
VIN-locked programming sessions

This is not magic software—it’s a controlled access system.

Dealers do not “unlock” cars manually. They authenticate with the manufacturer.

Do You Always Need Dealer Software? No.
Dealer software is required in some cases—but not all.

You usually need dealer software if:
All keys are lost
The immobilizer ECU was replaced
The car uses online-only key provisioning
The system requires manufacturer server authorization

You usually do NOT need dealer software if:
You already have at least one working key
The car supports onboard key learning
A locksmith tool supports the immobilizer generation
The system allows EEPROM or OBD learning

This is why many keys are programmed outside dealerships every day across Europe.

Onboard Key Programming (When It Exists)
Some vehicles allow basic programming sequences, such as:
Inserting keys in a specific order
Turning ignition cycles
Pressing buttons in sequence

These methods are model-specific and increasingly rare, but they still exist.

They are limited, insecure by modern standards, and usually disabled on newer cars.

Aftermarket Diagnostic Tools vs Dealer Tools
Professional locksmiths often use:
Advanced OBD programmers
EEPROM readers
Token-based platforms

These tools can:
Add spare keys
Clone certain transponders
Reset immobilizer memory (model-dependent)

They do not bypass security—they work within supported systems.
The difference is access method, not legality.

Common Myths About Car Key Programming

“Only dealers can program keys.”
False. Many locksmiths legally do this daily.

“Programming a key damages the car.”
False, if done correctly.

“You can program any key yourself.”
False. Many systems require professional tools.

“All keys are the same.”
False. Transponder types matter.

Security, Law, and Reality in Europe
In Europe:
Programming requires proof of ownership
VIN access is regulated
Manufacturer servers control high-security systems

This protects vehicles—but does not create a monopoly.

Independent programming exists legally alongside dealers.

For technical background on immobilizer systems, see:

What MR-KEY Does (and Does Not Do)
At MR-KEY, we:
Sell replacement car keys
Supply key shells, remotes, blades, and transponder-compatible keys
Support many European vehicle brands

We do NOT program keys.
Programming must be done by:
A professional locksmith
A dealership
A qualified automotive specialist

This ensures compliance, safety, and proper immobilizer pairing.

FAQ: Car Key Programming

Can I program a car key myself?
Sometimes. Only if your vehicle supports onboard programming. Most modern European cars do not.

Is a transponder chip always required?
Yes, for immobilizer-equipped vehicles. Without it, the engine will not start.

Can a locksmith program a key without dealer software?
Often yes—if at least one working key exists and the system supports it.

What happens if all keys are lost?
Dealer-level or server-authorized programming is usually required.

Does replacing a key erase old keys?
Sometimes. Many systems overwrite previous keys during programming.

Is key cloning legal?
It depends on the country, vehicle, and method. Always verify local regulations.

Get the Right Key First
Programming only works if the correct key is used.

Wrong frequency, wrong transponder, or incompatible remote = failed programming.

Visit our shop at mr-key.com to find the correct replacement car key for your vehicle before programming.

Related Posts

How Hot Weather Can Damage Your Car Key Fob – And What You Can Do About It

How Hot Weather Can Damage Your Car Key Fob – And What You Can Do About It

When you think about how hot weather affects your vehicle, your first thoughts might go to the engine, the tires, or maybe even the air conditioning. But there’s one small, essential part of your daily driving routine that’s often overlooked — your car key fob. It might seem like a tough little device, but the truth is, it’s far more sensitive than it looks. If you’ve ever left your key fob on the dashboard, in a hot glove box, or even inside your pocket during a heatwave, you may have already caused damage without realizing it. Car key fobs are built with delicate electronics, plastic shells, and lithium coin batteries — all of which are vulnerable to extreme temperatures. In this article, you’ll learn how hot weather affects each part of your key fob, how to spot the early signs of damage, and most importantly, what you can do to protect it. Taking just a few simple steps can save you from the cost and inconvenience of a non-functioning remote, especially when you least expect it. The Plastic Shell: First to Feel the Heat One of the first things to suffer from heat exposure is the plastic casing that protects your key fob. While it’s designed to withstand everyday use — being dropped, tossed in a bag, or handled frequently — it’s not built to survive hours in a baking-hot car. The interior temperature of a parked vehicle can soar past 60 or even 70 degrees Celsius on a sunny day, especially if the key is sitting directly in sunlight. Over time, this level of heat can soften the plastic, causing it to warp, bend, or even split at the seams. You may start to notice that your key doesn’t close as tightly as it used to, or the buttons may feel soft and spongy instead of firm. Cracks might appear along the sides, or parts of the shell may become discolored. While this might seem like a cosmetic issue at first, it has serious implications — a compromised shell allows moisture, dust, and debris to enter the fob, putting the internal electronics at risk. If your key fob’s shell is already showing signs of wear, especially after a hot summer, it’s time to consider replacing the casing before the damage gets worse. Battery Breakdown: How Heat Drains Power Inside your key fob, there’s usually a small lithium battery — typically a CR2032 coin cell. These batteries are reliable under normal conditions, but they don’t respond well to high temperatures. In fact, exposure to extreme heat can accelerate chemical breakdown inside the battery, leading to faster discharge and a shorter overall lifespan. What’s worse, in severe cases, the battery can swell or leak, which can damage the internal components of your fob permanently. If you’ve ever noticed your key fob suddenly stops working or becomes unreliable during the summer, there’s a good chance the battery is struggling under heat stress. The signal may become weaker, you might have to press buttons multiple times, or the remote might stop responding altogether. Replacing the battery is a quick and inexpensive fix, but it’s important to recognize that battery issues are often just the first symptom of deeper heat-related problems. Internal Electronics: Silent Victims of the Heat While the shell and battery are easier to see and replace, the most serious damage often happens silently — deep inside the electronic circuit board. This board, often referred to as the platine, is responsible for all communication between your key and your vehicle. It’s a compact, delicate system of soldered connections and microchips, and unfortunately, it’s not designed to cope with repeated thermal stress. When your key fob is exposed to fluctuating high temperatures, the constant expansion and contraction of materials can loosen solder joints or weaken connections. Moisture that gets trapped inside the shell during humid summer months can accelerate corrosion, especially if the casing is already cracked or loose. The damage might not be immediate, but over time you may find that your key fob becomes unpredictable — sometimes it works, other times it doesn’t, and eventually, it might stop working completely. What You Can Do to Prevent Heat Damage The good news is that most heat-related damage to key fobs is preventable with just a little care and awareness. First, never leave your key fob inside a parked car for extended periods, especially not in direct sunlight. It’s easy to toss your keys into the cup holder or leave them on the dashboard while you run errands, but those few minutes can expose them to dangerous levels of heat. Instead, keep your keys on you or store them in a shaded, temperature-controlled area. If you’re regularly in hot environments — such as driving in warm climates or working outdoors — consider investing in a protective silicone or leather cover. These not only shield the shell from heat exposure but also provide added protection against drops and dirt. You should also make it a habit to replace your battery once a year, even if it seems to be working fine. Batteries weakened by heat can fail suddenly, and a fresh cell ensures your key fob keeps working when you need it most. Finally, if your key fob’s shell is visibly worn or loose, replace it immediately. Many online stores, including Mr Key, offer affordable replacement shells that are easy to install and give your remote a like-new feel. Don’t wait for the damage to reach the internal electronics — by then, repair options are limited and usually more expensive. Protect Your Key, Protect Your Drive Your car key fob might be small, but it plays a huge role in your daily routine. From unlocking doors to starting your engine, it’s a modern convenience we all depend on — until it stops working. And while many drivers are careful with their car’s mechanical systems, few think twice about leaving their key fob in the heat. Now that you know how much damage summer temperatures can cause, you can take the steps needed to protect your key before it’s too late. If you’re looking for high-quality key shell replacements, batteries like the CR2032, or even complete key fobs compatible with your vehicle, Mr Key has you covered. Our online shop offers trusted parts for Peugeot, Citroën, Nissan, Suzuki, Fiat, and more — all designed to help you repair and maintain your car keys quickly and affordably.

How to Install a Hydrogel Navigation Screen Protector

How to Install a Hydrogel Navigation Screen Protector

Nowadays car interiors rely heavily on touchscreens. Whether you drive a BMW 3 Series , VW Golf , Audi A4 , Mercedes A-Class , Peugeot 3008 , or Skoda Octavia , your infotainment display is the centre of navigation, settings, entertainment and safety features. But these screens are also fragile—prone to scratches , fingerprints , micro-abrasions , and glare . A hydrogel navigation screen protector is one of the best ways to protect your car touchscreen without affecting clarity or touch sensitivity. This guide shows you exactly how to install a hydrogel protector , step by step, with expert tips, mistakes to avoid, and a few insider tricks that most guides miss. What Is a Hydrogel Screen Protector? Hydrogel is a soft, self-healing, flexible material used widely in phone protection and now increasingly in automotive displays. Unlike tempered glass, it adapts to curved edges and eliminates small bubbles over time. For more technical background, you can read the scientific definition on hydrogels Hydrogel is ideal for infotainment screen protection because it: Reduces glare Absorbs micro-scratches Maintains full touch sensitivity Adapts to curved and angled car screens Self-heals small marks over 24–48 hours It’s especially useful for European cars where screens are large and glossy, such as: Mercedes MBUX screens (A-Class, C-Class, GLC) Volkswagen MIB systems (Golf, Passat, Tiguan) BMW iDrive displays (3 Series, X1, X3) Audi MMI touchscreens (A4, A3, Q5) Peugeot i-Cockpit models Renault Clio, Captur, Megane Skoda Octavia, Superb, Scala Curious which specific models benefit the most from hydrogel protection? Check out our full guide on which cars benefit most from hydrogel navigation protection . Before You Start: Essential Preparation Installing a hydrogel protector takes only a few minutes, but the preparation stage determines whether the final result looks factory-perfect . You Will Need Hydrogel screen protector Microfiber cloth Screen-cleaning wipe (wet & dry) Dust-removal sticker (optional but recommended) Small squeegee / card Choose the Right Environment Install the protector in: A dust-free space (car parked indoors is ideal) Soft lighting (so dust particles are visible) A still environment (no wind, no blowing air) Avoid doing it outside or while standing near open windows. Step-by-Step: How to Install a Hydrogel Navigation Screen Protector 1. Clean the Navigation Screen Thoroughly Use a wet wipe first, then a dry microfiber cloth. Focus on: Corners Edges Around the frame Any oily fingerprints Tip: Turn the screen off to see dust more easily. 2. Remove All Dust Particles Even one small dust speck can create a permanent bubble. Use: Dust-removal stickers A clean microfiber cloth Hold the screen at an angle and look under the light. If perfectionism matters anywhere, it’s here. 3. Peel the First Protective Layer Most hydrogel protectors have two layers . Peel Layer 1 halfway and align the protector with: Left and right edges Upper frame Any curved edges Do not peel it completely yet. 4. Align and Apply the Protector Once aligned: Press the top centre gently Slowly drag your finger downward Peel off the rest of Layer 1 as you go The film will naturally stick without much force. 5. Use the Squeegee to Push Out Air Work from centre outward , using firm but controlled pressure. Hydrogel is self-healing , so small micro-bubbles usually disappear within 24–48 hours . 6. Remove the Final Top Layer After application: Peel Layer 2 from one corner Pull slowly to avoid lifting the protector This reveals a glossy, clear surface below. 7. Allow 24 Hours for Full Adhesion Do not touch the screen too much during this period. Avoid: Heat exposure Cleaning sprays Aggressive pressing Hydrogel needs time to “settle” and self-heal. Common Mistakes to Avoid Even a perfect protector can be ruined by simple errors. Installing in a dusty environment Fibres, dust and hair easily get trapped. Touching the sticky side This leaves permanent marks. Rushing the alignment Hydrogel is flexible but not stretch-proof. Cleaning with alcohol after installation This can damage the outer coating. Installing on a hot screen Heat weakens adhesion and causes micro-bubbles. For a complete walkthrough , see our guide on how to protect your car’s navigation screen . Why Hydrogel Is Better Than Tempered Glass for Car Screens Tempered glass works well for smartphones—but not for car navigation screens. Hydrogel performs better because: It bends and adapts to curved displays It doesn’t create raised edges It avoids touchscreen sensitivity issues It self-heals micro-abrasions It provides better Anti-Glare performance If you want to see more in depth guide on why hydrogel protectors are better check out our guide on Hydrogel vs Tempered Glass Navigation Protectors Comparison FAQs 1. Does a hydrogel protector reduce screen sensitivity No. Hydrogel maintains full touch responsiveness because the material is soft and pressure-adaptive. 2. Can I reuse a hydrogel screen protector? No. Once removed, it cannot be reinstalled cleanly. 3. How long do micro-bubbles take to disappear? Usually 24–48 hours. Stubborn ones may take up to 72 hours if the screen is curved. 4. Will the protector affect brightness or clarity? High-quality hydrogel preserves original screen clarity. Matte versions reduce glare but may slightly soften reflections. 5. Is hydrogel safe for anti-reflective or coated screens? Yes. Hydrogel adhesive is gentle and does not damage coatings. If you want premium hydrogel protectors for BMW, Audi, Mercedes, VW, Peugeot, Renault, Skoda and more, explore our full selection today. Visit our shop at mr-key.com Related Guides Which cars benefit most from hydrogel navigation protection How to Protect Your Car’s Navigation Screen from Scratches,Glare & Fingerprints Hydrogel vs Tempered Glass Navigation Protectors Comparison

Guide to Identifying and Replacing Your Keys

Guide to Identifying and Replacing Your Keys

Losing your keys can be a frustrating experience, but identifying the right replacement doesn't have to be. Whether you've lost a house key, a car key, or a key to a padlock or cabinet, understanding how to identify the key you need is crucial. This guide will walk you through the process of identifying your keys, ensuring you find the right replacement quickly and efficiently. The Importance of Key Identification Before diving into how to replace a lost key, it’s important to understand why key identification is critical. Keys come in a variety of shapes, sizes, and designs, each tailored to specific types of locks. Identifying your key correctly will save time, money, and frustration. For example, car keys often include transponder chips that need to be programmed to your vehicle, while house keys may have specific patterns that fit only one brand of lock. Step 1: Check for Key Codes and Markings The first step in identifying your key is to look for any codes or markings. These can be found on the key itself or sometimes on the lock. Key codes are often a series of letters and numbers that indicate the specific model or cut of the key. If you still have the original key, examine it closely for these codes. If not, check the lock for any inscriptions that might offer clues. Key codes are essential, particularly for high-security keys or specialized keys such as those used in commercial settings. For car keys, this code might also be found in the vehicle’s manual or on a key tag provided at the time of purchase. Step 2: Determine the Key Type Next, determine the type of key you need. Different keys serve different purposes: House Keys: Typically flat with unique grooves along the edge, these are used in residential locks. Car Keys: These may include electronic transponders and are often more complex. Padlock Keys: Usually smaller, these keys have a unique profile that fits the specific lock. Cabinet or Locker Keys: These are often smaller and may be specific to a brand or lock type. Identifying the correct key type is important because it narrows down your options when searching for a replacement. Step 3: Identify the Lock Brand If you cannot find a key code, identifying the lock brand is the next best step. The brand name is usually stamped somewhere on the lock or key. Knowing the brand will help you narrow down the options for finding a replacement key. For example, many house keys are cut to fit specific brands like Yale or Schlage. Car keys, on the other hand, are usually specific to the car manufacturer. Knowing the brand is especially useful when you need to replace a key without an original to reference. Step 4: Examine the Key Profile The profile of the key refers to the unique cuts, grooves, and ridges along its blade. This profile is what allows the key to operate a specific lock. When identifying your key, compare the profile of your key to those available through online resources or in-store at key-cutting services. If you have a high-security key, it may have a more complex profile that is difficult to replicate. In such cases, it’s best to consult a professional locksmith or the lock manufacturer for an exact match. Step 5: Utilize Online Resources There are many online resources available to help you identify and replace your lost key. Websites often offer key identification tools where you can input details such as key codes, lock brands, and key types to find a match. Additionally, many online stores specialize in replacement keys, offering a wide selection based on the information you provide. Step 6: Contact the Manufacturer If you're still having trouble identifying your key, contacting the lock or car manufacturer can be extremely helpful. Provide them with any details you have about the lock or key, and they can often guide you to the right replacement. For car keys, your vehicle identification number (VIN) can often be used by the dealership to cut a new key or program a replacement transponder key. Step 7: Professional Locksmith Assistance When all else fails, a professional locksmith is your best bet. Locksmiths have the tools and expertise to identify and replicate nearly any type of key. They can also assist with programming transponder keys for cars or creating master keys for complex locking systems. Losing a key doesn't have to be a stressful experience if you know how to identify and replace it effectively. By following these steps—checking for key codes, determining the key type, identifying the lock brand, examining the key profile, using online resources, and seeking professional help—you can ensure that you find the right replacement quickly and efficiently. Proper key identification is the first step toward restoring access and ensuring security.

How to Rescue Your Car Key After It Gets Wet: A Practical Guide

How to Rescue Your Car Key After It Gets Wet: A Practical Guide

The Modern Dilemma: Wet Car Keys and How to Fix Them Imagine this: you’re caught in an unexpected downpour, and your car key slips from your hand, landing straight into a puddle. Or perhaps you accidentally leave your keys in your pocket while diving into a swimming pool. Whatever the scenario, the moment you realize your car key has been submerged in water can be panic-inducing. With modern car keys embedded with electronic chips and sophisticated technology, exposure to moisture can mean more than just a temporary inconvenience—it could leave you locked out or facing expensive repairs. But before you rush to replace your key, there are several steps you can take to salvage it. Understanding the Risks: What Happens When a Car Key Gets Wet? Car keys today are more than just metal; many include electronic transponders and remote control systems that communicate with the vehicle’s ignition. Water exposure can lead to: Short circuits: Moisture can cause electronic components to malfunction or fail entirely. Corrosion: Over time, water can lead to rust and degradation of internal circuits. Battery failure: Many car keys contain small batteries, and water exposure can lead to leakage or loss of function. While traditional metal keys are less affected by water, smart keys and key fobs are vulnerable. Acting quickly can often save your key from irreparable damage. Immediate Steps to Take When Your Car Key Gets Wet If your car key has been exposed to water, time is of the essence. Here’s what you need to do: Retrieve the key from the water as quickly as possible and wipe off excess moisture using a dry, absorbent cloth or paper towel. Remove the battery if possible since many car key fobs have removable batteries; check your car manual for instructions. If the battery is wet, replace it with a new one rather than attempting to dry and reuse it. Disassemble the key fob if safe to do so, carefully opening the casing to allow internal components to dry. Avoid using force or tools that might damage delicate parts. Use silica gel or rice for drying—place the key fob in a container of silica gel packets (often found in new shoe boxes or electronics packaging) for 24-48 hours; if silica gel is unavailable, uncooked rice can work as an alternative, though it may not be as effective. Avoid using direct heat—do not use hairdryers, microwaves, or ovens to speed up drying, as high temperatures can warp plastic components and damage circuits; instead, allow the key to air dry naturally in a warm, ventilated space. Finally, test the key once you’re confident it is dry by reinserting the battery and testing it on your car; if the key does not work, it may require reprogramming or replacement. When to Seek Professional Help If your key remains unresponsive despite thorough drying, it may have suffered internal damage. In such cases, consider these options: Contact your car manufacturer or dealership—they can provide a replacement key or attempt to reprogram the existing one. Visit a professional locksmith—many automotive locksmiths specialize in repairing and reprogramming electronic keys at a lower cost than dealerships. Check your car insurance policy—some policies cover lost or damaged keys, potentially reducing replacement costs. Global Trends in Key Fob Durability and Waterproofing Car manufacturers are increasingly designing key fobs to withstand water exposure. For example, Tesla’s Model 3 key card eliminates the need for traditional keys by using a waterproof RFID card, Toyota and BMW have introduced water-resistant key fobs, minimizing the risk of damage, and future innovations may include biometric key technology, reducing dependency on physical devices altogether. As technology advances, water-resistant key designs may become the norm, reducing the stress of accidental spills or submersion. Preventative Measures: How to Protect Your Car Key from Water Damage To avoid future incidents, consider these preventative steps: Use a waterproof key case: Available online, these cases provide a protective barrier against water exposure. Designate a dry storage spot: Avoid leaving keys in pockets that may go through the wash or near pools and sinks. Invest in a spare key: Having a backup key can be a lifesaver if your primary key is damaged beyond repair. Check for manufacturer upgrades: Some car brands offer upgraded, water-resistant key fobs for an additional fee. Act Quickly to Save Your Key A wet car key doesn’t necessarily mean it’s the end of the road. By acting swiftly and following proper drying techniques, you may be able to rescue your key without costly replacements. As car technology evolves, so too will key durability, but for now, a little caution and quick thinking can go a long way. If you frequently find yourself around water, taking preventative measures can save time, money, and frustration.

Chat with us