Post Name

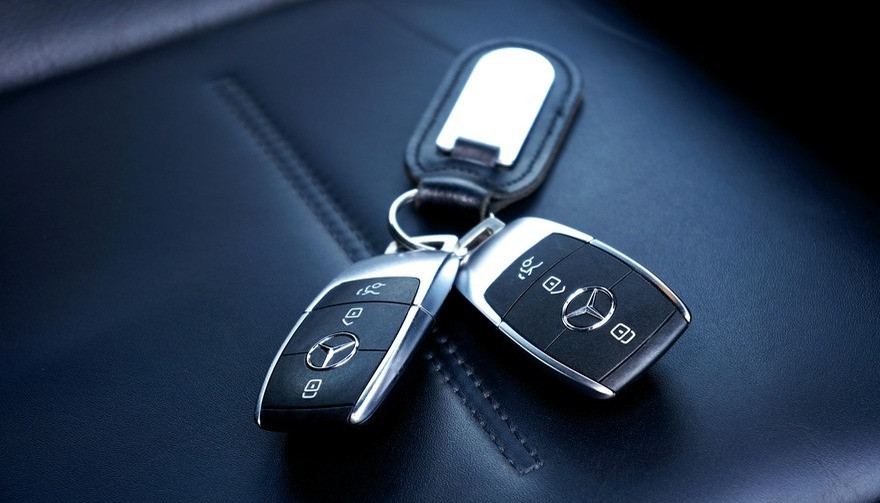
What is a Key Cover?

A key cover, often referred to as a key shell or key case, is the outer part of your key. It houses the electronic board, chip, and battery but excludes the internal electronics themselves. If your key casing is damaged, there’s no need to replace the entire key – just changing the key cover can restore its durability and usability while saving you money.

When Do You Need a New Key Cover?

You might need a key cover replacement when:

  • The buttons on your key become worn out or stop responding.
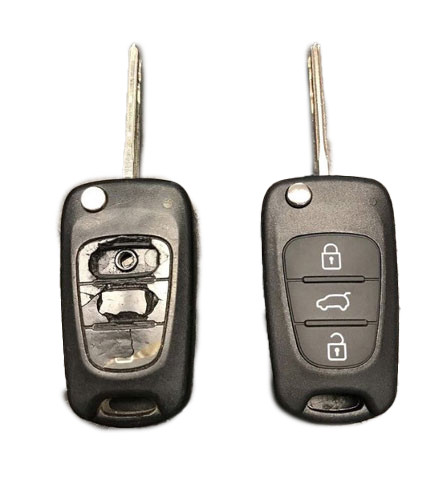
  • The outer case cracks, exposing the internal electronics.
  • The key mechanism no longer functions smoothly.
  • You want to refresh the appearance of your key with a new, sturdy shell.

Instead of struggling with a faulty key, simply replace the cover and extend the lifespan of your original key!

How to Choose the Right Key Cover?

When selecting a replacement key cover, consider the following factors:

  • Button Layout: Ensure that the number of buttons and their symbols match your existing key.
  • Blade Shape: If your key includes an integrated blade, make sure the new shell accommodates it correctly.
  • Quality: A good-quality key cover ensures a snug fit, smooth functionality, and long-lasting durability.

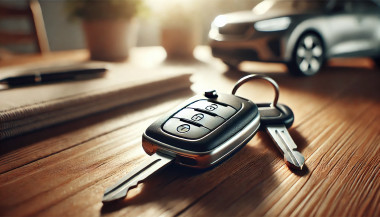
At MR-KEY, we offer a variety of key covers designed to match your specific car model perfectly, providing both aesthetics and functionality.

How to Change Your Key Cover?

Replacing your key cover is simple and doesn’t require professional assistance. Here’s how:

  1. Purchase a compatible key cover from our website.
  2. Open your old key case carefully.
  3. Transfer the electronic board and chip from your original key to the new key cover.
  4. Reassemble the key, ensuring all components fit securely.
  5. Test the buttons and functions to confirm everything is working properly.

For step-by-step guidance, we provide video tutorials on our website, showing you exactly how to change your key shell and even replace the battery if needed.

What Else Can You Change When Replacing the Key Cover?

While changing your key cover, it's the perfect time to:

  • Replace non-functional click buttons on your key’s electronic board.
  • Change the battery since you're already disassembling the key, ensuring it lasts longer.

At MR-KEY, we strive to make key replacements easy, affordable, and accessible to everyone. Explore our website to find the perfect key cover, key cutting services, and useful video guides to help you maintain your car key like a pro!

Related Posts

How to Protect Your Car’s Navigation Screen from Scratches, Glare & Fingerprints

How to Protect Your Car’s Navigation Screen from Scratches, Glare & Fingerprints

Modern cars often pack large touchscreens into the dash, and keeping these displays clear is key to enjoying every drive. A single scratch or dirty spot can make maps and menus hard to read. Car insurers warn that infotainment screens are surprisingly fragile – even a small dent or scratch can disable parts of the system . Worse, replacing a built-in navigation unit can cost thousands and take weeks . The good news? A little proactive care goes a long way. Interior dashboards are loaded with touchscreens that easily pick up scratches and smudges. For example, a high-quality navigation screen protector can shield your display from daily wear . These protectors are often made of tough 9H-tempered glass with an oleophobic coating (to repel fingerprints) and an anti-glare matte finish . A properly fitted protector keeps your screen looking brand-new and makes cleaning simpler. Invest in a Quality Screen Protector Choose the right fit Get a protector cut for your car’s make and model so it covers the entire display without blocking cameras or buttons. Hydrogel protector over tempered glass A hydrogel navigation screen protector is the best modern option for car screens. Unlike tempered glass, hydrogel film is flexible, ultra-thin, and self-healing — meaning small scratches disappear on their own over time. Hydrogel also fits curved or irregular screens better, doesn’t crack or chip like glass, and offers excellent clarity with strong anti-scratch and anti-glare properties. It maintains perfect touch sensitivity and blends seamlessly with the original display. To understand the real differences between hydrogel film and tempered glass — and which one offers the best long-term protection for your car — check out our detailed comparison guide: Hydrogel vs Tempered Glass Navigation Protectors Comparison . Anti-glare & oleophobic coatings Many navigation screen protectors include a matte, anti-glare surface. This scatters harsh sunlight and helps repel fingerprints and oil. (Some even advertise oleophobic layers that resist smudges.) Installation matters Follow the instructions carefully (clean the screen first, align the film, and smooth out bubbles). A misaligned or bubbled protector can itself cause visibility issues. Installing a car screen protector isn’t just about preventing scratches. It also helps maintain screen clarity over time. As one Tesla owner discovered, adding a new glass protector made even a worn, glare-prone screen “look almost new again” If you’ve already chosen a hydrogel protector and want to install it correctly, follow our step-by-step guide on how to install a hydrogel navigation screen protector . Clean Your Screen the Right Way Fingerprints, dust and grease are everyday enemies of visibility. But cleaning improperly can do more harm than good. Follow these expert tips: Use a microfiber cloth Wipe the screen with a soft, clean microfiber towel – even better if it’s dedicated just to your screen . This gentle fabric removes oils without scratching the glass. Spray cleaner on the cloth, not the screen If you need liquid cleaning, lightly mist it onto the cloth first. Never spray cleaners or water directly onto the touchscreen . Too much liquid or harsh chemicals can seep into seams or damage any oleophobic coatings. Avoid household glass cleaners Standard window cleaners (with ammonia or alcohol) can strip away protective coatings or damage the display . In fact, Car and Driver cautions that you should “avoid using household glass cleaner on your car’s touchscreen” unless you know it’s ammonia- and alcohol-free . Use fresh wipes Always use a clean side of your cloth or a new wipe on the screen. AGWS (an auto insurer) advises against using a cloth or wipe that’s already been on the dashboard or door panels – it can transfer grit and actually scratch the display Detail with precision If dirt or fingerprints linger, dampen the cloth with plain water or a gentle, screen-safe cleaner and buff in small circles. For stubborn spots, a second dry pass with the microfiber cloth will remove streaks. Wipe smudges away with a soft cloth – spraying cleaner on the cloth, not on the screen . Clean your screen each time you wash the car, or whenever you notice foggy patches. In fact, one test found that many “interior detailer” sprays (like Chemical Guys or Meguiar’s) can work just as well as specialized screen cleaners if they’re labeled safe for screens. Reduce Sunlight Glare Glare is one of the biggest complaints with modern car touchscreens. It makes maps hard to read, increases eye strain, and leads to drivers pressing harder on the display—over time, this causes wear and visible marks. To reduce glare: Install a matte hydrogel screen protector Adjust the display’s brightness and contrast Avoid cleaning with shiny or oily cloths Park with the dashboard away from intense sunlight when possible Hydrogel films help significantly because they diffuse harsh reflections without dulling the screen. Prevent Fingerprints and Smudges Touchscreens are fingerprint magnets. Oils from your hands quickly accumulate on the surface, especially on climate controls or zoom gestures. Solutions that actually work: Oleophobic coatings (built into many hydrogel protectors) Regular microfiber wipe-downs Avoid touching the screen with sunscreen or lotion on your hands Use voice commands for common actions when possible Drivers notice a big difference after installing a car navi screen protector—much fewer smudges and much easier cleaning. Protect the Screen During Everyday Use Small habits reduce long-term wear: Remove rings before using the touchscreen Don’t store hard objects (keys, coins) near the display Keep dust off the dashboard Avoid pressing with fingernails Use steering-wheel controls when possible Tiny scratches add up, especially on softer automotive materials. FAQ What is the best way to protect a car navigation screen? Installing a car-specific hydrogel screen protector provides the best protection against scratches, glare and fingerprints. Do hydrogel protectors really self-heal? Yes. The top layer softens slightly with heat and pressure, allowing micro-scratches to fade within minutes. Do these protectors affect touch sensitivity? No. Hydrogel films are extremely thin and designed to preserve the original touchscreen response. Can I install a screen protector myself? Hydrogel films are easy to install because they are flexible and bubble-resistant. Most people complete the installation in minutes. Will a protector reduce screen brightness? A high-quality hydrogel film maintains screen clarity while reducing harsh glare. Do car manufacturers recommend screen protectors? Many dealerships now advise using some form of screen protection due to rising replacement costs and increasing touchscreen sizes. Which Cars Benefit Most Some car brands benefit disproportionately from hydrogel screen protection — especially large-format touchscreens in premium models. If you want the full breakdown of the top models for 2025–2026, see our detailed guide on which cars benefit most from hydrogel navigation protection . To protect your own car’s screen from scratches, glare and fingerprints, visit our shop at mr-key.com . Related Guides How to Install a Hydrogel Navigation Screen Protector Which Cars Benefit Most From Hydrogel Navigation Protection? (2026 Overview) Hydrogel vs Tempered Glass Navigation Protectors Comparison

How to Take the Perfect Photo of Your Key for Easy Replacement

How to Take the Perfect Photo of Your Key for Easy Replacement

When you need a replacement key , taking a clear, detailed photo of your key can make the process much faster and more accurate. A high-quality image helps key makers understand the exact specifications, cuts, and dimensions of your key, which is especially important if you don’t have a spare. In this guide, we’ll walk you through the best practices for photographing your key so you can get an accurate replacement with ease. Why a Clear Key Photo Matters Photographing a key might sound simple, but it requires a bit of attention to detail. A well-taken photo captures the key’s grooves and unique cuts clearly, helping the key cutter replicate the exact pattern. Saves Time : A high-quality photo reduces the need for multiple attempts to cut a new key . Ensures Accuracy : Clear images help capture specific details, leading to a more precise fit. Convenient Process : With just a smartphone and a few tips, you can photograph your key from home without needing special equipment. Essential Tools for Photographing Your Key To take a clear photo of your key, you don’t need much beyond a few household items. Here’s what you’ll need: Smartphone or Camera : A phone camera is usually sufficient, but a standard digital camera works well too. Plain Background : Choose a neutral, solid-colored background like a piece of white paper or a smooth table surface. Good Lighting : Natural daylight or a bright room light helps capture details without shadows. Small Object for Elevation : A coin or similar item can lift the key slightly, making it easier to photograph. Step-by-Step Guide to Taking the Perfect Key Photo Follow these steps to take a photo that ensures clarity and accuracy for key replacement. 1. Set Up the Background Place a piece of plain white paper or another smooth, light-colored surface under your key. The solid color helps the details of the key stand out without any visual distractions. Tip : Avoid backgrounds with patterns or textures, as these can obscure the key’s features. 2. Position the Key Correctly Lay the key flat on the background, with the grooves and cuts facing up. The key should be positioned horizontally to allow a clear view of all its details. Side Profile : Make sure to capture the side profile that shows the cuts and grooves. Elevate Slightly : Place a coin or small object under one end of the key to angle it slightly toward the camera. This can help reduce shadows and improve focus on the cuts. 3. Adjust Lighting Good lighting is essential for capturing details. If possible, photograph your key in natural daylight near a window or use a well-lit room. Avoid Shadows : Ensure that no shadows fall across the key, as they can obscure details. Diffuse Light : If using a lamp, consider placing a thin cloth over it to diffuse the light and reduce harsh reflections. 4. Focus and Zoom Make sure your camera or smartphone is focused directly on the key. You may need to tap the screen to bring it into sharp focus. Zoom in Carefully : If you’re using a smartphone, zoom in slightly to capture the details, but avoid over-zooming, which can blur the image. Test Multiple Angles : Sometimes a slight adjustment in angle can capture the cuts more effectively, so take a few shots from slightly different perspectives. 5. Capture Multiple Photos It’s always a good idea to take several photos to ensure you have the best one. Try different angles and lighting adjustments to capture as many details as possible. Close-Up of the Grooves : Take one close-up image focusing on the cuts and grooves of the key. Overall Image : Include one full-length photo that shows the entire key from end to end. Try Different Angles : Slightly tilt the key or move the camera to see which angle best captures the detail of the cuts. Common Mistakes to Avoid When Photographing Your Key To get the best results, steer clear of these common issues that can impact the quality of your key photo: Blurry Images : If your hand shakes, use a small tripod or prop your phone on a stable surface. Poor Lighting : Avoid taking photos in dim rooms; use bright light to ensure the key is clearly visible. Obstructed Details : Make sure the entire length of the key is visible, without any part being cut off or covered. Tips for Ensuring a Smooth Replacement Process Once you have a clear photo of your key, there are a few final steps to make the replacement process as efficient as possible. Check the Photos : Look over your photos before sending them to ensure that they’re clear and detailed. Label the Key : If you’re photographing multiple keys, label each one in the image or add a note to avoid confusion. Include Measurements : If possible, add the measurements of the key’s length and width in your notes for added accuracy. A clear, detailed photo of your key can save you time and effort when seeking a replacement. By following these simple steps, you’ll provide all the necessary details to ensure your new key is an accurate match. Remember, good lighting, focus, and capturing all the unique cuts are essential to achieving the best results. With these guidelines, you’re set to take a photo that will make your key replacement process smooth and hassle-free.

How to Program a Car Key: A Step-by-Step Guide

How to Program a Car Key: A Step-by-Step Guide

Lost Your Car Key Programming? Here's What to Do Have you ever lost your car keys or found yourself with a spare key that doesn’t start your vehicle? While the process of programming a car key might seem intimidating, it’s often simpler than you’d expect. In many cases, car owners can program keys themselves without needing a visit to a dealership. This guide walks you through the essentials of car key programming, helping you save time, effort, and potentially a significant amount of money. Understanding Car Key Programming: The Basics Car key programming is the process of syncing a key with a car's internal computer so it can communicate securely. Modern vehicles use transponder keys or smart keys equipped with chips that emit a unique signal. Without proper programming, these keys won’t function, even if they fit perfectly into the ignition. While older mechanical keys didn’t require programming, today’s advanced systems add a layer of security, reducing the risk of car theft. However, this added sophistication means that replacing or reprogramming a key is no longer as simple as cutting a piece of metal. Quick Tip: Check your vehicle’s owner manual to see if programming your car key is a DIY-friendly process, as some models allow self-programming, while others require professional tools. Step-by-Step Guide to Programming a Car Key Before starting, ensure you have all necessary tools and information: The vehicle’s owner manual. All keys that need programming, including the functional ones. Step 1: Access Programming Mode Start by sitting in the driver’s seat with all the doors closed. Insert the already functional key into the ignition and turn it to the “on” position (do not start the engine). Some vehicles require you to cycle the key between “on” and “off” positions a specific number of times to enter programming mode. Step 2: Add the New Key Once in programming mode, remove the functional key and quickly insert the new key into the ignition. Turn it to the “on” position. The vehicle’s security light may flash to indicate the key has been successfully programmed. Step 3: Test the Key After programming, remove the new key and test it to ensure it can start the car and unlock the doors. Note: Each car manufacturer has unique programming steps. Be sure to consult your owner’s manual or the manufacturer’s website for specific instructions. When Professional Help Is Needed While many vehicles allow for DIY key programming, others require specialized equipment or software that only dealerships or locksmiths can access. This is particularly true for luxury or high-end cars with advanced encryption and security features. If your DIY efforts fail, it’s best to seek help from a certified professional. Visiting a dealership is a reliable, albeit more expensive, option. Alternatively, professional locksmiths often provide programming services at a lower cost, making them a practical choice for many drivers. Costs and Considerations The cost of programming a car key varies significantly based on the vehicle’s make and model. For basic models, self-programming might cost nothing if you already have a functional key. However, professional programming can range from $50 to $300 or more, especially for smart keys or proximity fobs. To minimize costs: Have a spare key : Always keep a functional spare to simplify programming if a replacement is needed. Research costs : Call local locksmiths or dealerships to compare pricing. Empower Yourself with Knowledge Programming a car key doesn’t have to be a daunting task. With the right tools and information, many car owners can handle the process themselves, saving time and money. However, it’s essential to recognize when professional assistance is necessary, particularly for complex key systems. By understanding the basics of car key programming and following a step-by-step approach, you can ensure your vehicle remains secure and functional. So, whether it’s a spare key or a replacement, you now have the confidence to tackle the task or know where to turn for help.

Understanding Key Fob Security: Protecting Your Vehicle

Understanding Key Fob Security: Protecting Your Vehicle

You use your key fob every day—locking and unlocking your car, maybe even starting the engine from a distance—without giving it a second thought. But as technology in vehicles advances, so do the methods used to compromise it. Keyless entry has made life more convenient, but it’s also introduced a new set of risks. If you’ve ever wondered how secure your key fob really is, or how you can protect yourself against modern car theft, this guide is for you. How Your Key Fob Works Key fobs operate by sending a low-frequency radio signal to your car. When the car recognizes the encrypted signal, it unlocks or starts the engine. It’s fast, wireless, and requires no physical interaction with the car—just proximity. Most modern fobs also use a rolling code system that changes the signal each time, making it harder for thieves to duplicate. This technology helps protect against basic forms of signal cloning, but “harder” doesn’t mean “impossible.” Criminals have found ways to bypass even these security measures. What Is a Relay Attack? One of the most common forms of key fob theft today is the relay attack. It relies on extending the communication range of your key fob without your knowledge. Here’s how it works: thieves use two devices. One person stands near your home, capturing the signal from your key fob—even through walls or windows. The second person uses a relay device to transmit that signal to your car. The car thinks the key fob is close and unlocks the doors. In some cases, they can even start the engine and drive off without ever seeing the key. All of this can happen in seconds. There’s no broken glass, no forced entry, and often no alarms triggered. By the time you realize something’s wrong, your vehicle might already be gone. Signal Jamming and Other Threats Relay attacks aren’t the only thing to worry about. Another tactic thieves use is signal jamming. This involves blocking the signal between your key fob and your car when you attempt to lock it. You might press the button and hear nothing unusual—but your car never actually locks. You walk away, thinking everything’s secure, while the thief simply opens the door and gains access. Then there’s code grabbing, which involves intercepting your key fob’s signal and replaying it later to unlock the vehicle. While more complex and less common, it’s another reminder that your key fob isn’t just a convenience—it’s a target. How to Protect Your Key Fob Fortunately, there are several effective ways to protect your key fob. Start by storing it away from exterior walls and windows. The closer your fob is to the outside of your home, the easier it is for thieves to pick up its signal. For stronger protection, use a Faraday pouch or metal container. These signal-blocking enclosures prevent any radio frequency from escaping, effectively rendering your fob invisible to relay devices. They’re inexpensive, easy to use, and highly effective. If your vehicle allows it, consider disabling the keyless entry feature when not in use—especially overnight or when your car is parked for long periods. You’ll usually find this option in your car’s settings or user manual. Make a habit of confirming your vehicle locks before walking away. Look for flashing lights or listen for the beep. These small checks can alert you if a jamming attempt has occurred. Be cautious with third-party or aftermarket fobs. Not all of them use reliable encryption or high-quality components. A poorly designed fob could introduce new vulnerabilities rather than protecting against them. Stay One Step Ahead Keyless technology is here to stay, offering undeniable convenience to drivers. But with that convenience comes a new wave of digital risks. Thieves don’t need to break windows anymore—they just need the right equipment and an unsecured signal. You don’t need to be a tech expert to protect yourself. Just understanding how your key fob works—and taking a few simple precautions—can significantly reduce your risk. Treat your fob like the digital key it is. Keep it protected, and you’ll keep your car safer, too. Because in today’s world, car security isn’t just about the locks—it’s about the signal.

Chat with us