Post Name

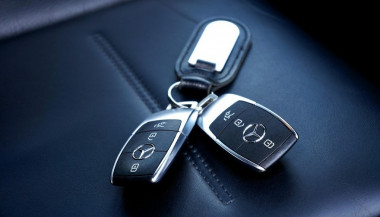
Your car key fob is one of the most used items in your daily life. You press it multiple times a day, carry it in your pocket or bag, toss it on desks, and sometimes accidentally drop it on the ground. But how often do you actually clean or check it?

Most people only think about their key fob when it stops working. By then, it's often too late. The good news is, with a little attention and regular maintenance, you can keep your car key fob working perfectly for years to come.

In this article, you'll learn how to clean and maintain your car key fob like a pro — so you can save money, avoid frustration, and get the best performance out of your key.

Why Cleaning and Maintaining Your Key Fob Matters

Car key fobs aren’t just simple remotes. They're packed with sensitive electronics, small batteries, and tiny contact points that can easily get damaged by dirt, moisture, or simple neglect.

If you never clean or check your key fob, you might start to notice:

Unresponsive buttons

Reduced signal range

Frequent battery issues

Complete failure to unlock or start the car

Most of these problems are avoidable with basic maintenance. Cleaning your key fob regularly helps keep it functional, protects its electronics, and ensures it lasts longer. It also saves you from spending money on costly repairs or total key replacements.

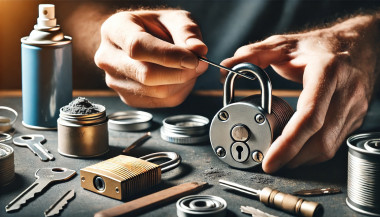
How to Clean Your Car Key Fob: Step-by-Step Guide

Step 1: Open the Key Fob Gently

Start by carefully opening your key fob. Most models have a small groove or notch where you can insert a flathead screwdriver or a coin to separate the shell. Be gentle — forcing it open can crack the plastic or damage internal clips.

If you're unsure, check your car’s manual or look up your key model online to find specific instructions.

Step 2: Remove the Battery

Once you open the key fob, always remove the battery before cleaning. This protects the electronic circuit from any accidental moisture and prevents short-circuiting.

Set the battery aside in a dry, safe place.

Step 3: Clean the Exterior

Use a soft, dry microfiber cloth to wipe the outside of the key fob shell. For tougher dirt or sticky areas, slightly dampen the cloth with water or isopropyl alcohol (70% or higher). Avoid using harsh cleaning chemicals that could damage the plastic or remove painted symbols.

Step 4: Clean the Buttons and Small Gaps

Dirt, dust, and pocket debris often collect around the buttons. These particles can block the buttons from making proper contact or cause them to stick.

Use a cotton swab or a soft toothbrush to gently clean around the edges and in between the buttons. For tight spaces, a toothpick can help dislodge stubborn dirt. If needed, lightly moisten the cotton swab with alcohol to break down grime.

Always dry the key fob thoroughly after cleaning.

Step 5: Inspect and Clean the Battery Contacts

Battery contacts can become dirty or corroded over time, especially if the battery leaked or moisture got inside.

Check the metal contact points carefully. If you see white powder or greenish residue (common signs of corrosion), gently clean them using a cotton swab dipped in isopropyl alcohol. Be extremely careful not to bend or scratch the contacts.

If corrosion is too severe, the key fob might need professional repair or a replacement circuit board.

Step 6: Replace the Battery if Needed

Key fob batteries typically last between 1 to 2 years, but frequent use, weak signals, or exposure to extreme temperatures can shorten battery life.

If your battery is old or low, replace it with a new one. Most car key fobs use CR2032 or CR2025 batteries. Always make sure you install the new battery in the correct position, respecting the polarity (+ / -).

A fresh battery not only improves response time but also ensures the signal reaches your car reliably.

Step 7: Reassemble the Key Fob

Once everything is clean and fully dry, carefully snap the key fob back together. Make sure the casing is securely closed and the buttons feel smooth and responsive.

Test the key fob to confirm that it works correctly.

Pro Tips to Keep Your Car Key Fob in Top Shape

A well-maintained key fob can last many years. Here’s how to keep it working perfectly:

Keep it Dry: Most key fobs aren’t waterproof. Avoid rain, puddles, wet pockets, or any contact with liquids.

Use a Protective Cover: A silicone or rubber key cover adds shock protection, keeps out dirt, and prevents scratches.

Avoid Extreme Heat or Cold: Leaving your key fob in direct sunlight or in a freezing car can damage the battery and weaken plastic parts.

Change the Battery Regularly: Don’t wait for your key fob to completely stop working. Weak batteries can lead to unreliable signals and unexpected failure.

Don’t Drop It: Even though most key fobs can handle light drops, repeated impact can cause internal damage.

When to Replace the Key Fob Shell

If your key fob shell is cracked, worn, or no longer closes tightly, it’s time to replace it. A damaged shell can let moisture and dirt reach the electronics and cause long-term damage.

Replacing the shell is a quick and affordable solution that can extend your key fob’s life significantly.

At Mr. Key, we offer high-quality key fob shells, batteries, and repair kits that can help you refresh your key fob and save money compared to dealership prices.

Explore our key fob repair kits, protective covers, and replacement batteries now at mr-key.com.

Your car key fob may seem like a small detail, but it plays a huge role in your daily life. Without it, you can’t get in or even start your car.

The good news is that taking care of your key fob is easy. With regular cleaning, battery checks, and some simple maintenance, you can keep it working reliably for years.

And if you need to replace your battery, your key shell, or your entire key fob, Mr. Key is here to help.

We provide everything you need to keep your keys in perfect shape, save money, and avoid unnecessary trips to the dealer.

Related Posts

Simple Tips to Free a Stuck Lock: What You Need to Know

Simple Tips to Free a Stuck Lock: What You Need to Know

Locks are meant to provide security, but when they seize up, they can leave you feeling frustrated and helpless. Dealing with a stuck lock is more common than you might think, and thankfully, there are affordable and effective solutions to get it working smoothly again. Whether it's a car door, trunk, or your home lock, here are some tried-and-true methods to free up a jammed lock. Why Locks Seize Up Understanding the causes behind a stuck lock can help you prevent it from happening in the future. Locks can seize up for various reasons: Dirt and Debris : Over time, dust, grime, or even small particles can accumulate inside the lock mechanism, making it harder for the internal parts to move smoothly. Rust and Corrosion : Exposure to moisture, humidity, or salty air can lead to rust buildup on metal parts within the lock, which can prevent movement. Lack of Lubrication : Locks need to be lubricated occasionally to ensure smooth operation. Without lubrication, friction increases, and the lock may eventually jam. Now, let’s look at some simple steps to tackle a seized lock. Step 1: Use Graphite Powder or Dry Lubricant The first thing to try is applying a lubricant, but be careful about what type you use. Wet or oil-based lubricants can attract dust, which eventually clogs the lock. Graphite Powder : This is one of the best options for freeing up a stuck lock. Sprinkle a small amount of graphite powder into the keyhole, insert the key, and gently move it back and forth. This spreads the graphite, reducing friction and allowing the lock components to move more freely. Dry Lubricants : These are specifically designed for locks and are ideal for situations where you want to avoid residue buildup. Spray a small amount into the lock, then insert the key and gently turn it. Pro Tip : Avoid using regular WD-40 or other oil-based products, as they may lead to a buildup over time, making the problem worse. Step 2: Try the Key with Gentle Force If lubrication alone doesn’t do the trick, the next step is to use a little gentle force with your key. Be cautious here; applying too much force could break the key inside the lock. Insert the Key : Once the lubricant has been applied, insert the key fully into the lock. Wiggle Carefully : Gently wiggle and turn the key without applying too much force. This movement may help distribute the lubricant further and gradually loosen up any stuck components. Caution : If you feel excessive resistance, don’t force the key. Forcing it can cause damage or even snap the key, which would require additional assistance to remove. Step 3: Warm Up the Lock (Especially Useful for Cold Weather) Cold temperatures can cause locks to seize due to ice or metal contraction. If you suspect the cold is the issue, warming up the lock can be effective. Use a Hair Dryer : Direct warm air onto the lock for several minutes to allow the metal to expand and the ice (if any) to melt. Heat the Key : You can also try warming the key slightly with a lighter, but exercise caution and make sure it isn’t too hot before inserting it into the lock. Safety Note : Avoid open flames directly on the lock itself, as this can damage surrounding surfaces or even warp the lock mechanism. Step 4: Use a Vinegar Solution for Corroded Locks If rust is the culprit, vinegar is a great household solution for loosening rust and corrosion in a lock. Apply Vinegar : Put a few drops of vinegar on the key, insert it into the lock, and let it sit for a minute or two. Vinegar can help dissolve light rust, making it easier to turn the key. Follow with Lubricant : After using vinegar, apply a small amount of graphite powder or dry lubricant to ensure the lock remains smooth and functional. Step 5: Work with Compressed Air to Remove Debris If dirt or debris has accumulated inside the lock, compressed air is a quick and efficient way to clear it out. Blow Out Dust : Use a can of compressed air and direct the nozzle into the keyhole. Short bursts of air can blow out dust and small debris that may be obstructing the mechanism. Follow Up : After using compressed air, it’s a good idea to add a dry lubricant to prevent any remaining dust from causing future jams. How to Prevent Lock Seizure in the Future Once you’ve successfully freed a seized lock, it’s helpful to take steps to prevent it from happening again. Here are some preventive tips: Regularly Lubricate : Use a dry lubricant or graphite powder once or twice a year, especially if you live in a humid or dusty area. Keep Locks Clean : Wipe off any visible dirt or dust around the lock mechanism. If the lock is exposed to elements (like outdoor or car locks), covering it can help keep debris and moisture out. Avoid Overusing Keys : If your key shows signs of wear, consider getting a replacement. Worn-out keys can cause more friction inside the lock, leading to jams. When to Seek Professional Help Sometimes, despite your best efforts, a lock just won’t budge. In cases where the lock is significantly damaged, heavily corroded, or if the key breaks inside, it’s best to reach out for professional assistance. A professional has specialized tools and expertise to address these issues without causing further damage. Taking Care of Your Locks A stuck lock can be an inconvenience, but by following these simple steps and using a little patience, you can often resolve the issue without professional help. Keeping locks in good condition with regular care is the key to ensuring they function smoothly for years to come.

Hydrogel vs Tempered Glass Navigation Protectors Comparison

Hydrogel vs Tempered Glass Navigation Protectors Comparison

Cars and vehicles nowadays often include large touchscreen navigation systems that are prone to scratches, fingerprints and cracks. These displays are expensive to replace – one owner reported a factory infotainment screen costing over $3,000 to swap out – so protecting them is crucial. That’s where navigation screen protectors come in. The two main options are hydrogel film protectors and tempered glass protectors . Below, we compare hydrogel vs tempered glass for car navigation screens, looking at fit, durability, clarity and more, so you can choose the best protection for your car. Hydrogel vs Tempered Glass: The Essentials Tempered glass protectors A rigid, hard 9H glass shield. Excellent scratch resistance, very clear, and feels like the original screen. Best for completely flat displays. Hydrogel protectors A flexible, self-healing polymer film originally used in aviation and military applications. Ultra-thin, edge-to-edge fit, excellent for curved or uniquely shaped screens. Key difference: Hydrogel bends. Tempered glass doesn’t. Fit & Coverage (Hydrogel Wins) Modern cars often have curved or tapered displays. Tempered glass cannot follow these shapes, leaving exposed edges, air gaps or weak adhesion points. Hydrogel protectors conform perfectly to flat, curved and 3D-shaped screens. They wrap the edges, eliminate halo gaps, and achieve full-surface coverage. If your car’s screen isn’t perfectly flat, hydrogel is the correct choice. Scratch & Impact Protection Tempered glass: Extremely resistant to scratches Can crack on impact, sacrificing itself to protect the screen Once cracked, must be replaced Hydrogel: Softer surface, but self-heals micro-scratches over time Doesn’t shatter; absorbs everyday bumps Ideal for preventing long-term wear and swirl marks Glass is harder; hydrogel stays clearer longer thanks to self-healing. Clarity, Glare & Touch Sensitivity Both types maintain high clarity and touch accuracy, but behave differently in real use: Tempered glass: Ultra-clear Glossy surface shows fingerprints easily Good touch response Hydrogel: Crystal-clear or matte anti-glare options Reduces reflections in sunlight — very useful in cars Zero touch interference due to ultra-thin structure Minor micro-bubbles self-resolve within hours If you drive in bright sun or hate fingerprint shine, hydrogel’s matte option is a major advantage. Installation & Removal Tempered glass: Simple dry install One-shot alignment Rigid, so easy to place but unforgiving if misaligned Hydrogel: Dry or wet install Allows micro-adjustments Easy bubble removal No cracking during installation Removal is simple for both, though hydrogel is safer (no glass shards, no risk of breakage during removal). If you want to learn more about how to install your hydrogel navigation screen protector visit our guide. Which Should You Choose? For general car owners with modern infotainment systems, the winner is clear: ✔ Hydrogel protectors are better for most car navigation screens. Why: Perfect fit on curved screens Self-healing surface Anti-glare options Full edge-to-edge coverage Zero loss in touch sensitivity Tempered glass is fine for older or perfectly flat screens — but today’s automotive displays benefit more from hydrogel technology. FAQ Does a navigation screen really need protection? Yes. Screens scratch easily, attract fingerprints, and are expensive to replace. A protector preserves clarity and resale value. Is hydrogel or tempered glass better overall? Hydrogel — unless your screen is perfectly flat. It fits better, reduces glare, and self-heals surface scratches. Will a protector affect touch response? No. Both types maintain excellent touch accuracy. Hydrogel is especially responsive due to its thin, adaptive structure. How do I protect my screen from fingerprints and glare? Use a matte hydrogel film. For more techniques, see our guide on [ How to Protect Your Car’s Navigation Screen from Scratches, Glare & Fingerprints ] . Which cars benefit most from hydrogel protection? Any model with curved, large, glossy or high-resolution displays. See our model list: [ Which Cars Benefit Most From Hydrogel Navigation Protection? ] . For custom-cut hydrogel protectors for your exact car model, visit mr-key.com . Related Guides How to Protect Your Car’s Navigation Screen from Scratches, Glare & Fingerprints How to Install a Hydrogel Navigation Screen Protector Which Cars Benefit Most From Hydrogel Navigation Protection?

KEY COVERS: WHAT DO YOU NEED TO KNOW?

KEY COVERS: WHAT DO YOU NEED TO KNOW?

What is a Key Cover? A key cover , often referred to as a key shell or key case, is the outer part of your key. It houses the electronic board, chip, and battery but excludes the internal electronics themselves. If your key casing is damaged, there’s no need to replace the entire key – just changing the key cover can restore its durability and usability while saving you money. When Do You Need a New Key Cover? You might need a key cover replacement when: The buttons on your key become worn out or stop responding. The outer case cracks, exposing the internal electronics. The key mechanism no longer functions smoothly. You want to refresh the appearance of your key with a new, sturdy shell. Instead of struggling with a faulty key, simply replace the cover and extend the lifespan of your original key! How to Choose the Right Key Cover? When selecting a replacement key cover, consider the following factors: Button Layout: Ensure that the number of buttons and their symbols match your existing key. Blade Shape: If your key includes an integrated blade, make sure the new shell accommodates it correctly. Quality: A good-quality key cover ensures a snug fit, smooth functionality, and long-lasting durability. At MR-KEY , we offer a variety of key covers designed to match your specific car model perfectly, providing both aesthetics and functionality. How to Change Your Key Cover? Replacing your key cover is simple and doesn’t require professional assistance. Here’s how: Purchase a compatible key cover from our website. Open your old key case carefully. Transfer the electronic board and chip from your original key to the new key cover . Reassemble the key, ensuring all components fit securely. Test the buttons and functions to confirm everything is working properly. For step-by-step guidance, we provide video tutorials on our website, showing you exactly how to change your key shell and even replace the battery if needed. What Else Can You Change When Replacing the Key Cover? While changing your key cover, it's the perfect time to: Replace non-functional click buttons on your key’s electronic board. Change the battery since you're already disassembling the key, ensuring it lasts longer. At MR-KEY , we strive to make key replacements easy, affordable, and accessible to everyone. Explore our website to find the perfect key cover, key cutting services, and useful video guides to help you maintain your car key like a pro!

Can I order a replacement car key online with delivery?

Can I order a replacement car key online with delivery?

Short answer: Yes. You can order a replacement car key online in the UK and have it delivered in 3–4 days. Choose the right key type, provide a photo or key code for cutting, and have a local locksmith program it when it arrives. Why trust this guide: With over 25 years in the locksmith trade and more than 650,000 satisfied customers, Mr-Key explains exactly how online key replacement works — clearly, securely, and step by step. When online replacement works (and when it doesn’t) Ordering online is ideal if you need a spare, a like-for-like remote, or a replacement for a lost or damaged key. It’s the fastest and most convenient way to get OEM-grade parts delivered to your door. You simply order the correct key, have it cut from a photo or key code, then let a local locksmith program it to your vehicle. Online ordering doesn’t replace immobiliser pairing. Modern vehicles still require professional programming once the key arrives. Key types explained Transponder keys These have a mechanical blade and an electronic chip that communicates with your car’s immobiliser. Remote fobs Include lock/unlock buttons plus a built-in transponder. We supply the pre-cut blade (if requested) and tested electronics. Proximity or smart keys Keyless entry and push-start units. Delivered ready for your locksmith to pair with the car. Key shells & batteries Replace worn housings or dead batteries without any programming. Also available: caravan keys, ATV keys , roof-rack keys , mailbox keys, towbar keys , and more. Browse our full range at mr-key.com . How online ordering works 1. Identify your key Use your vehicle make, model, and year. Match your key shape, button layout, and frequency markings. 2. Choose how to cut it By photo: send a clear image of your existing key. By key code: provide the manufacturer’s key code for factory-accurate cutting. 3. We cut and test Keys are machine-cut and tested for precision. Electronics are checked before dispatch. 4. Delivery in 3–4 days Typical UK delivery with tracking and updates. 5. Local programming Arrange a nearby automotive locksmith to pair the key. Most jobs take 15–30 minutes. What affects cost Key type — proximity and smart keys cost more than basic transponders. Electronics and frequency — differ by brand and year. Cutting method — photo or code; standard or laser blade. Programming complexity — varies by model. Extras — spare shells, emergency blades, or upgraded housings. Pro tip: Order two keys now — you’ll save money on future locksmith visits and prevent lockouts. Programming: DIY vs local locksmith Modern immobilisers are secure by design. Mr-Key does not supply pairing or programming kits. A professional locksmith uses diagnostic tools to safely program your new key and verify vehicle ownership. It’s faster, safer, and ensures full functionality. Shipping, warranty & returns Delivery: 3–4 days across the UK. Warranty: 12-month full coverage on keys and electronics. Returns: Contact support before programming — unused items are easier to exchange. Dealer vs local locksmith vs online Option Speed Convenience Programming Best for Main dealer Medium–slow Appointment required Dealer tools Brand-new cars, under warranty Local locksmith Fast Mobile visit Done on site Emergencies, quick help Online (Mr-Key) 3–4 days Order from home Done by locksmith Planned replacements, spares Most UK drivers choose online ordering + local locksmith pairing — the fastest, most cost-efficient combination. Troubleshooting after delivery Key turns but car won’t start Blade fits, but immobiliser isn’t paired yet. Book a locksmith. Remote buttons not working Replace the battery and re-pair during programming. Proximity key not detected Use the emergency start position (usually near the steering column) and ask your locksmith to register it. Blade feels rough Use light graphite lubricant or send a photo for recheck. How to avoid another lockout Order a second key and keep it at home. Replace weak remote batteries yearly. Label your spare with the vehicle reg. For keyless cars, store keys away from doors and use a signal-blocking pouch. FAQ Can I order a replacement car key online and get it delivered? Yes. Send your key photo or code, receive delivery in 3–4 days, and have it programmed locally. Do I need proof of ownership? Your locksmith may ask for it. For UK vehicle documentation, see GOV.UK – V5C log book . What’s the difference between key types? Transponder keys start the car; remote fobs add buttons; proximity keys enable keyless entry/start. Can you cut my key from a photo? Yes. Clear, well-lit images allow accurate decoding and cutting. Can I program the key myself? No. Only an automotive locksmith can safely pair it. How long does delivery take? Usually 3–4 days within the UK. Do you cover my vehicle? Almost all brands plus caravans, ATVs, lockers, and more. What warranty do I get? 12-month full warranty on all keys and electronics. What if the battery is dead? Replace it with the correct cell. If issues continue, have the locksmith check frequency and pairing. What if I’ve lost all keys? Order online and arrange programming. Mobile locksmiths can often attend on site. Can I order two keys? Yes — it’s the smartest option to prevent future emergencies. Shop now: https://mr-key.com

Chat with us