Post Name

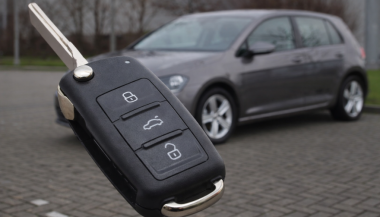
In the modern age of technology, where smartphones dominate our lives, it’s easy to overlook the small yet significant gadgets we use daily—like car keys. What was once a simple metal tool has now transformed into a sophisticated device, integrating technology, convenience, and security. But how did we get here? And what surprising secrets do car keys hold? This journey into the secret life of car keys will reveal their evolution, innovative features, and potential future.

From Metal to Smart: A Brief History of Car Keys

The history of car keys is a fascinating reflection of automotive innovation. In the early 20th century, cars relied on simple ignition switches, but by the 1940s, car keys became standard. These were basic metal tools designed to operate mechanical locks and ignitions.

The 1980s marked a significant milestone with the introduction of remote keyless entry systems. Suddenly, unlocking a car was as simple as pressing a button, a feature that quickly became a standard in most vehicles. By the early 2000s, car keys had evolved into smart keys, incorporating technology that allowed keyless ignition and enhanced security. These advancements weren’t just about convenience—they were a response to rising concerns about car theft.

Today, digital car keys take innovation even further. Some manufacturers now allow drivers to unlock and start their vehicles using smartphone apps, integrating biometric authentication for added security. This evolution highlights how far we’ve come from the humble metal key.

Hidden Features: What Your Car Key Can Do

Modern car keys are more than just tools for unlocking and starting your car—they’re packed with features that many drivers don’t even realize exist.

  1. Panic Button: Most car key fobs have a panic button, which emits a loud alarm to deter potential threats or help locate your car in a crowded area.
  2. Remote Start: Certain keys allow you to start your car from a distance, a lifesaver in extreme weather conditions.
  3. Window Control: Some key fobs can roll your windows up or down remotely, perfect for venting a hot car before stepping inside.
  4. Valet Mode: This feature limits the speed and access to certain compartments when you hand over your keys, enhancing security.

These features reflect how car keys have grown beyond their traditional roles, becoming integral to the driving experience.

Car Keys Across the Globe: Different Innovations, Same Purpose

Car key technology isn’t uniform—it varies across regions, catering to different needs and preferences.

  • Asia: In countries like Japan and South Korea, biometric car keys are becoming the norm. Fingerprint or facial recognition ensures that only authorized users can access the car.
  • Europe: European car manufacturers emphasize eco-friendly designs, often using recycled materials in key fobs.
  • North America: Remote start and smartphone integration are popular features, reflecting the region’s focus on convenience.

These regional differences underline how car keys adapt to meet the diverse demands of global markets.

Challenges with Modern Car Keys

While advanced car keys offer unparalleled convenience, they’re not without drawbacks.

High Replacement Costs: Losing a smart key can be expensive, with replacements costing hundreds of dollars due to programming requirements.

Security Risks: Keyless entry systems can be vulnerable to relay attacks, where thieves intercept and amplify the key’s signal to gain access to the car.

Battery Dependency: Smart keys rely on batteries, and a dead battery can leave drivers stranded.

To address these challenges, drivers are encouraged to keep spare keys, invest in signal-blocking pouches, and regularly check key fob batteries.

The Future of Car Keys

As technology advances, the future of car keys looks exciting. Biometric keys are expected to become mainstream, offering unmatched security through fingerprint or retina scanning. Additionally, digital keys, which allow drivers to control their vehicles entirely through smartphones, are gaining traction.

In the coming years, sustainability will likely play a bigger role. Manufacturers are exploring ways to make key fobs more environmentally friendly, such as using biodegradable materials or incorporating solar charging for battery-free operation.

These innovations signal a future where car keys become even more sophisticated, secure, and eco-conscious.

Why Car Keys Matter More Than You Think

Car keys are small devices with big responsibilities. Beyond their practical use, they symbolize how technology can integrate seamlessly into our lives. Understanding their features and potential can help you make informed decisions, whether it’s upgrading to a smart key or taking precautions to protect your investment.

Pro Tips for Car Key Maintenance:

  • Keep a Spare Key: Always have a backup in case of loss or damage.
  • Check Battery Life: Replace key fob batteries regularly to ensure consistent performance.
  • Use Protective Covers: These prevent wear and tear, especially in extreme weather conditions.

By caring for your car keys, you ensure their longevity and reliability, saving you from unexpected hassles.

More Than Just a Key

Car keys have evolved from simple metal tools into complex devices that enhance security, convenience, and connectivity. As technology continues to advance, their role in our daily lives will only grow. By understanding their capabilities and challenges, you can fully appreciate the innovation behind these essential tools.

The next time you hold your car key, take a moment to think about its journey—from the past to the future, it’s a small device with a story as dynamic as the automotive industry itself.

Related Posts

Hydrogel vs Tempered Glass Navigation Protectors Comparison

Hydrogel vs Tempered Glass Navigation Protectors Comparison

Cars and vehicles nowadays often include large touchscreen navigation systems that are prone to scratches, fingerprints and cracks. These displays are expensive to replace – one owner reported a factory infotainment screen costing over $3,000 to swap out – so protecting them is crucial. That’s where navigation screen protectors come in. The two main options are hydrogel film protectors and tempered glass protectors . Below, we compare hydrogel vs tempered glass for car navigation screens, looking at fit, durability, clarity and more, so you can choose the best protection for your car. Hydrogel vs Tempered Glass: The Essentials Tempered glass protectors A rigid, hard 9H glass shield. Excellent scratch resistance, very clear, and feels like the original screen. Best for completely flat displays. Hydrogel protectors A flexible, self-healing polymer film originally used in aviation and military applications. Ultra-thin, edge-to-edge fit, excellent for curved or uniquely shaped screens. Key difference: Hydrogel bends. Tempered glass doesn’t. Fit & Coverage (Hydrogel Wins) Modern cars often have curved or tapered displays. Tempered glass cannot follow these shapes, leaving exposed edges, air gaps or weak adhesion points. Hydrogel protectors conform perfectly to flat, curved and 3D-shaped screens. They wrap the edges, eliminate halo gaps, and achieve full-surface coverage. If your car’s screen isn’t perfectly flat, hydrogel is the correct choice. Scratch & Impact Protection Tempered glass: Extremely resistant to scratches Can crack on impact, sacrificing itself to protect the screen Once cracked, must be replaced Hydrogel: Softer surface, but self-heals micro-scratches over time Doesn’t shatter; absorbs everyday bumps Ideal for preventing long-term wear and swirl marks Glass is harder; hydrogel stays clearer longer thanks to self-healing. Clarity, Glare & Touch Sensitivity Both types maintain high clarity and touch accuracy, but behave differently in real use: Tempered glass: Ultra-clear Glossy surface shows fingerprints easily Good touch response Hydrogel: Crystal-clear or matte anti-glare options Reduces reflections in sunlight — very useful in cars Zero touch interference due to ultra-thin structure Minor micro-bubbles self-resolve within hours If you drive in bright sun or hate fingerprint shine, hydrogel’s matte option is a major advantage. Installation & Removal Tempered glass: Simple dry install One-shot alignment Rigid, so easy to place but unforgiving if misaligned Hydrogel: Dry or wet install Allows micro-adjustments Easy bubble removal No cracking during installation Removal is simple for both, though hydrogel is safer (no glass shards, no risk of breakage during removal). If you want to learn more about how to install your hydrogel navigation screen protector visit our guide. Which Should You Choose? For general car owners with modern infotainment systems, the winner is clear: ✔ Hydrogel protectors are better for most car navigation screens. Why: Perfect fit on curved screens Self-healing surface Anti-glare options Full edge-to-edge coverage Zero loss in touch sensitivity Tempered glass is fine for older or perfectly flat screens — but today’s automotive displays benefit more from hydrogel technology. FAQ Does a navigation screen really need protection? Yes. Screens scratch easily, attract fingerprints, and are expensive to replace. A protector preserves clarity and resale value. Is hydrogel or tempered glass better overall? Hydrogel — unless your screen is perfectly flat. It fits better, reduces glare, and self-heals surface scratches. Will a protector affect touch response? No. Both types maintain excellent touch accuracy. Hydrogel is especially responsive due to its thin, adaptive structure. How do I protect my screen from fingerprints and glare? Use a matte hydrogel film. For more techniques, see our guide on [ How to Protect Your Car’s Navigation Screen from Scratches, Glare & Fingerprints ] . Which cars benefit most from hydrogel protection? Any model with curved, large, glossy or high-resolution displays. See our model list: [ Which Cars Benefit Most From Hydrogel Navigation Protection? ] . For custom-cut hydrogel protectors for your exact car model, visit mr-key.com . Related Guides How to Protect Your Car’s Navigation Screen from Scratches, Glare & Fingerprints How to Install a Hydrogel Navigation Screen Protector Which Cars Benefit Most From Hydrogel Navigation Protection?

Inside a Key Rescue: How to Salvage a Wet or Flooded Car Key

Inside a Key Rescue: How to Salvage a Wet or Flooded Car Key

Water damage is one of the most common – and most stressful – problems car key owners face. Whether your key fell into a puddle, went through the wash, or was simply caught in a downpour, it can stop working in an instant. But does water exposure always mean you need to buy a new key? Not necessarily. In many cases, a quick and proper response can save your key, restore its function, and spare you an expensive replacement. This guide walks you through how to rescue a wet or flooded car key, what not to do, and how to know when it’s beyond repair. How Car Keys Get Wet Modern car keys, especially keyless remotes and fobs, aren’t designed to be waterproof. Even small amounts of moisture can cause damage if the internal components are exposed. Some of the most common causes of water-damaged keys include: Being left in clothing and run through the washing machine Falling into sinks, toilets, or puddles Exposure to rain, snow, or slush Dropped at the beach or near pools Stored in damp gym bags or jackets Once water enters the key shell, it can corrode the circuit board, damage the battery, or short-circuit the transponder chip. What to Do Immediately After Getting Your Key Wet The first few minutes after exposure are critical. Acting quickly can mean the difference between a working key and a dead one. 1. Remove the Key from the Water Take the key out of the water as quickly as possible. The longer it sits, the more damage can occur inside. 2. Open the Key Shell If your key has a removable shell, gently open it using a small screwdriver or plastic tool. This allows you to access the internal parts and dry them properly. If you’re unsure how to open it, look up a video or guide specific to your car model. 3. Take Out the Battery Immediately remove the battery. A wet battery in contact with electronics can cause short circuits and corrosion. Do not reinstall the same battery later; it may be compromised. 4. Dry the Internal Components Gently pat all visible parts dry with a lint-free cloth. Do not use paper towels, as they can leave behind fibers. Then allow the key to air-dry using one of the following methods: Option A: Use Silica Gel or Desiccant Packs Place the opened key and all components in an airtight container with silica gel packets. Leave it sealed for at least 24 to 48 hours. Option B: Use Uncooked Rice If silica gel isn’t available, uncooked rice can work as an alternative. Place the key in a bowl of rice and cover it completely. Leave it for 2 to 3 days. Do not use a hair dryer, microwave, or place the key near a heater. High heat can warp the plastic shell and damage sensitive electronics. After Drying: Will the Key Work Again? After a full drying period, insert a new battery and test the key. In many cases, it will begin working again — especially if water exposure was brief and the board was not damaged. If the key still doesn’t respond, try the following steps: Inspect the circuit board for corrosion or residue Try replacing the outer shell if buttons feel worn or unresponsive Check if the vehicle recognizes the transponder chip If none of these steps work, the internal chip or electronics may be permanently damaged. When to Replace the Key Sometimes the damage goes beyond what cleaning and drying can fix. You’ll likely need a full replacement if: The key no longer sends a signal The LED light doesn’t flash when pressing buttons There is visible corrosion on the circuit board The transponder chip fails to communicate with the vehicle Buttons are physically damaged or unresponsive The key was underwater for an extended time In these situations, replacing the key is often the most reliable solution. Don’t Wait Until It’s Too Late – Keep a Spare Key If you’ve experienced water damage once, there’s a good chance it could happen again. Keeping a backup key stored in a safe, dry location is one of the best precautions you can take. You can find replacement key shells, blades, batteries, and fully programmed keys for most vehicle brands at mr-key.com . Investing in a spare can save time, money, and stress. Final Tips for Car Key Water Damage Act fast and remove the battery as soon as possible Use silica gel or rice for slow, safe drying Avoid heat, rubbing, or shaking the electronics Replace the shell if it’s worn, cracked, or damaged If in doubt, test with a new battery before replacing the entire key Need Replacement Parts? Whether you need a new shell, battery, or a complete key, visit mr-key.com to find compatible parts for a wide range of vehicles. Our selection includes: Key shells for all major brands CR2032 batteries Key blades and electronics Fully assembled remote keys with chip and programming options If your key has been exposed to water, don’t panic. With the right steps, many keys can be rescued — and if not, we’re here to help you find the right replacement.

Programming Your Car’s Keyless Remote: A Simple Guide for Every Car Owner

Programming Your Car’s Keyless Remote: A Simple Guide for Every Car Owner

When it comes to convenience, car keyless remotes have revolutionized the way we interact with our vehicles. No more fumbling with traditional keys or worrying about locking yourself out. With just a push of a button, you can lock, unlock, and even start your vehicle. But what happens when your keyless remote stops working, or when you need to program a new one? Here’s a simple guide to help you program your car's keyless remote, regardless of your vehicle's make or model. Understanding Keyless Remotes Before jumping into the programming process, it’s important to understand what a keyless remote is and how it works. Essentially, a keyless remote allows you to interact with your vehicle without needing to physically insert a key. Instead of using a traditional metal key, your car’s electronic system communicates wirelessly with the remote, allowing you to lock, unlock, and sometimes even start your vehicle, all with the push of a button. These remotes typically use a radio frequency to communicate with your car, sending a signal that’s encrypted for security. Most modern cars use transponder technology, which makes the system more secure and resistant to hacking or copying. This means that the remote must be properly programmed to your vehicle’s system to function correctly. When Do You Need to Program a Keyless Remote? There are several situations in which you might need to program your keyless remote: Replacing a Lost or Damaged Remote : If you’ve lost your keyless remote or it’s no longer functioning properly, you’ll need to get a replacement. This may require programming the new remote to sync with your vehicle. Adding a New Remote : If you’ve bought an additional keyless remote for your car (for a spouse, child, or other family member), you’ll need to program it so that it works with your vehicle. Battery Replacement : Sometimes, replacing the battery in your remote can cause the programming to reset, meaning you’ll need to reprogram the remote for it to work again. Changing or Resetting Vehicle Settings : Occasionally, vehicle settings or remotes can be reset or reprogrammed as part of regular maintenance, requiring you to program new or additional remotes. How to Program Your Car’s Keyless Remote Programming a keyless remote is easier than you might think, and in most cases, it can be done by following a few simple steps. The process varies slightly depending on the make and model of your car, but here’s a general overview of the steps involved: Get Your New or Replacement Remote : Ensure that your remote is compatible with your car’s system. If you're not sure, you can check with your car's manufacturer or an authorized dealership. Some remotes require specific codes to be programmed. Sit Inside Your Vehicle : For safety and security reasons, most cars require you to be inside the vehicle while programming the remote. Insert the Key in the Ignition : Insert the key into the ignition and turn it to the "ON" position without starting the engine. For cars with push-to-start systems, you may need to press the start button without pressing the brake pedal. Activate the Programming Mode : Depending on your car’s system, you’ll need to follow a sequence of steps to enter programming mode. This could involve turning the key on and off several times, or pressing certain buttons in a specific order. Refer to your vehicle’s manual for the exact steps, as the process can differ from one model to another. Program the Remote : Once your car is in programming mode, you’ll need to press the button on your keyless remote that you want to program. Usually, you’ll hear a chime or see the lights flash, indicating that the remote has been successfully programmed. Some cars may require you to press the button several times to ensure proper synchronization. Test the Remote : After programming, test the remote to make sure it works properly. Try locking and unlocking the doors or starting the engine. If everything works as expected, you’re done! Exit Programming Mode : To finish the process, simply turn off the ignition and remove the key. This should exit programming mode. If you have additional remotes to program, repeat the steps above for each one. What to Do if Programming Doesn’t Work While programming a keyless remote is usually a straightforward process, there are instances where things don’t go as planned. If your remote isn’t syncing with your car after following the steps, here are a few troubleshooting tips: Check the Battery : If the remote’s battery is dead or weak, it won’t transmit the signal to your car. Replace the battery and try programming again. Verify the Compatibility : Make sure that the remote is compatible with your vehicle’s make, model, and year. Some vehicles require special remotes that can only be programmed by the manufacturer or an authorized locksmith. Reset Your Vehicle’s System : In some cases, you might need to reset the car’s system to clear previous programming attempts. Check your owner’s manual or consult a professional for assistance. Consult a Professional : If you continue to have issues, it might be time to visit a dealership or a certified locksmith. These professionals have the tools and experience to program the remote correctly and ensure everything works seamlessly. Why Programming Your Keyless Remote Is Important Programming your keyless remote is a simple but important task that helps ensure your car’s security and convenience. By understanding how the process works and what to do if things go wrong, you’ll be able to troubleshoot and solve any issues quickly. Whether you’re replacing a lost remote or adding a new one to your collection, knowing how to program your remote saves time and money compared to visiting a dealership or locksmith. With the increased reliance on keyless remotes for unlocking and starting vehicles, it’s essential for every car owner to be familiar with this process. By keeping your remote in good working condition and knowing how to program it when necessary, you’ll enjoy a smoother, more efficient experience with your vehicle.

Condensation Inside Motorcycle TFT Displays: Causes, Warning Signs & What It Really Means

Condensation Inside Motorcycle TFT Displays: Causes, Warning Signs & What It Really Means

Every modern motorcycle rider has seen it. You park your bike after a cold morning ride, glance at the dashboard, and notice a faint haze forming behind the TFT screen. Maybe small droplets gather along the edges. Maybe the whole display looks fogged from the inside. That moisture is not cosmetic. It is water inside a sealed electronic unit — and it is the earliest visible warning of a problem that can destroy a component costing €700 to over €1,200 to replace. This guide explains exactly why condensation forms inside motorcycle TFT displays, which bikes are most affected, what it really means for your instrument cluster, and the one affordable upgrade that prevents the damage cycle before it starts. Why Motorcycle TFT Displays Get Condensation Inside A motorcycle TFT display is a sealed electronic module exposed to some of the harshest conditions any screen will ever face. Unlike your phone in a pocket, a motorcycle dashboard sits directly in the path of rain, road spray, temperature swings, UV radiation, and constant vibration. Condensation forms when warm, humid air trapped inside the display housing meets a cooler surface — the glass front panel. The moisture in that air turns to liquid droplets on the coldest point, which is almost always the inside face of the screen. Here is how moisture gets trapped in the first place. Thermal breathing. Every ride creates a heat cycle. The engine, direct sunlight, and the display's own backlight warm the air inside the housing. When the bike stops and cools, that air contracts and draws in fresh, humid outside air through micro-gaps in the seals. Over weeks and months, humidity accumulates inside the unit. Seal degradation. The rubber gaskets and adhesive bonds that seal a TFT housing are not permanent. UV exposure breaks down rubber. Vibration loosens adhesive joints. Temperature cycling causes materials to expand and contract at different rates, gradually opening pathways for water ingress. Micro-damage to the front surface. Stone chips, cleaning scratches, and pressure marks on the display face can create hairline cracks invisible to the naked eye. These become moisture entry points — especially in rain or when using a pressure washer. High-humidity environments. Riders in coastal areas, tropical climates, or northern European countries with persistent dampness face accelerated moisture ingress. A bike garaged in a humid environment without ventilation is particularly vulnerable. The result is always the same: water inside the display that the sealed housing cannot easily release. Which Motorcycles Are Most Affected Condensation inside TFT displays is not limited to one manufacturer. It has been documented across virtually every major brand using TFT instrument clusters. BMW — The R 1250 GS, R 1300 GS, S 1000 RR, F 850 GS, and F 900 R all use 6.5-inch or 10.25-inch TFT displays. These are high-quality units, but they sit in exposed positions — particularly on adventure models ridden in all weather conditions. OEM replacement for the 6.5-inch TFT runs around £1,200, and if the wiring loom is damaged during theft or failure, that figure can reach £3,000+. Yamaha — Models like the MT-09, MT-07, Tracer 9, and Ténéré 700 use TFT dashboards. Yamaha's displays are generally well-sealed, but the same thermal breathing cycle applies. Adventure and touring riders who cover high mileage in variable conditions report condensation after 2–3 seasons. Honda — The Africa Twin, CB650R, and CBR1000RR-R all run TFT clusters. The Africa Twin's display sits in a highly exposed cockpit position. Forum reports from owners confirm moisture ingress, especially after extended wet-weather riding. Triumph — The Tiger 900, Street Triple, and Speed Triple RS use TFT displays. Triumph's units are compact, but the same vulnerability to vibration-induced seal failure applies across the range. Kawasaki — The Z900, Ninja 1000SX, Versys 1000, and newer Z650 models all feature TFT dashboards. Like all manufacturers, Kawasaki's sealed units face the same environmental pressures. The pattern is clear: this is not a brand-specific defect. It is an inherent vulnerability of mounting sensitive display technology in one of the most hostile environments imaginable. The Warning Signs You Should Never Ignore Condensation inside a motorcycle TFT display is progressive. It starts small and escalates. Here is what each stage looks like — and what it means. Light fogging after a cold start. A thin mist on the inside of the screen that clears within 10–15 minutes of riding. This is the earliest sign. Moisture is present inside the housing but has not yet caused damage. At this stage, the problem is still manageable. Persistent edge condensation. Droplets that form along the bottom or side edges of the display and do not fully evaporate during a ride. This means moisture is accumulating faster than it can escape. The seals are compromised. Internal staining or water marks. Visible trails, spots, or discolouration behind the glass that remain even when the display is dry. This is mineral residue from evaporated water. It means moisture has been cycling inside the display repeatedly. The internal coatings and bonding layers are being attacked. Intermittent display issues. Flickering backlight, sections of the screen dimming unevenly, or the display briefly shutting off during a ride. These are early signs of electrical damage from moisture reaching the circuit board or flex connectors behind the panel. Dead pixels appearing alongside condensation. If you see pixel failure combined with any visible moisture, the display is in active degradation. The liquid crystal layer or its driver circuits are being damaged. This combination almost always leads to full failure. Complete display blackout. The screen powers on but shows nothing, or fails to power on at all. At this point, the TFT module is usually beyond repair and must be replaced entirely. The critical takeaway: condensation that clears quickly is a warning. Condensation that stays, stains, or coincides with display glitches means damage is already underway. What Condensation Actually Does to a TFT Display The fog itself is not the problem. The damage happens behind it. A motorcycle TFT display is a laminated stack of layers: a front glass or polycarbonate cover, a polarising film, the liquid crystal panel itself, LED backlighting, and a circuit board with drivers and connectors. All bonded together with adhesive and housed in a sealed plastic or metal frame. When moisture sits inside this assembly, several destructive processes begin simultaneously. Corrosion of electrical contacts. The flex cables and solder joints connecting the LCD panel to the main circuit board are extremely sensitive to moisture. Even trace amounts of water can cause oxidation, increasing resistance and eventually breaking the connection. This is how entire rows or columns of pixels fail at once. Delamination of optical layers. The adhesive bonds between the polariser, LCD panel, and backlight diffuser swell and weaken when exposed to moisture. This causes visible clouding, uneven brightness, and eventually permanent optical distortion. Mineral deposits on internal surfaces. Water that evaporates inside the display leaves behind dissolved minerals and contaminants. These deposits scatter light, reduce contrast, and cannot be cleaned without disassembling the unit — which is rarely possible without destroying it. Short circuits on the PCB. If enough moisture reaches the main circuit board, it can bridge traces and create short circuits. This can cause complete display failure, error codes, or even damage to the motorcycle's CAN bus communication system. A motorcycle TFT display is not designed to be serviced. It is a sealed, disposable module. Once moisture damage reaches the internal electronics, the only option is full replacement. How to Prevent Water Ingress in Motorcycle TFT Displays Before Damage Starts Prevention is not complicated. But it requires acting before symptoms appear — not after. Never use a pressure washer on the dashboard. High-pressure water jets force moisture past seals that can handle rain but not direct, concentrated spray. Wash the display area gently with a damp microfibre cloth and motorcycle-safe LCD cleaner. Avoid parking in direct sunlight for extended periods. Prolonged heat accelerates UV degradation of seals and adhesives. It also increases the temperature differential that drives the thermal breathing cycle. Use a cover or park in shade when possible. Store the bike in a ventilated, dry environment. A damp, unventilated garage is one of the worst places for a motorcycle with a TFT display. If humidity control is not possible, a small dehumidifier or silica gel packs placed near the bike can help. Inspect the display edges regularly. Look for any visible gap between the display housing and its frame, or any separation of the front glass from the body. Catching a seal failure early — before moisture accumulates — gives you the chance to act. Protect the display surface from physical damage. The front face of the TFT is the largest and most vulnerable entry point for moisture. A single stone chip or a scratch from an abrasive cloth can breach the surface coating and create a pathway for water. Preventing that surface damage is the single most effective thing you can do. The One Upgrade That Prevents Condensation Damage in Motorcycle TFT Displays A quality screen protector designed specifically for your motorcycle's TFT display is the most cost-effective protection available — by a wide margin. Here is what a properly fitted screen protector actually does. It creates a physical barrier against impact. Stone chips, gravel flicks, and minor impacts hit the protector instead of the display surface. This eliminates the micro-cracks that become moisture entry points. It shields the surface from UV radiation. UV is the primary cause of seal and adhesive degradation. A screen protector absorbs UV energy before it reaches the display housing, slowing the ageing process of the seals beneath. It prevents cleaning damage. Without a protector, wiping the TFT with a dirty cloth, gloves, or the wrong cleaning product can create fine scratches that compromise the surface. With a protector fitted, you can clean aggressively without risking the display itself. After a few years, replace the protector — the screen underneath stays pristine. It reduces direct water contact with the display edges. A well-fitted protector overlaps the display bezels slightly, redirecting water away from the most vulnerable seal points around the screen perimeter. The cost comparison makes the decision obvious. A screen protector costs between €10 and €25. A TFT display replacement costs €700 to €1,500 or more, depending on the motorcycle. That is a return on investment measured in thousands of percent. Riders who fit a screen protector on day one of ownership — before the first ride, before the first stone chip, before the first rain — give their TFT display the best possible chance of lasting the life of the motorcycle. What to Do If You Already Have Condensation If moisture is already visible inside your display, the situation is not necessarily hopeless — but your options depend on how far it has progressed. If you see light fogging only. Park the bike in a warm, dry, ventilated space. Run the engine and let the display heat up for 20–30 minutes to encourage evaporation. Some riders have had success placing a small silica gel packet near the display housing to draw out residual moisture. Fit a screen protector immediately to prevent further surface-level water entry. If the bike is under warranty. Contact your dealer. Condensation inside a sealed TFT display is a manufacturing defect in the seal or housing. Many manufacturers — including BMW and KTM — have replaced displays under warranty for this exact issue. Document the condensation with clear photographs before your appointment. If condensation has caused staining or pixel issues. At this stage, the damage is internal and typically irreversible without replacing the display module. Get a quote from your dealer, check whether aftermarket options exist for your model, and fit a screen protector to the new unit immediately to prevent the cycle repeating. FAQ Is condensation inside my motorcycle TFT display normal? A very light, temporary fog on a cold morning that clears within minutes can occur even in a properly sealed unit. However, persistent condensation, visible droplets, or any staining is not normal — it indicates a compromised seal and active moisture ingress. Can I fix condensation inside a motorcycle display myself? If it is only light fogging, gentle heat and dry storage may resolve it temporarily. However, the seals are already compromised, so it will likely return. Full repair requires resealing or replacing the display unit, which is not a realistic DIY job for most riders. Will condensation void my warranty? No. Condensation inside a sealed factory unit is a seal failure, not user damage. Most manufacturers honour warranty claims for moisture ingress, provided there is no evidence of physical impact or tampering. Always document the issue with photos. How much does it cost to replace a motorcycle TFT display? OEM replacement costs vary significantly. BMW TFT units typically cost £700–£1,200 for the part alone, plus fitting. Honda, Yamaha, Triumph, and Kawasaki displays range from €400–€900 depending on the model. Labour adds €100–€300. Does a screen protector actually prevent condensation? A screen protector does not fix existing condensation. What it does is prevent the surface damage — stone chips, scratches, UV degradation — that causes seals to fail and moisture to enter in the first place. It is the most effective preventive measure available. Should I fit a screen protector to a brand-new bike? Yes. Day one. Before the first ride. The TFT display is at its most vulnerable when new because the seals have not yet been tested, and any early surface damage will accelerate their failure. Protecting the screen from the start is the best insurance against a four-figure repair bill down the line. Does riding in rain damage a motorcycle TFT display? Rain alone should not damage a properly sealed TFT display. The issue is cumulative: repeated exposure to rain, spray, temperature cycling, and UV gradually degrades seals over time. A screen protector significantly slows this process by shielding the most exposed surface. Protect Your Display Before It Costs You Hundreds A motorcycle TFT display is one of the most expensive single components on a modern bike — and one of the most exposed. The damage from water ingress is progressive, often invisible until it is too late, and almost always irreversible. A screen protector fitted from day one is the simplest, cheapest, and most effective way to protect that investment. Browse precision-fit motorcycle TFT screen protectors for BMW, Yamaha, Honda, Triumph, Kawasaki, and more at mr-key.com.

Chat with us